After signing up, user gains access to an account where he can create an unlimited number of projects. What are they and how to manage them?
What are projects?
Projects allow the account owner to grant full or limited access to their dashboard to other users to collaborate on resources.

There are two types of projects:
- Personal project
This project is created automatically after signing up an account, the user has full access to the project. If necessary, it can be made general.
- General project
Projects of this type can be created by the user to provide collaboration with other users.
The owner has the right to add a project participant and choose one of 3 roles for him: owner, administrator or accountant:
- Owner
The role is assigned by default to the account owner, after which he can assign it to any other participant. This role gives full access to the control panel
- Administartor
This role user cannot add or exclude project participants, nor can he influence the “Owner” role (add, delete, transfer, etc.). Otherwise, this role has the same capabilities as the owner.
- Accountant
This role will have access only to tabs with financial information, for example: “Partners”, “Billing”, “Support” and “Customer info”. This role can also see all project participants.
Creating a Project
After signing up and/or login in the control panel in the upper left corner will display the Serverspace logo and a personal project created automatically. For a general project, you need to click on the name of your personal project and select the “Add project” option from the drop-down list:
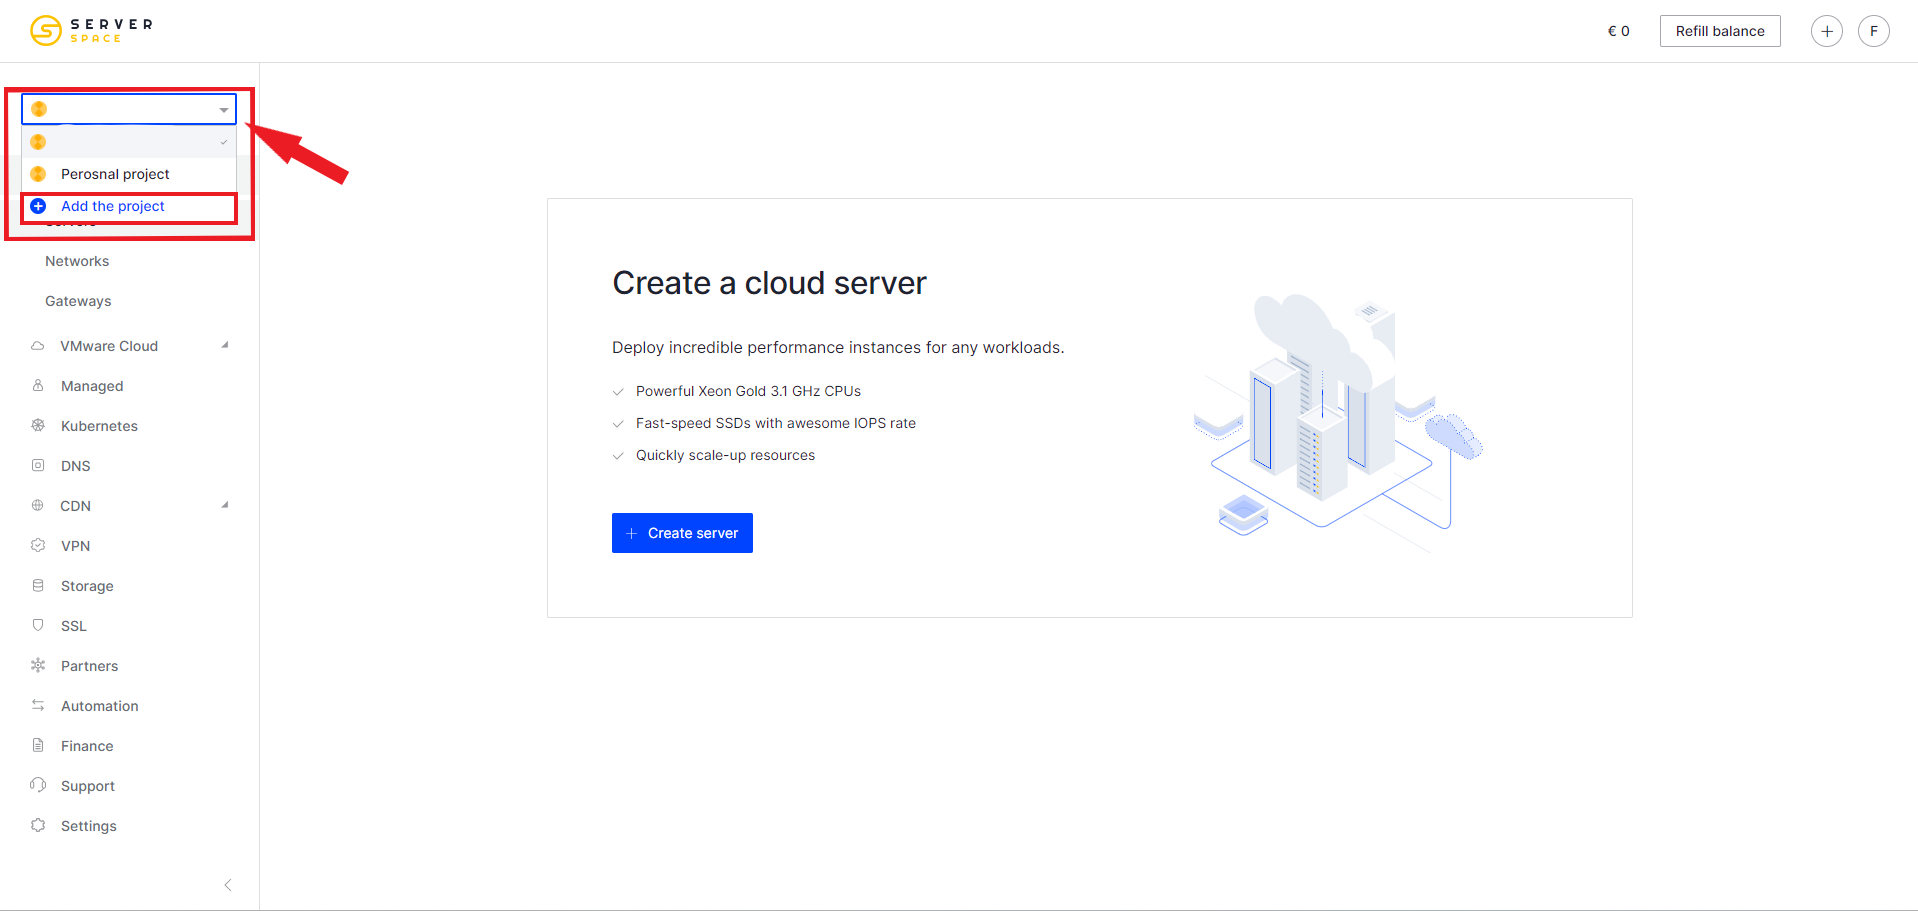
Next, you can convert an existing personal project into a general one, or simply create a new one.
Select a name for the project and, if necessary, its logo and click create project:

After creating a project, the project settings menu will open. Next, we will look at each tab separately.
Project management
Project details
Here you can change the name of the project, add a new participant, or edit access to an existing one
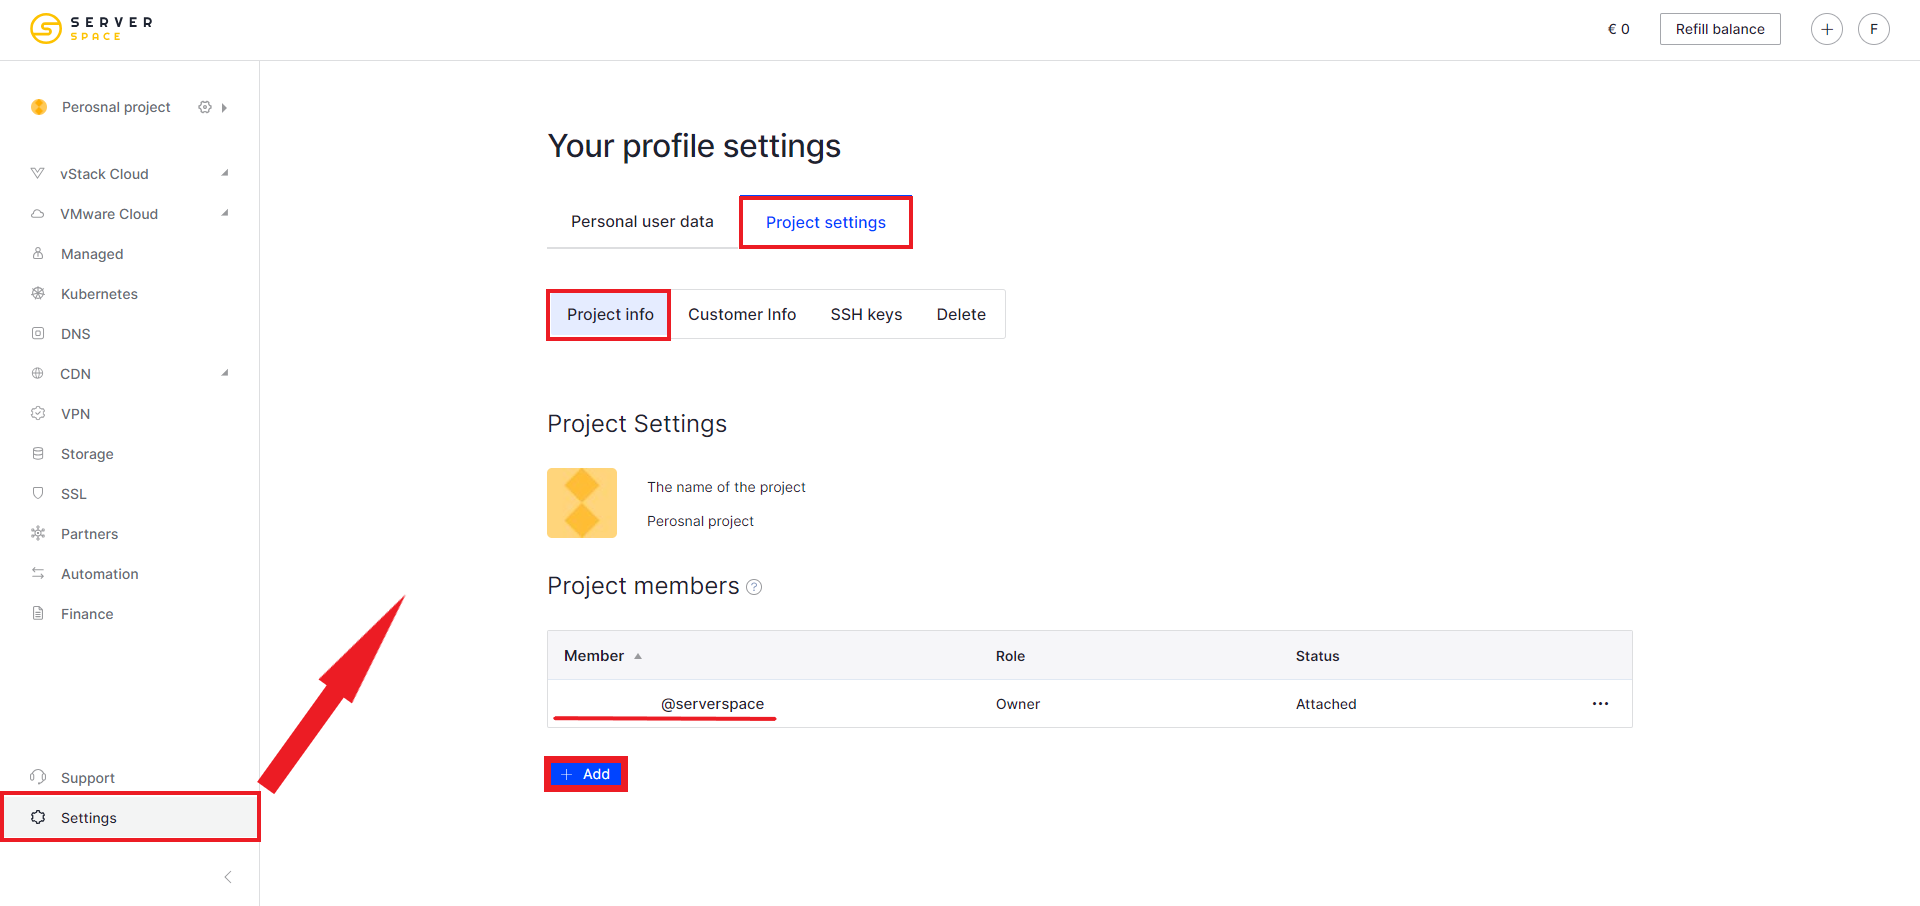
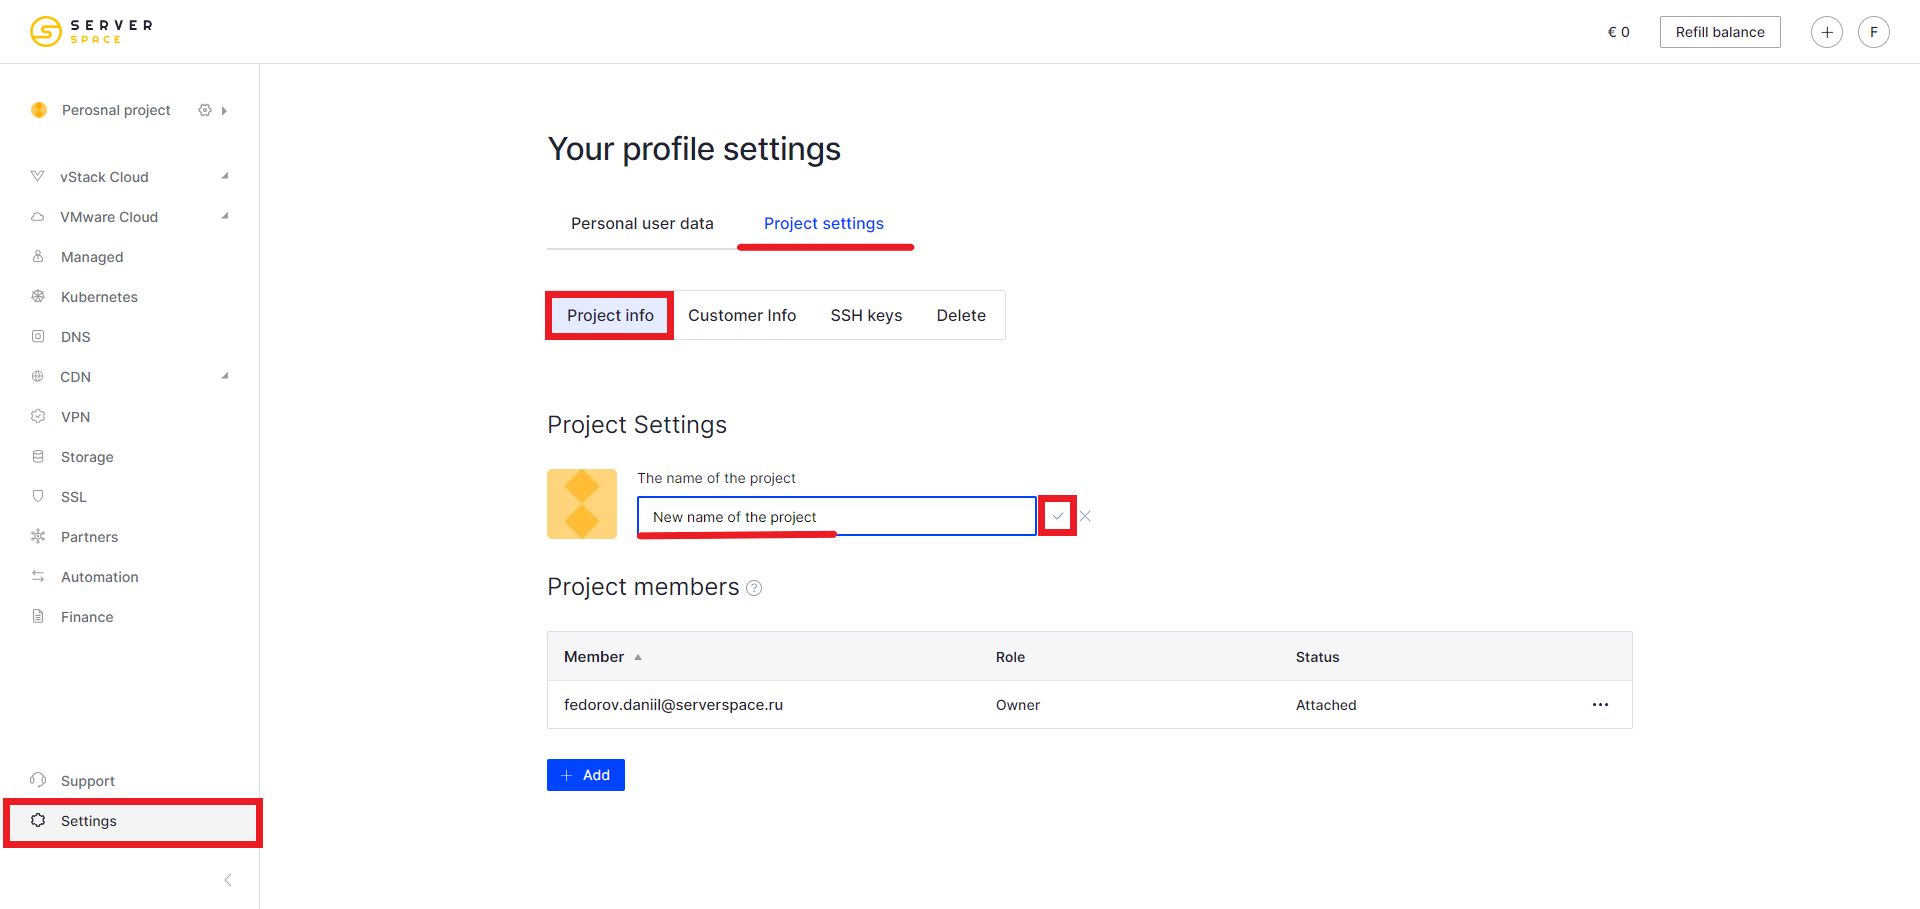
You can change the project name by clicking on it:
To add a new member, click on the “Add” button at the bottom of the page:
Then you must specify the new user's email and role:
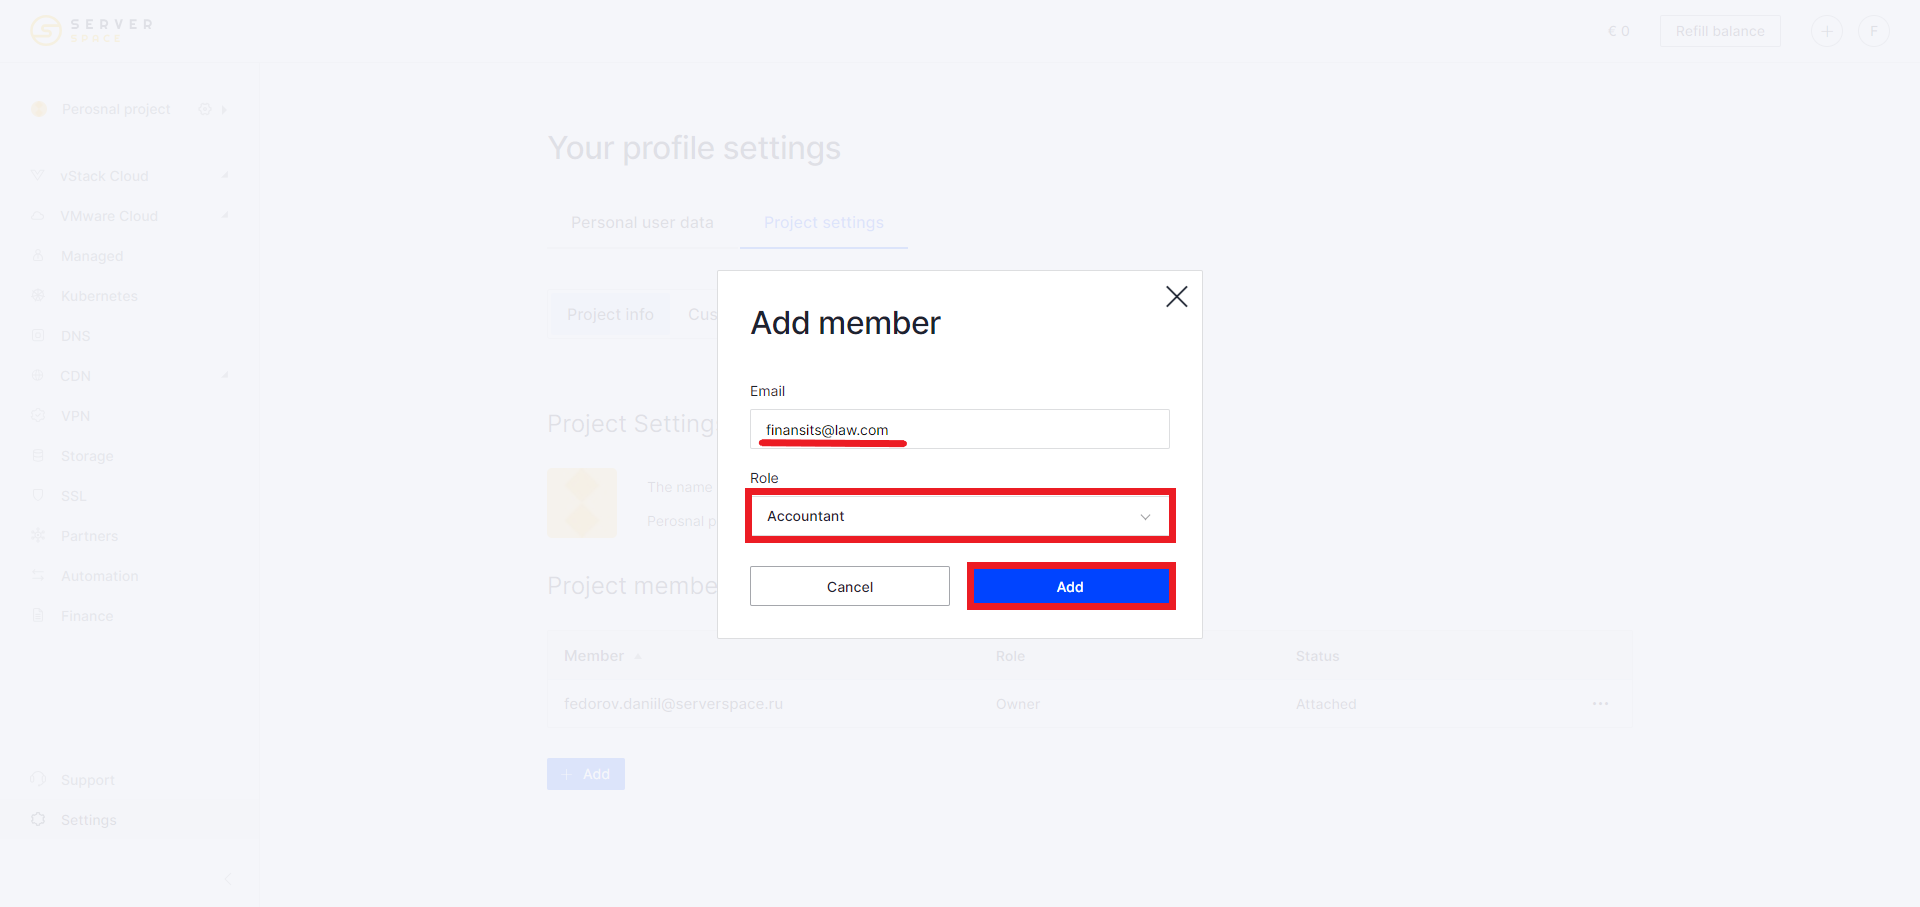
The new project member will appear in the list:
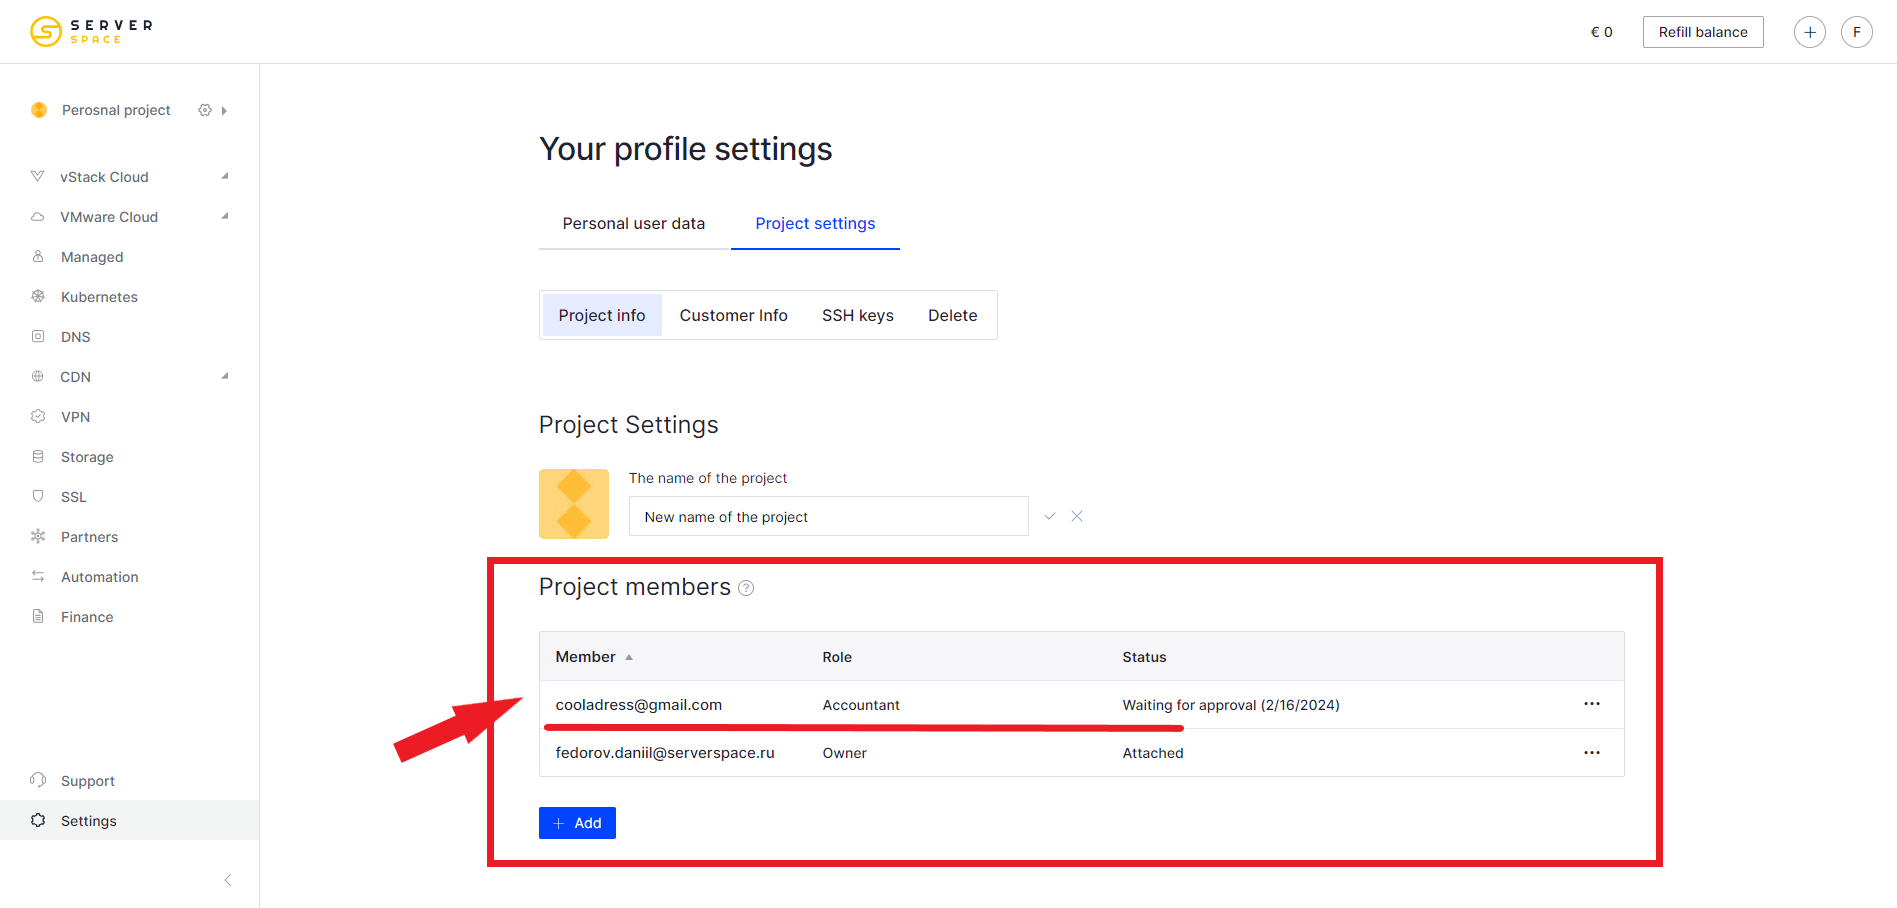
To confirm, the added member must log into their control panel. In the list of projects, he needs to select a new project and confirm participation.
Project participant management
In order to interact with a project participant, click on the ellipsis to the right of it:
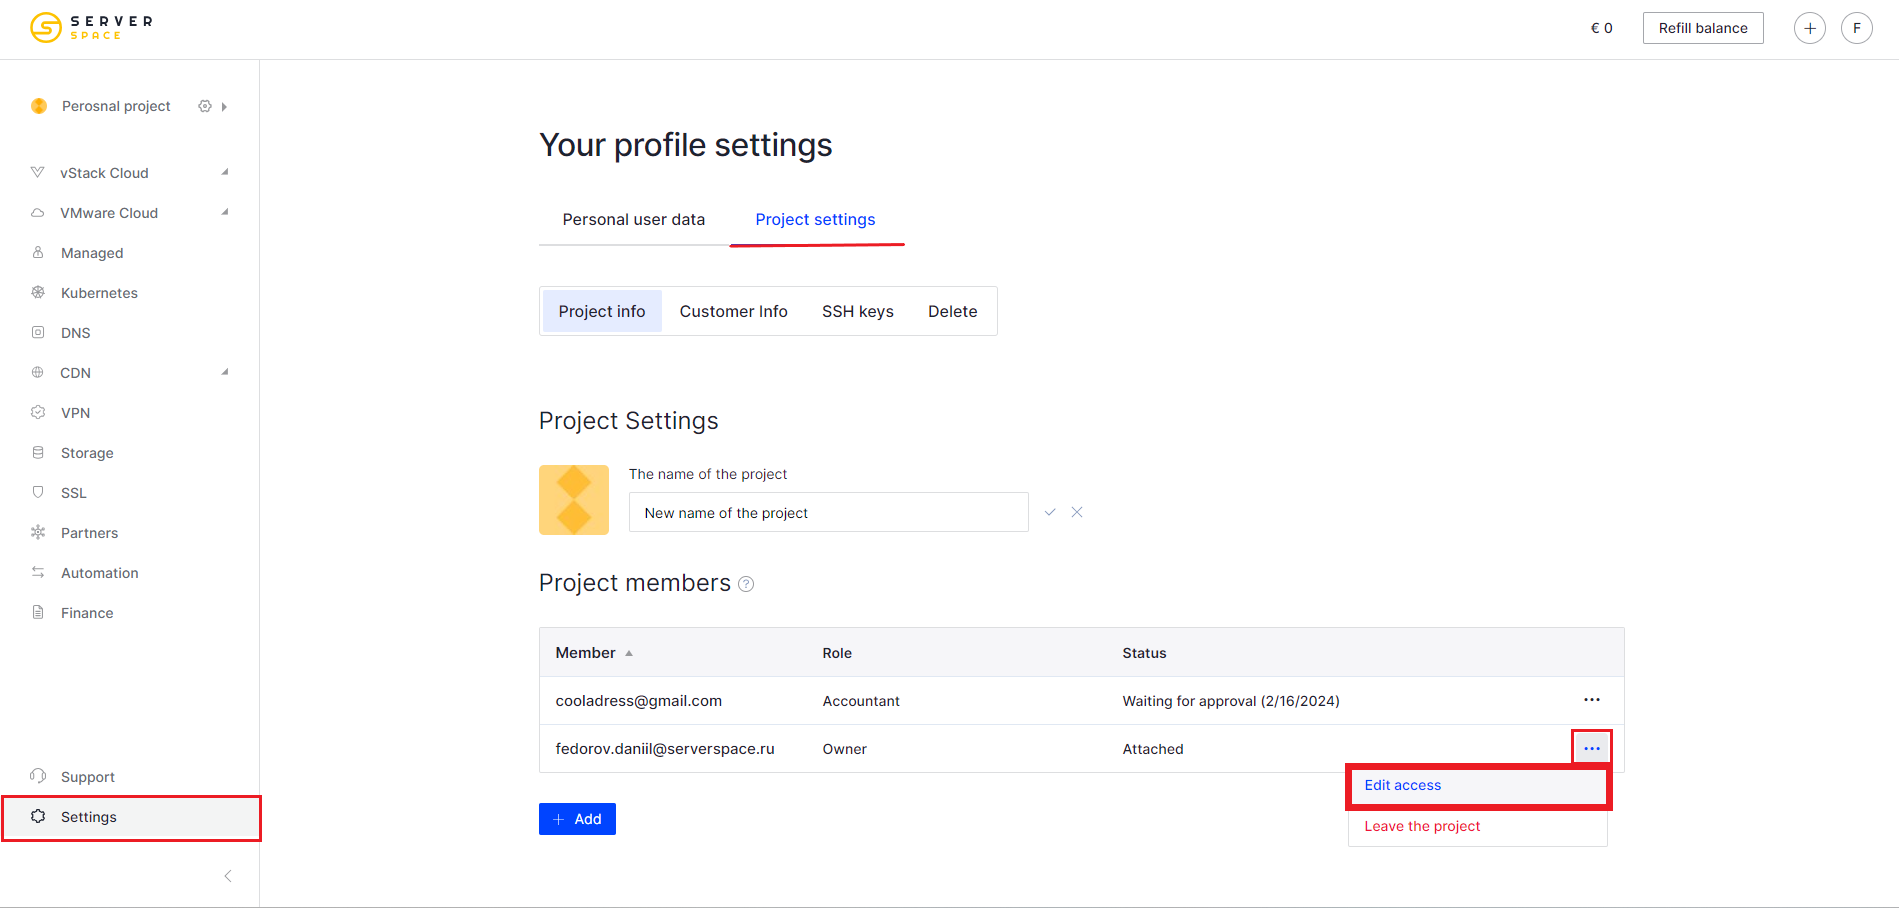
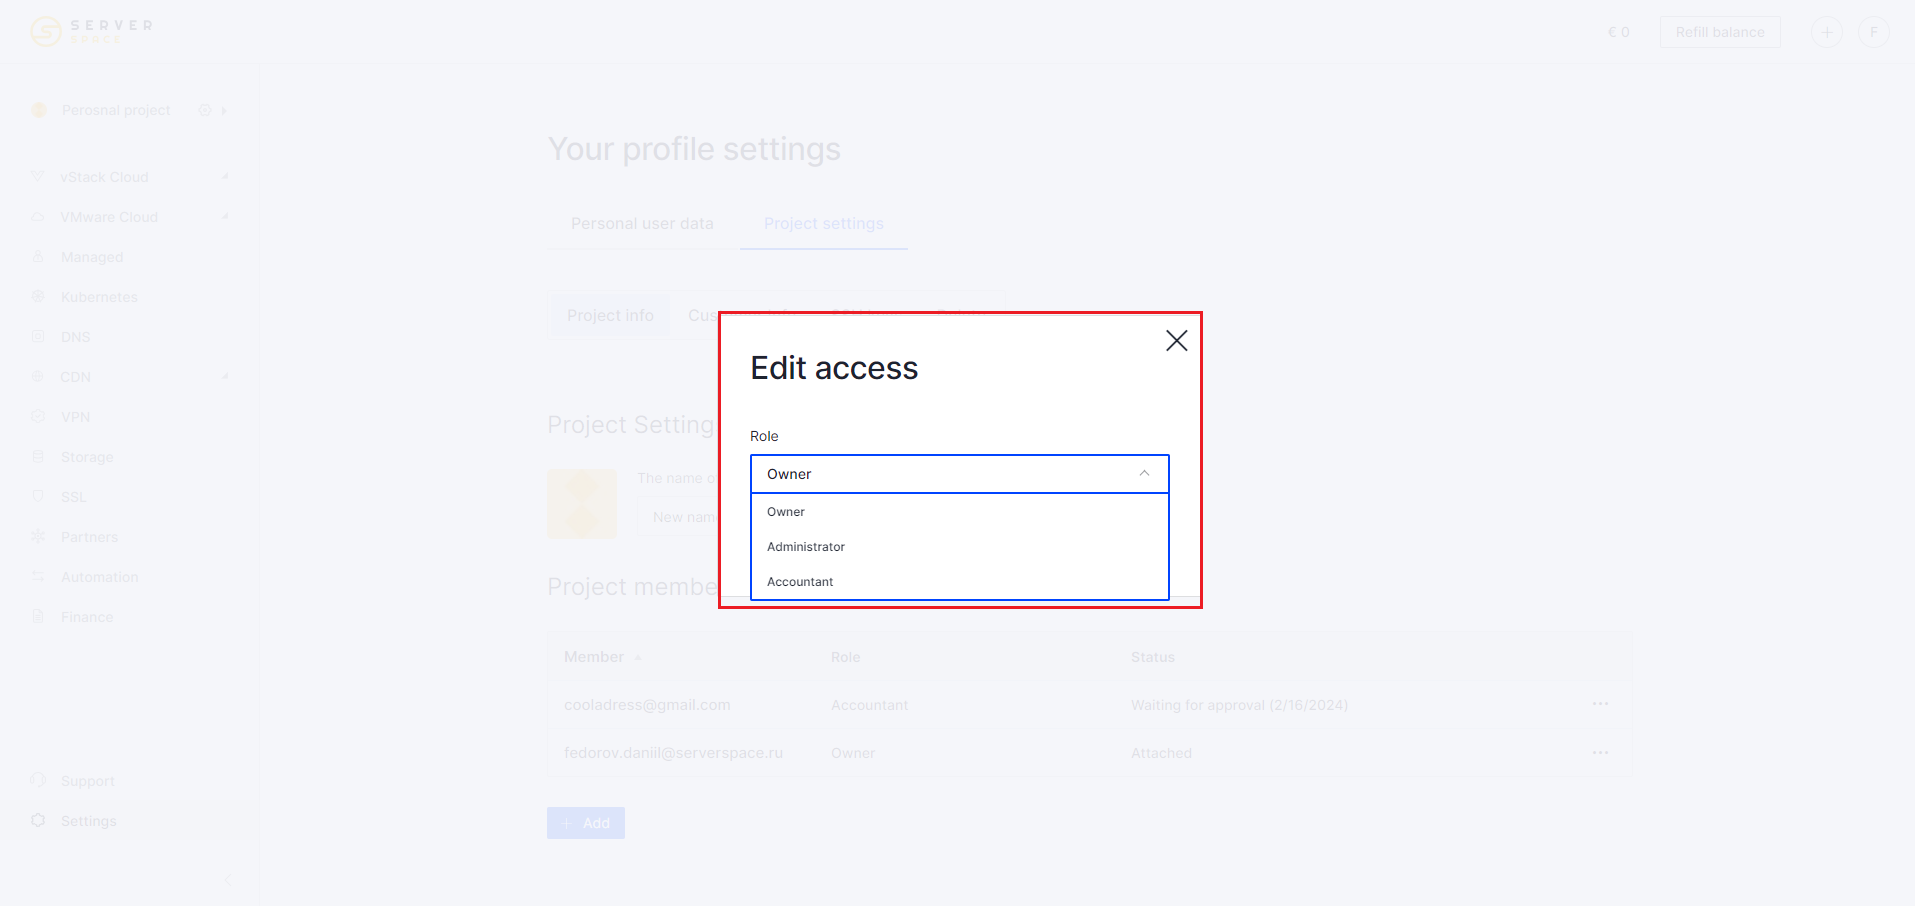
Through the same menu, you can manage participant access.
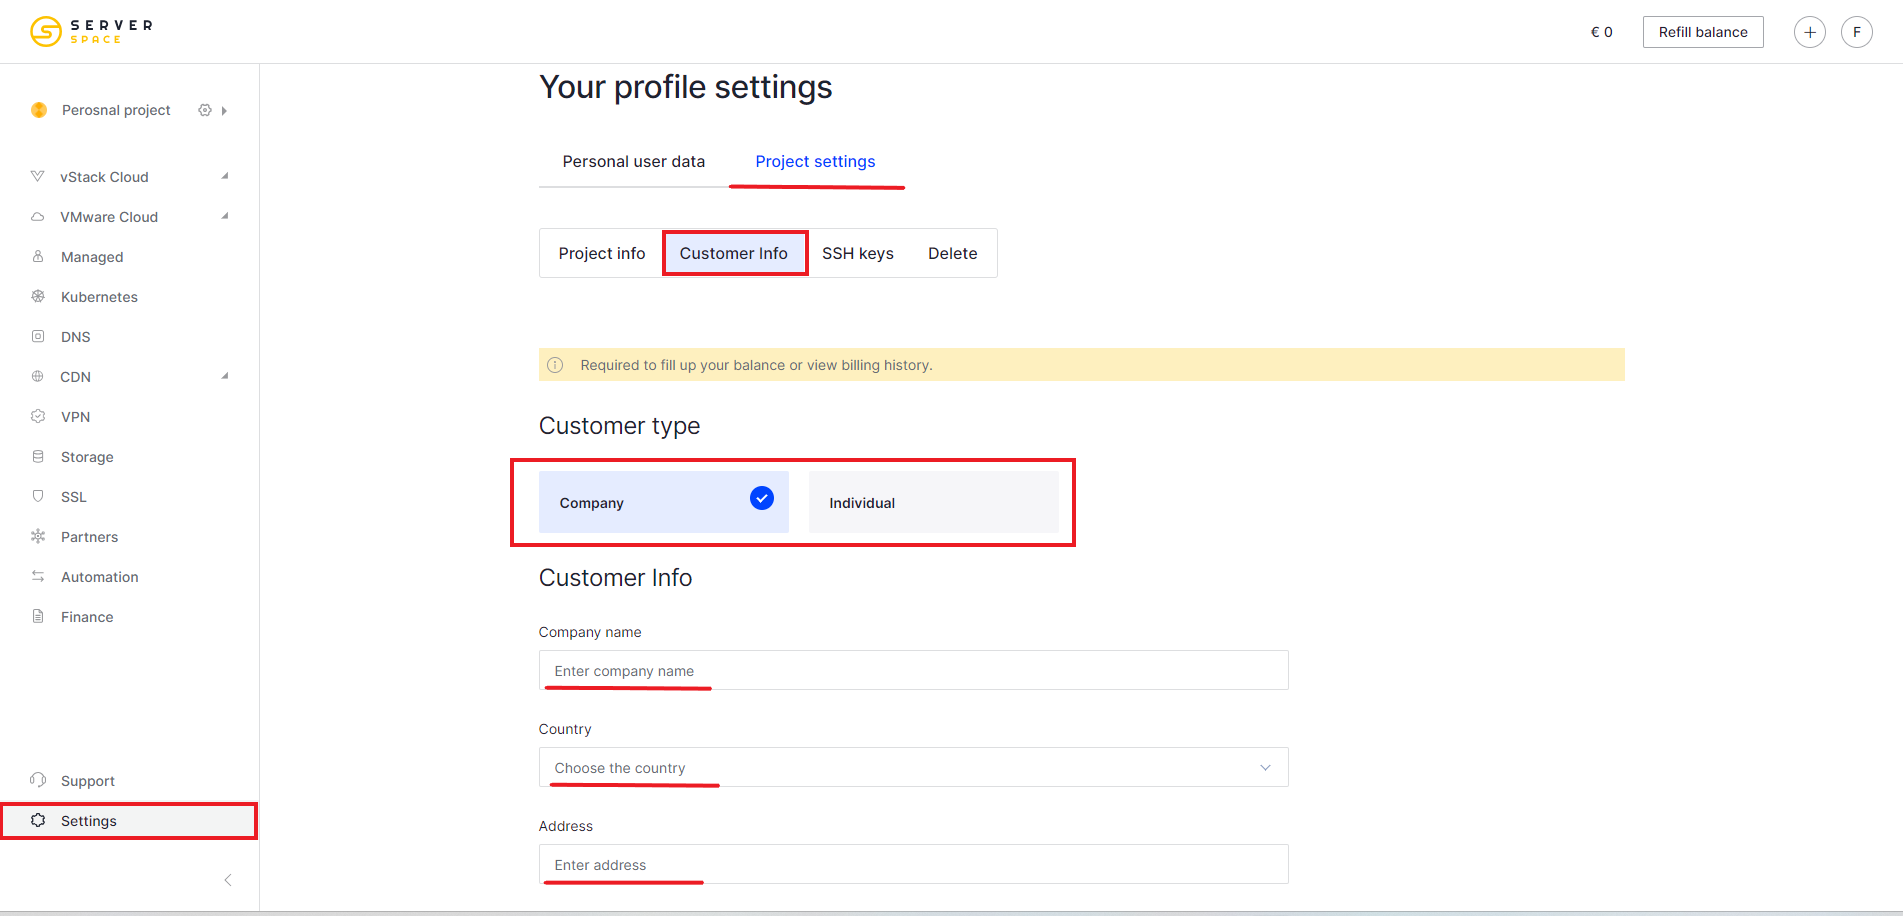
Customer info
If you work in the panel as a legal entity, then you can fill out legal data for issuing documents and paying invoices: select a jurisdiction, specify legal data, specify financial data, financial statements and automatically send invoices for payment:
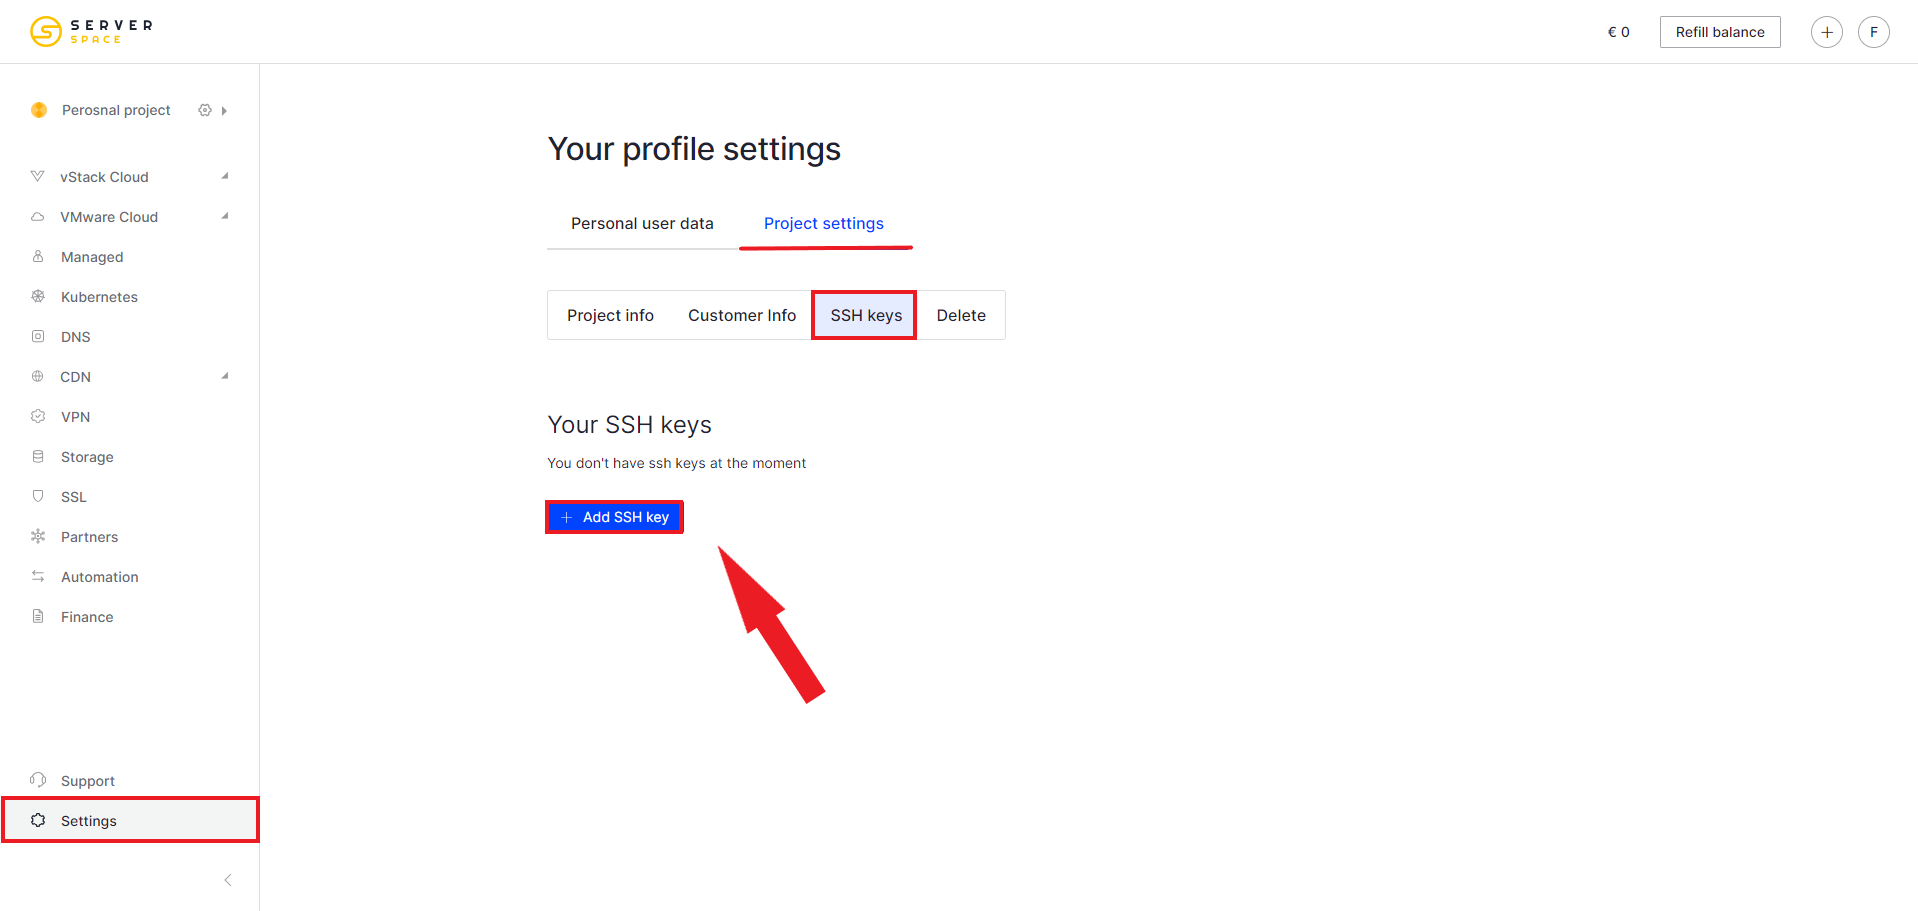
SSH- keys
On this tab you can add a new SSH key or manage existing ones. You can add it by clicking on the “Add SSH key” button:
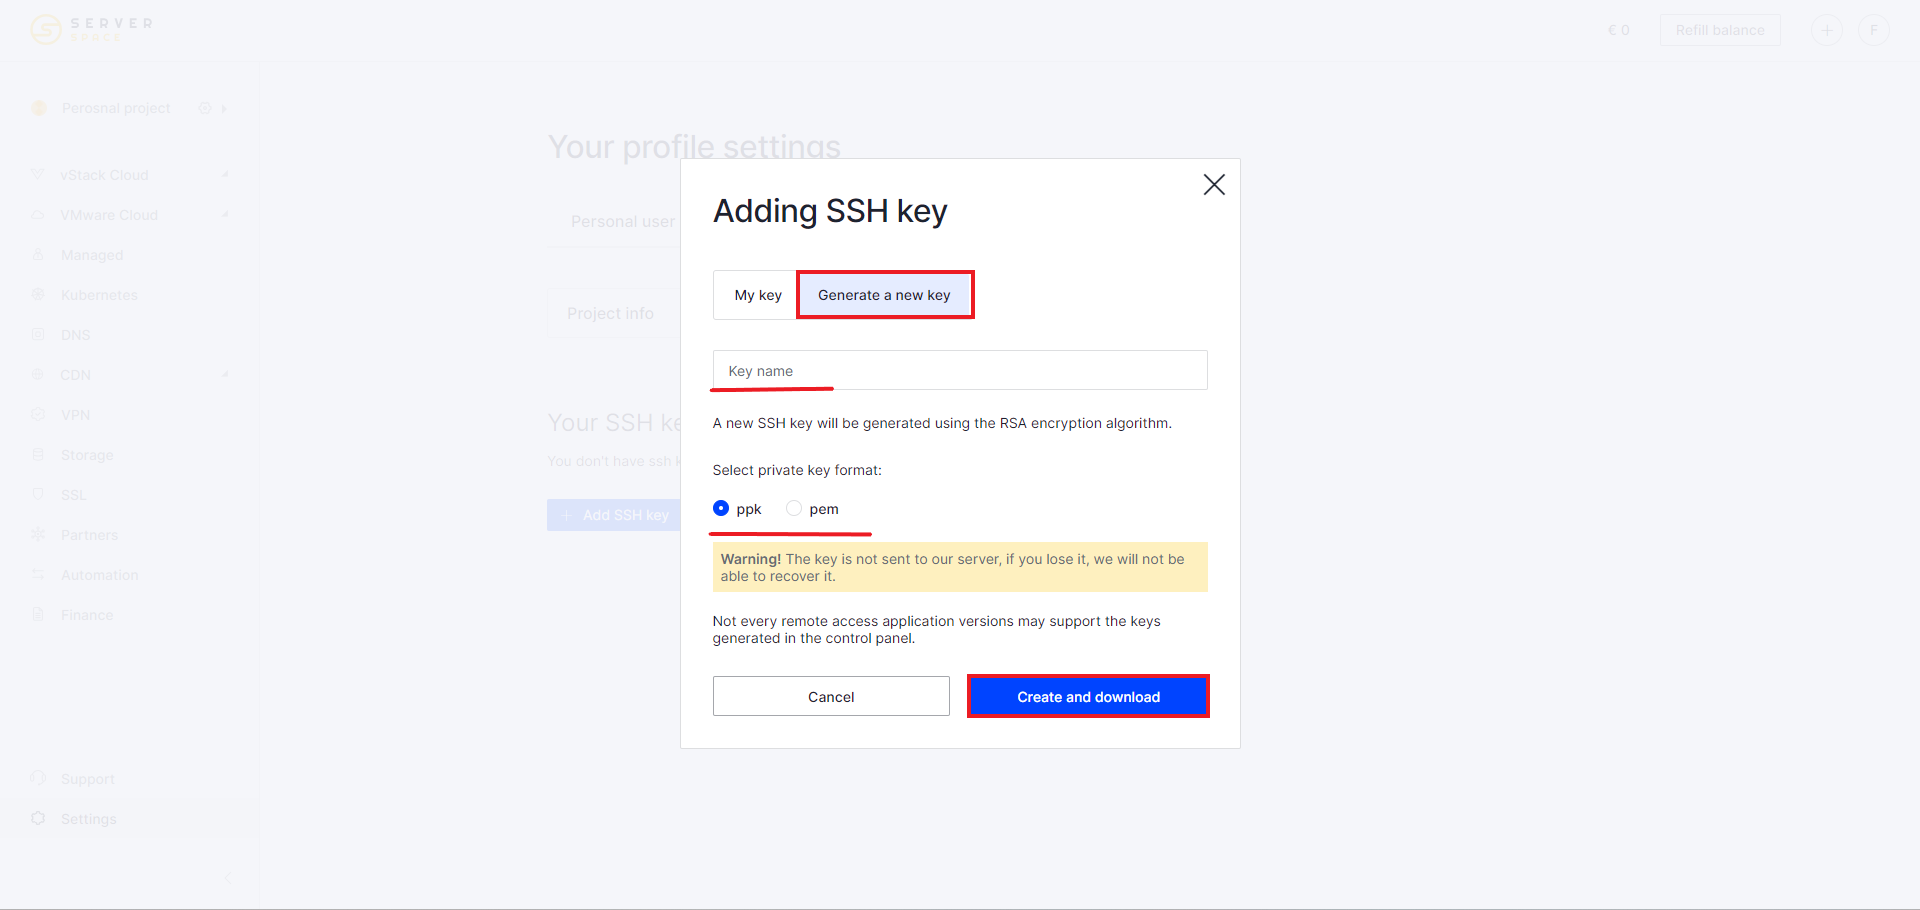
After which you will be asked to either add an existing key or generate a new one:
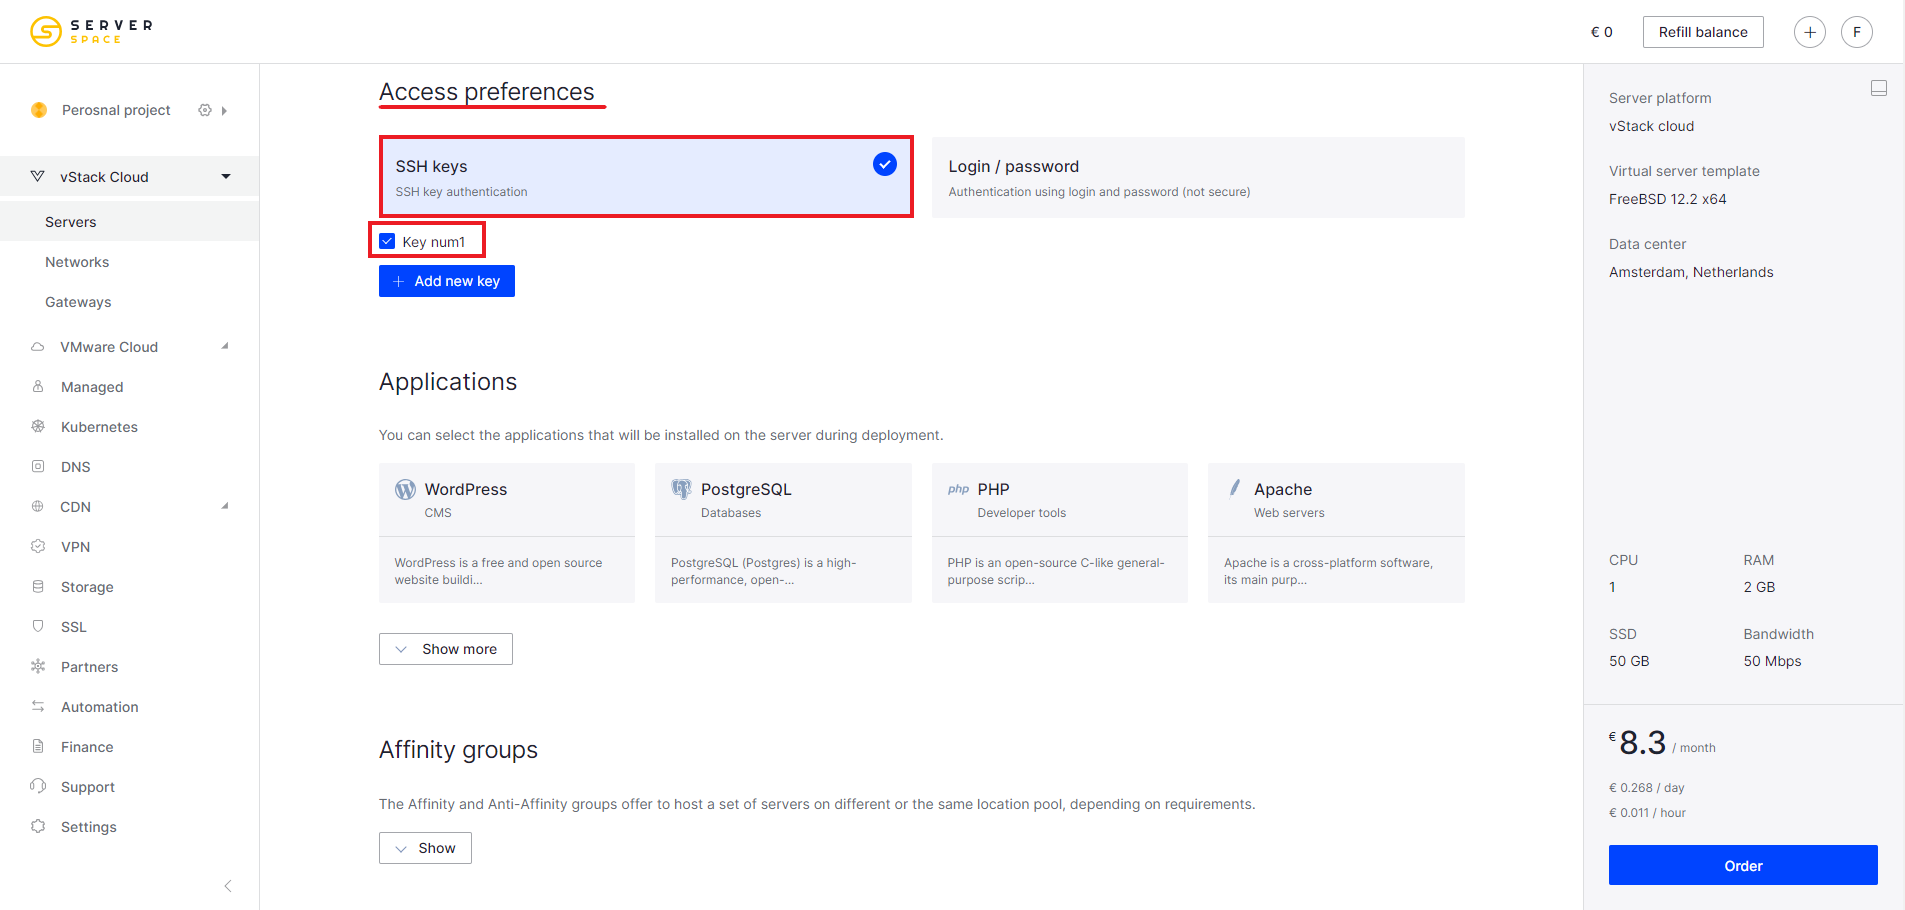
After this you can use this SSH key, while creating a server:
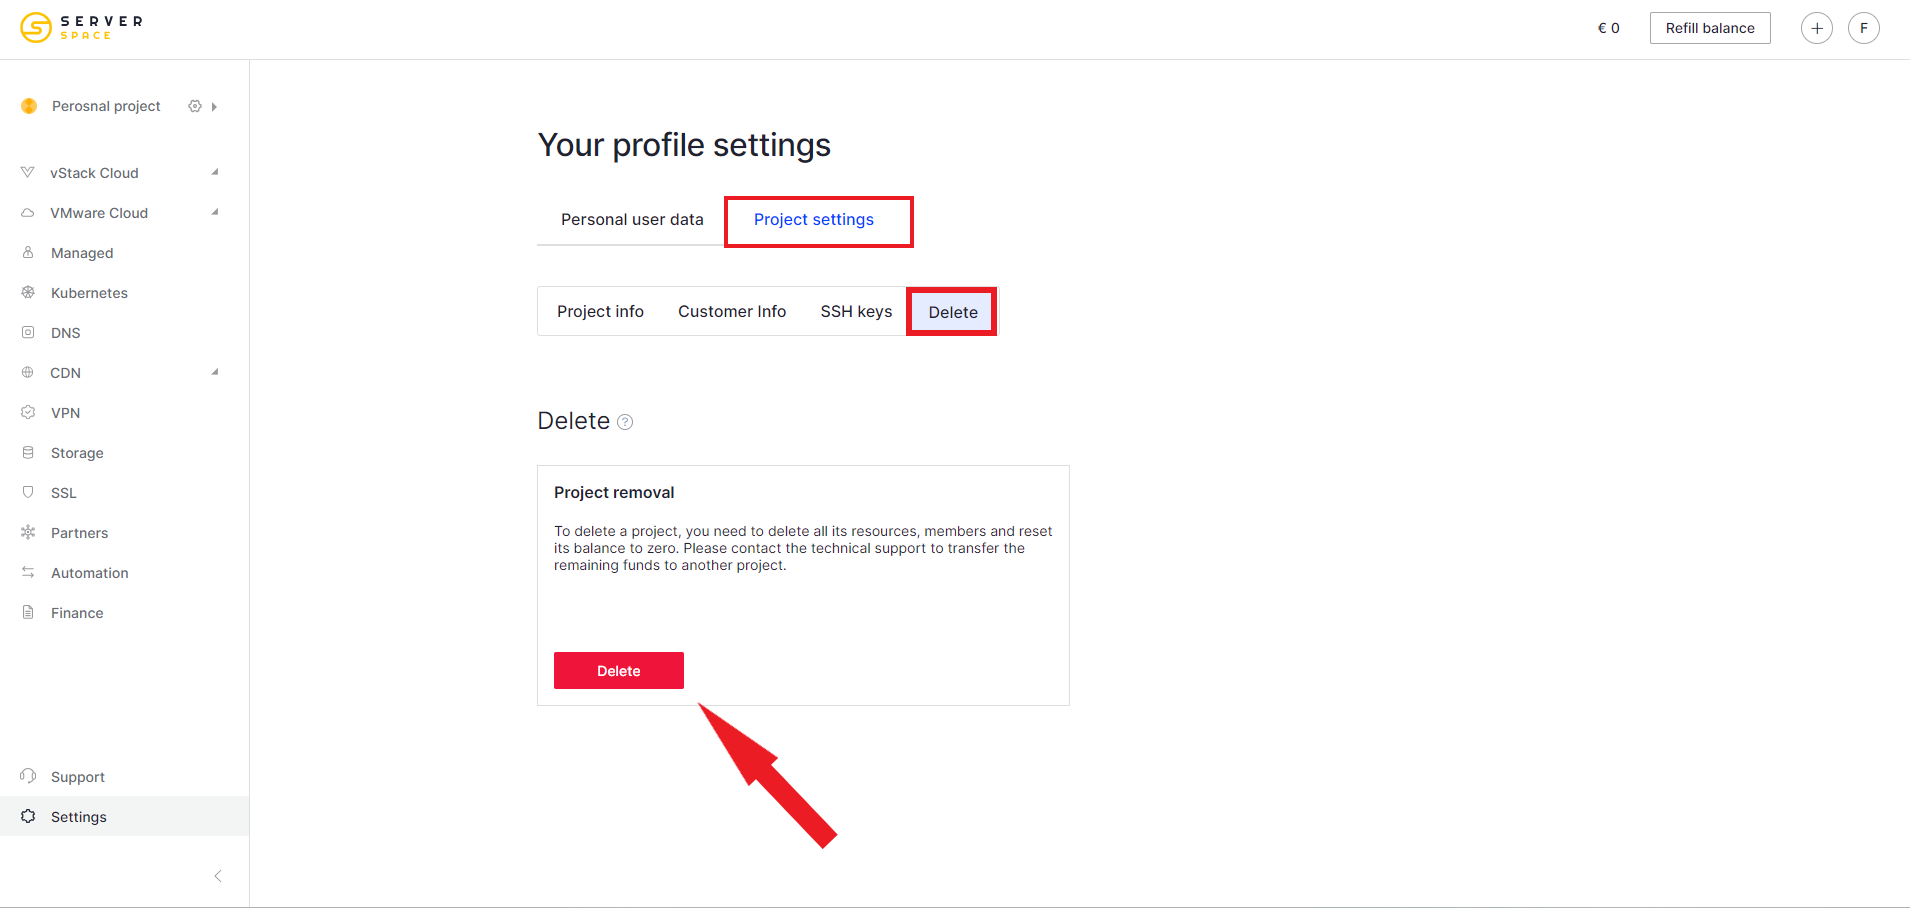
Delete project
Here you can delete the project by clicking the corresponding button