Sign up types
To work with Serverspace services and manage cloud servers, you need to create an account in the my.serverspace.io control panel:
- via Serverspace.io;
- by an referral invitation.
There are several methods you can use to create an account:
- using your email address;
- sign up using services like Google or GitHub.

How to sign up
Signing up via web-site
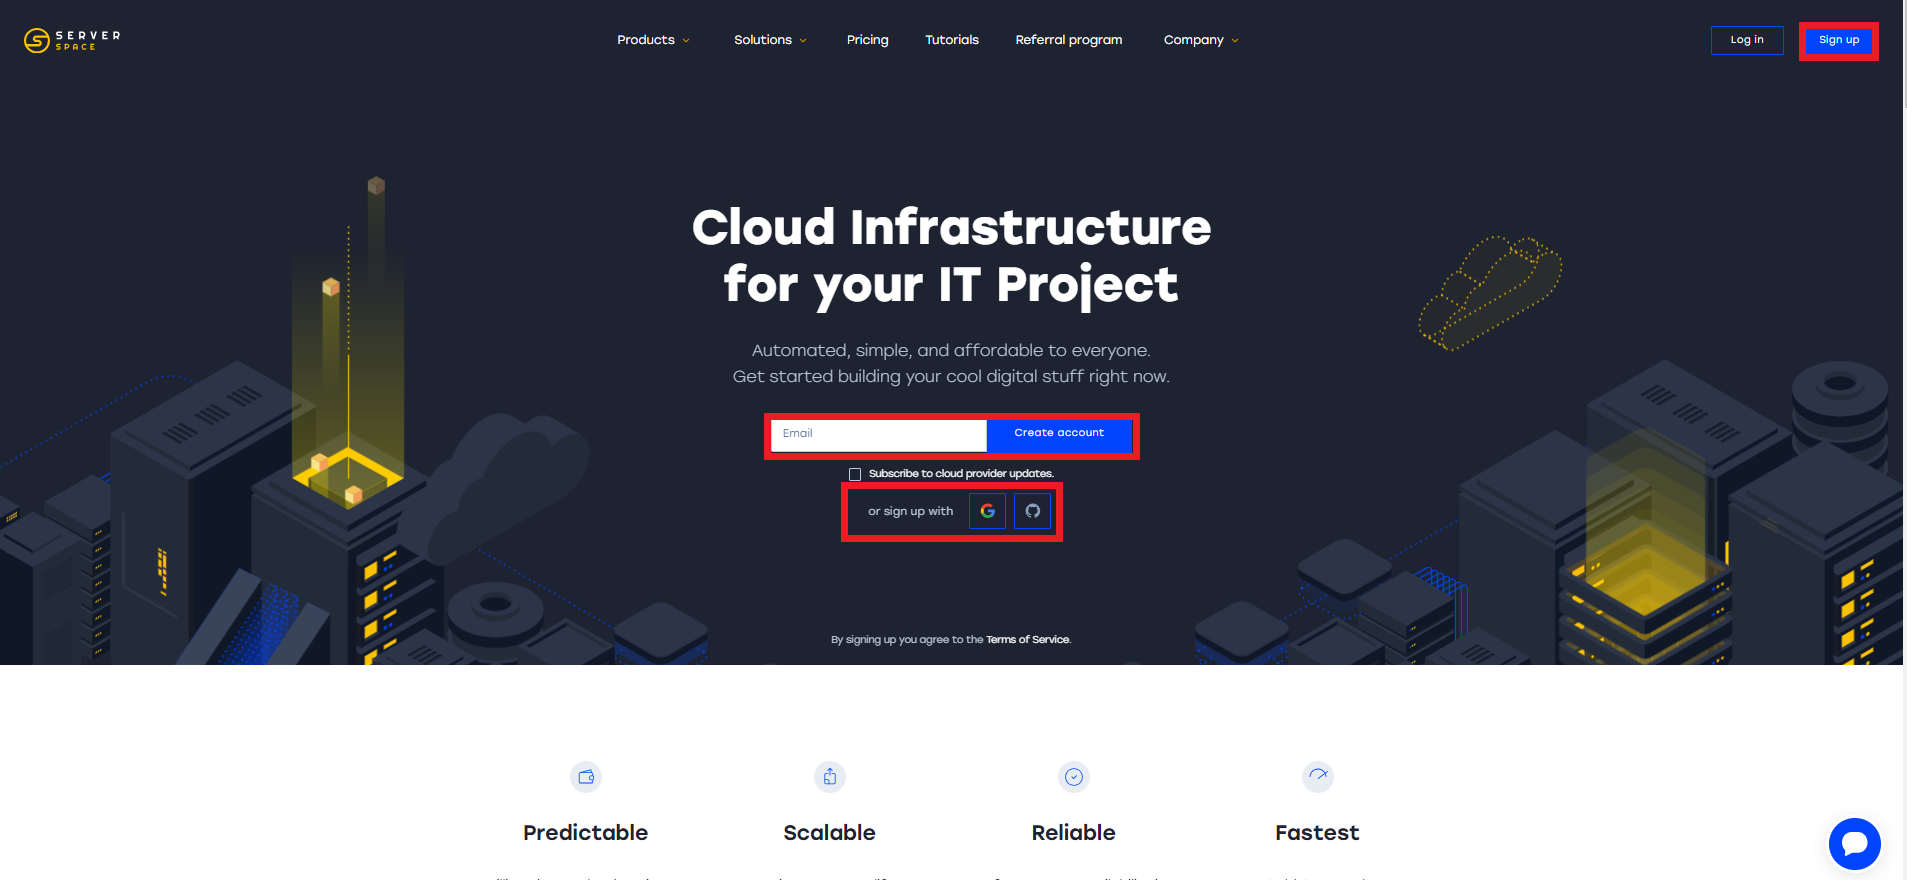
On the web-site, click on “Sign up” in the upper right corner or use the buttons located on the pages.
In the tab that opens, you can start creating an account by specifying your mailbox or using third-party services: Google or GitHub.
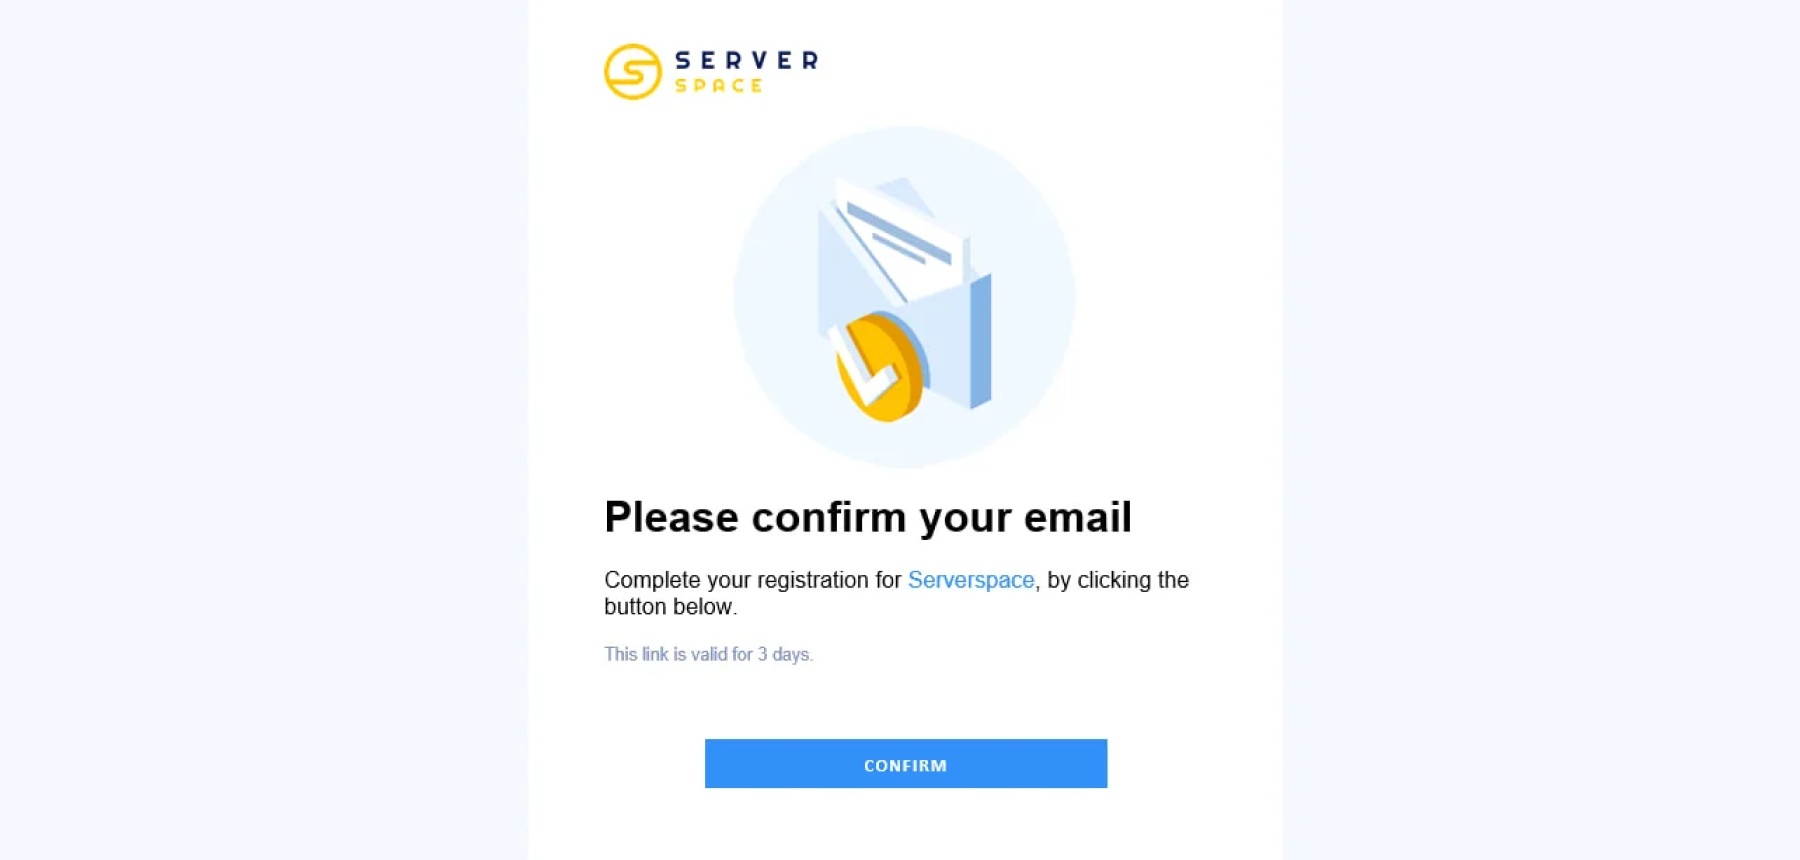
A confirmation email will be sent to specified email. After this, you will receive a password to log into the control panel and your personal account:
Registration by invitation
To register by invitation, you will need an invitation link. You can get it from a person already registered in Serverspace. After clicking on this link, registration occurs in the same way: via email or a third-party service.
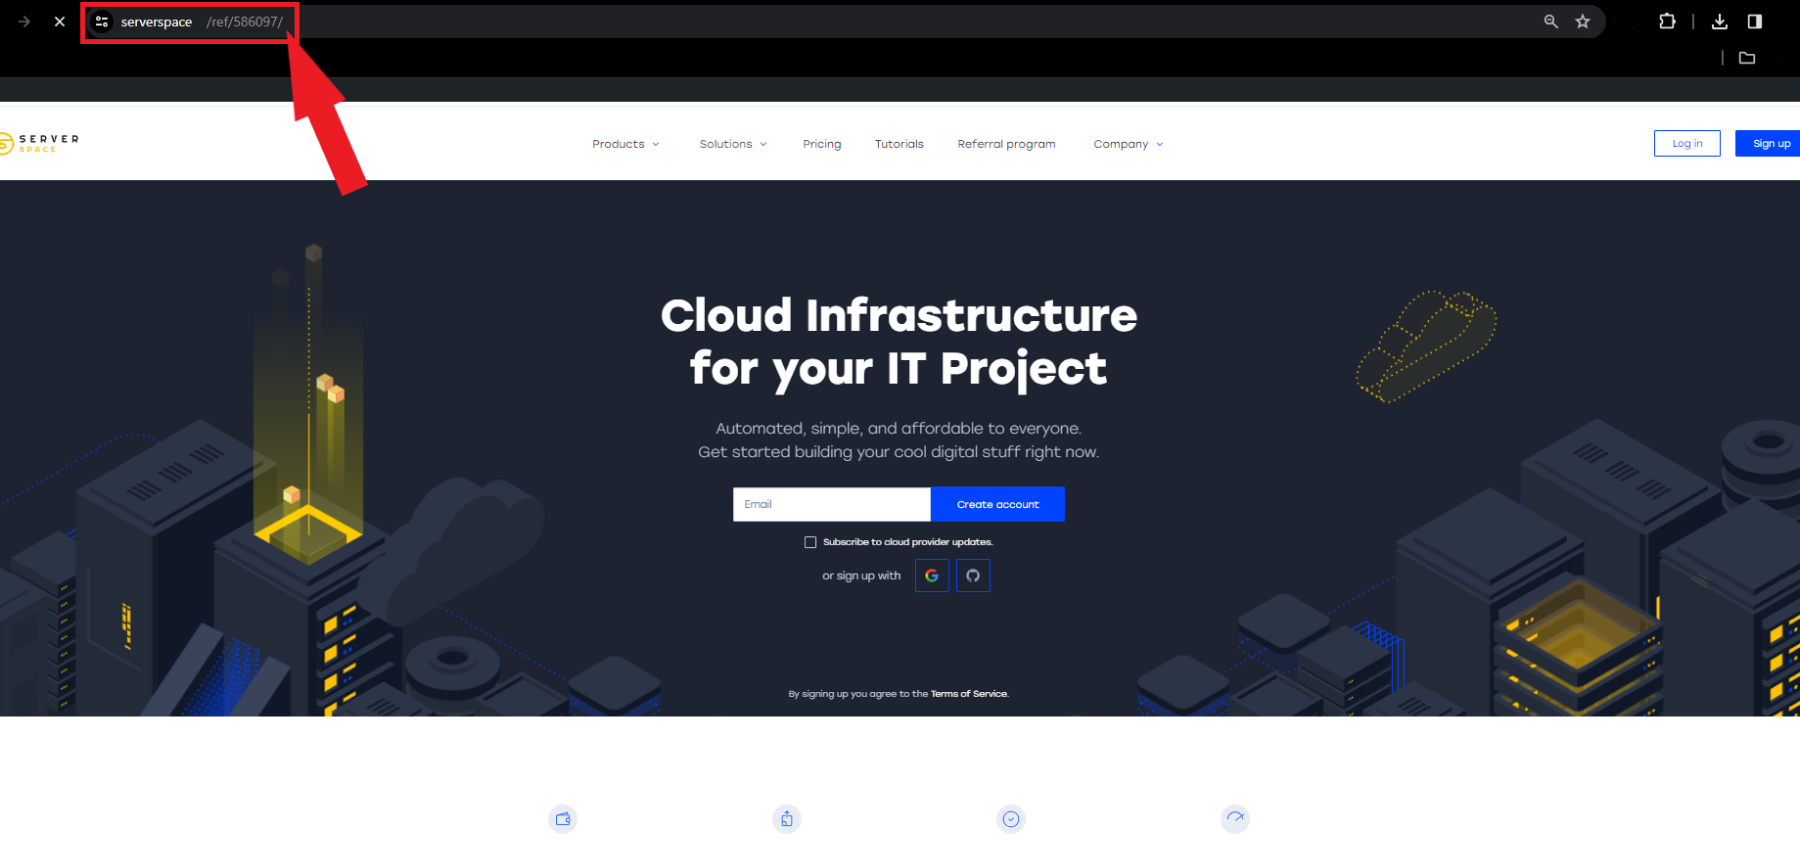
The advantage of such registration via referral program is that the person or organization that invited you will receive up to 10% of your payments. You will receive 20% cashback on your first payment.
Personal settings
After completing registration, it is recommended to set up an account. Serverspace allows you to configure both personal data and customer info in your account.
Personal
Settings. In the Personal column you can specify your First Name, Last Name and display language:

Security. Here you can enable two-factor authentication via the mobile application:
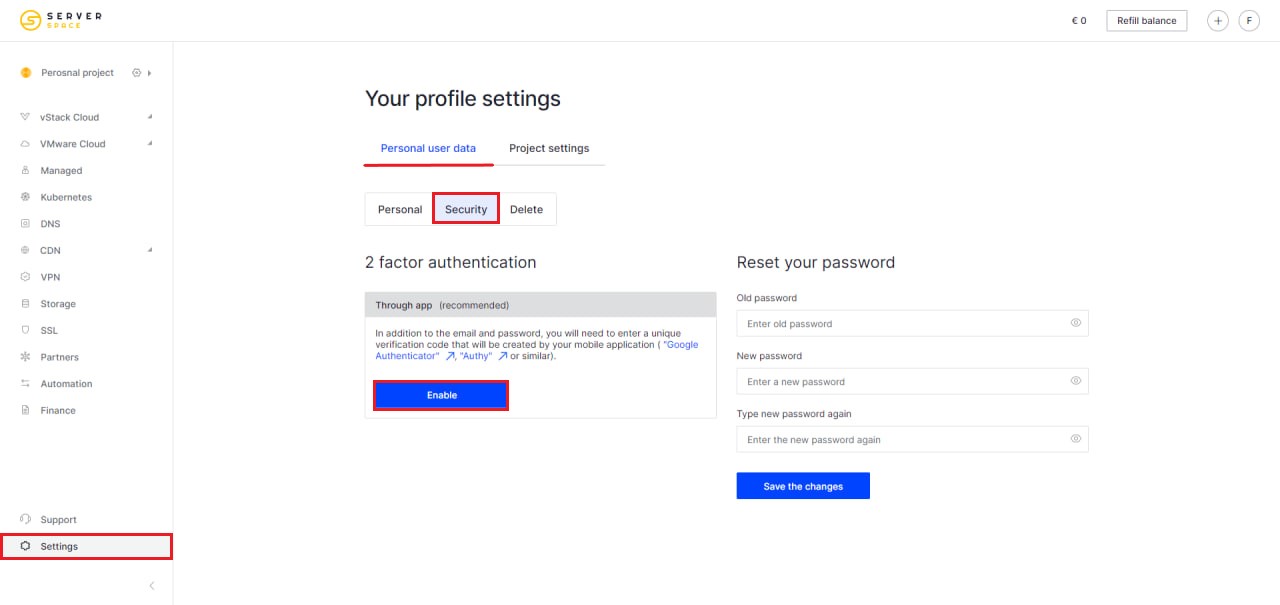
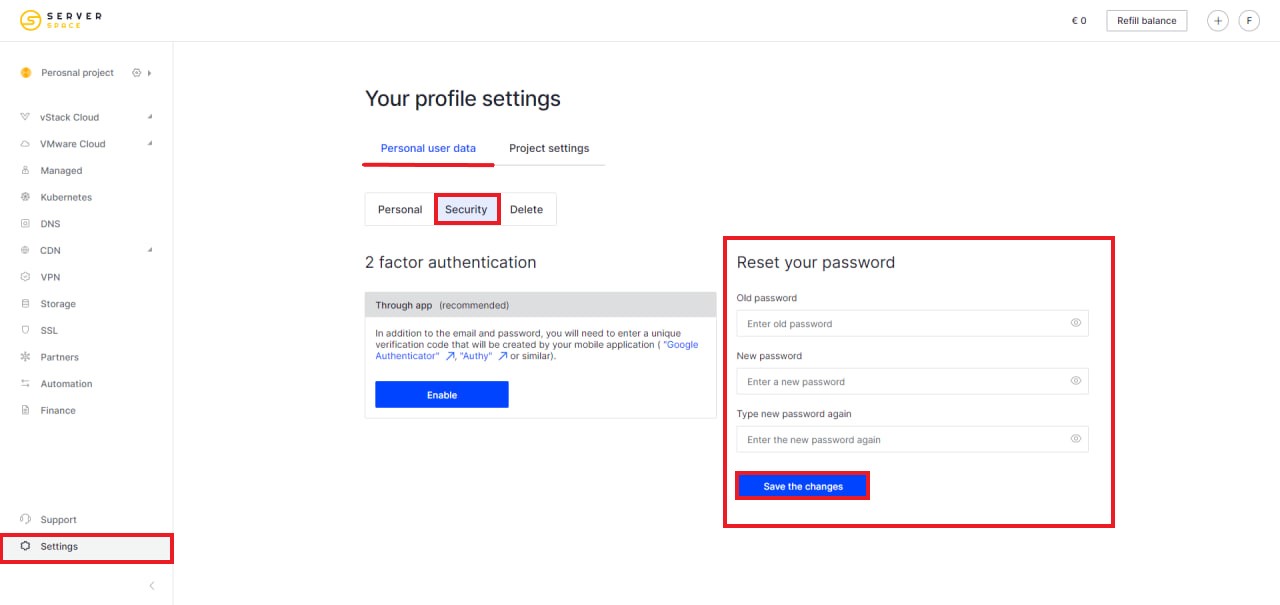
Here you can change your password. We recommend changing your password the first time you log into your account:
Project settings
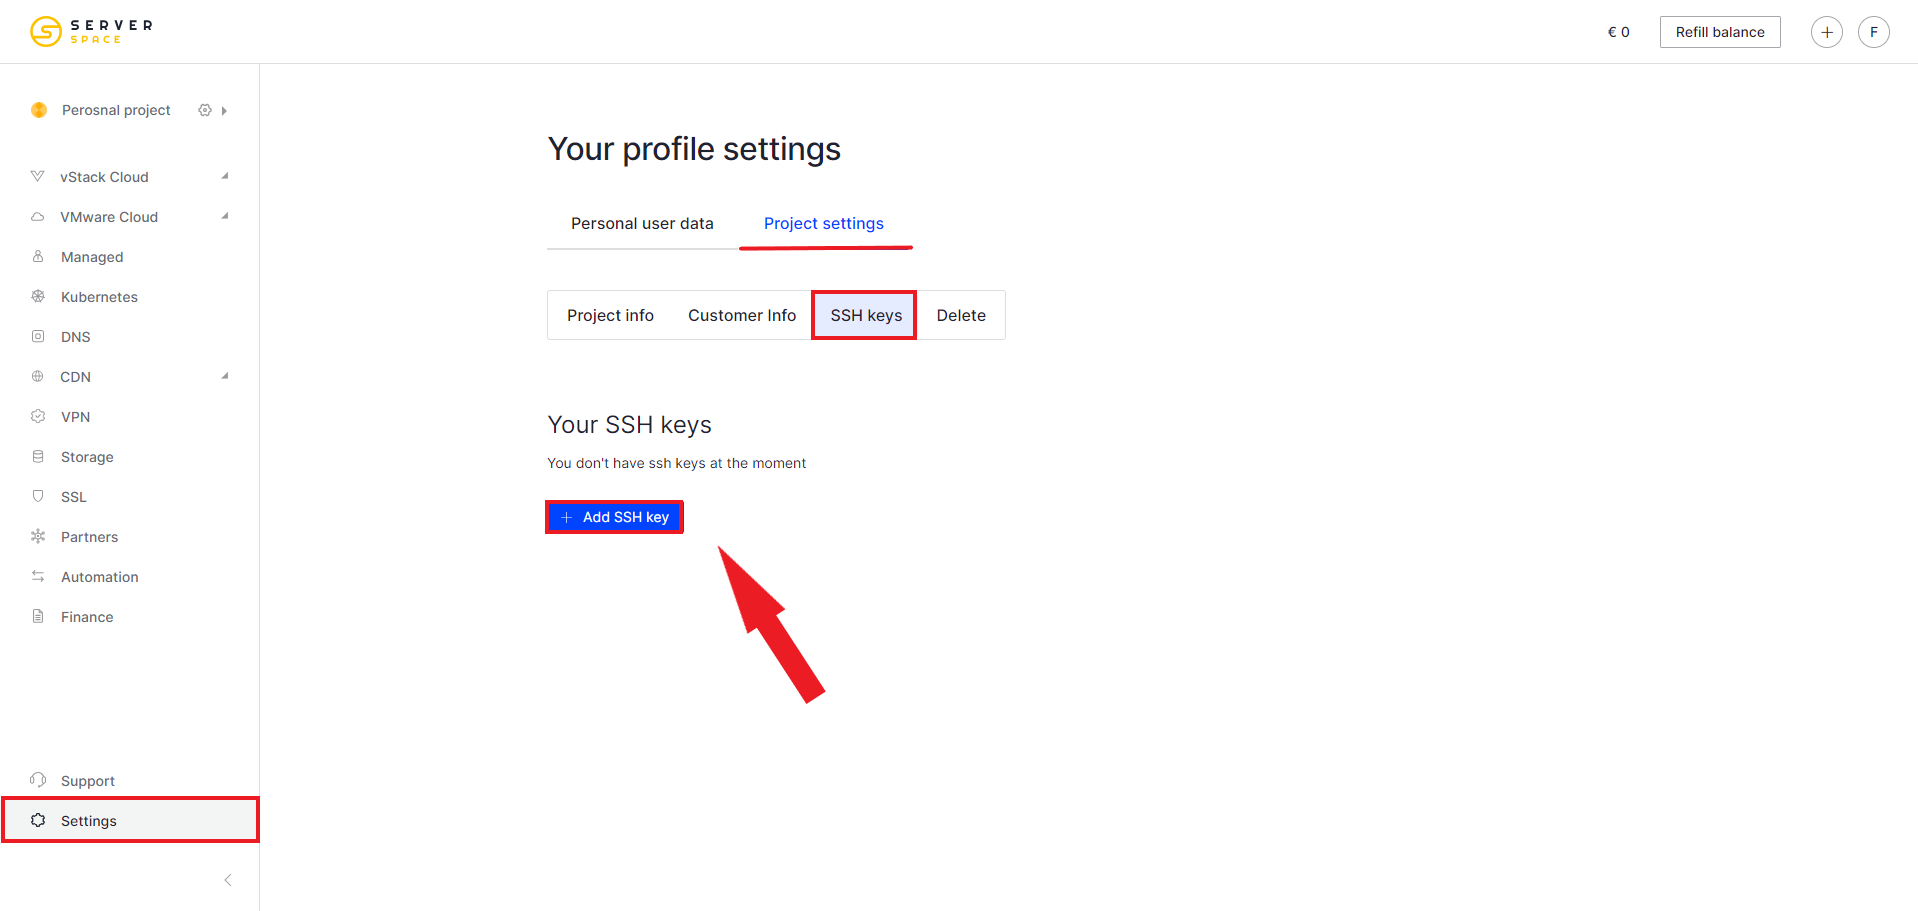
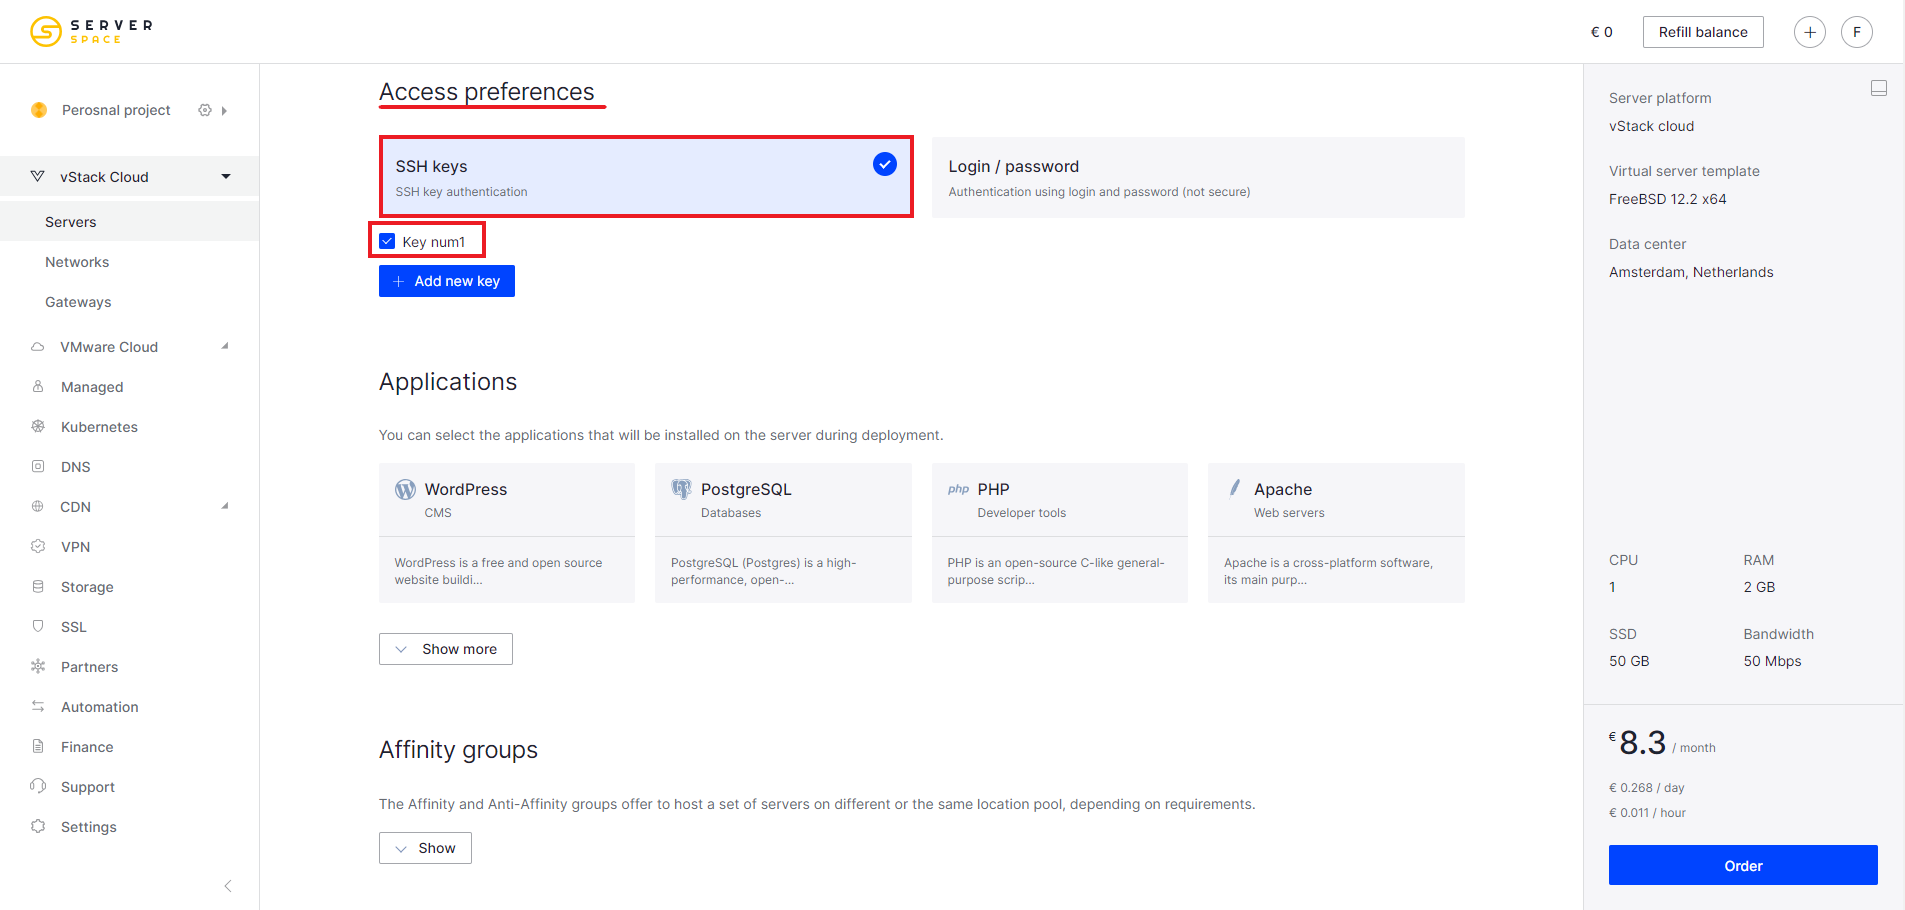
In the SSH keys tab, you can create encryption keys for the SSH protocol:
In the window that appears, select the Generate a new key tab, select the name and format of the key:
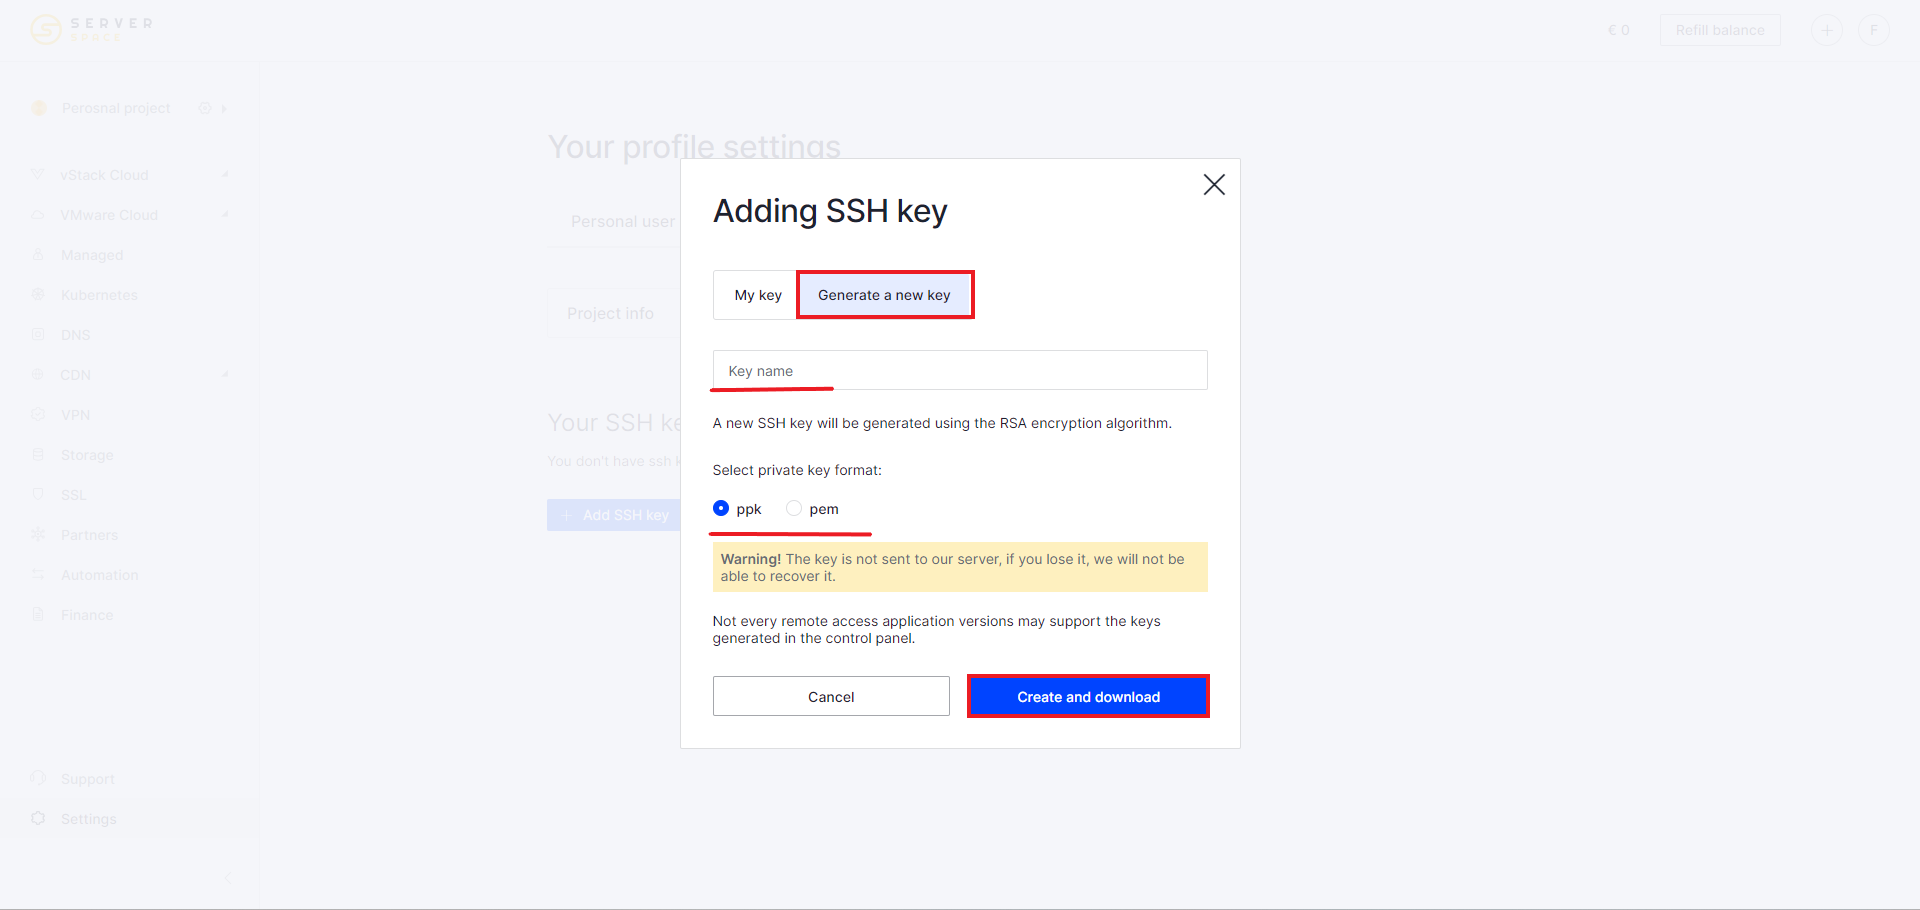
The created key can be used during server configuration. In the Access preferences field, select the Authentication by SSH key option, then the name of your key:
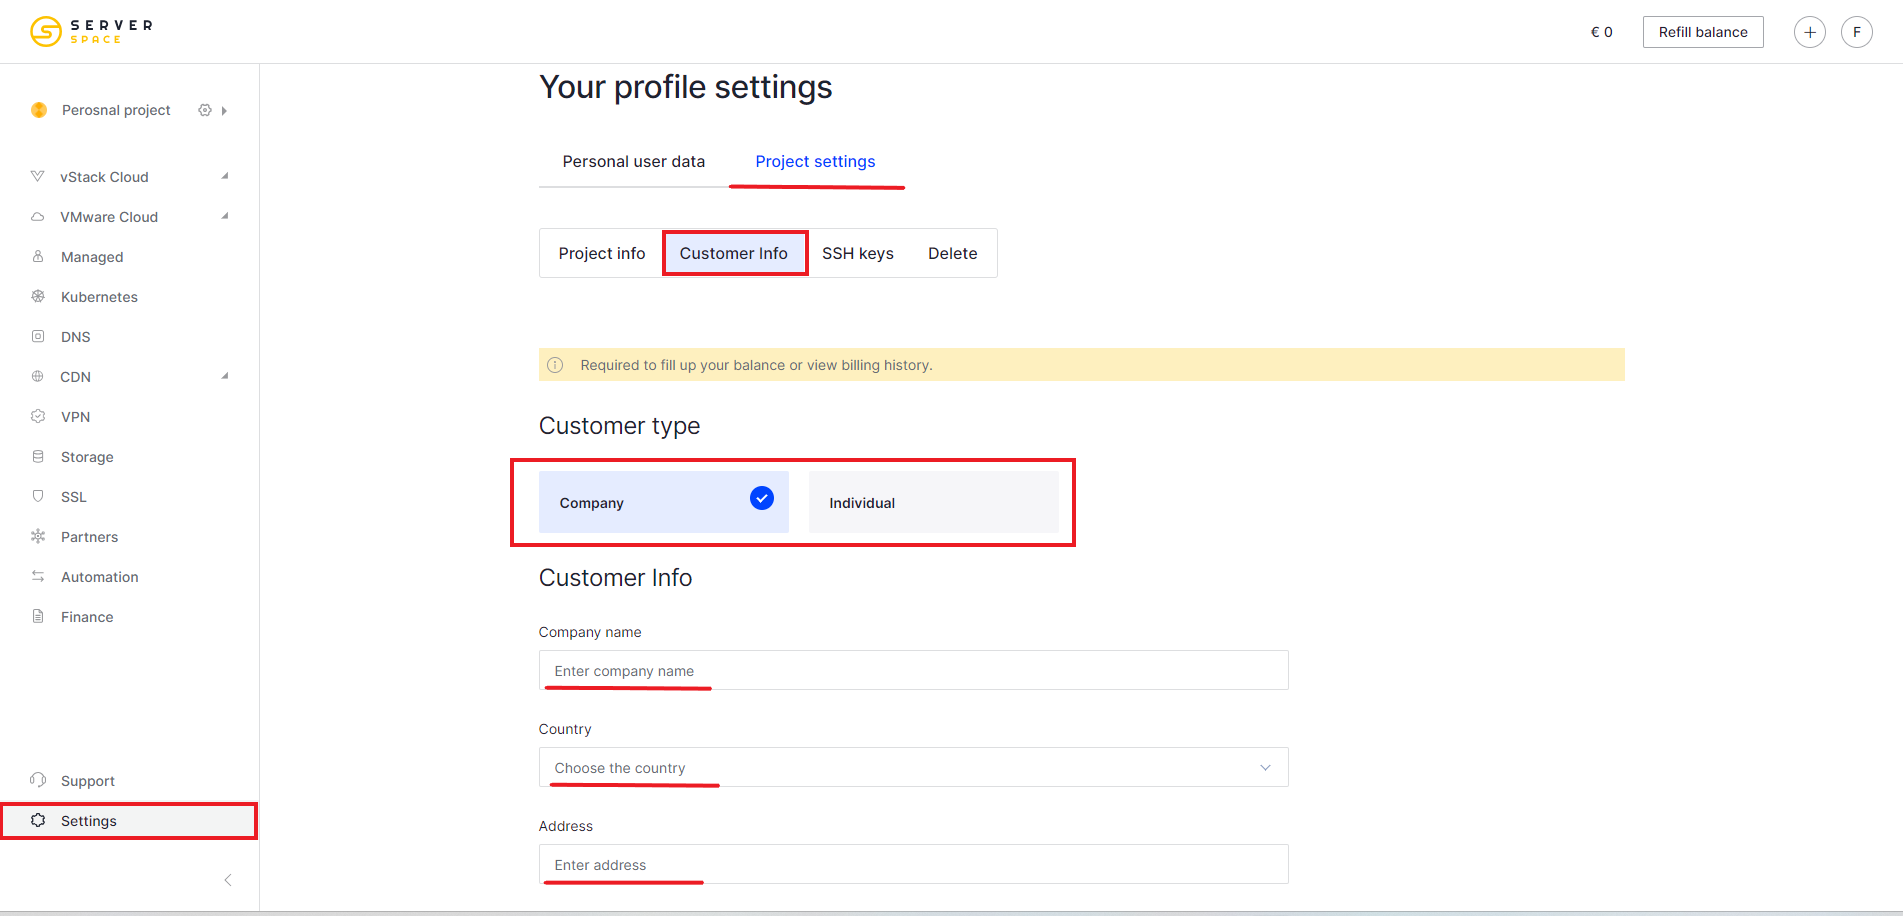
Customer Info
To add a customer info to your account, go to Settings -> Project Settings -> Customer info. Select customer type Company or Individual.
Fill in the fields:
- Company name
- Country
- Address
- VAT ID
- And Billing address if you chose individual
After filling out, check if data is correct:
Types of projects
After registering and setting up your account, you will have access to control panel
Your projects. Projects are divided into Personal and General. You can add other Serverspace users to Shared Projects. Only you have access to Personal Projects.
To create a new project, go to the Projects tab - Add project:
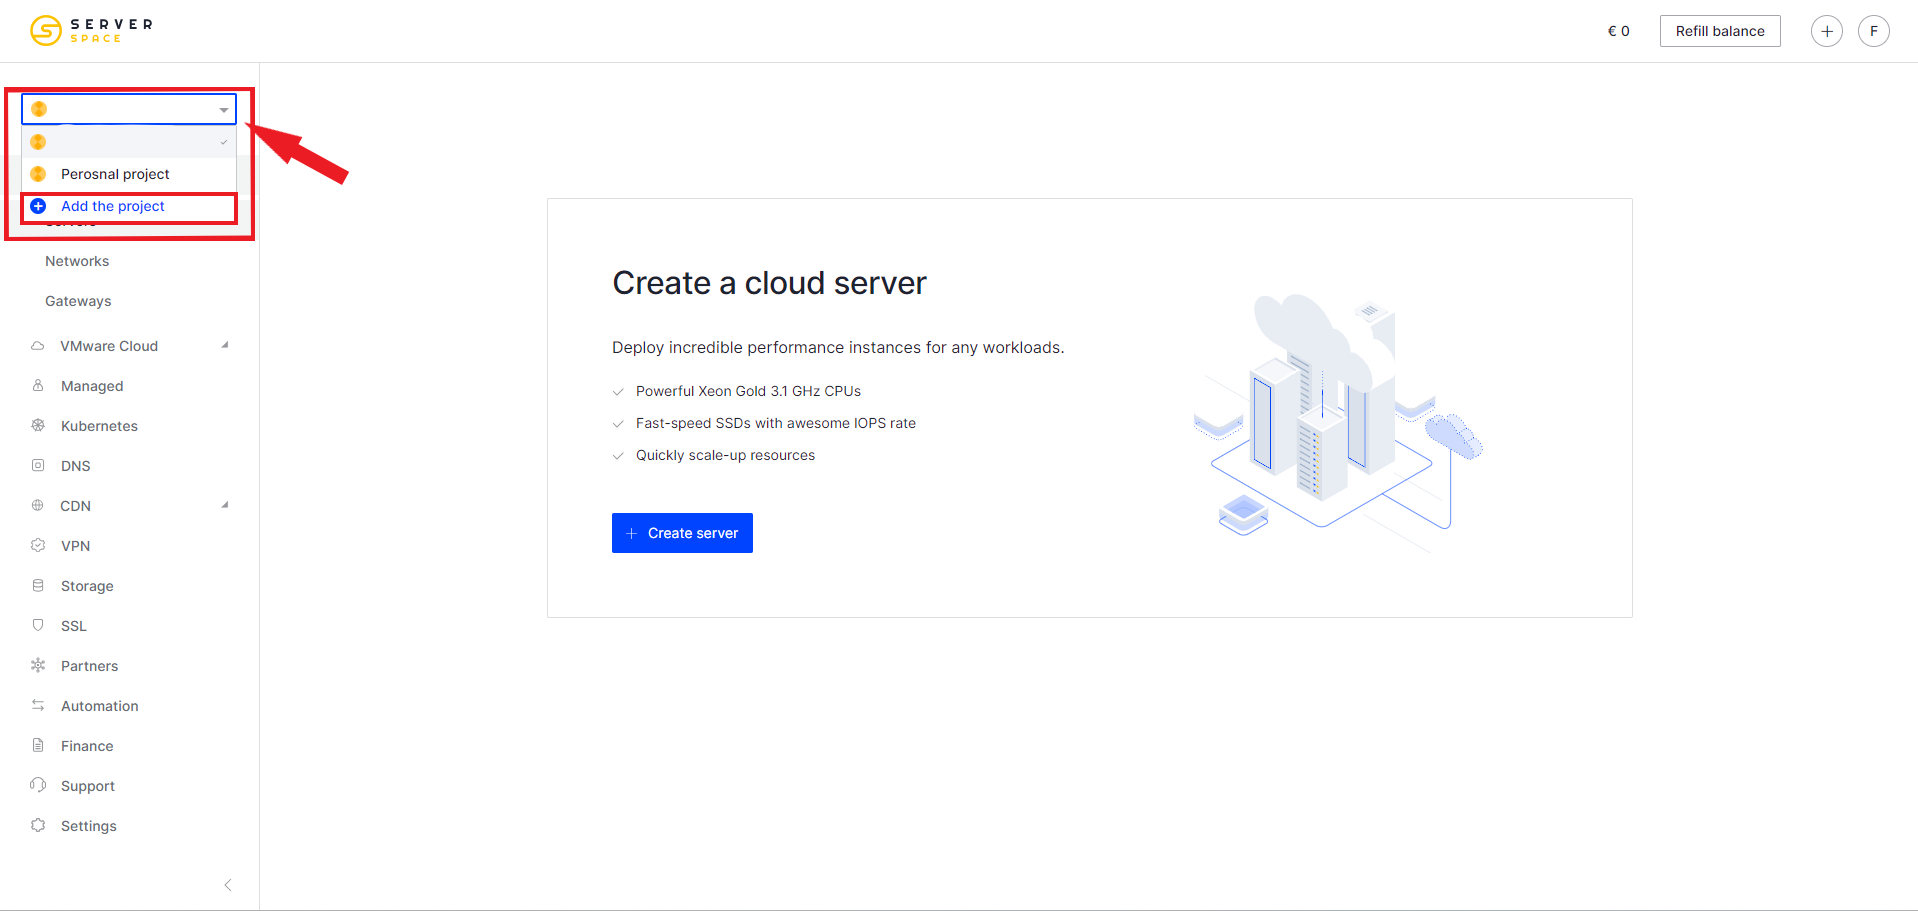
In the window that opens, enter the name of the new project and click the Create a project button:

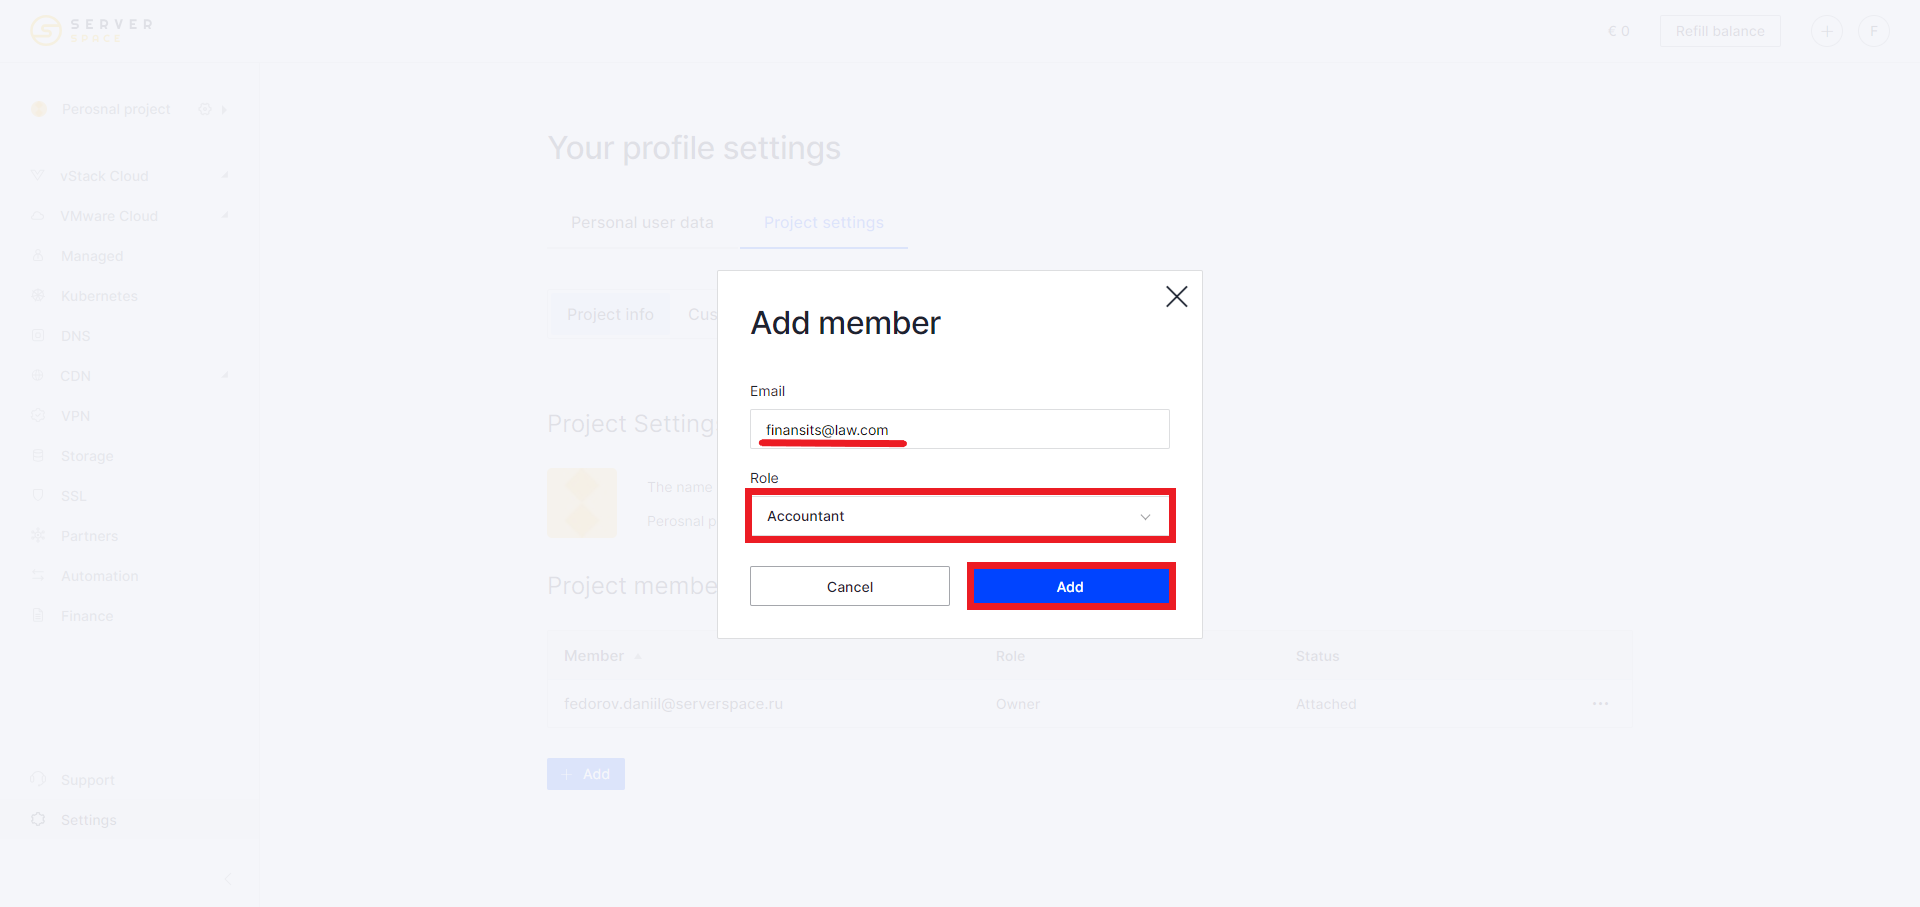
Congratulations! You have created a new Personal Project. To make it Public, click on the Add button in the Project members block:
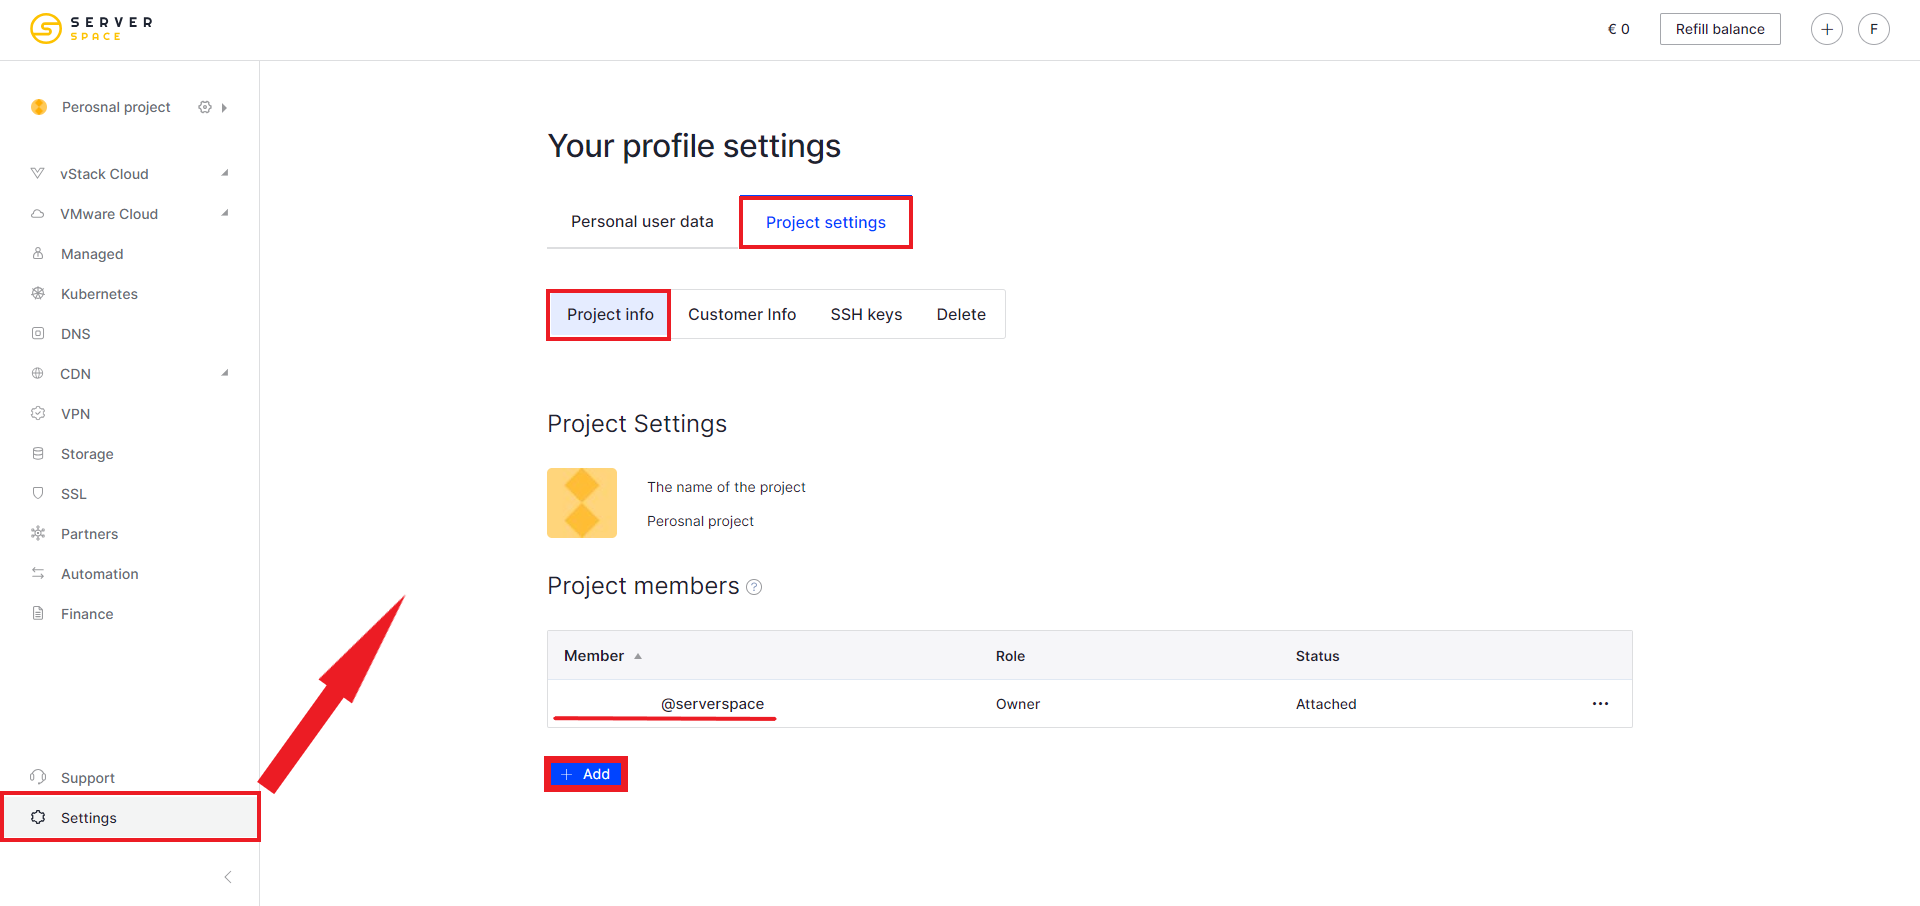
Then enter the email address of the person you want to share the project with and select the appropriate role.: