This guide will provide you with detailed steps to manage your project and add or remove members.

Adding a member of project
To add a member to a project, you must make your personal project public, or create a new public project.
Personal Project Expansion
Let's look at the process of expanding your project to the public.
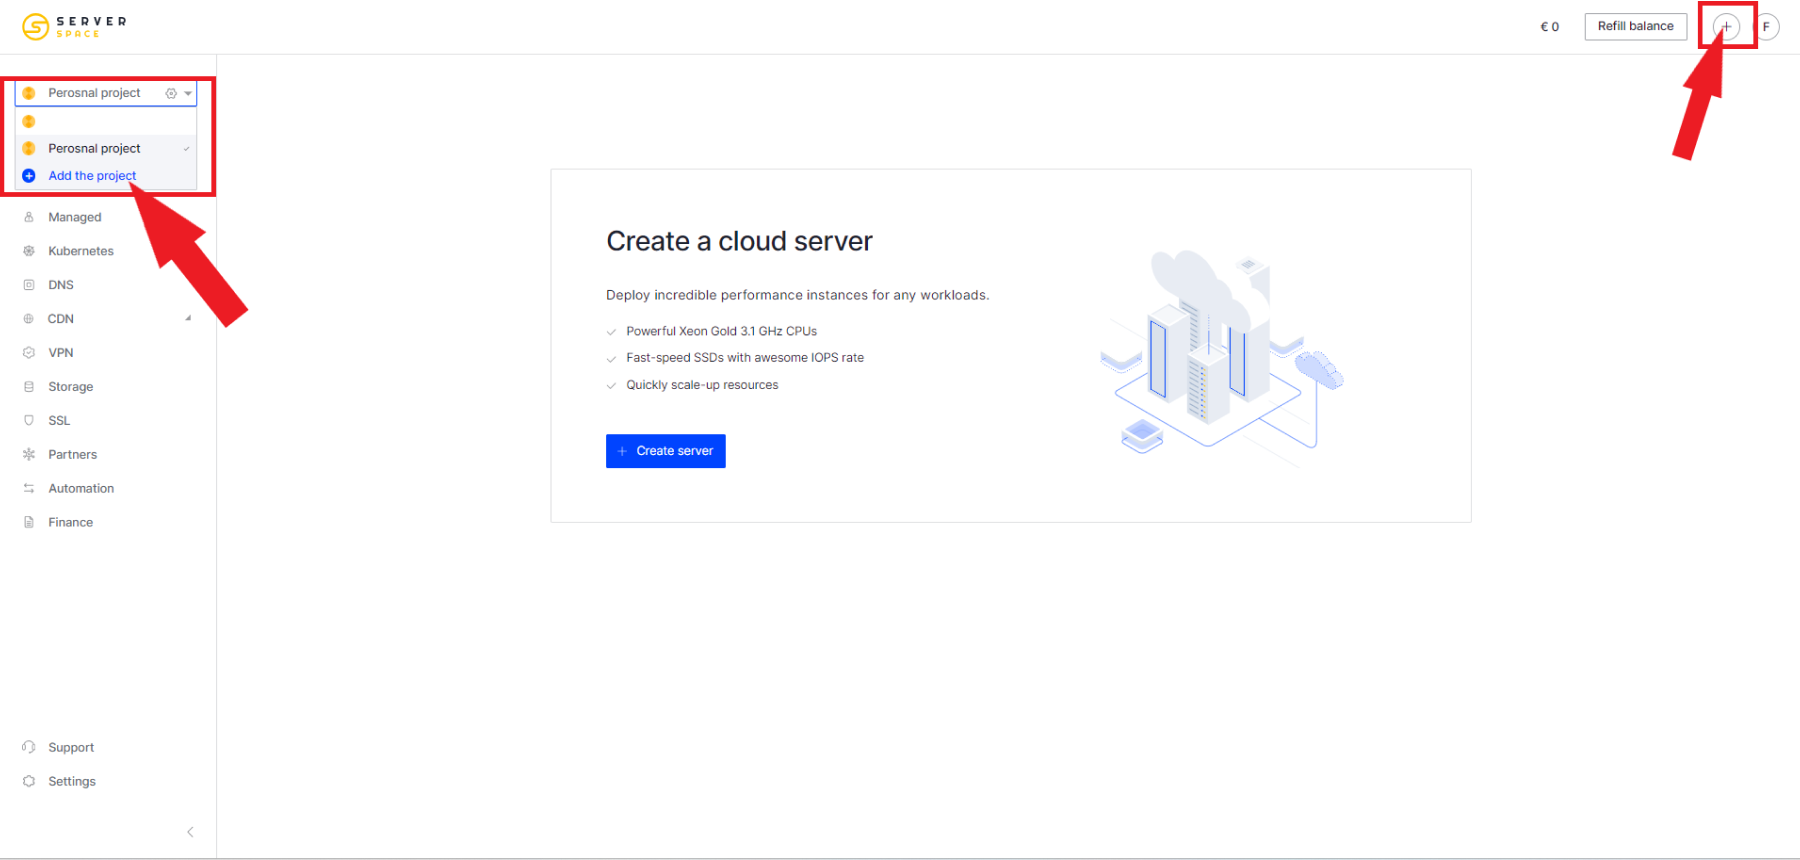
At the top right, click on the + symbol or you can click on your project name and menu of your projects will expand, and there you can also click on the "Add the project" button:
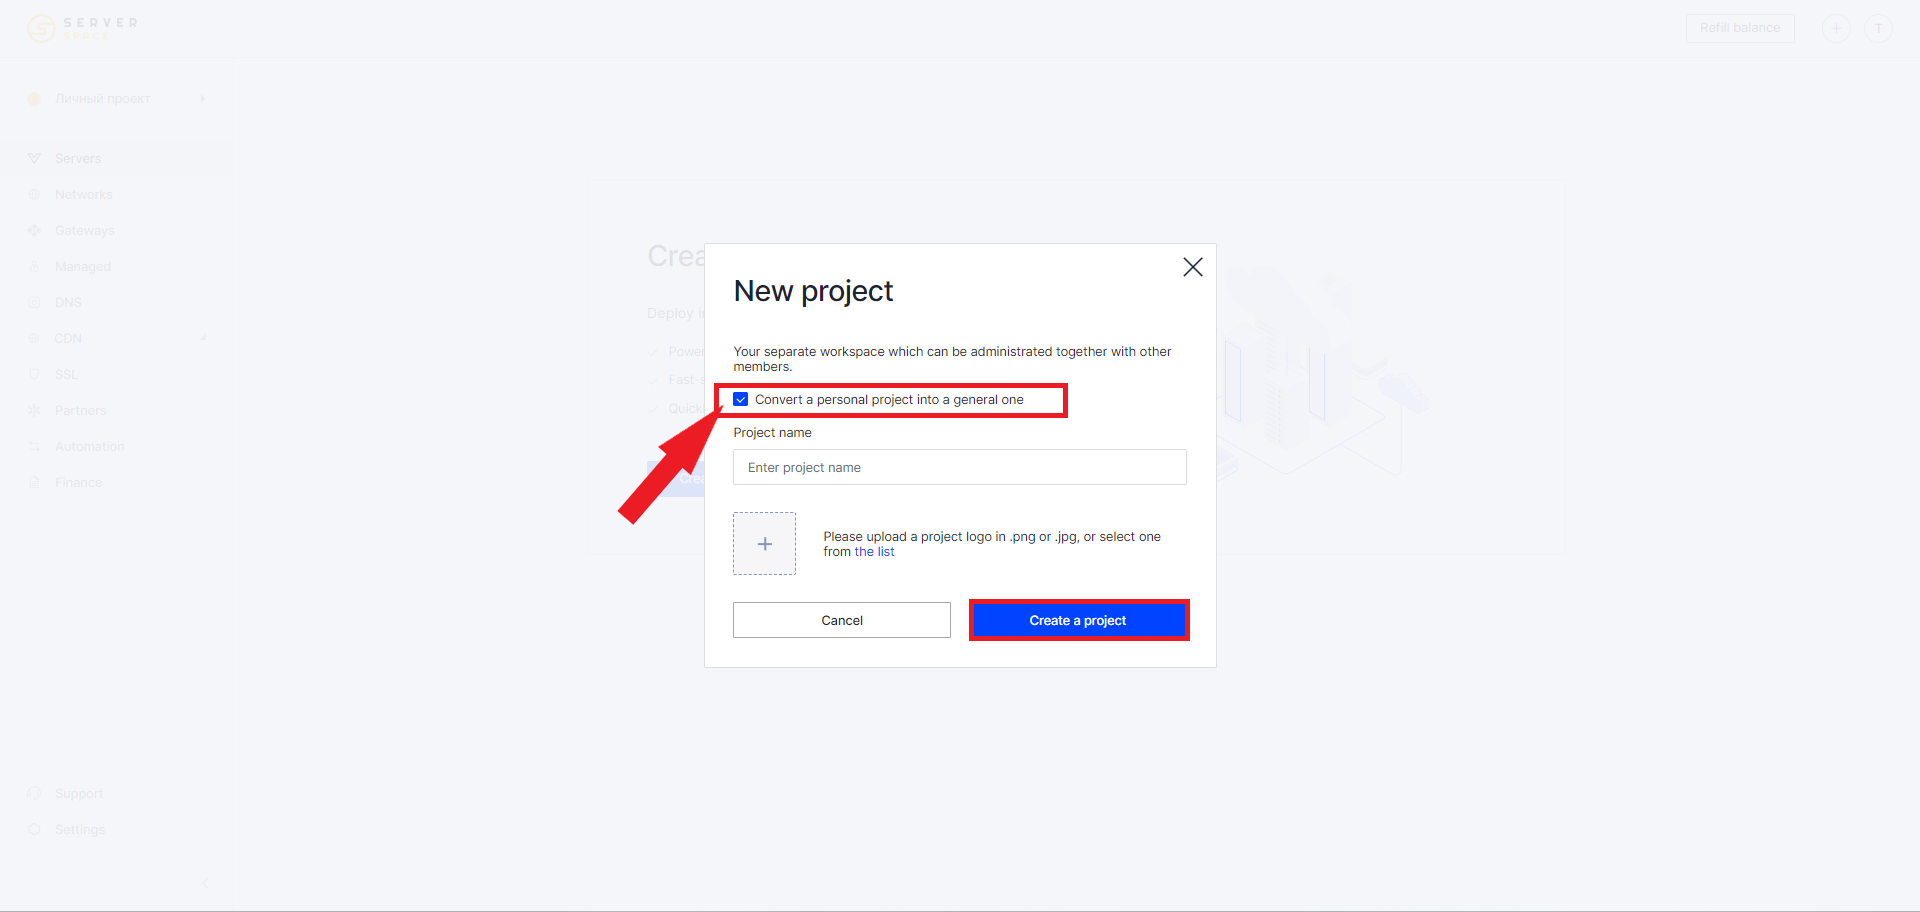
Then check the box, come up with a name and click on the Create project button:
Creating a new project
At the top right, click on the + symbol or you can click on your project name and menu of your projects will expand, and there you can also click on the "Add the project" button:
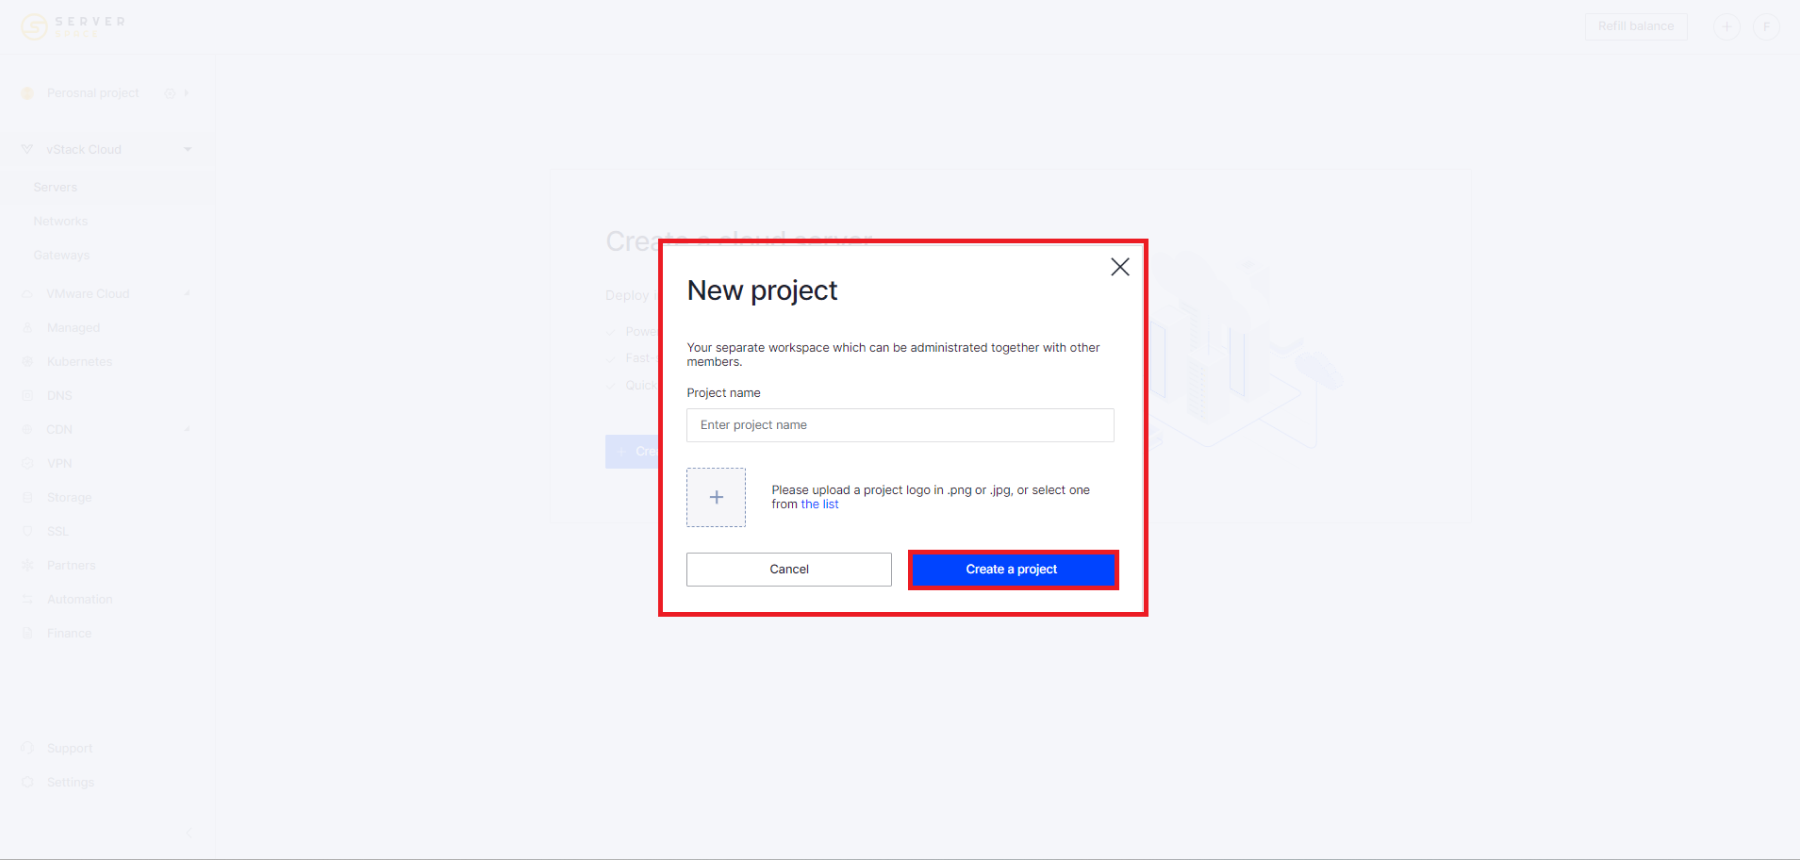
Come up with a name and click on the Create project button:
Adding a user
Regardless of the project creation method you choose, the process for adding a member will remain the same.
Go to Settings - Project Settings - Project Details:
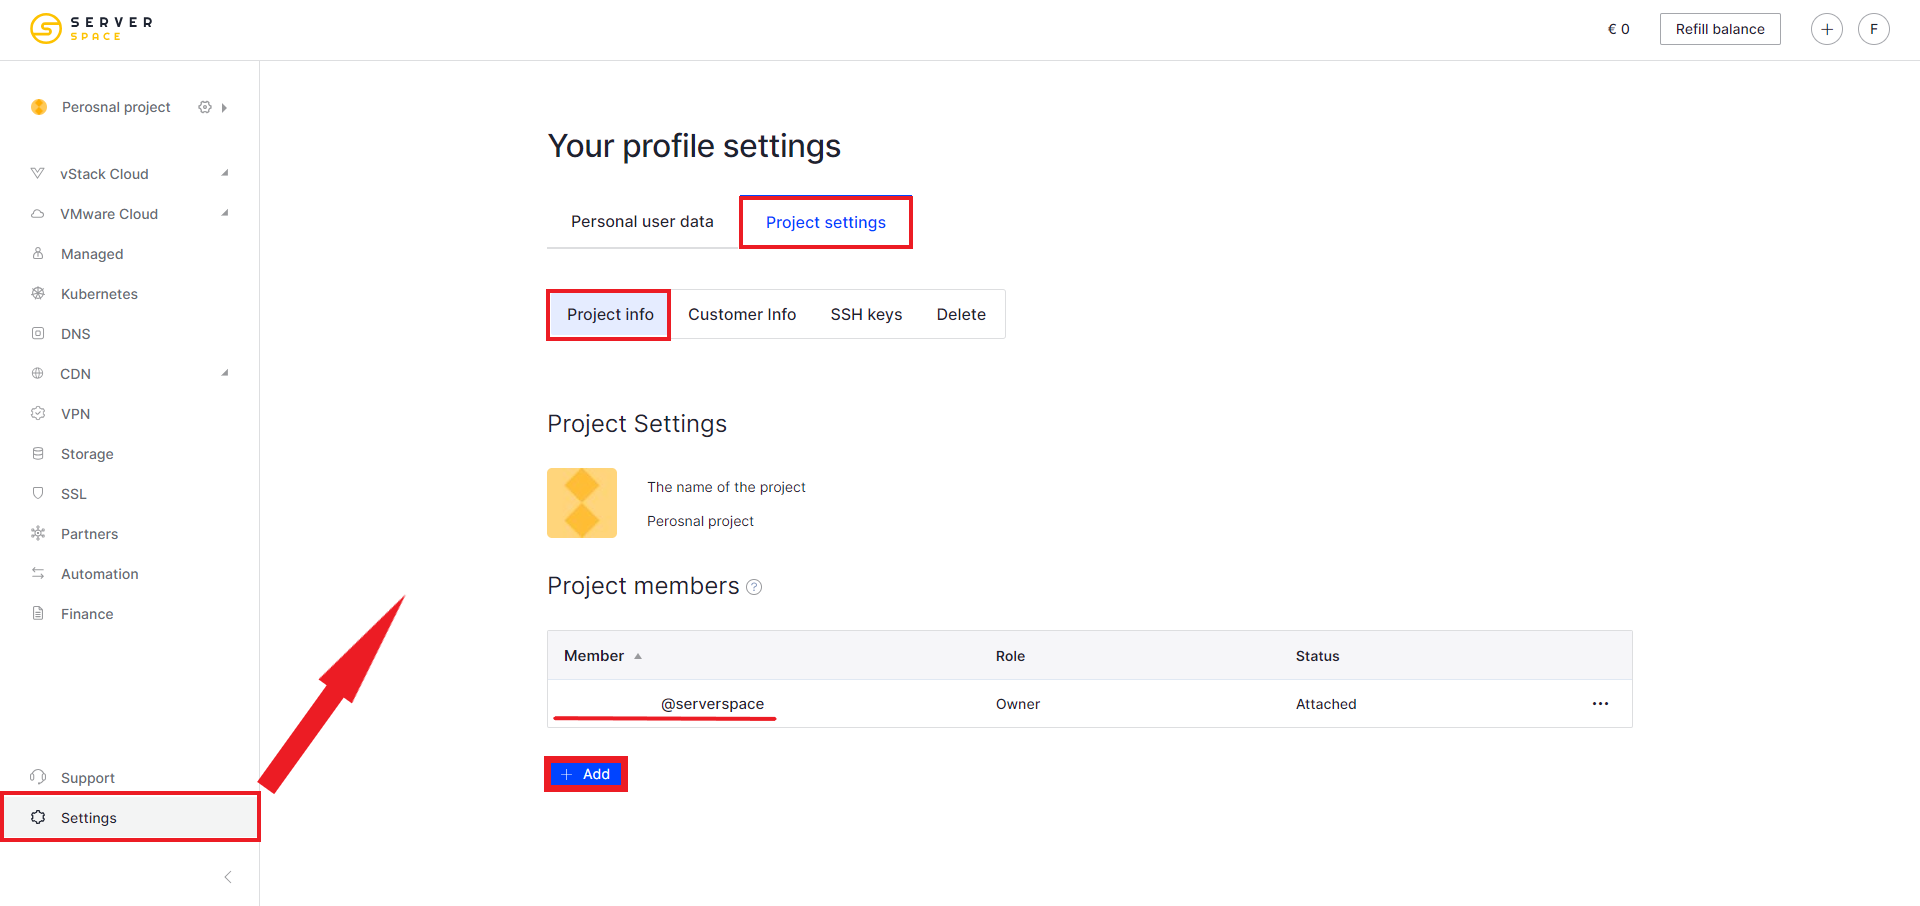
There are 3 roles available to choose from:
- Owner
The role is assigned by default to the account owner, after which he can assign it to any other participant. This role gives full access to the control panel
- Administrator
This role user cannot add or exclude project participants, nor can he influence the “Owner” role (add, delete, transfer, etc.). Otherwise, this role has the same capabilities as the owner. - Accountant
This role will have access only to tabs with financial information, for example: “Partners”, “Billing”, “Support” and “Customer info”. This role can also see all project participants.
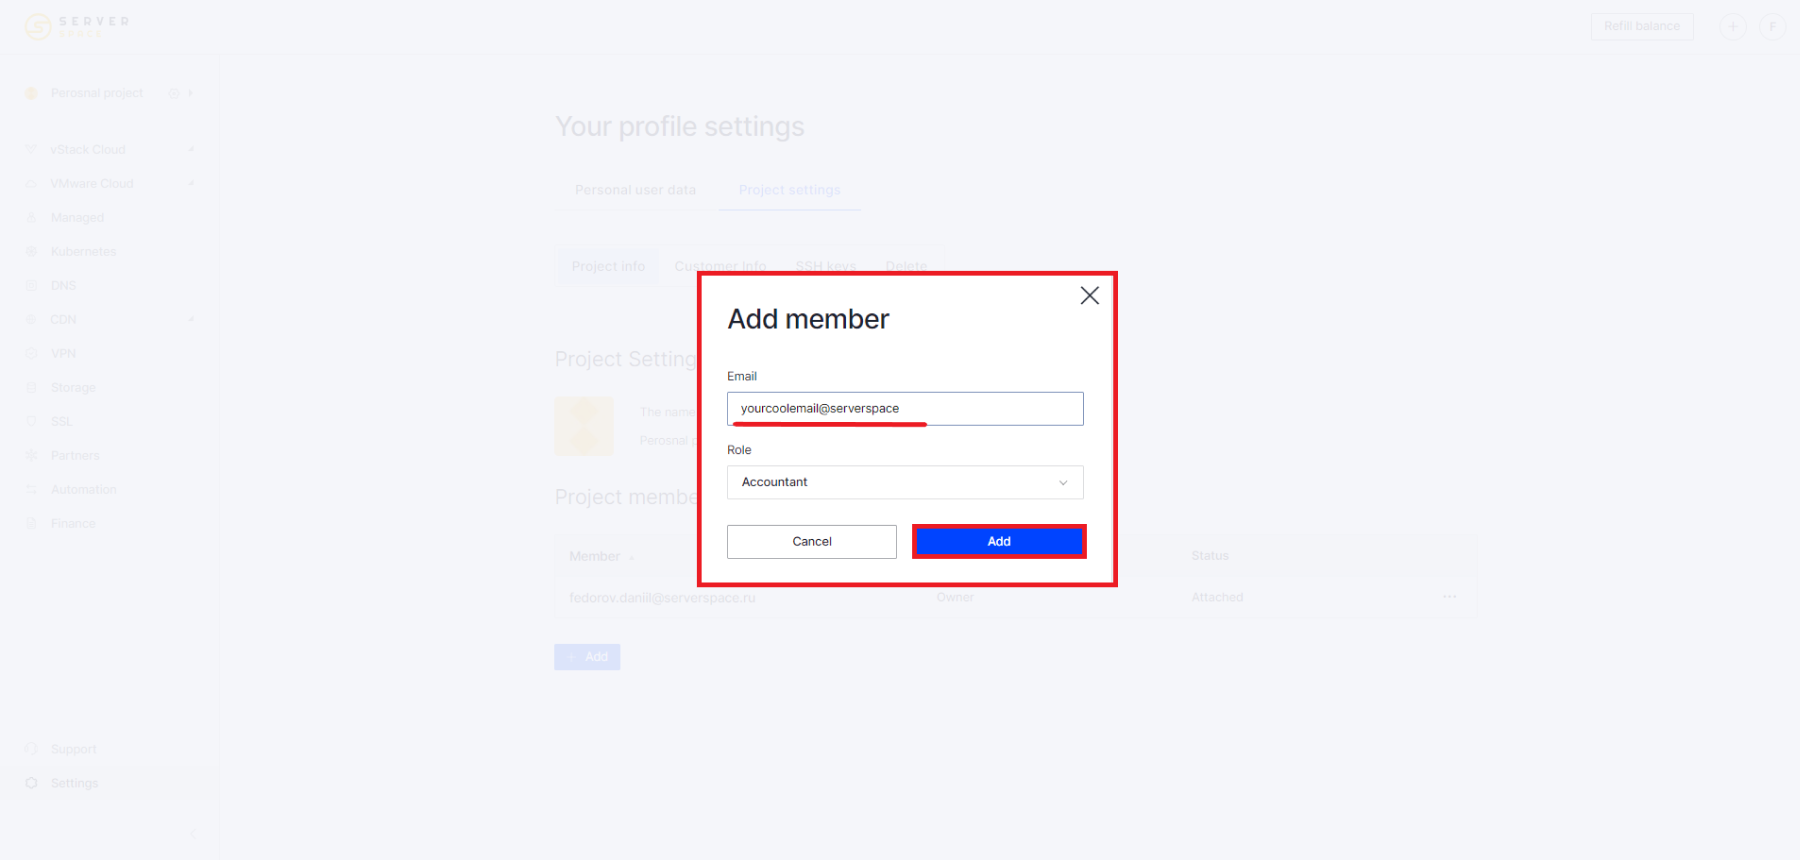
Specify the role of the future participant, enter his mailing address. An invitation to the project will be sent to:
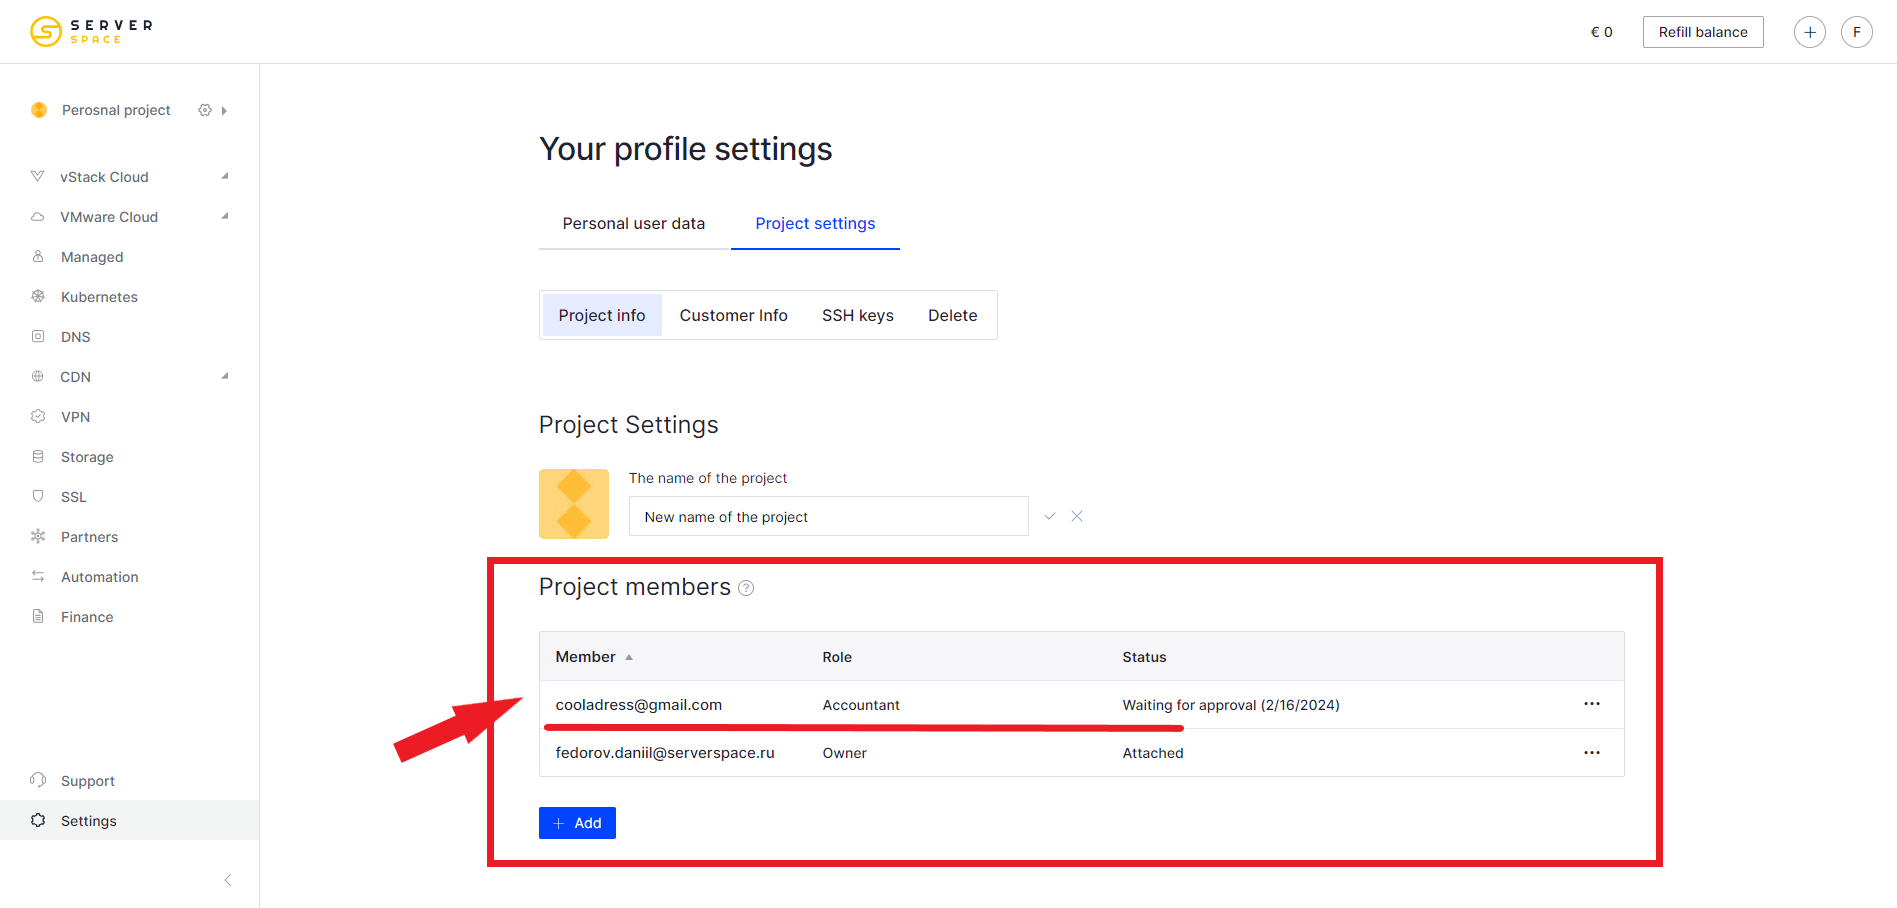
Once the user accepts your invitation, it will appear in the project settings:
Deleting a member
To delete a project participant, go to Settings - Project Settings, and then click on the user you want to delete:
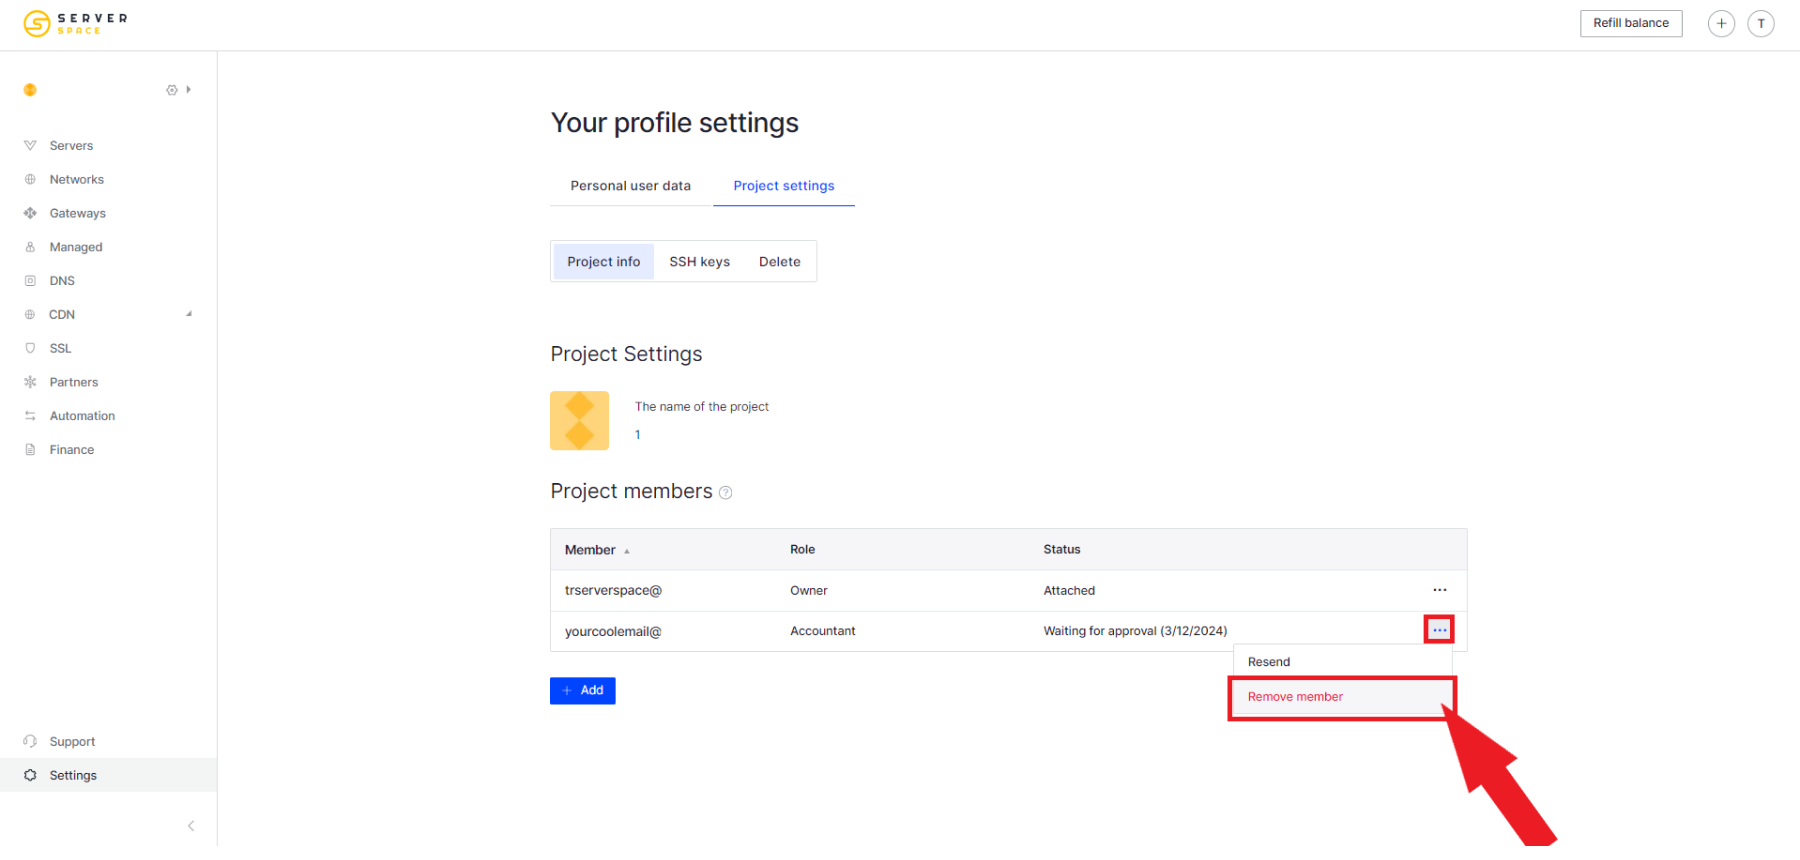
After confirmation, the participant will be removed from the project.


