Introduction
This guide will help you configure your mail server with Postfix, Dovecot, MySQL and SpamAssassin in Debian 11. This setup will allow you to add virtual domains, users and aliases and protect the virtual server from spam.
Using a corporate mail for business or personal purposes offers several benefits:
- Professionalism: A corporate email address, such as yourname@yourcompany.com, creates a more professional image compared to generic free email providers.
- Branding: A corporate email allows you to promote your brand and create a consistent identity across all communication channels.
- Credibility: Having a dedicated email address linked to your business domain enhances credibility and trustworthiness among clients, partners, and customers.
- Security: Corporate email services often provide advanced security measures, such as encryption and spam filters, to protect sensitive information and prevent unauthorized access.
- Control and Ownership: With a corporate email, you have full control over your email infrastructure and data, ensuring privacy and compliance with data protection regulations.
- Collaboration: Corporate email platforms often integrate with other productivity tools like calendars, task management, and document sharing, enabling seamless collaboration within teams.
- Scalability: As your business grows, a corporate email service can easily accommodate the increasing number of users and provide additional features and storage capacity.
- Customization: You can customize the email settings, user permissions, and email policies according to your business requirements.
- Support: Many corporate email providers offer dedicated technical support to resolve any issues or provide assistance when needed.
- Separation of Personal and Business Communication: Using a separate corporate email helps separate personal and business—related communication, making it easier to manage and prioritize tasks.
Overall, utilizing a corporate email service offers numerous advantages in terms of professionalism, security, control, collaboration, and branding, making it a valuable asset for businesses and individuals alike.

Requirements
- Domain name;
- Docker CLI >= version 20
- Docker Compose >= version 2.0;
- Root rights;
- Configured FQDN;
- Optional: SSL certificate.
Install Packages:
Firts of all we need to start update packages on our system:
apt update && apt dist-upgrade
Install all needed requirements and dependencies for system configuration by command:
sudo apt install apt-transport-https ca-certificates curl gnupg-agent software-properties-common -y 
Add and download keys from official Docker repositories, but if you use another version of system Debian, then change link bellow:
curl -fsSL https://download.docker.com/linux/ubuntu/gpg | sudo apt-key add -
This command will use utility, which set encryption key on the system and allow you to use repositories.
Now add link and update package list:
sudo add-apt-repository "deb [arch=amd64] https://download.docker.com/linux/ubuntu focal stable" && apt update
In that case we download Docker Compose as a plugin for our server, which works as standalone application by command below:
sudo apt install docker-ce docker-ce-cli containerd.io docker-composeThe plugin will containerize application and help us start 3 main modules of mail server together:
- Mail Transfer Agent;
- Mail User Agent;
- Mail Delivery Agent.
Each of them complete their part of needed work in that process. We will install modern and security provided mail server, therefore, we need to use such modern protocol for transfer data. SSL will help with this requirements and one of the advantages in front of usual mail server from IT corporation it's securities!
We don't provide any data to corporation or anything else. That situation say more about our privacy, but take in mind this solution will work only with two clients on our email!
Continue our installation. Write command for add user in docker group:
sudo usermod -aG docker yourname
Add domain records
For our purposes in next step we indicate and write the DNS record to our panel, in that case i use delegated panel from Serverspace and write needed records, in your case you can use anything provider:
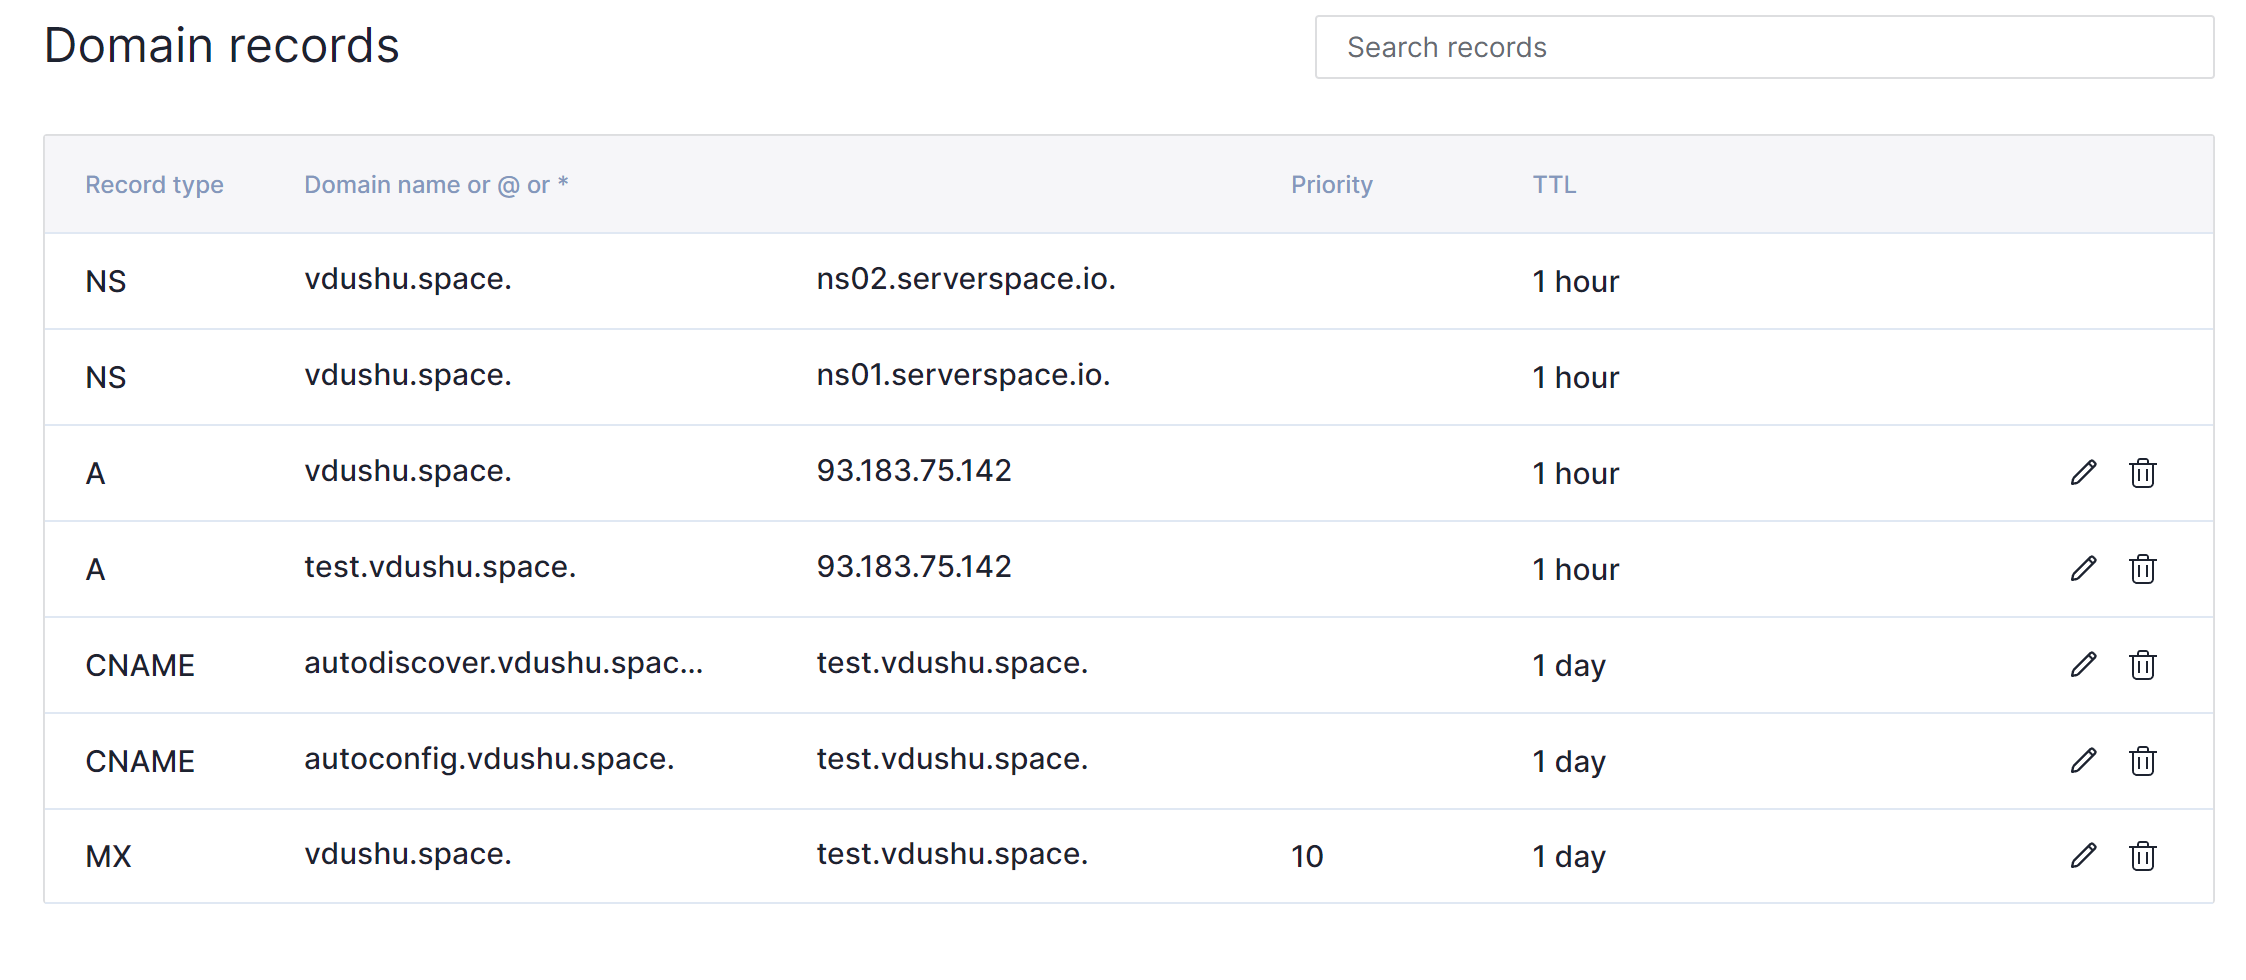
A record help our mail service to detect accordance between our domain name and IP addresses via DNS server in our example they indicate like NS record ns.02 and ns.01 with dot at the end. That need to search information about our IP address in unified format. Our domain second level vdushu.space and for mail server test.vdushu.space was wrote.
CNAME record represent synonym. In the language words of the same part of speech with full or partial coincidence of meaning. In the technologies that use for the same purposes. Any request to autoconfig.* or autodiscover.* redirect to main domain test.vdushu.space they need for docker container configuration.
MX record provide user domain name of requested canonical name. That help to determine mail server where the information will be delivered. For example we received email from sender: ussc.us and want to reply fo this message, agent make response request and recieved message like MX:test.vdushu.space, check of accordance for security issue and then send mail to mx server.
NS server or name server is main component for indicate which dns server provide maintenance for dedicated domain name. After you setup all DNS records change hostname on your Linux machine, that help in use DNS resolver /etc/resolv.conf you can check that:
hostnamectl set-hostname yourdomain.com && nano /etc/resolv.conf 

If domain don't change then check /etc/hostname:
nano /etc/hostnameAnd write canonical name of domain that you use! In our example vdushu.space.
Install and config part of server
Create a worker folder for download packets via command below:
mkdir -p /main/mail && cd /main/mail
Installation of mail server begin at the github downloading for this enter command:
apt install git && git clone https://github.com/mailcow/mailcow-dockerized
Then generate config for installation via command below:
cd /main/mail/mailcow-dockerized && ./generate_config.sh 
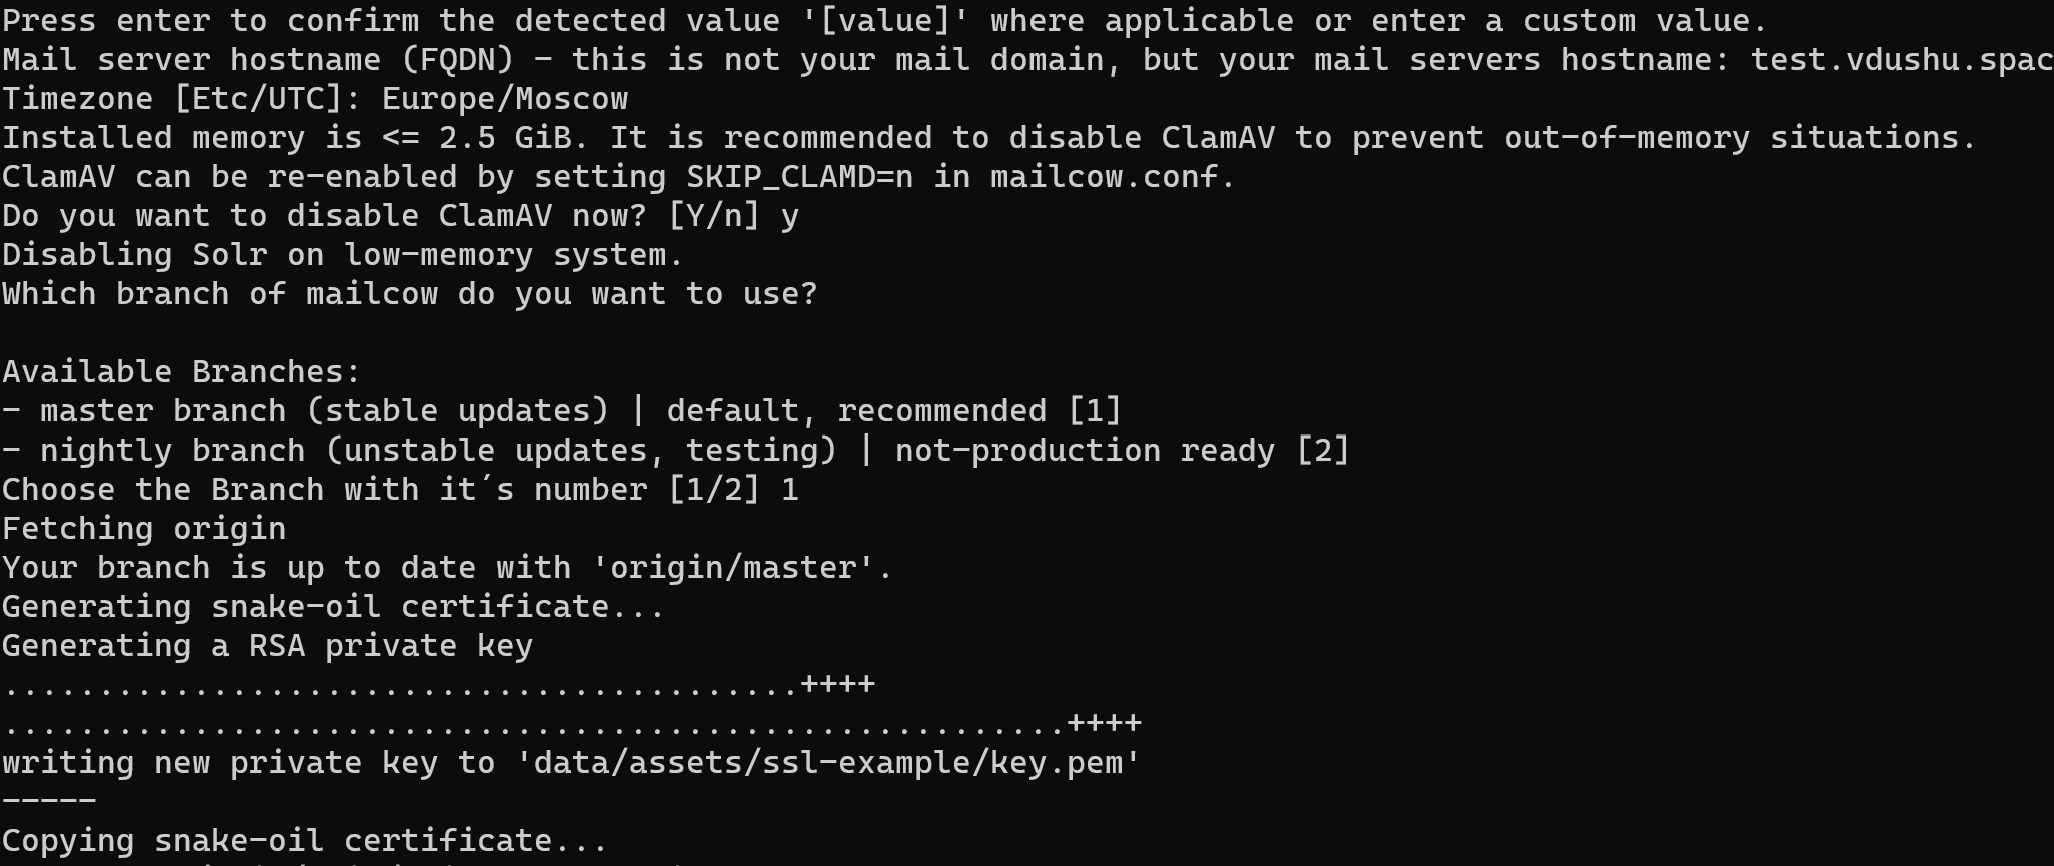
Follow the instruction in popup question and requirements. You need to fill field with label Timezone, domainname, indicate with letter Y if you want to install antivirus or N to disable them, choose stable version for that installation and wait for generate SSL certificate:
Conclusion
The guide aims to provide a comprehensive setup for a modern and secure mail server, utilizing Docker containers and incorporating various components for effective mail handling and delivery. In the next part of instruction we continue considering installation and configuring the server. Don't tune!


