Introduction
pgAdmin is an open source project designed to manage PostgreSQL databases. PostgreSQL is one of the most popular database management systems in the world.
The tool is easy to use for beginners and professionals working with PostgreSQL. It uses an object-relational database and provides a web interface and desktop version for easy interaction with database objects.

Preparing for installation
For proper operation between pgAdmin 4 and PostgreSQL, it is necessary to prepare in advance:
- Deployed Ubuntu Server 22.04. A user with sudo command access. Utility for configuring the ufw firewall. We invite you to use our instruction;
- Installed and configured Nginx as reverse proxy http://unix:/tmp/pgadmin4.sock;
- Installed PostgreSQL, you need to add a new user, as well as database to connect pgAdmin to our database;
- Virtual environment deployed in Python;
Stage 1 – Deploying pgAdmin and downloading dependencies
Updating package indexes first, let's use the built-in apt utility.
sudo apt updateDownload the dependencies of libgmp3-dev, a high-precision arithmetic library; libpq-dev, a library that allows you to work with the PostgreSQL backend.
sudo apt install libgmp3-dev libpq-devCreate several directories for the purpose of storing information on connected sessions, storage and log files:
sudo mkdir -p /var/lib/pgadmin4/sessions

sudo mkdir /var/lib/pgadmin4/storage

sudo mkdir /var/log/pgadmin4
Create user serverspace:
useradd -m serverspaceThen a new passphrase for the user serverspace must be set:
passwd serverspaceAdd it to the sudo group:
usermod -aG sudo serverspaceNext, change the directory owners from root to serverspace, some utilities do not allow access to run services as root:
sudo chown -R serverspace:serverspace /var/lib/pgadmin4sudo chown -R serverspace:serverspace /var/log/pgadmin4Then go to the folder created under the name "test". In these instructions, the names of the directories are given in the same way as in the instructions. Go to the previously created test directory and run the test_env environment:
cd test/source test_env/bin/activateRunning the test_env virtual environment, update the pip package to install the required library. In the case of a non-updated pip, we may encounter some difficulties in installing pgAdmin.
To update the pip, proceed as follows:
python3 -m pip install -U pipUse a web browser to download the latest release of a file with a .whl extension. Which is the standard package extension for the Python distribution. Copy the utility link and type in the command line:
wget https://ftp.postgresql.org/pub/pgadmin/pgadmin4/v6.10/pip/pgadmin4-6.10-py3-none-any.whlUsing pip, configure the downloaded package:
python -m pip install wheelSet it up:
python -m pip install pgadmin4-6.10-py3-none-any.whlDownload Gunicorn in Python WSGI, which will communicate with Nginx:
python -m pip install gunicornThe first step has been completed successfully. Modify the configuration file, then you can connect to the database.
Stage 2 – Configuring pgAdmin 4
You need to back up the config.py file, which is located in the folder of the installed pgAdmin package. In this example the path to the file:
/test/test_env/lib/python3.10/site-packages/pgadmin4/
cd /test/test_env/lib/python3.10/site-packages/pgadmin4/Changing the master file - can result in loss of data:
cp config.py config.py.origThe config.py file should only be edited if necessary to avoid damaging the data and performance of pgAdmin 4.
Make edits to the config_local.py file.
Important! The file must be located at the address: /site-packages/pgadmin4/
You can use the touch utility to create a file, or you can create and open a file with vim or nano. We will use nano:
nano /test_env/lib/python3.10/site-packages/pgadmin4/config_local.pyAfter opening, we will make the edits:
LOG_FILE = '/var/log/pgadmin4/pgadmin4.log'

SQLITE_PATH = '/var/lib/pgadmin4/pgadmin4.db'

SESSION_DB_PATH = '/var/lib/pgadmin4/sessions'

STORAGE_DIR = '/var/lib/pgadmin4/storage'

AZURE_CREDENTIAL_CACHE_DIR = '/var/lib/pgadmin4/azurecredentialcache'

SERVER_MODE = True
This piece of code does:
LOG_FILE: Path to the log file
SQLITE_PATH: Path to user data in SQLite database The file is stored in /var/lib/pgadmin4/ directory, our user data will not be lost after upgrade.
SESSION_DB_PATH: Path to a directory containing information about connected sessions.
STORAGE_DIR: Path to a directory containing storage and certificate information.
SERVER_MODE: The server mode selected is True.
To exit and save, press ESC, type :wq! and press ENTER.
To start configurations from this location, start pgAdmin with a number of commands.
Set up a public key:
curl -fsS https://www.pgadmin.org/static/packages_pgadmin_org.pub | sudo gpg --dearmor -o /usr/share/keyrings/packages-pgadmin-org.gpgTo proceed, add a configuration file. Send the following command to the terminal:
sudo sh -c 'echo "deb [signed-by=/usr/share/keyrings/packages-pgadmin-org.gpg] https://ftp.postgresql.org/pub/pgadmin/pgadmin4/apt/$(lsb_release -cs) pgadmin4 main" > /etc/apt/sources.list.d/pgadmin4.list && apt update'
Install pgadmin4:
sudo apt install pgadmin4Let's run the configuration:
sudo /usr/pgadmin4/bin/setup-web.shNext we will write our details (email, passphrase) for the future login to the pgAdmin web interface:
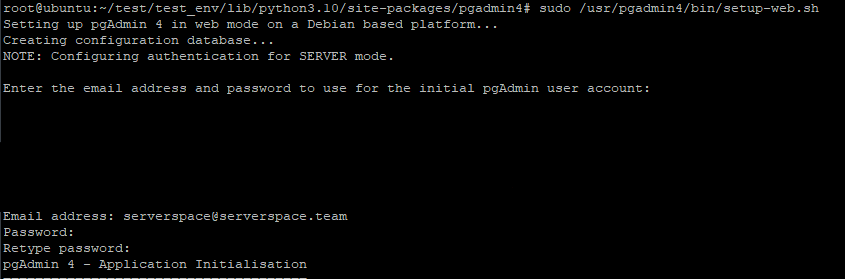
pgAdmin is now available on our network.
Stage 3 – Deploying Gunicorn and Nginx
Gunicorn is responsible for running pgAdmin as a web application. It is currently possible to connect to pgAdmin from local computers. A Nginx web server is configured for access outside our network.
Go to the root directory, then go to the address:
cd /etc/nginx/sites-available/Make changes to the /test_domain.io file:
server {

listen 80; #Listening on port 80 IPv4

listen [::]:80; #In most cases, when starting nginx -t gives an error, is sent to this line, when you get an error, comment out the line

server_name test_domain.io www.test_domain.io; #Server name

location / { #Path

proxy_pass http://unix:/tmp/pgadmin4.sock; #reverse proxy

include proxy_params;

}

}
Let's run the Python virtual environment. Connect the reverse proxy using a few commands:
source /test/test_env/bin/activategunicorn --bind unix:/tmp/pgadmin4.sock --workers=1 --threads=25 --chdir /root/test/test_env/lib/python3.10/site-packages/pgadmin4 pgAdmin4:app#Output
[2022-11-04 21:55:37 +0000] [6338] [INFO] Starting gunicorn 20.1.0
[2022-11-04 21:55:37 +0000] [6338] [INFO] Listening at: unix:/tmp/pgadmin4.sock (6338)
[2022-11-04 21:55:37 +0000] [6338] [INFO] Using worker: gthread
[2022-11-04 21:55:37 +0000] [6339] [INFO] Booting worker with pid: 6339The command must be executed from the test_env virtual space and there must be no library related errors in the output.
Stage 4 - Access to pgAdmin 4
On the machine on our network, start a web browser and in the address bar specify the address of the host where pgAdmin is deployed http://server_ip/pgadmin4.
The current example uses the address http://10.0.0.1/pgadmin4
When logging in, specify the email and password used to create the configuration (End "Step 2 - Configuring pgAdmin 4").
Log in by clicking on the Login button (see Screen 1)

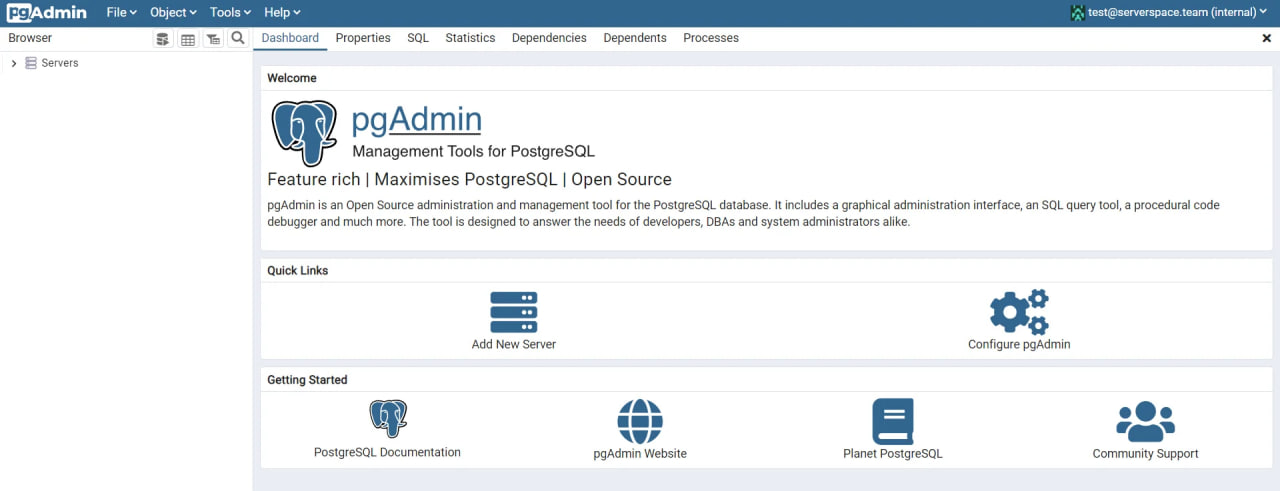
If authorised successfully, you will see the home page of the pgAdmin web interface (see Screen 2).
Now edit the configuration file used to connect to the PostgreSQL database.
Stage 5 – PostgreSQL user configuration
Pressing CTRL + C will stop the process, thus going back to the console.
By following the Setup Process item from the instructions. Let's proceed to setup.
Log in to the "built-in" administrator account:
su postgrespsql postgresCreate a user and the database itself using commands:
CREATE ROLE <login> LOGIN PASSWORD '<password>';

CREATE DATABASE <database> WITH OWNER = <login>;
For example:
CREATE ROLE serverspace LOGIN PASSWORD 'ububntu';

CREATE DATABASE serverspacedb WITH OWNER = serverspace;
In the database terminal, add a password for the serverpace user. When deploying the DBMS, each user needs to create complex passwords and specify user privileges:
ALTER USER serverspace PASSWORD 'p@55w0rd';Exit by pressing \q.
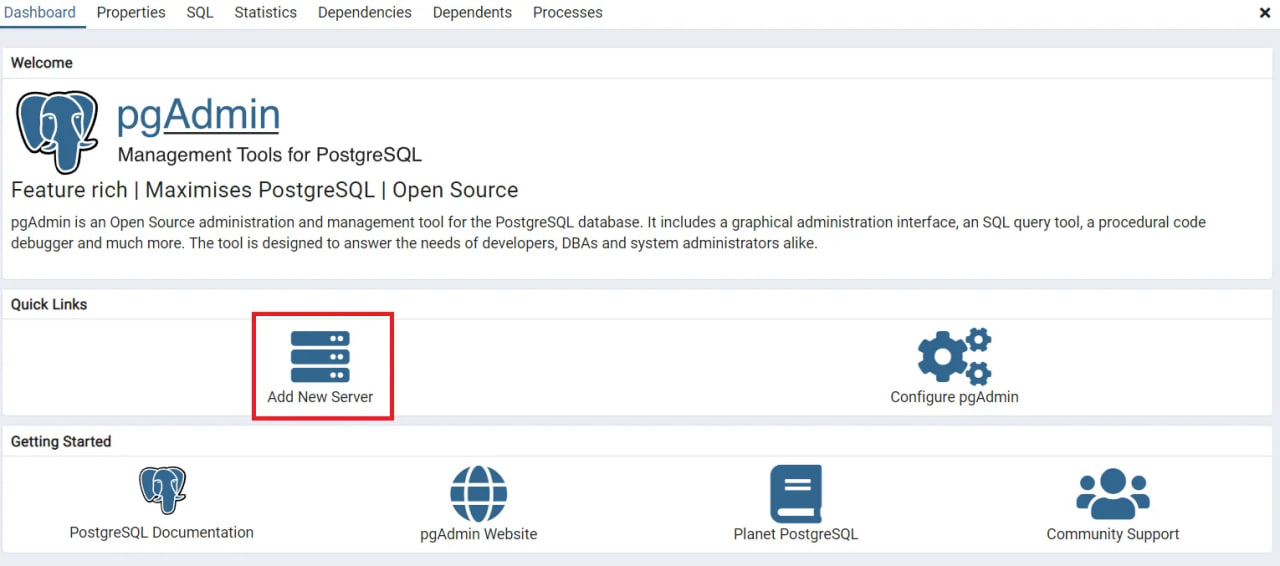
Use the browser to access the pgAdmin 4 console. Add a new server using the Add New Server tool (see Screen 3).
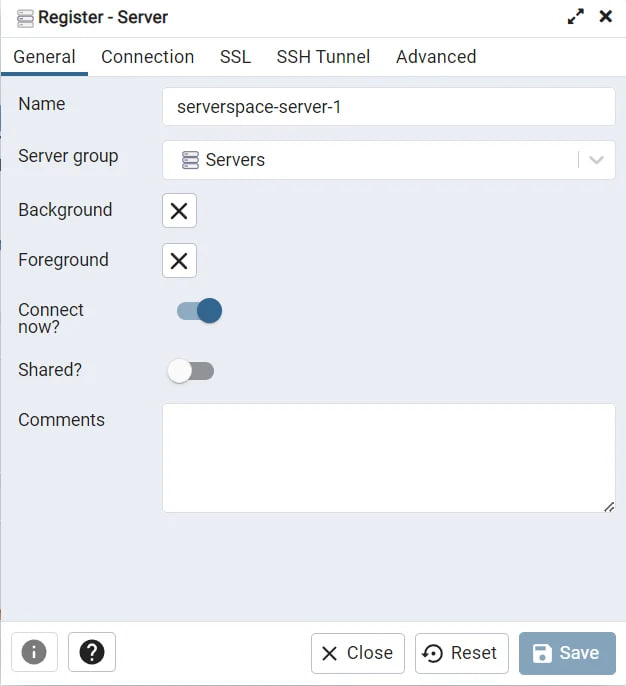
Let's enter the name (see Screen 4).
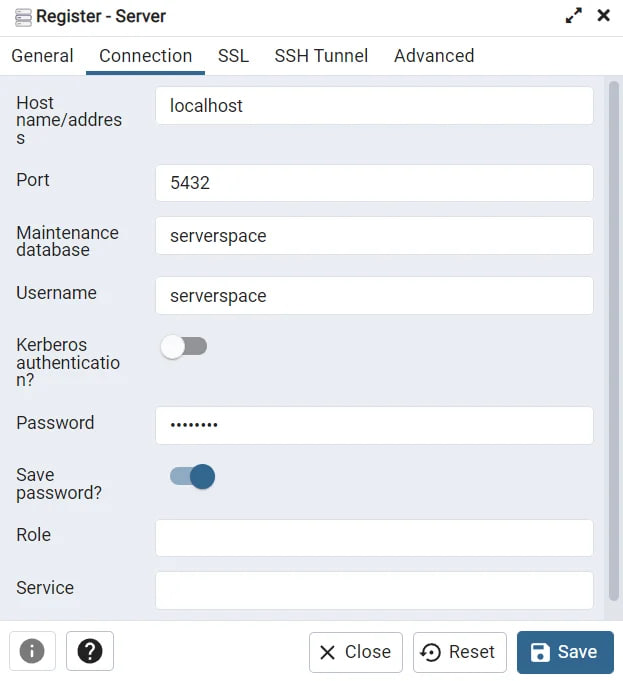
Let's go to the Connection tab, fill in the fields Hostname / address (Host name / address) - localhost, Maintenance database (Serving database) - serverspacedb, Username (User name) - serverspace, Password (Password) - specified earlier on the command line. After filling in the fields, click the Save button (see Screen 5).
Consider! The illustrations show the name of the database: serverspace.
The correctness of the connection is checked in the Browser tab. Symbols (1) will appear in the Servers tab, notifying that a new server has been connected. In expanded form, we get information about Database (Databases), Login / Group Roles (Roles / Login Group), Tablespace (Tablespaces). The Databases section stores two postgres databases (the standard database installed by default in PostgreSQL) and serverspacedb previously created. (See Screen 6).
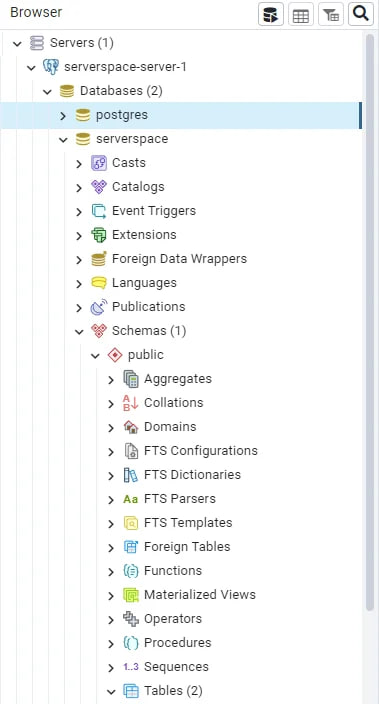
Added a server with a few clicks of the mouse.
Stage 6 – Creating a table using the Web Interface.
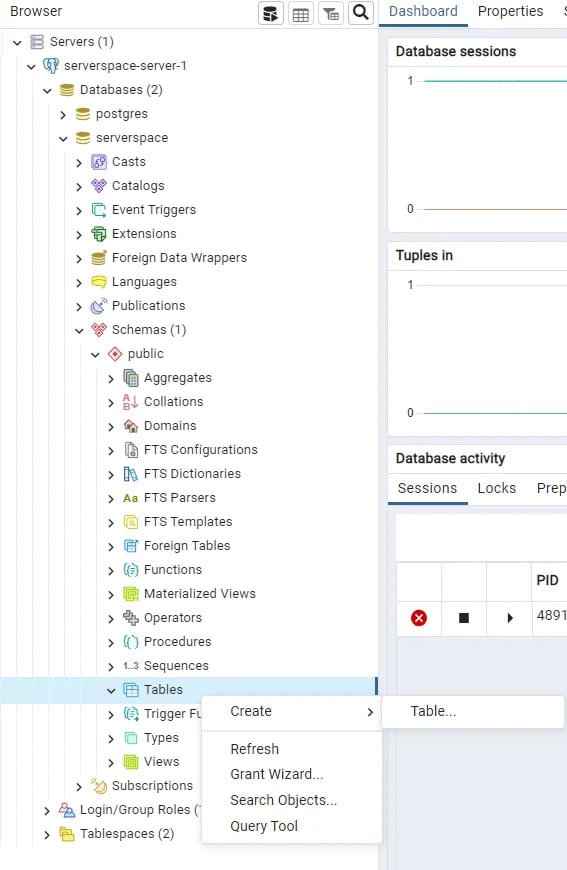
To create a table in a database, you must:
- Select Schemas in the serverspacedb database, then Tables;
- Select Create -> Table.(see Screen 7)
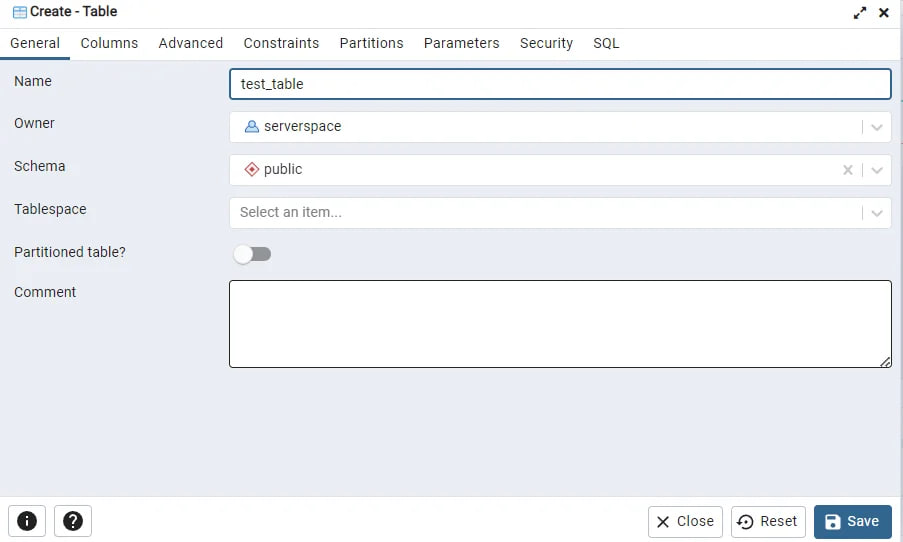
The Create table window will open, in the General tab. Next, enter the name of the table in the field Name. Owner and Schemas are filled in automatically. If necessary, you can make changes at your discretion (see Screen 8).
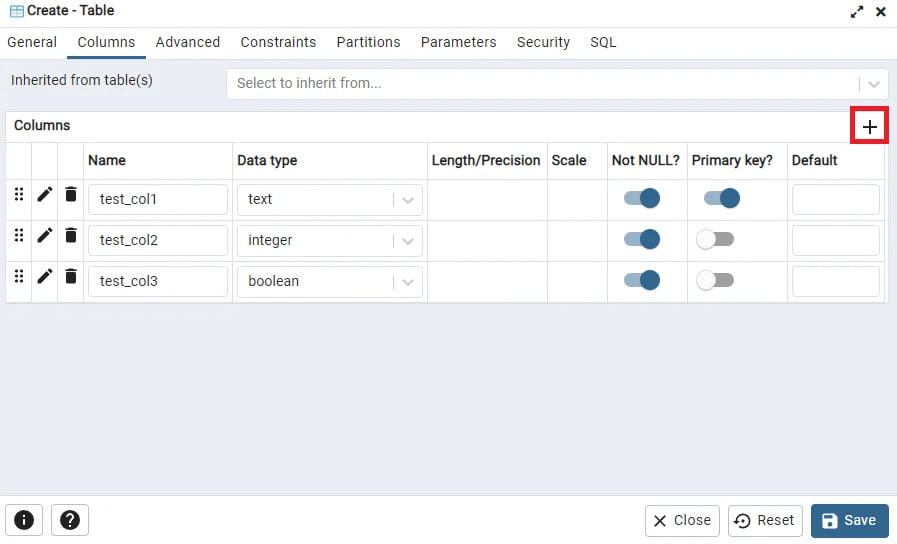
Let's go to the tab Columns, adding a column is as follows, press the "+" button, specify Name, Data type and the value Not NULL so that all columns are not empty and select Primary key to specify the primary key and click Save (See Screen 9).
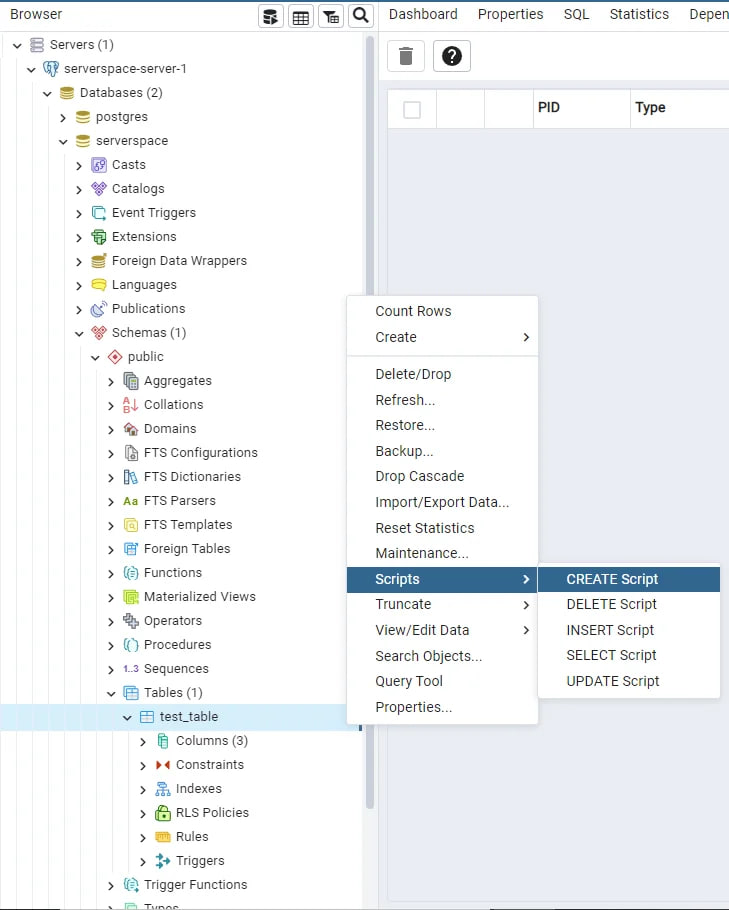
The set up database and our table with columns appeared. Let's start filling the table with SQL. Right-click on our table and click on Scripts -> CREATE Script (see Screen 10).
Add a script to fill in the columns, you can also add more information separated by commas (see Screen 11).
/*Adding information to a table*/

INSERT INTO public."test_table"(

/*Line names*/

test_col1,

test_col2,

test_col3)

/*Values*/

VALUES

/*Row Information*/

('Test1', 10, 'True'),

('Test2', 20, 'False'),

('Test3', 30, 'True');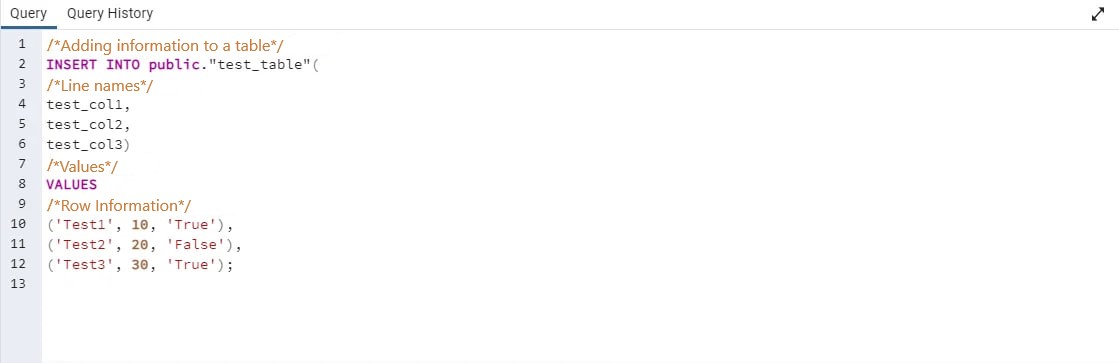
Run the script with the (▶) button and close the editor window.
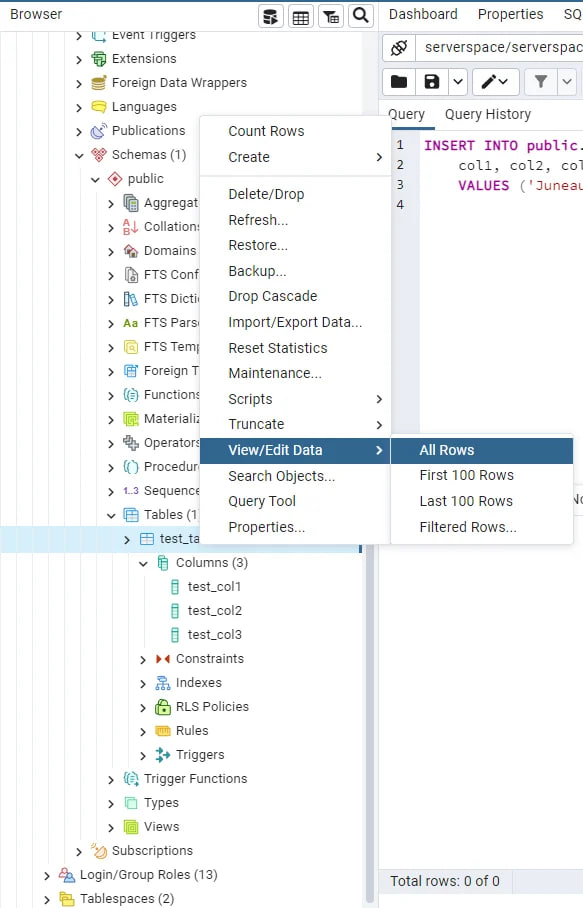
To view the changes made to the table, proceed as follows:
- Right-click on the desired table;
- Select View/Edit Data;
- Then select All Rows. (see Screen 12)
In the window that opens with the results of the completed query, the completed data is stored in the Data Output section. (see Screen 13)
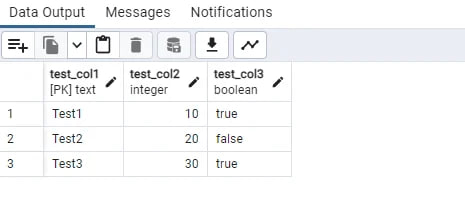
The method used is considered one of those used to create the table and fill it in.
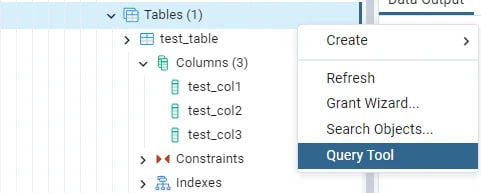
However, the following example uses only a SQL query:
- Call the context menu on the Tables item;
- Select Query Tool. (see Screen 14).
Create a table and columns. Fill the created fields with the data type, and information with the values "15, 'test_table2', 'True'" (see Screen 15):
/*Create a table called test_table2*/

Create table test_table2 (

/*Table attributes*/

test_table1 int,

test_table2 text,

test_table3 boolean );

/*Script to fill the table*/

insert into test_table2 (

/*Entering data into tables and their attributes*/

test_table1,

test_table2,

test_table3 )

/*Fillable Attribute Values*/

values (15, 'test_table2', 'True'); 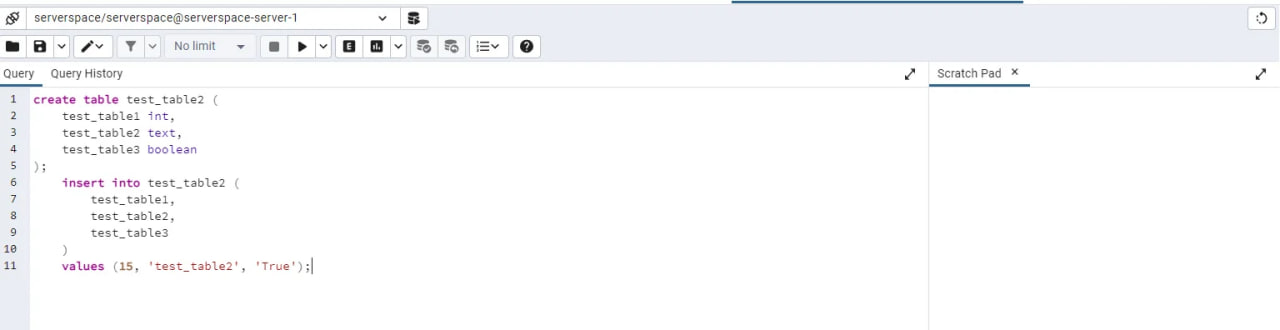
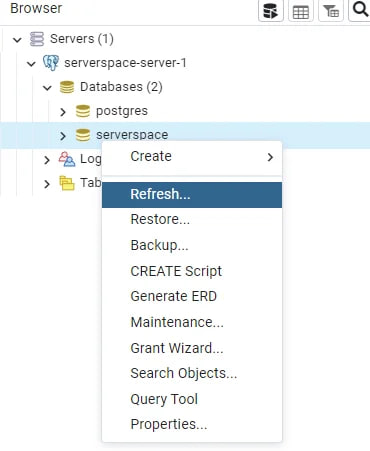
When checking for a new table, we will not find the new table until we update the serverspacedb database.
Right-click on the database and select Refresh. (see Screen 16)
Now let's see the results of our code query. The data is filled in accordance with the written request (see Screen 17)

We have two tables: one using a visual interface and one using SQL.
Conclusions
pgAdmin is a unique tool for working with a database in web-interface mode.
How to work:
- Install Ubuntu Server 22.04;
- Configure ufw for port 80/tcp;
- Install Nginx, Python, PostgreSQL;
- Deploy the virtual environment in Python;
- Install the Gunicorn library;
- Configure a reverse proxy in Nginx;
- Configure Gunicorn and Nginx to work together;
- Run the pgAdmin virtual server installation script;
- Start the server;
- Go to the local host server in your browser;
- Add server, specify data for PostgreSQL;
- Create the table, fill in the data and edit.


