
One of the fundamental functions of a reverse proxy is to serve as a protective buffer, shielding the backend servers by intercepting and handling requests from clients. By doing so, it effectively hides valuable information about the servers, such as their IP addresses and other sensitive details. This adds an extra layer of security to your infrastructure, making it harder for potential attackers to directly target your servers.

Installing and configuring Nginx
Let's get everything up to date and install your nginx reverse proxy with sufficient requirements. First of all execute command in the Terminal:
apt update

apt install nginx
Change Nginx's configuration to determine how it handles incoming requests and serves the appropriate responses:
nano /etc/nginx/sites-available/default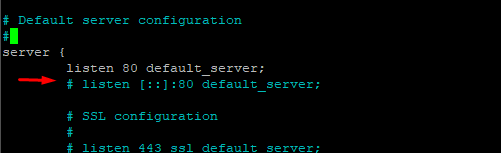
Inside this file, you can configure Nginx to suit your specific requirements. It allows you to define server blocks, SSL certificates, and other directives to optimize the performance and security of your reverse proxy setup. But why we came here is to comment out the line related to IPv6, save the changes and exit the file. Run this:
dpkg --configure -aThe command ensures that all packages on the system are properly configured by going through the installation and configuration process for any pending packages. It checks the status of all installed packages and configures them according to their respective installation scripts.
Double-check that Nginx is in good working order.
service nginx status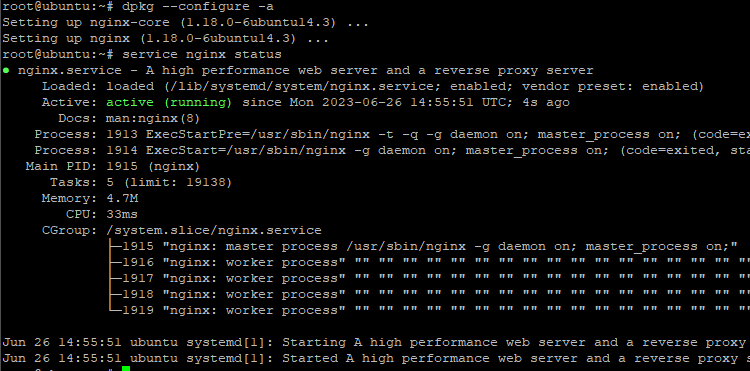
Now you should configure a firewall to ensure that only necessary traffic can reach your reverse proxy. We will use Uncomplicated Firewall (UFW) for this purpose.
Install ufw:
apt install ufwTurn it on:
ufw enableAllow HTTP traffic to go through by:
ufw allow 'Nginx HTTP'Check the status and current rules of the firewall:
ufw status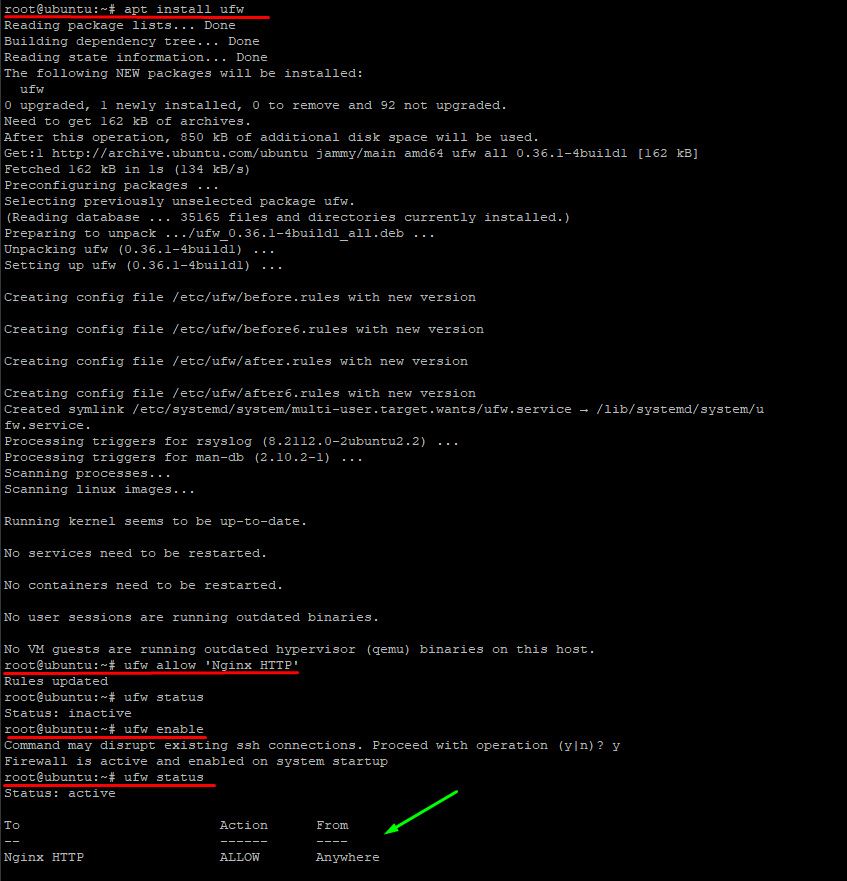
Let's create the config file named after our domain.
Inside this file, define the specific settings for your proxy: server name, listening ports, and the location where incoming requests will be forwarded:
server {

listen 80;

#listen [::]:80;

server_name test_domain.io www.test_domain.io;

location / {

proxy_pass ip_addres_app;

include proxy_params;

}

}
Replace ip_address_app with the actual IP address or domain name of your backend server.
The proxy is configured using the /etc/nginx/proxy_params file. The default settings are fine for this example, but you can change them if you need to.
Enable the reverse proxy by making a symbolic link:
ln -s /etc/nginx/sites-available/test_domain.io /etc/nginx/sites-enabled/A symbolic link, also known as a symlink or soft link, is a special type of file that acts as a pointer or reference to another file or directory in the file system. It allows you to create a shortcut to a file or directory, providing a convenient way to access or reference it from a different location.
Run a test to be sure nothing is broken:
nginx -t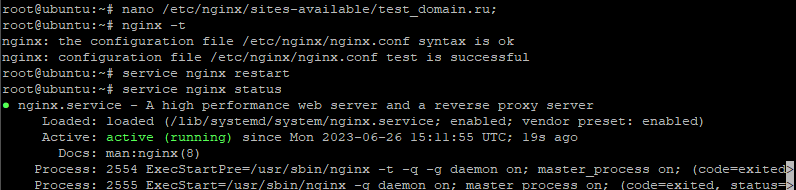
If no errors are shown:
service nginx restartAt the moment, Nginx is configured with a reverse proxy. The next step is to install and configure the application testing server.
Testing
Now, to test the reverse proxy you just made let's start a Gunicorn (short for "Green Unicorn"). It is a server designed to work with web requests to Python web applications while Nginx is not that good at doing it. So, to test the functionality of your proxy we will run a simple Python application to validate if this whole stack is working.
Install it:
apt install gunicornCreate the file:
nano wsgi.pyPut this text into it:
def wsgi(environ, start_response):

start_response("200 OK", [])

return iter([b"Welcome, to new wsgi server"])
This wsgi.py file contains a simple application that responds with a "200 OK" status message.
The command starts Gunicorn with two worker processes:
gunicorn --workers=2 wsgi:wsgiUpon starting Gunicorn, a master process is initiated to oversee the overall functioning of the server. The master process assumes the responsibility of managing the worker processes, accommodating configuration changes, and monitoring the health of the workers. The actual task of handling requests is assigned to the worker processes.
Each worker process operates independently, with the capability to manage one or more requests concurrently. The number of worker processes can be tailored to suit specific requirements, considering factors such as available system resources, anticipated traffic load, and the characteristics of your application.
By employing multiple worker processes, Gunicorn optimizes the handling of requests, allowing for parallel processing and improved response times. This approach ensures efficient utilization of system resources and enables the server to handle a higher volume of concurrent requests without becoming overwhelmed.
Open a browser from the remote host and enter the address/domain of our server. We should get a message like this:

After that we successfully connect to application server and receive logs from it!
With this guide you have learned:
- how to install Nginx and Gunicorn;
- add an Nginx HTTP rule;
- set up the server part for testing the application;
- create symbolic links;
- start the server to test the application.
FAQ (Frequently Asked Questions)
- Why should I comment out the IPv6 line in the Nginx configuration?
Some servers may not support IPv6 or may have unstable behavior when it's enabled. Commenting out the listen [::]:80; line helps avoid potential conflicts, especially if you don’t plan to use IPv6. - What should I do if nginx -t returns an error?
Check your configuration files for syntax errors, especially in the server and location blocks. Make sure the application’s IP address is entered correctly and that no semicolons are missing. - How do I know if Gunicorn is actually working through Nginx?
Open the domain or IP address specified in the server_name directive in your browser. If everything is set up correctly, you should see the message from wsgi.py. You’ll also see logs in the terminal where Gunicorn is running. - Can I use a different backend instead of Gunicorn?
Yes. Gunicorn is used here as an example of a Python-based server. You can proxy requests to any application that handles HTTP requests — such as Node.js, PHP-FPM, Ruby Puma, etc. - How do I disable or restart UFW?
To disable: ufw disable. To reload: ufw reload. Make sure to keep the rules that allow HTTP/HTTPS traffic when configuring it.


