Network interface configuration in Ubuntu 18.04 via netplan

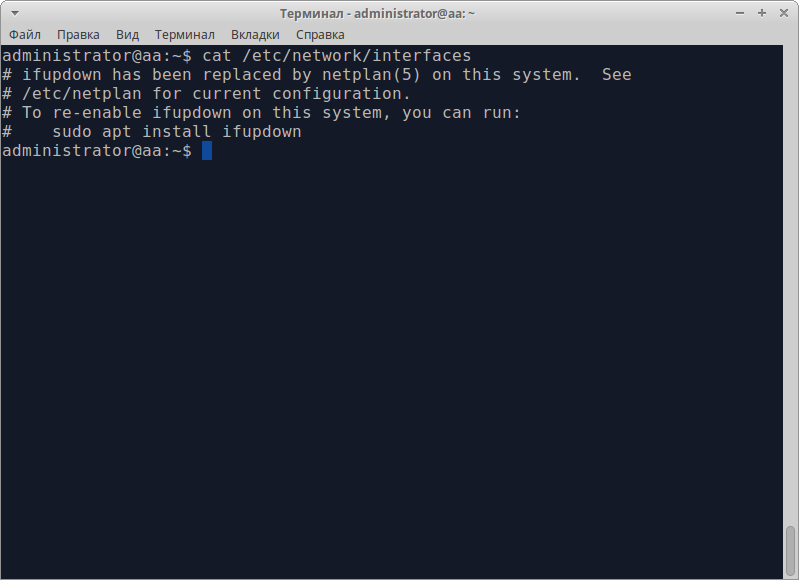
Network management in Ubuntu 18.04 has undergone significant changes compared to earlier releases. While the traditional configuration file /etc/network/interfaces still exists, it now plays a minimal role, serving mainly as a reference. The actual network settings are now managed through YAML files located in the /etc/netplan directory, which have become the primary method for defining and controlling network interfaces:
Let's look at this:
ls /etc/netplan
Then take a look at the file structure:
cat /etc/netplan/50-cloud-init.yaml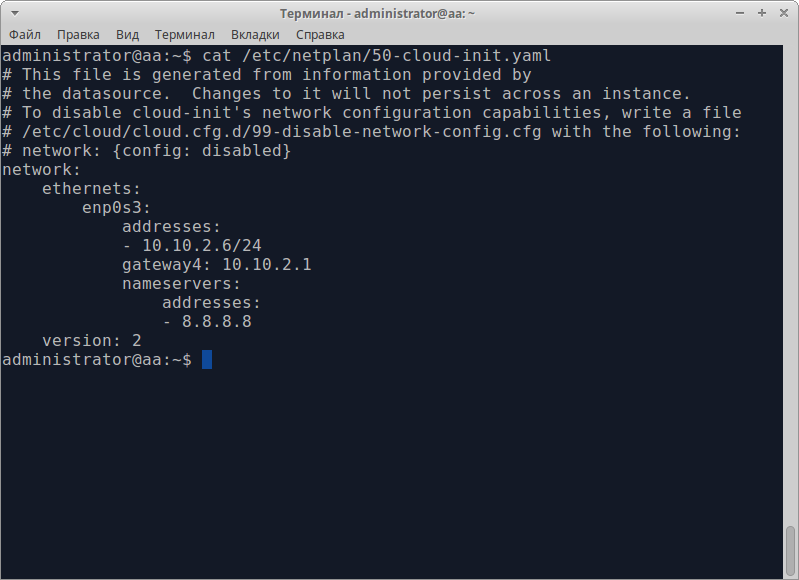
The netplan settings is described in YAML (Yet Another Markup Language). Let's look inside:
- network — a "marker" word that means the start of a logical block of the settings;
- ethernets — this parameter means that the Ethernet network will be configured further;
- enp0s3 — the name of the interface to be setup. Yours will probably look different. All network interfaces present on the computer will be displayed after the following command:
ifconfig -a- addresses — an IP addresses that the interface has. Addresses should be set in CIDR format. The first IP is written as at the screenshot, and when more than one address is required, they are placed in square brackets, a comma is placed between the addresses;
- gateway4 — IPv4 gateway;
- nameservers — this "marker" indicates that the section below contains the names or IP-addresses of servers that processes DNS queries;
- addresses — names (or addresses) of hosts that resolve DNS names to IP addresses. If necessary, they may be written in square brackets as described above, one address is separated from another by a comma;
- version — YAML language version.
To activate new settings, run this:
netplan applyNetwork configuration without netplan
Before the setup, I advice you to clarify which interfaces are really present in the system:
ifconfig -a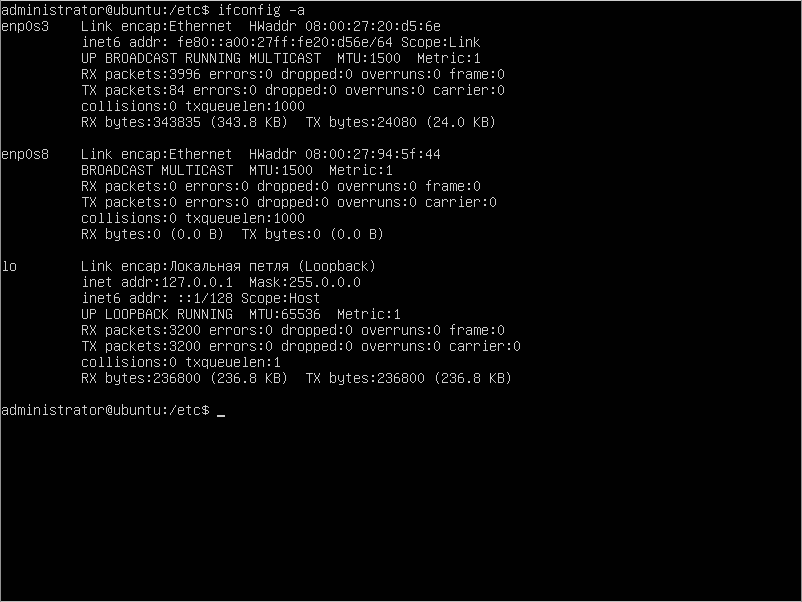
In the screenshot above, you can see that there are two interfaces without assigned IP's present, cause the machine is waiting for settings from the DHCP server. In a situation where there is no such DHCP-server in the network segment, you should assign the IP manually. So, change the config-file so that it looks like the one shown in the picture:
sudo nano /etc/network/interfaces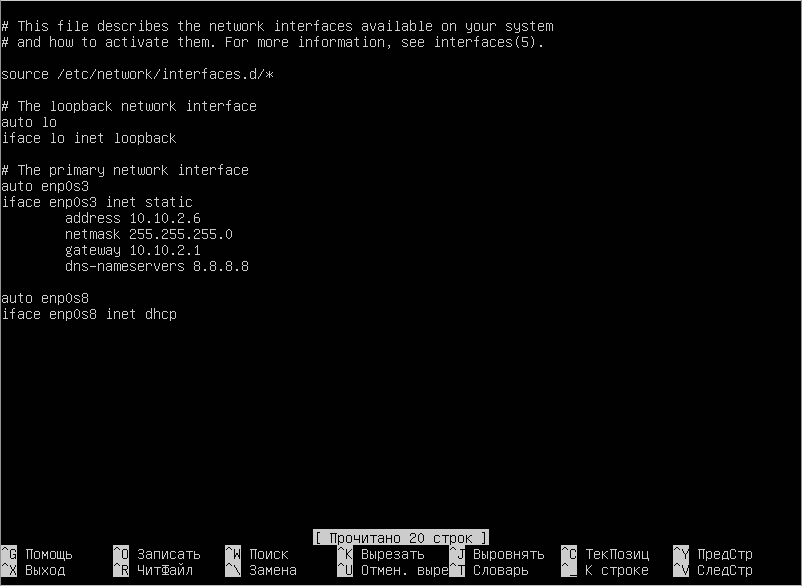
Let's talk about the parameters:
- auto enp0s3 - this instruction "tells" the computer to automatically start the network after reboot;
- iface enp0s3 inet static - parameter indicating that the network address should be set manually;
- address 10.10.2.6 - assigned IPv4 address;
- netmask 255.255.255.0 - subnet mask
- gateway 10.10.2.1 - IPv4 gateway
- dns-nameservers 8.8.8.8 - hosts that process DNS requests.
To confirm the changes, you should run this:
sudo /etc/init.d/networking restart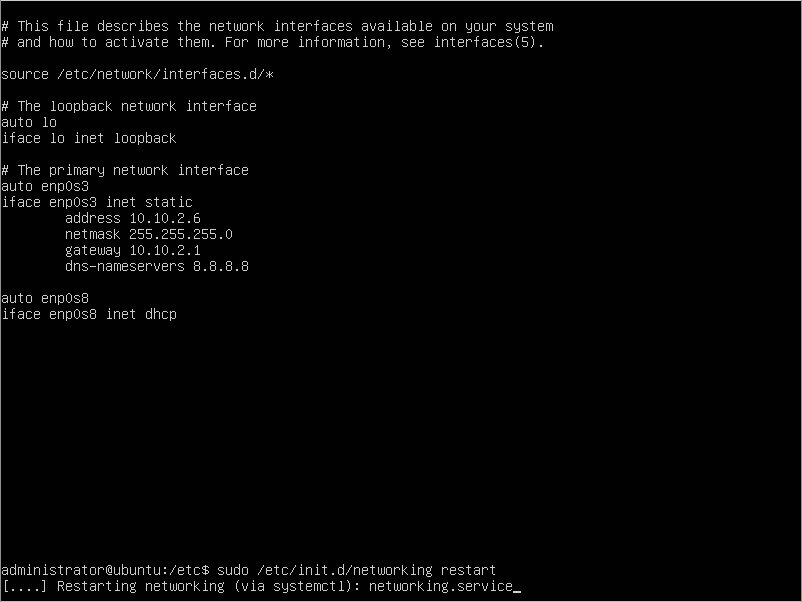
After the service restart, the computer should be available via assigned IP address. If not, reboot the server entirely, it will help.
Conclusion
In this guide, we covered two ways to configure network interfaces in Ubuntu 18.04: the modern Netplan approach and the legacy /etc/network/interfaces method. In most Ubuntu 18.04 installations, Netplan is the default and recommended option, using YAML files in /etc/netplan/ to generate configuration for systemd-networkd or NetworkManager. It’s flexible, consistent, and safer for remote servers—especially when you use netplan try to avoid losing SSH access. The traditional /etc/network/interfaces workflow is still useful in environments that explicitly rely on ifupdown, but it’s not the primary network stack on a standard 18.04 setup. By understanding both methods, you can confidently assign static IPs, gateways, and DNS, and quickly troubleshoot connectivity issues on Ubuntu servers.
FAQ
- Q1: What is Netplan and why is it used in Ubuntu 18.04?
A: Netplan is Ubuntu’s default network configuration system in 18.04. You define settings in YAML files under /etc/netplan/, and Netplan applies them through a backend renderer such as systemd-networkd or NetworkManager. - Q2: How do I check which network interfaces exist on my server?
A: Use ip addr show (or ip link) to list all interfaces, including those without IP addresses. If you prefer older tools, ifconfig -a works only if net-tools is installed. - Q3: How can I find out whether my system uses NetworkManager or systemd-networkd?
A: Open your Netplan YAML file in /etc/netplan/ and look for the renderer value. If it’s not set explicitly, Ubuntu Server commonly uses systemd-networkd, while Desktop typically uses NetworkManager. - Q4: How do I apply Netplan changes safely on a remote server?
A: Use sudo netplan try first. It applies the new config temporarily and rolls back automatically if the network breaks. Once confirmed, run sudo netplan apply to make changes permanent. - Q5: How do I set a static IP using Netplan?
A: In your YAML file, disable DHCP and define IP settings, for example: set dhcp4: false, add addresses in CIDR format, specify gateway4, and set DNS under nameservers: addresses. Then run sudo netplan apply. - Q6: Is /etc/network/interfaces still used in Ubuntu 18.04 by default?
A: Usually no. Ubuntu 18.04 typically manages networking through Netplan. The legacy /etc/network/interfaces method is relevant mainly if your system is configured to use ifupdown explicitly. - Q7: I edited /etc/network/interfaces but nothing changed — why?
A: Most likely your system is still using Netplan (or NetworkManager/systemd-networkd), so /etc/network/interfaces is ignored. Configure the interface through /etc/netplan/ instead, or switch the system to ifupdown intentionally. - Q8: What should I do if the network doesn’t come up after changes?
A: First, re-check YAML indentation and CIDR formatting. Then verify routing with ip route and DNS with your resolver settings. If needed, restart the relevant network service (NetworkManager or systemd-networkd) or reboot the server. - Q9: What are the most common Netplan mistakes?
A: Incorrect YAML indentation, using a wrong interface name (e.g., enp0s3 vs ens3), wrong CIDR mask, missing gateway, or DNS misconfiguration. These issues often result in no route to the internet or no name resolution. - Q10: How can I confirm the new configuration is working?
A: Check interface status with ip addr, default route with ip route, and test DNS resolution (for example by pinging a domain). If your server is remote, confirm SSH remains accessible after applying changes.


