Administration of information systems is inextricably linked to the use of the command line interface. Many servers in corporate networks or data centres do not have a graphical shell, because they represent an unnecessary load on the system. And also it does not always contribute to a quick or efficient solution of the task.
Each OS on a cloud server or workstation has its own CLI shell with specific syntax and semantics. In this tutorial, we will look at the proprietary PowerShell shell, which is a Microsoft development and is actively used in Windows distributions.
In more detail, PowerShell is an object-oriented programming language that is integrated with the OS and allows you to interpret high-level commands into low-level commands without knowing all of the system's interaction mechanisms. It also makes managing users on a local area network or a domain network much easier!
What are PowerShell cmdlets?
Comandlets or commands in PS are a syntactic verb-noun set that represent an action and an object of interaction. For example, we need to create a new user for a workgroup or local machine. To do this, we can use the command:
New-LocalUser -Name GG 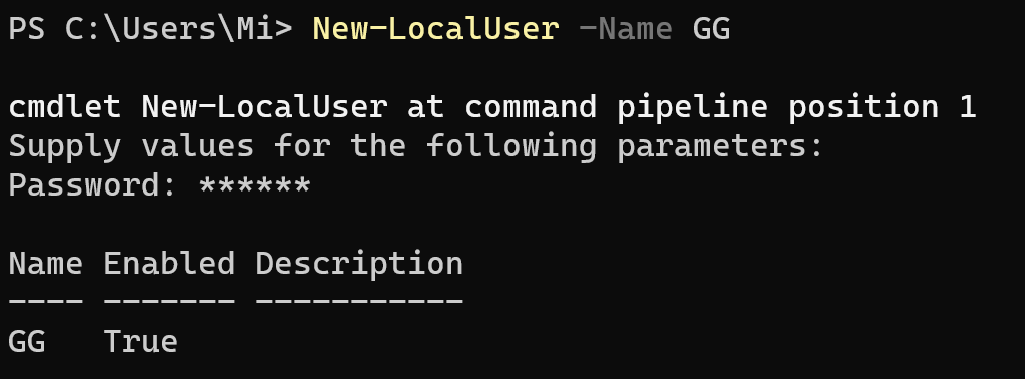
Which allows, when using the New-LocalUser cmdlet with the -Name parameters and the passed GG value, to create a new user in the system. Commandlets access OS objects and return only information about them, to find new comandlets use the Get-Help command or read the more detailed instructions on how to use PS.
Working with modules in PowerShell
Before you start working, it is necessary to update Get-Help, because if you want to understand the material on your own, it will not be easy without new packages-instructions. Let's update the current packages with Get-Update command and install new ones:
Get-Update 
You can use the newly updated database to find the necessary commands yourself:
Get-Help user To search for commandlets that have the keyword user in their name or description!
Please note! Currently, almost all cmdlets are structured and organised into modules, which are functional folders. For example, the OS has a module Microsoft.PowerShell.LocalAccounts, which stores all cmdlets related to managing users on local machines without a domain. This also helps in finding the right cmdlet. In order to view the full list of installed and available modules, load it via the cmdlet:
Get-Module -ListAvailable There can be many different modules on the output, to find the one you need you need to use a filter via pipline. In other words, the output of one command as an object is passed to another and filtered:
Get-Module -ListAvailable | Where-Object Name -like "*LocalAccounts*" 
Also, in many materials you can find a cluttered construction {$_.Name -like "*LocalAccounts"}. We can use a new one instead, just specifying the current object or column to filter and a parameter with a condition.
Note! The key query contains asterisks, which represent a mask, any sign and quantity. Thereby expanding the search for values.
How do I create users via PowerShell?
Let's turn to one of the modules discussed above and review all of its commands:
Get-Command -module Microsoft.PowerShell.LocalAccounts 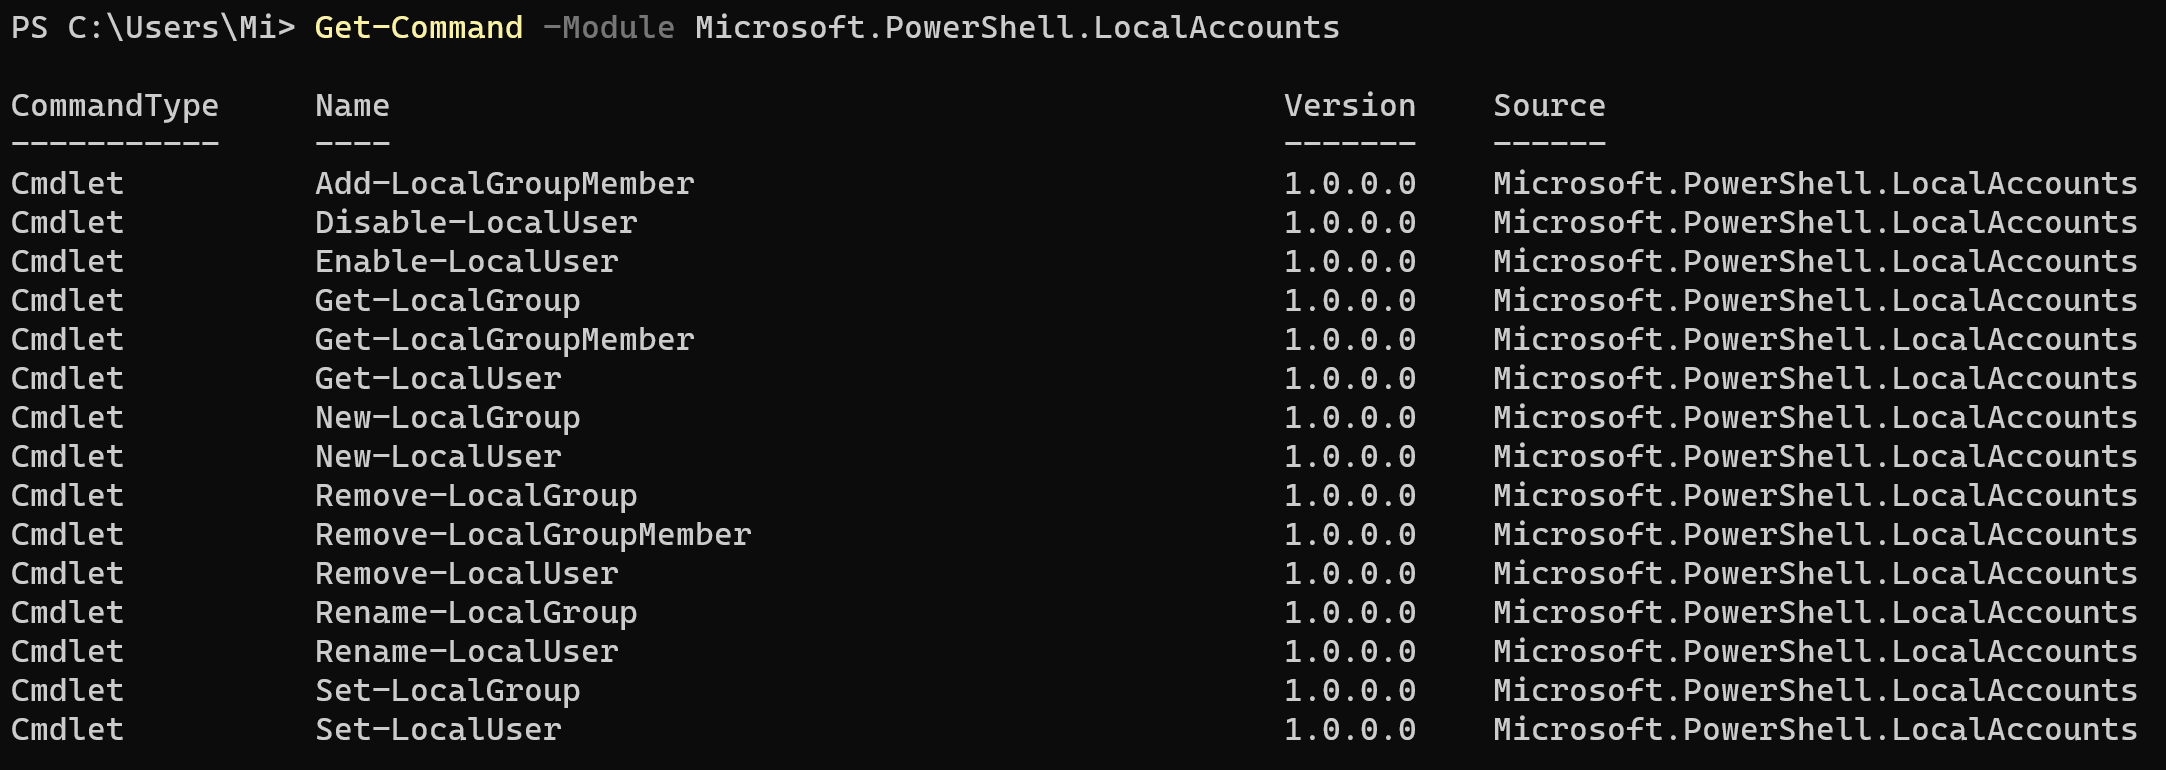
Each of the commandlets has its own numerous options, which help to perform more fine-tuning or action on the object. For viewing we will use Get-Help, but before that we need to deploy the server where we will conduct the tests. To ensure that our experiments do not affect the main system. Let's move on to creating a VPS server on either of the two platforms vStack Cloud or VMware Cloud. Click the Create Server button and select a configuration that suits our needs, then click the Order button.
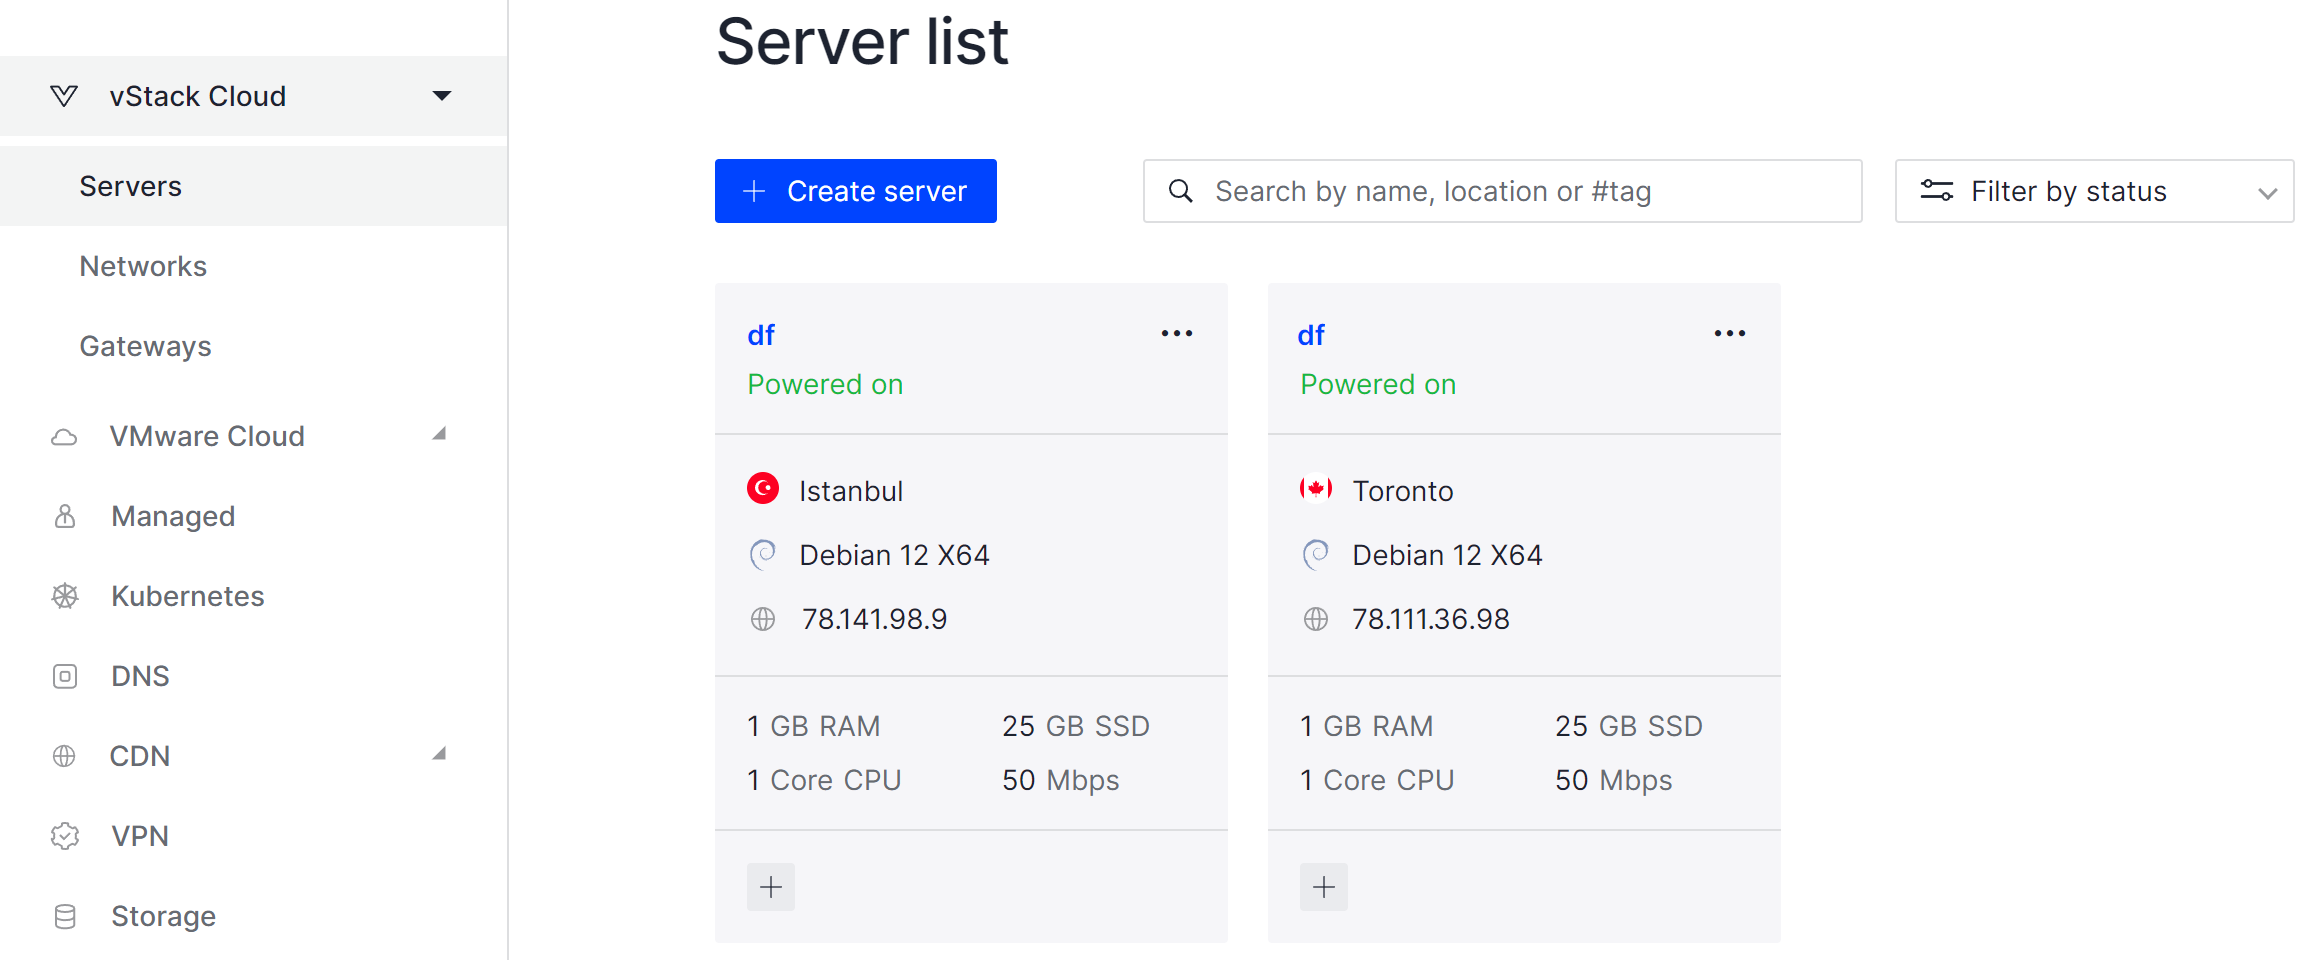
After some time the servers will be available via any of the main connection methods, for the current tasks Windows OS with data centre in Istanbul has been chosen.
Let's see detailed information about the options and arguments accepted by the New-LocalUser command:
Get-Help New-LocalUser 
It is very important to be able to read the syntax of a command to understand how to use it. In this case it is described that besides using the commandlet itself we can add options:
- -Name which will specify the username, accepted in string format;
- -AccountExpires the period when the password on the account expires;
- -AccountNeverExpires indefinite password validity;
- -Description description of the account;
- -Disabled The created account will be immediately disabled;
- -FullName full user name;
- -NoPassword do not set a password for the account;
- -UserMayNotChangePassword user cannot change password;
- -Confirm confirmation of creation without additional windows.
For example, for a local PC we need to create a user and give him Administrator rights, for this we will write the command:
New-LocalUser -Name GG 
We created a user with standard parameters with no password expiry dates or other arguments, in this case -Name as a minimum requirement.
How to add users to a group via PowerShell?
Then let's assign the user to the Administrators group and check the correctness of the actions performed:
Add-LocalGroupMember -Group Администраторы -Member GGGet-LocalGroupMember -Group Администраторы
In the displayed visual form we can see the newly created and added user in the system! But this module, as it is clear from the name works only with local users, for the role of AD server we need a separate module that will address the domain of the controller.
How do I add a user to AD via PowerShell?
First, let's find the right module for the job and filter the values:
Get-Module -ListAvailable | Where-Object Name -like "*Active*"
Realising in advance that there are countless commandlets in this module, it is necessary to sort them in advance. We need only those cmdlets that mention user and group. Hence, user and group:
Get-Command -module ActiveDirectory | Where-Object Name -like "*User*" And the appropriate command for the group:
Get-Command -module ActiveDirectory | Where-Object Name -like "*Group*" 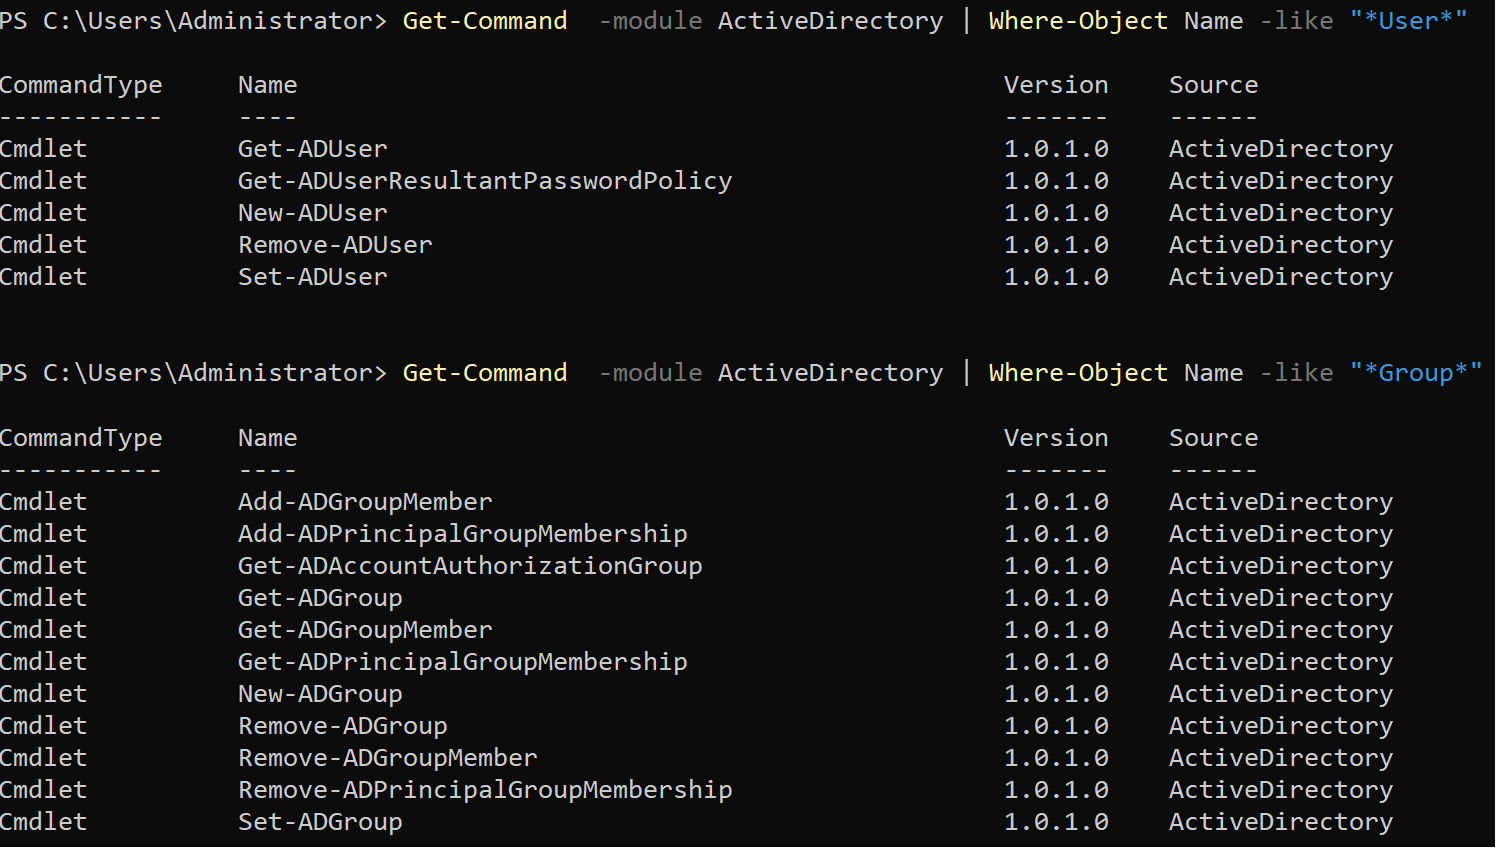
In the first field we see the New-ADUser command, using which we will proceed to create a new entity and immediately set a password:
New-ADUser Set-ADAccountPassword 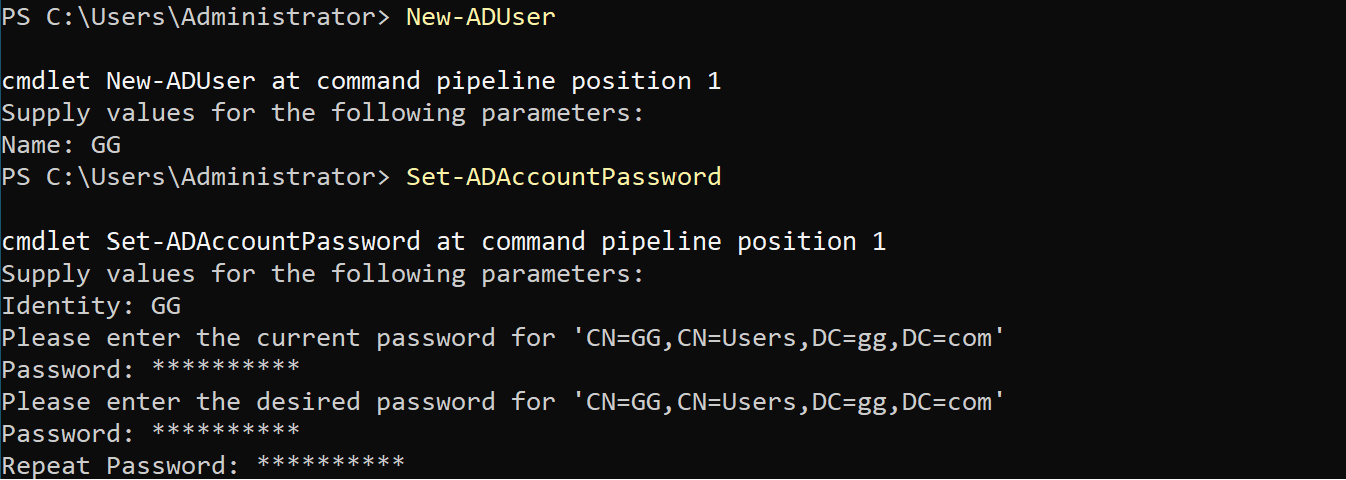
After entering the password twice, let's add the user to the group and check if our actions are correct:
Add-ADGroupMember Get-ADGroupMember 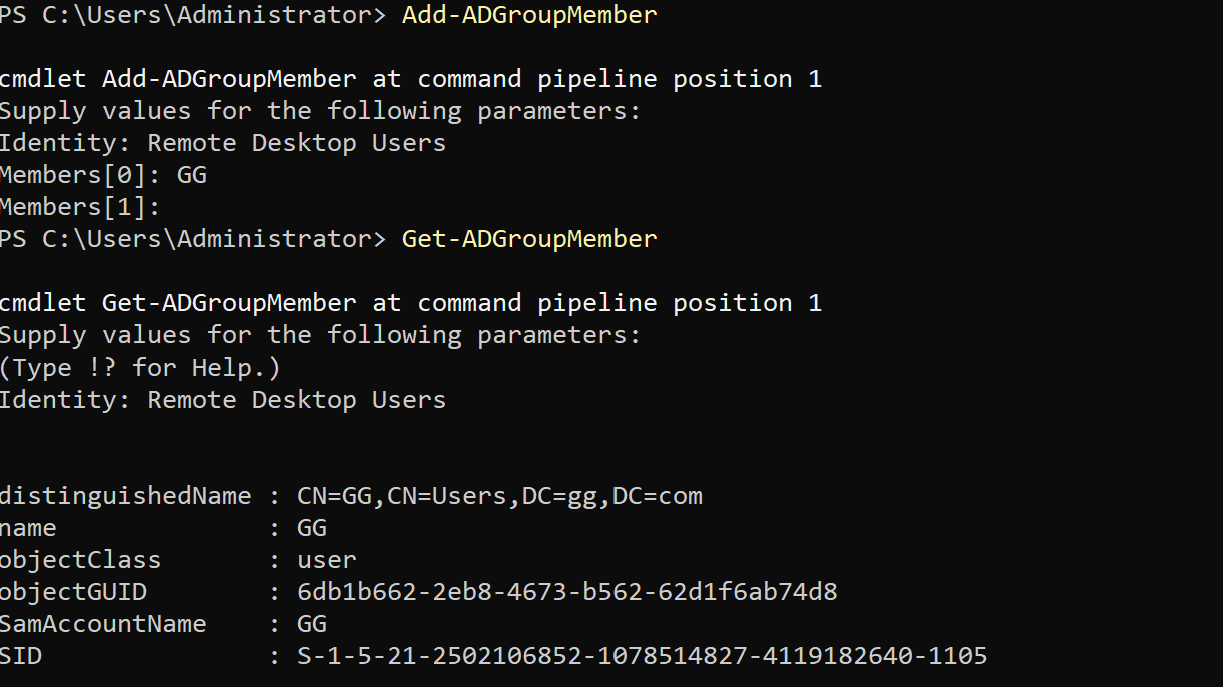
On the screenshots we can see that the actions performed from the administrator account were performed correctly!
Administration of information networks through the command line interface, in particular, using PowerShell, provides a number of advantages, such as reducing the load on the system, faster and more efficient solution of tasks and simplified management of users in local and domain networks. PowerShell cmdlets automate basic operations, making the administrator's work more productive and convenient.


