Link aggregation on Linux, also known as bonding, is the process of combining multiple network interfaces into a single logical connection. This approach increases available bandwidth and improves link reliability by distributing traffic across multiple physical interfaces.
This process can be performed using different technologies and protocols such as Link Aggregation (IEEE 802.3ad), Bonding (Linux bonding driver) and others.
This guide explains how to configure link aggregation (bonding) on Linux systems to increase network bandwidth and provide fault tolerance. You will learn how to combine multiple network interfaces into a single logical interface using standard Linux tools.
Preparing the Linux Server for Link Aggregation
Imagine that your proxy server or router is Linux and you need to increase the speed of data transmission over the communication link, but physical possibilities do not allow you to choose fibre optics or other communication options. In this case we can use link aggregation! By creating a single logical interface and configuring it, we will be able to accept connections from two physical links, thus increasing the performance and resilience of the network.
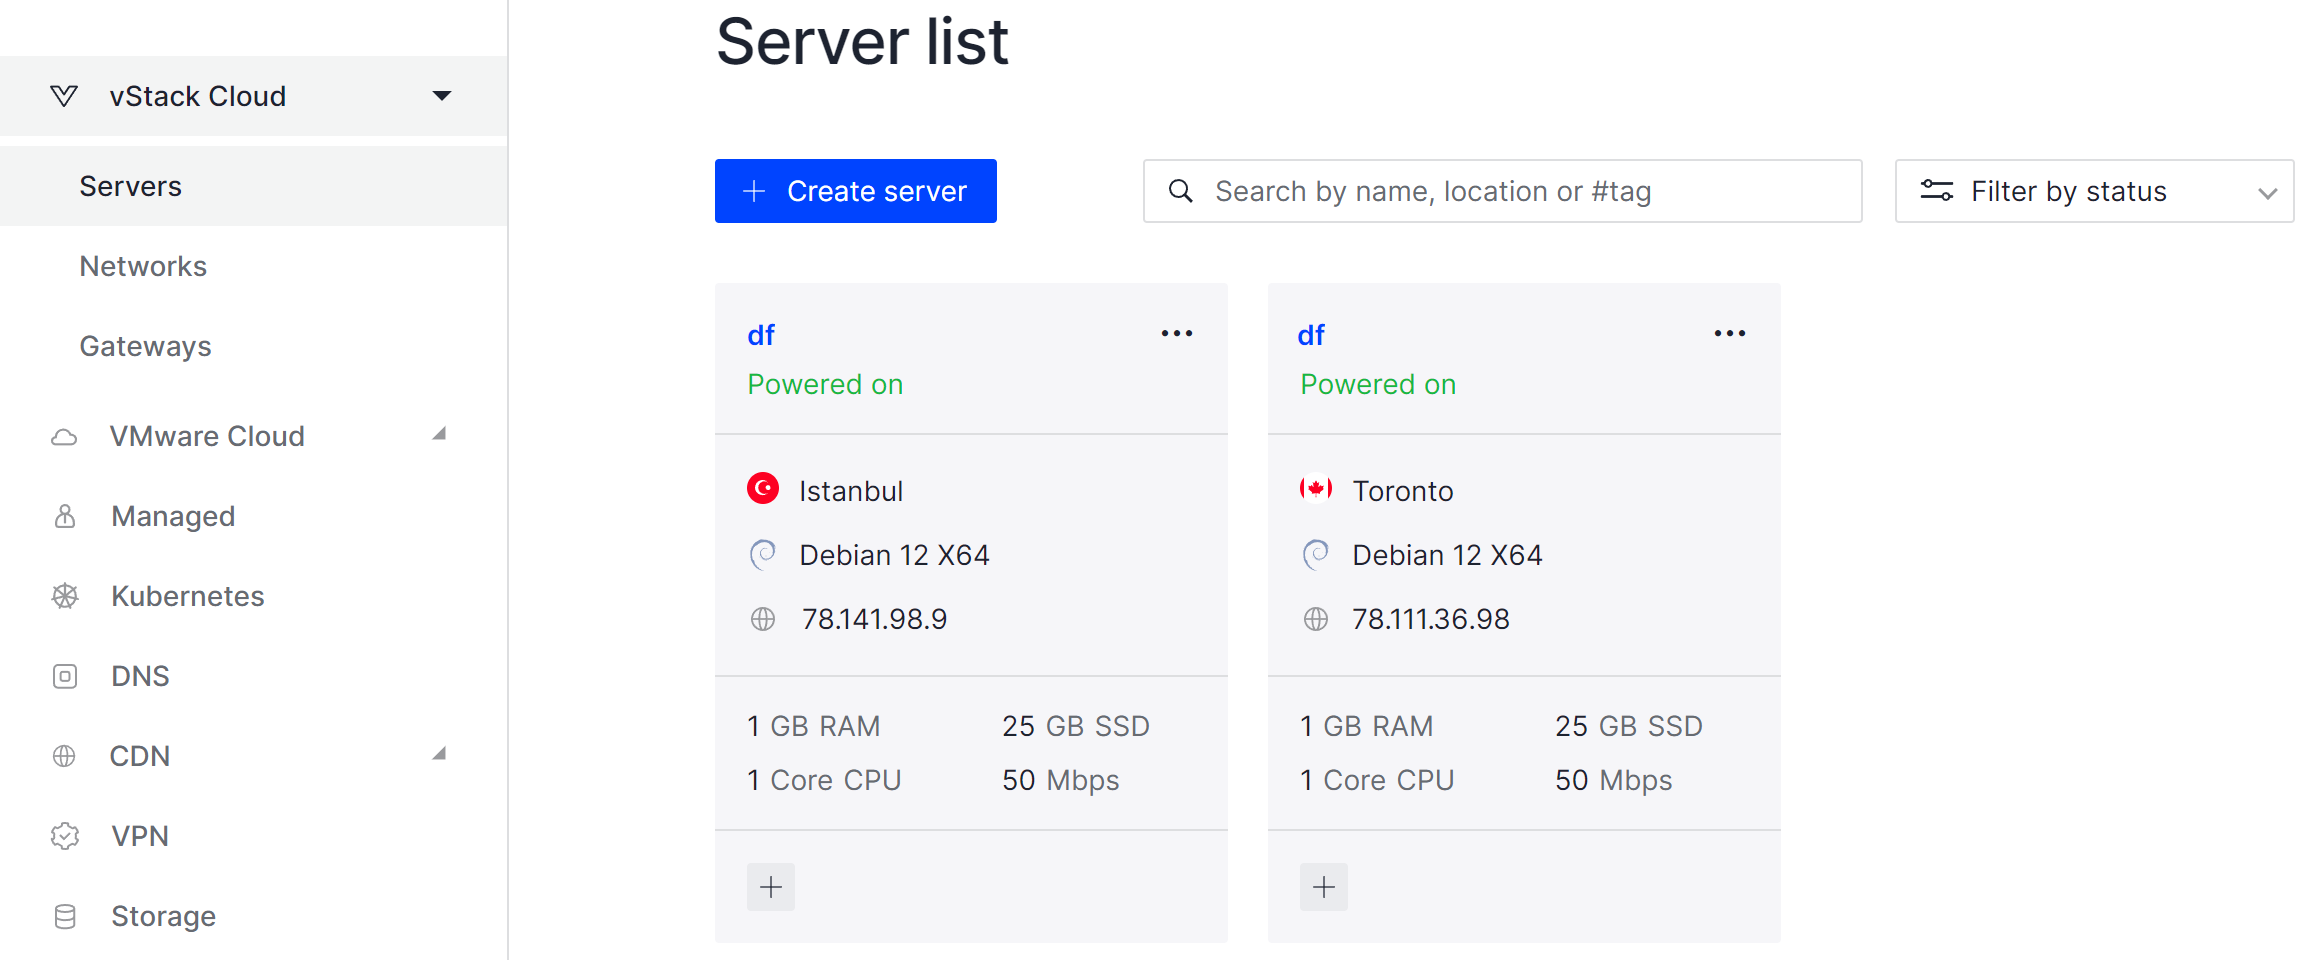
For that create a VPS server using Serverspace control panel. Let's go to the left menu tab to servers, having previously selected the cloud platform and click on the Create Server button.

In its settings we will add two network interfaces, which we will later merge and configure for sharing!
Preparing for aggregation
Let's go to the server, having first connected according to the instructions described next to the control panel. If you are using your own virtual machine, skip the following command. The interfaces are automatically configured, thanks to scripts, in order to use them in manual mode let's go to the cloud configuration file. And write disable network synchronisation of the configuration:
echo "network: {config: disabled}" >> /etc/cloud/cloud.cfg.d/99-disable-network-config.cfgThis disables cloud-init network configuration to prevent automatic overwriting of manual network settings.

Restart the network services so that the settings are applied:
systemctl daemon-reloadCheck the network settings and further disable network adapters that are required in the aggregation:
ip a
The following command disables the interfaces that will be added to the bonded connection:
ifdown enp0s5 && ifdown enp0s6 Let's not forget to install the appropriate link aggregation software:
apt install ifenslave -yThis package is required on Debian- and Ubuntu-based systems. Other distributions may use different bonding utilities.
You can also specify a specific version when installing the package, if it is compatible with your system. In this case, the latest version of the package installs a module that allows you to manage network connectivity, including aggregation of communication links!
Configuring Link Aggregation Using Linux Command-Line Tools
In Linux, there are two ways to apply settings to the machine: via utilities, whose settings are usually valid until reboot, and via configuration files. The latter are already read every time the machine is started. However, nobody forbids you to use a utility to create an aggregated link, via autoload scripts!
To configure the first case, create a bond0 interface with the command:
ip link add bond0 type bondIn order to assign interfaces to link aggregation, a new virtual interface must be enabled and the previously disabled interfaces for aggregation must be assigned to it:
ip link set bond0 up ip link set enp0s5 master bond0 ip link set enp0s6 master bond0 
Depending on which interfaces you have aggregated, you must now choose an IP address so that the hosts can reach you. If you added a network cable or a virtual interface to the same subnet, then specify the same IP address! If you are combining two interfaces from two different subnets, then note that you will now have one address for two networks and most likely the point of segmentation will be lost, you will need to use a different configuration with HSRP or other communication protocols. Let's add an address to the interface.
ip address add 10.0.3.1/24 dev bond0Replace the IP address and subnet with values appropriate for your network.
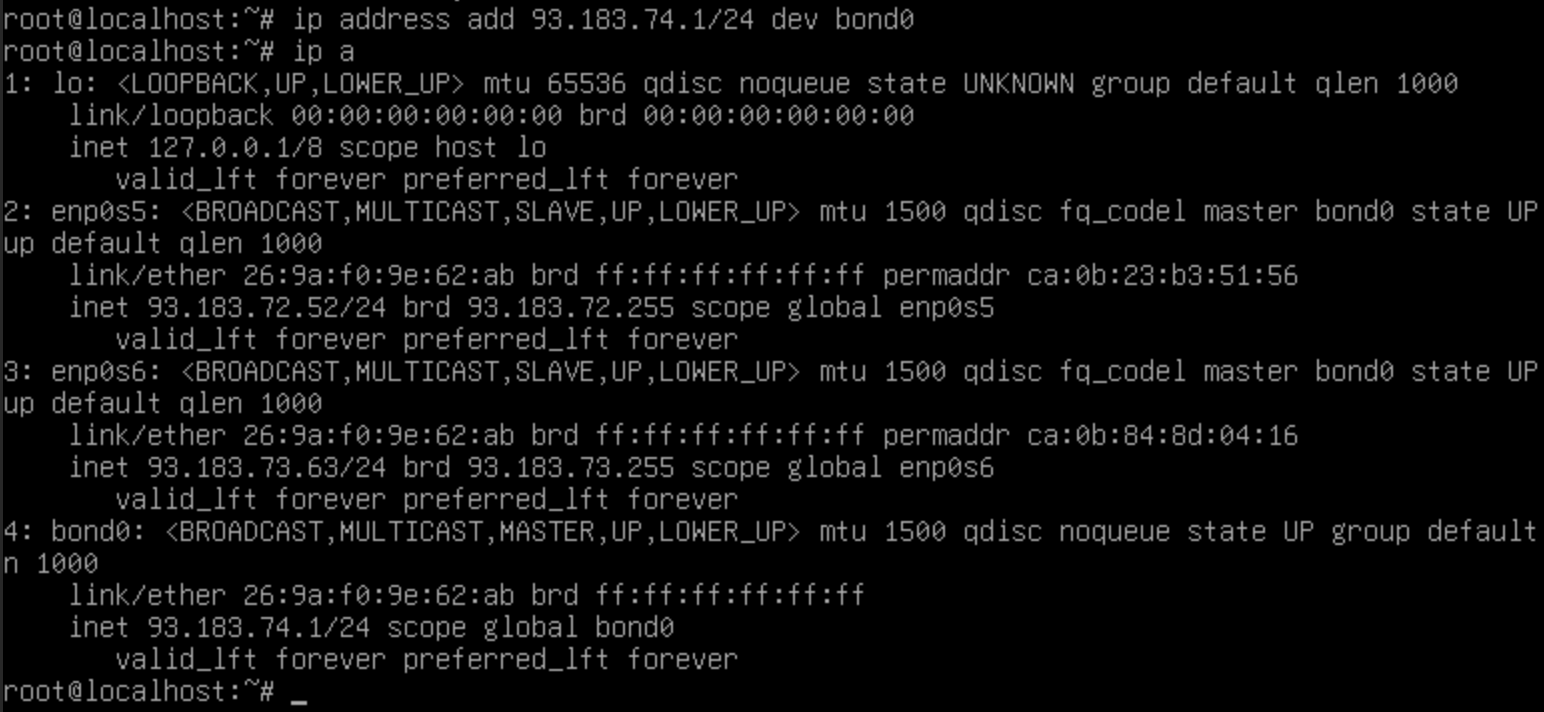
And let's immediately look at the result of the configuration:
ip a 
In the screenshot we can see the state of the two aggregated interfaces as SLAVE, i.e. subordinate to the bond0 interface. This interface has the master parameter, which allows synchronised link management. However, these settings will be valid only until reboot, let's consider a permanent configuration.
Configuring Persistent Link Aggregation via Network Configuration Files
Initially, let's go to the configuration file and see the settings before the changes. Each OS may have different configuration paths and views, so take this into account when configuring. For Serverspace users it is necessary to go to the path and open the file:
nano /etc/network/interfaces.d/50-cloud-initFor other Debian users, you can also go to the common settings file:
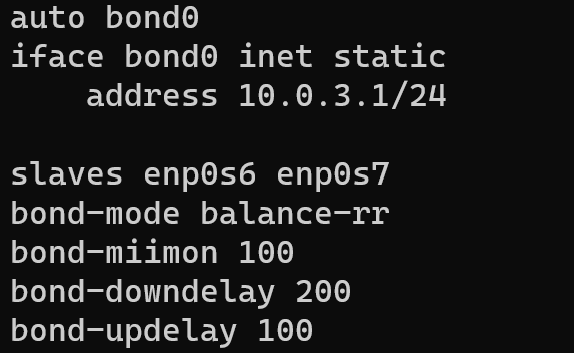
nano /etc/network/interfacesAnd paste in the following configuration:
auto bond0

iface bond0 inet static

address 10.0.3.1/24

slaves enp0s6 enp0s7

bond-mode balance-rr

bond-miimon 100

bond-downdelay 200

bond-updelay 100
It is necessary to replace the address, slaves fields, in which you specify the network interfaces for aggregation and the new IP for the virtual interface. Each of the other fields also has its own designation:
- auto bond0 - the line is intended for raising the interface at system startup;
- iface bond0 inet static - select static settings for the bond0 interface;
- bond-mode - this parameter defines the logic of operation of the virtual interface and can determine the type of traffic balancing,
- detection and management of connection state, fault tolerance;
- bond-miimon - defines the interval for monitoring the state of slave interfaces;
- bond-downdelay - defines the threshold value of the response delay before an interface is considered unavailable;
- bond-updelay - defines the threshold value of the interface uplink delay.
You must now reboot the network service to apply the settings from the file, having previously saved with the Ctrl + O combination:
systemctl restart networkingRestarting the networking service may temporarily interrupt network connectivity.
After the configuration is complete, you must restart the network service to apply the changes. Now the communication links will be aggregated and work according to the set parameters.
Conclusion
Link aggregation on Linux is an effective way to increase network bandwidth and improve fault tolerance. By combining multiple interfaces into a bonded connection, administrators can make better use of available network resources. Proper configuration ensures stable and predictable network performance.


