How to Install and Configure Zabbix 5 with PostgreSQL and Nginx on CentOS 8
In this tutorial, you will learn how to install and configure the Zabbix 5 server monitoring system on CentOS 8. We'll use PostgreSQL 12 as the database backend and Nginx as the web server to host the Zabbix frontend. This setup provides a lightweight, efficient, and scalable monitoring solution for your infrastructure.

Installing the necessary packages for Zabbix
First, install the official Zabbix repository and refresh the package manager cache to ensure access to the latest packages.
rpm -Uvh https://repo.zabbix.com/zabbix/5.0/rhel/8/x86_64/zabbix-release-5.0-1.el8.noarch.rpm

dnf clean all
After adding the repository, we can now install the necessary packages.
dnf install zabbix-server-pgsql zabbix-web-pgsql zabbix-nginx-conf zabbix-agentPostgresql-12 installation
Install the Postgresql-12 repository and clear the cache.
rpm -Uvh https://download.postgresql.org/pub/repos/yum/reporpms/EL-8-x86_64/pgdg-redhat-repo-latest.noarch.rpm

dnf clean all
Disable the pre-installed DBMS module.
dnf -qy module disable postgresqlAfter that set up the Postgresql-12 packages.
dnf -y install postgresql12 postgresql12-serverNow let’s initialize the database.
/usr/pgsql-12/bin/postgresql-12-setup initdbNow we can activate the service and make it start at system startup.
systemctl enable --now postgresql-12Database configuration
Create a new Postgresql user for Zabbix. Enter the password for it when prompted.
sudo -u postgres createuser --pwprompt zabbixThen create a new database to work with the server monitoring system.
sudo -u postgres createdb -O zabbix zabbixLet’s import the starting schema and information into the database for Zabbix. When prompted, type the password for the zabbix user that we recently created.
zcat /usr/share/doc/zabbix-server-pgsql*/create.sql.gz | sudo -u zabbix psql zabbixIn the /etc/zabbix/zabbix_server.conf file uncomment the DBPassword line and enter the password for accessing the database here.
DBPassword=zabbixTo be able to establish connection from Zabbix with the database, open the /var/lib/pgsql/12/data/pg_hba.conf file and find the lines:
# IPv4 local connections:

host all all 127.0.0.1/32 ident
Change the method to password.
host all all 127.0.0.1/32 passwordAnd restart the DBMS.
systemctl restart postgresql-12Nginx configuration
Open the /etc/nginx/conf.d/zabbix.conf file and uncomment the listen and server_name parameters. In the last one enter the domain mane of your server or _ if you only want to access it using an IP address.
server {

listen 80;

server_name _;

...
In the last case, you also need to comment out the entire server section in the /etc/nginx/nginx.conf file.
# server {

# listen 80 default_server;

# listen [::]:80 default_server;

# server_name _;

# root /usr/share/nginx/html;

...
In the /etc/php-fpm.d/zabbix.conf file uncomment the php_value[date.timezone] parameter and set your timezone.
php_value[date.timezone] = Europe/PragueNow restart the configured applications and make them to launch with the system boot.
systemctl restart zabbix-server zabbix-agent nginx php-fpm

systemctl enable zabbix-server zabbix-agent nginx php-fpm
Zabbix frontend configuring
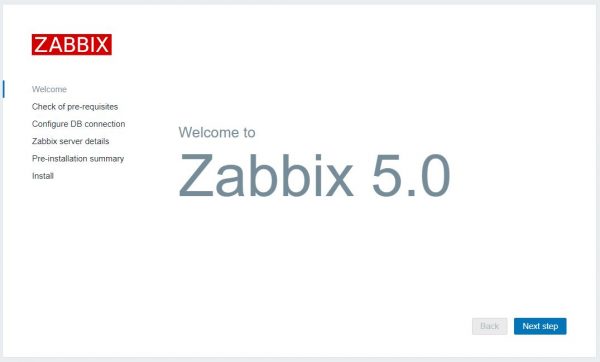
Open the IP address of your server in the browser.
Check if all the prerequisites are OK on the second step.
In the third step, enter 127.0.0.1 in the Database Host field and the password for the database in the corresponding field.
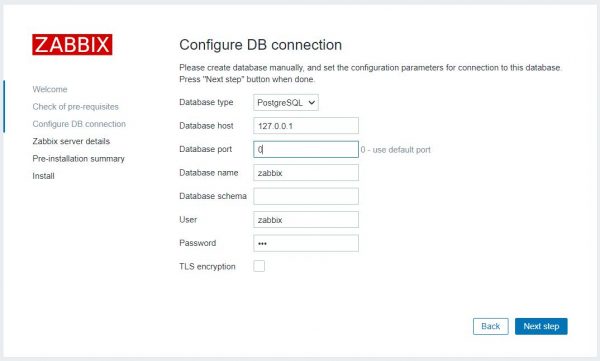
Now follow to the end of configuration and leave the default parameters.
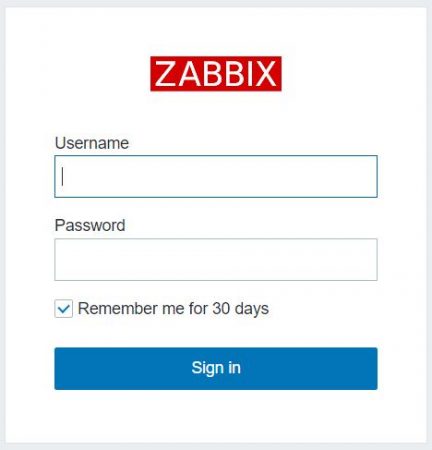
Login Admin and password zabbix are used to log in to the administration panel.
Conclusion
By following this guide, you’ve successfully installed and configured Zabbix 5 on CentOS 8 using PostgreSQL 12 and the Nginx web server. This setup provides a reliable and scalable foundation for monitoring your servers, network devices, and services in real time. From setting up the database and configuring the backend to launching the web frontend, each step helps ensure your monitoring environment is secure, efficient, and ready for production. Whether you're managing a small server or a large infrastructure, Zabbix offers powerful tools for performance tracking and alerting.
FAQ - Frequently Asked Questions
- Why use PostgreSQL instead of MySQL for Zabbix?
PostgreSQL is fully supported by Zabbix and offers advanced features, performance, and better standards compliance, making it a solid choice for many enterprise environments. - Can I use Apache instead of Nginx with Zabbix?
Yes, Zabbix supports both Apache and Nginx. This guide uses Nginx for its lightweight footprint and high performance, but you can use Apache if it's already part of your stack. - Where can I access the Zabbix web interface?
Open your server’s IP address in a web browser (e.g., http://your_ip/). You should see the Zabbix welcome page. The default login is Admin, and the password is zabbix. - How do I secure the Zabbix frontend?
After installation, it is highly recommended to configure HTTPS with an SSL certificate, change the default credentials, and restrict access to the admin panel using firewall rules or Nginx access controls. - What ports need to be open for Zabbix to work?
Port 80 (HTTP) or 443 (HTTPS) for the web interface
Port 10050 for the Zabbix agent
Port 10051 for the Zabbix server


