How to Configure a Static IP Address on Ubuntu 18.04 Using Netplan
Main idea of this article
The most often case of infrastructure organization today is automated settings assign via DHCP server cause no more needed on client side. But if you don't have DHCP - no panic. You may set IP address manually after this material reading.

Firstly, you should define the network interface which settings you are want to change. To see all network cards with theirs settings just run command below:
ip a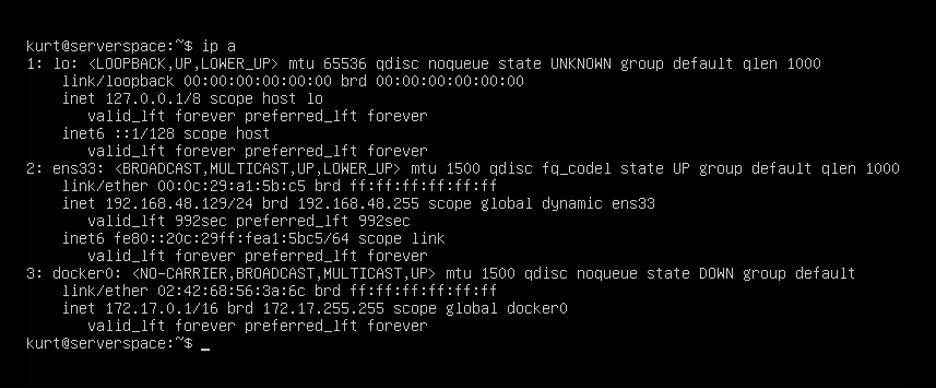
In this output we've seen that our computer has three ethernet adapters. One of them is assigned to docker, other is loopback interface. So, our aim is ens33 network adapter. Let's go.
Since version 17.10 Ubuntu uses netplan tool to manage connectivity settings. This utility based on YAML synopsis rules. All settings are stored in /etc/netplan/*.yaml files.
So we should list all files in /etc/netplan/ directory:
ls /etc/netplan/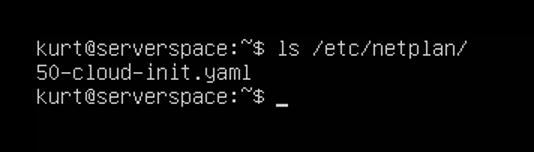
NOTE: If there are no files found you can re-build it to default system config:
sudo netplan generate
As we see, only 50-cloud-init.yaml file is present. To change connectivity settings we will edit it via text editor.
sudo nano /etc/netplan/50-cloud-init.yaml
Let's find our adapter's name inside. By default, Ubuntu 18.04 is trying to get network settings from dedicated DHCP-node. Directive below is responsible for this:
dhcp4: true = dchp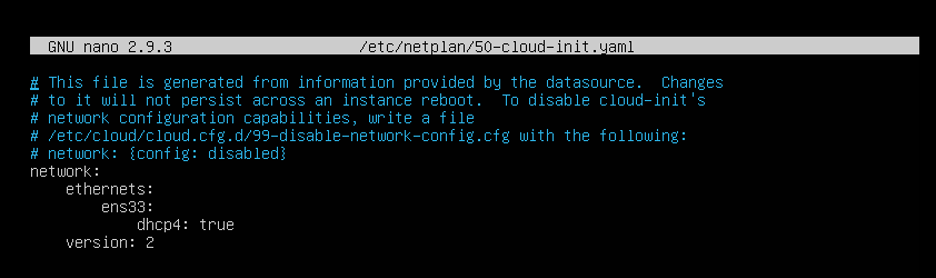 To modify this behavior just change the YAML-file like that:
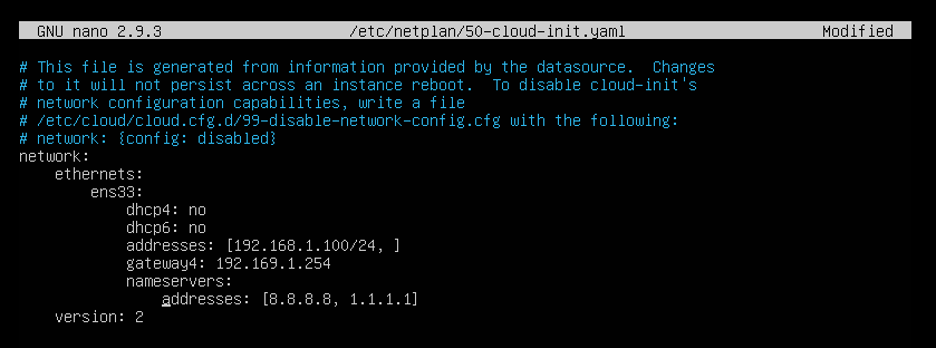
Some explains:
ens33 – interface name
dhcp4, dhcp6 – this sections are respective to the dhcp-properties for 4th and 6th IP-protocol versions.
addresses – static addresses "pointed" to the interface. (in CIDR format)
gateway4 – IPv4 address for default hope.
nameservers – IP addresses for servers which resolves DNS-queries.
NOTE: You must use spaces only, no tabs.
To apply changes just run this command:
sudo netplan apply
As we see, no error messages, everything is OK.
And finally, just see system settings again:
ip a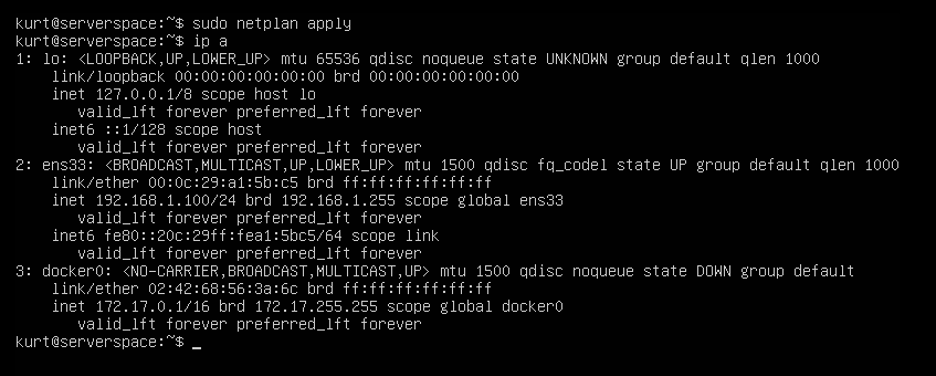
Congratulations! IP addresses config is fully consistent with YAML-file we modified.
Conclusion
After this instruction reading you may assign static IP addresses to your Ubuntu server.


