How to Backup a Linux Server Using Veeam Agent – Installation and Configuration Guide
In our example we will use Ubuntu 20.04 OS. So you need to download the Veeam agent software from here Veeam Software for Enterprise and copy the deb file your ubuntu machine where you plan to install the agent.
Veeam Agent Installation

Go to the directory where you have saved the veeam-release package and install the package with the following commands for Debian / Ubuntu
dpkg -i ./veeam-release* && apt-get updateAnd just run the package installation
sudo apt-get install veeam -yAfter installation finishes just run
veeamand veeam agent gui will launch.
Veeam Agent Configuration
Backing up with Veeam Agent for Linux is very easy. There aren't too many options to choose from, so you can check them out for yourself. In our case I will make a full backup of the whole system and move it to samba share.
So lets create a task to backup our server to our storage using smb.
veeamWe are immediately prompted to specify the license file. Since we don't have a license, we refuse. We are greeted by the main window of the program.
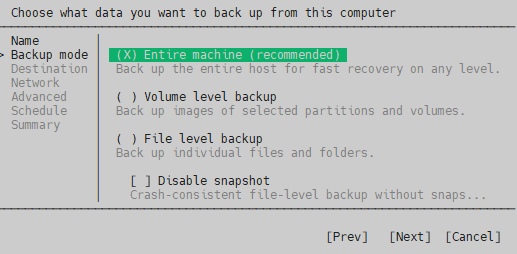
Press C (configure) to setup a backup job. We give it a name for the job and then choose that we want to backup entire machine.
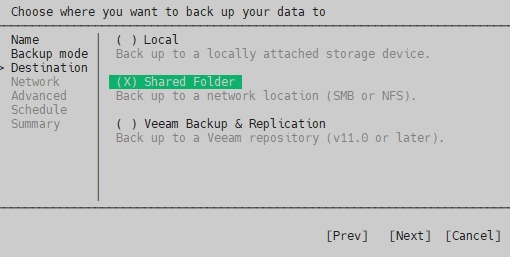
As a destination for the system backup, we select Shared Folder.
Next, you will need to enter access parameters to the backup location. In my example I’ve shared a folder on a Windows server, so I’ve chosen SMB share.
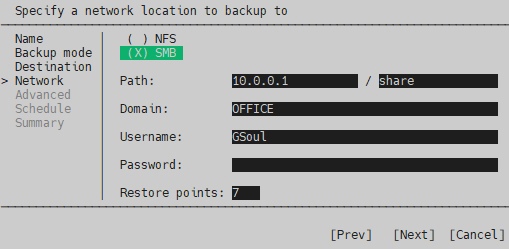
The Restore Points item specifies the depth of the archive. That's the number of copies you want to keep on the server. If you make a backup every day and specify 14, the system backups for the last 14 days will be preserved. If you backup every other day, then 28 days, and so on.
You can create several tasks with different backup depths. For example: every day 7 backups, once a week 4, and once a month 12. This way you will always have the last 7 backups of the system for that week. Then one backup per week for the last month and 12 backups per month for the last year. Press Enter to continue
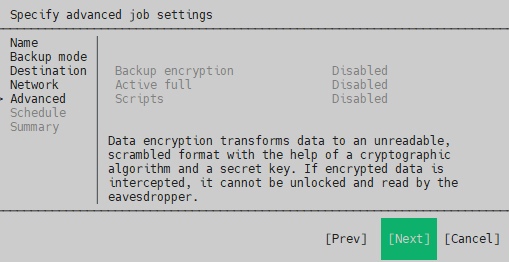
Advanced options disabled by default for free version, but if you have a license I recommend to encrypt the backup.
Press enter to continue and see the backup schedule, in free version you cannot edit this also.
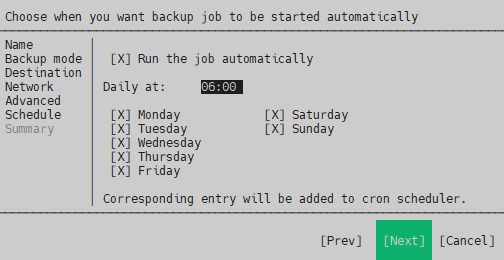
Press enter and fishish.
The backup will start ASAP. If you get an error:
The current system does not support cifs. Please install the cifs client package.
Install the cifs client package:
sudo apt-get install cifs-utilsRestart veeam and continue.
Now you have started the backup process. You can monitor its progress.
If you get an error that snapshot creation failed
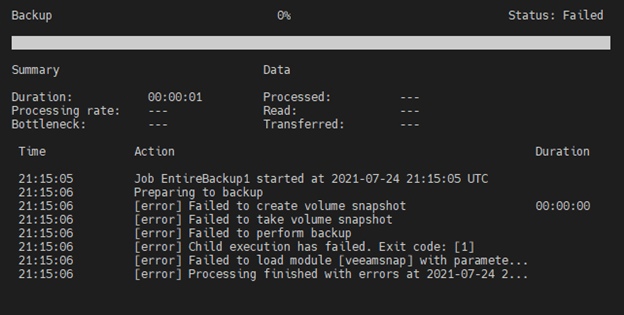
Try the following:
We need to get deeper to the root cause so we go to the Backup log folder of VEEAM /var/log/veeam/Backup
Navigate to the job log and open it with text editor, for example nano.
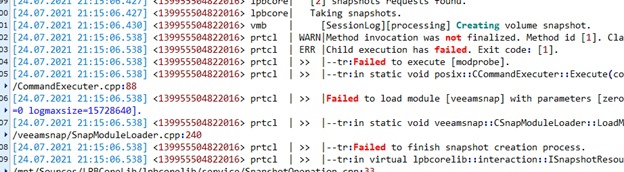
We found that modeprobe failed to load module veeamsnap
For this we need to install linux-headers first, just check your kernel version :
uname -r
And install the right linux-headers
sudo apt-get install linux-headers-5.4.0.-74-generic -yAnd now we need to load veeamsnap:
modprobe veeamsnapRun veeam again and press S. It should work now
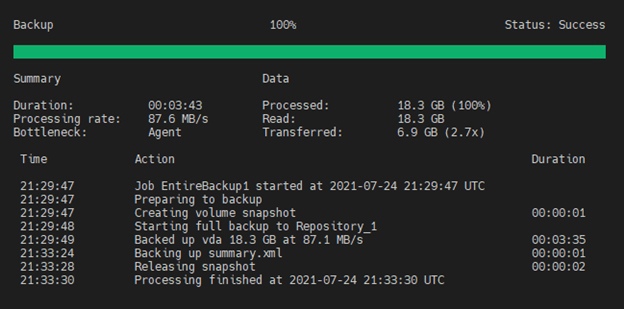
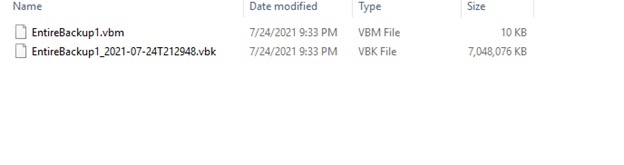
After completing a system backup, you can check the contents of your shared drive by accessing it directly from the Windows.
With this, the configuration of a full Linux server backup using Veeam Agent is complete. Your system data is now securely stored, whether on a local drive or a network share, ensuring protection against data loss due to hardware failures, system crashes, or human errors. Regular backups like this provide peace of mind and allow for fast recovery in critical situations. For even greater reliability, consider implementing backup rotation policies and monitoring your backup jobs to ensure consistent success.


