
Zabbix is a powerful open-source monitoring solution that enables you to monitor and manage IT infrastructure. The Zabbix API allows for programmatic interaction with the Zabbix server, facilitating automation and integration. In this tutorial, we will walk you through the process of creating a Zabbix API token, which grants access to the API's functionality.

Zabbix is developed and maintained by the Zabbix team and community. Using official features such as API tokens ensures compatibility with supported versions and follows recommended security practices for monitoring and automation.
Prerequisites
- Zabbix 6.4 installed
- Web interface access
- Admin or sufficient permissions
Creating tokens
Access the Zabbix web interface using your preferred web browser and enter your login credentials to access the Zabbix dashboard.
Now you have two ways: you can either manage the tokens yourself or give Zabbix users the rights to create tokens for themselves.
If you want to create tokens by yourself you will need to go Administration → General → API tokens.
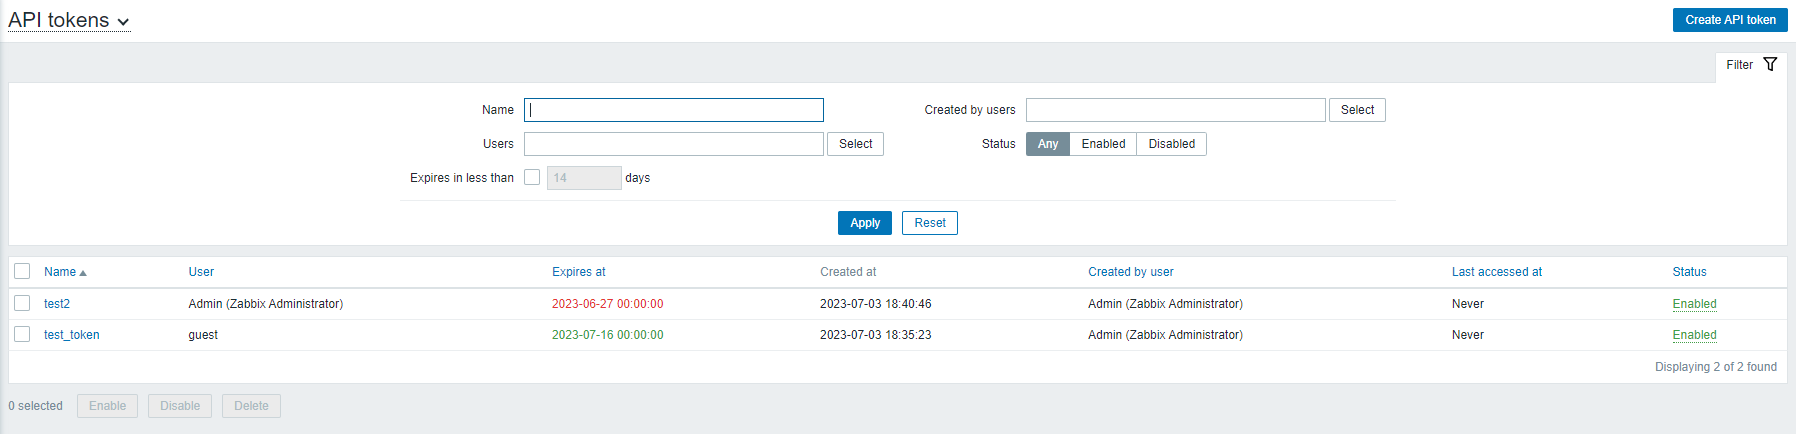
Here you can see through the list of the tokens created for your Zabbix, disable or enable them if needed, or check the expiration date.
Click "create API token".
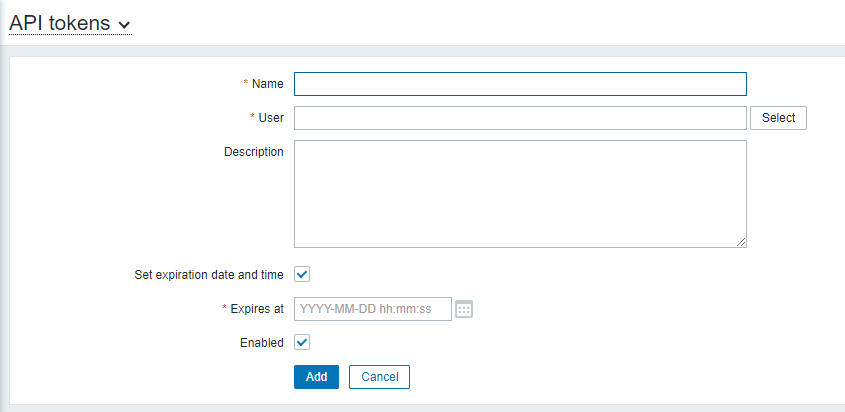
Fill in the lines, hit add and you will see something like this:
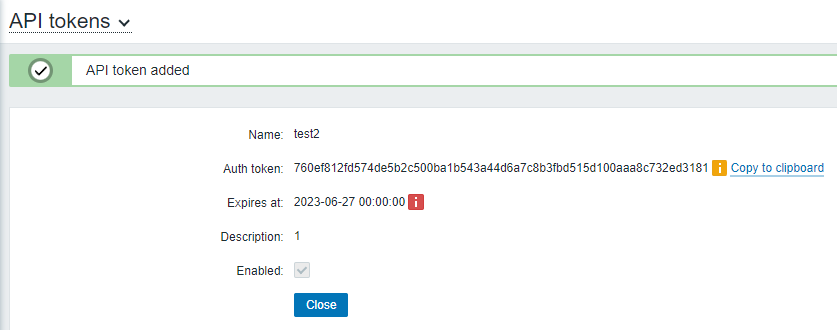
Don’t forget to save the token somewhere safe, or you won’t be able to see it after the creation.
If you want the users to be able to create tokens for themselves - edit their user group permissions: Make access to API enable, also you can whitelist, or blacklist the API methods of your choosing here.

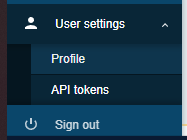
After that the user will be able to see or create his token in this menu.
Testing with cURL:
To test the API token, you can use cURL, a command-line tool for making HTTP requests.
Launch your terminal or command prompt to execute cURL commands.
Use the following cURL command template to make an API request:
curl -X POST -H "Content-Type: application/json" -H "Authorization: Bearer YOUR_API_TOKEN" -d '{"jsonrpc":"2.0","method":"user.login","params":{"user":"YOUR_USERNAME","password":"YOUR_PASSWORD"},"id":1}' http://YOUR_ZABBIX_SERVER/api_jsonrpc.phpMake sure to replace the following placeholders with your actual information:
- YOUR_API_TOKEN: Replace this with the API token you generated.
- YOUR_USERNAME: Provide your Zabbix username.
- YOUR_PASSWORD: Enter your Zabbix password.
- YOUR_ZABBIX_SERVER: Enter the URL or IP address of your Zabbix server.
Copy and paste the constructed cURL command into your terminal or command prompt. Press Enter to execute the command.
Check the response returned by the Zabbix API. It should indicate the success or failure of your API request. You will receive something like this if everything is right:
![]()
![]()
Conclusion:
API tokens are the recommended authentication method for working with the Zabbix API in modern environments. By using API tokens instead of usernames and passwords, you improve security, simplify automation, and gain better control over access permissions.
In this guide, we covered how to create and manage API tokens in Zabbix 6.4, assign permissions for individual users or groups, and test API access using cURL. These tokens can be safely integrated into scripts, monitoring automation, CI/CD pipelines, and third-party tools without exposing sensitive credentials.
For advanced use cases, consider regularly rotating API tokens, limiting allowed API methods, and monitoring token usage to maintain a secure and reliable monitoring infrastructure.
FAQ: Zabbix API Tokens
- 1. What is a Zabbix API token used for?
A Zabbix API token is used to authenticate requests to the Zabbix API without relying on a username and password. It allows scripts, automation tools, and integrations to securely interact with the Zabbix server for tasks such as retrieving monitoring data, managing hosts, or updating configurations. - 2. Are Zabbix API tokens more secure than username and password authentication?
Yes. API tokens are more secure because they can be limited in scope, have an expiration date, and be revoked at any time without affecting user accounts. This makes them ideal for automation and integration scenarios where storing user credentials would be risky. - 3. Can API tokens be restricted to specific API methods?
Yes. Zabbix allows you to control which API methods a token can access by configuring user group permissions. You can whitelist or blacklist specific API methods, ensuring that tokens only have access to the functionality they actually need. - 4. How do I revoke or rotate a Zabbix API token?
You can revoke or disable an API token from the Administration → General → API tokens section in the Zabbix web interface. Token rotation is done by disabling the old token and creating a new one, then updating it in your scripts or integrations. - 5. Do I need to use user.login when working with API tokens?
No. When using an API token, authentication is handled automatically via the Authorization: Bearer header. The user.login method is only required when authenticating with a username and password. - 6. Where should I store my Zabbix API token?
API tokens should be stored securely, such as in environment variables, secret managers, or protected configuration files. Never commit tokens to version control systems or expose them in public scripts.


