With the rise of information systems, virtually every organizational process—whether HR, accounting, or document management—has transitioned to digital formats. This shift has made it easier to store, transmit, modify, and process vast amounts of data efficiently. However, it also introduced new risks: information has become vulnerable to threats against its core principles of integrity, availability, and confidentiality. To safeguard these fundamental properties, a reliable solution was needed—something akin to a digital seal or signature that ensures data security.
This solution came in the form of electronic digital signature (EDS) technology. EDS leverages cryptographic algorithms and trusted third parties to securely verify the authenticity and integrity of transmitted messages, providing a robust mechanism to protect digital communications from tampering and forgery.

What is a GPG signature?
GPG signature is an analogue of a normal human signature on documents. It is not a picture or a graphical signature, but a string sequence that has been generated by a unidirectional hashing function and encryption process by a cryptographic algorithm.
The input to a cryptosystem, or a programme that allows cryptographic transformations, is information that needs to be signed. The file or string sequence to be signed passes through a unidirectional mathematical function or hash function that converts the data into a meaningless sequence. But unique for the given text or file. That is, if you change a single character, the function will have a different meaning. Asymmetric encryption algorithm is responsible for confidentiality.
Installing and configuring GPG
Let's take an example of the process of creating a signature for a file or message so that the recipient can be sure of the integrity, authenticity and, in some configurations, confidentiality of the transmitted data. First, let's update the packages on the machine so that all dependencies are up to date and there are no problems in the connection.
apt update && apt upgrade -y By default, distributions already include the gnupg package solution, which allows you to perform cryptographic conversions. However, if your device does not have it, specify a package manager and command:
- apt for Debian/Ubuntu;
- yum/dnf for Fedora/RedHat.
apt install gnupg -y 
Before we start a test machine, which we can do on Serverspace cloud platform which will help in easy deployment, also you can skip this step if you have a cloud server. To create the node we need to find the cloud platform from the left menu which you can choose depending on your requirement. We choose vStack or VMware platform and click on Create Server button.
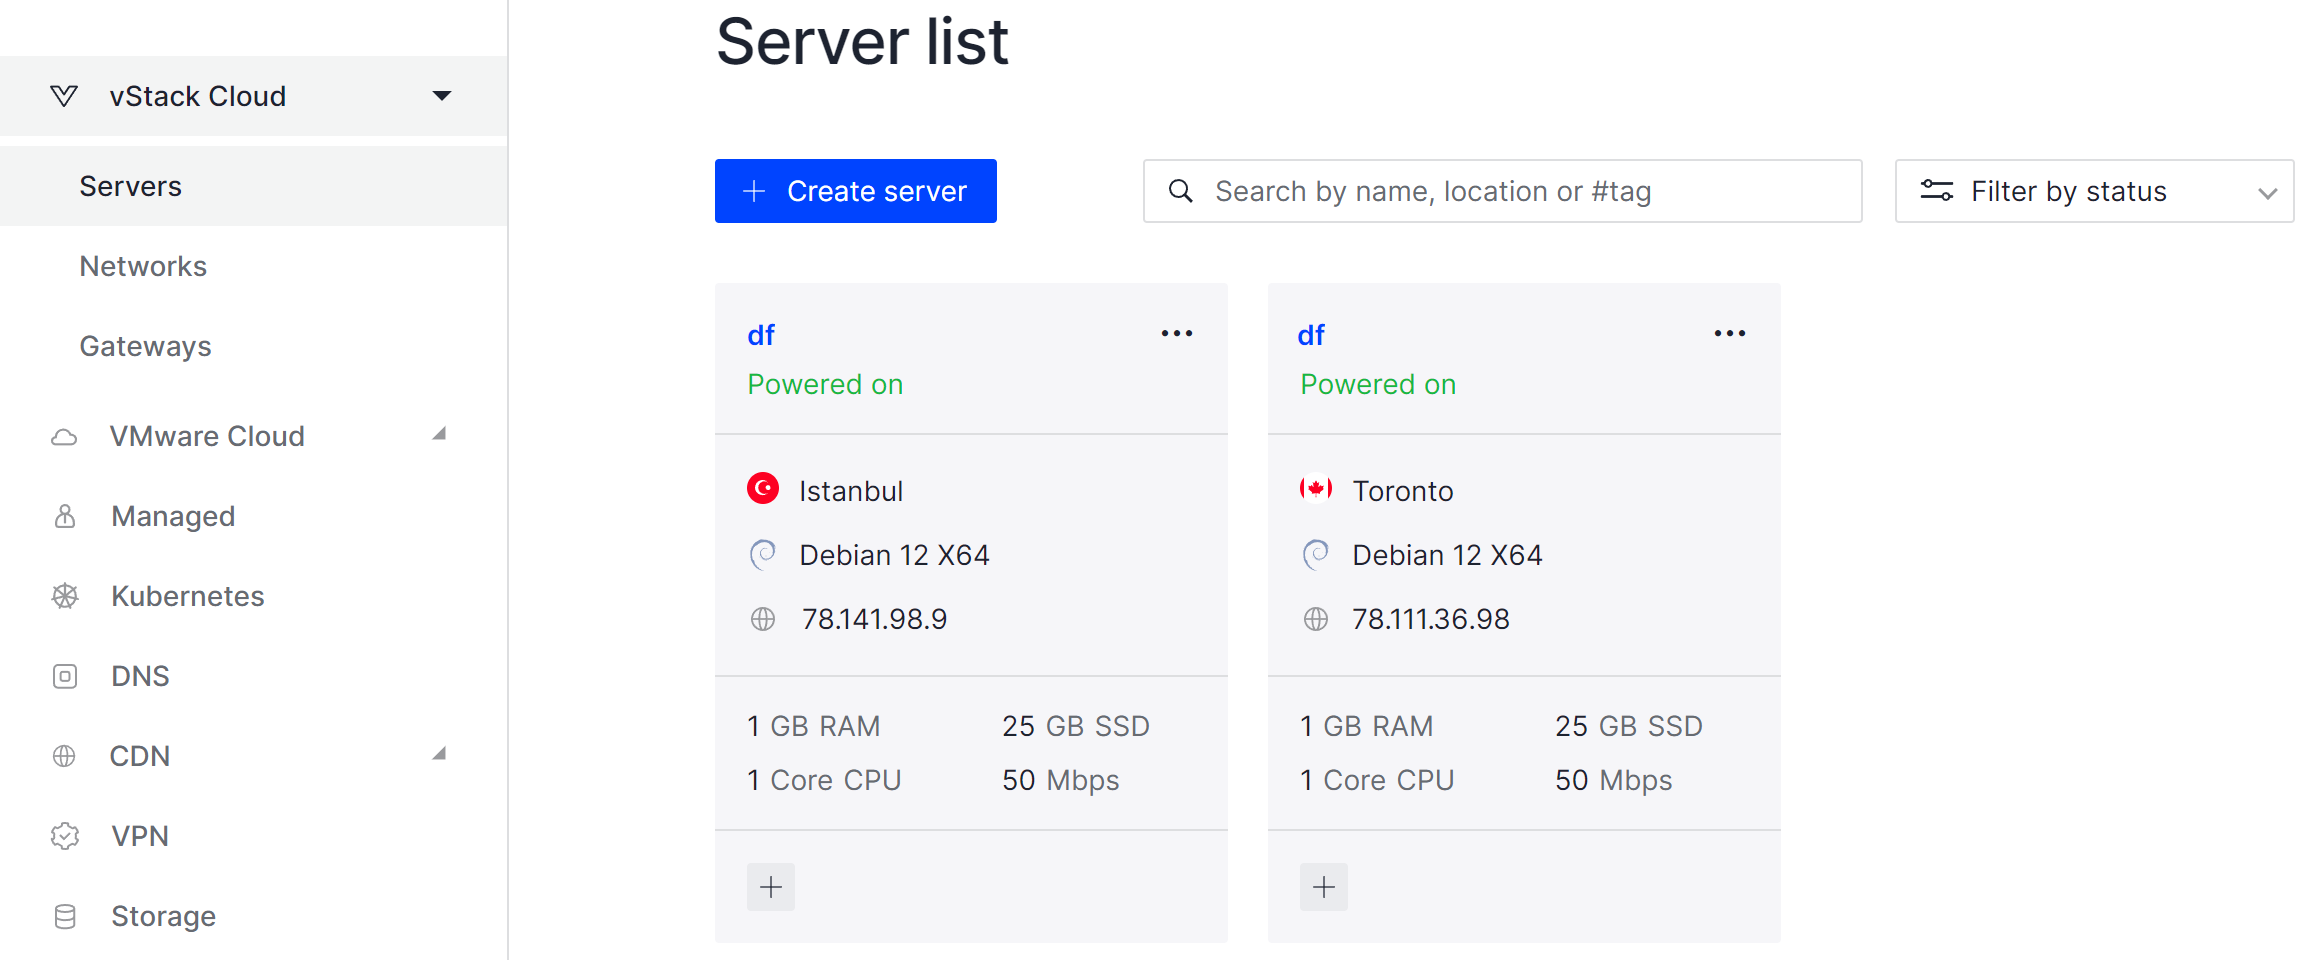
It will take some time to deploy server capacity. After that you can connect in any of the convenient ways. Let's return to our terminal with the utility already installed, to familiarise ourselves with the syntax we will write the commands:
gpg -h 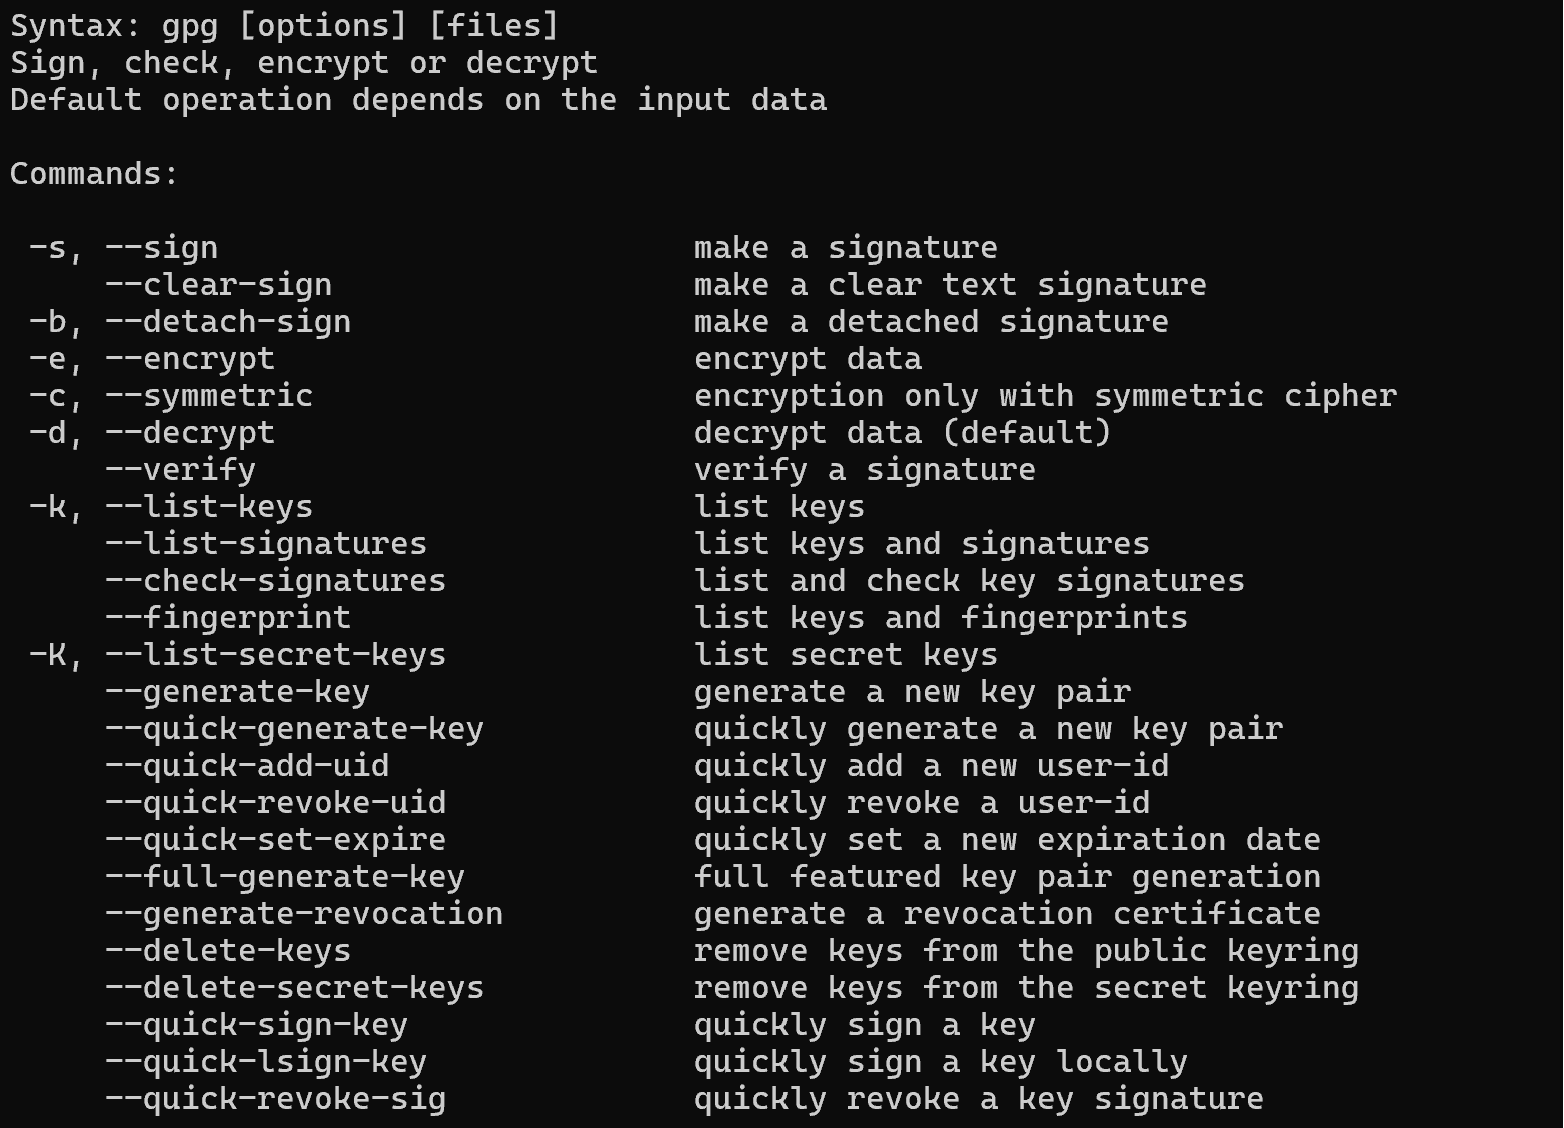
As we can see, the list of options is quite extensive. Therefore, let's focus on the main options and functions of the command, which may be needed in the course of performing basic actions.
How do I create GPG keys?
In order to sign a message, a key pair must be generated using an asymmetric encryption algorithm:
gpg --full-generate-key --expertUse gpg with --full-generate-key and --expert options for more detailed key and user configuration. By selecting the RSA encryption algorithm, key length 2048 and setting the user ID, we will make sure that the keys have been created. By default, it is stored in a keyring or keyring database, which is encrypted with the user key. Accordingly, the authenticity of the message and files depends on the length of the user's key and password, during transmission and storage. Therefore, it is necessary to set a complex password, preferably from 14 characters.
Let's look at the key pairs created, for public -k, for private -K:
gpg -k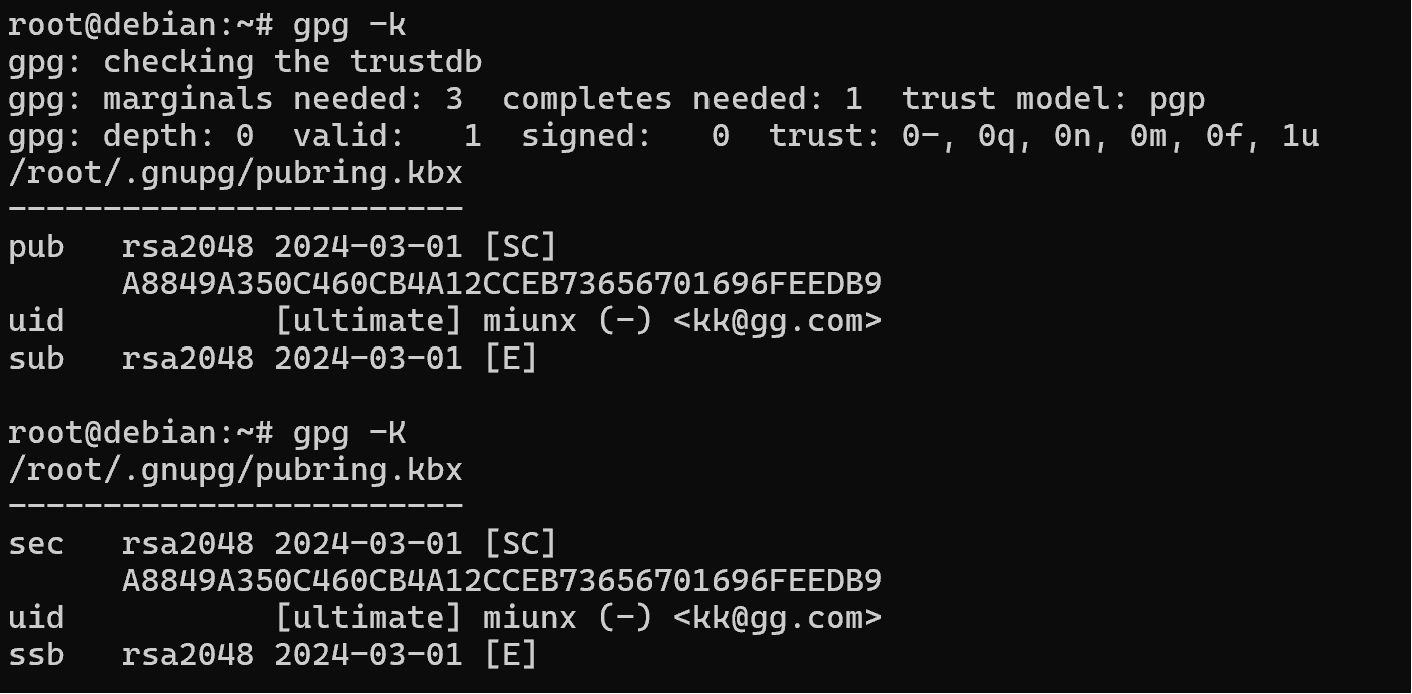
In order for the recipient to verify the signature it is necessary to export and then import the public keys to the recipient:
gpg -a -u Koldek --export > keys.asc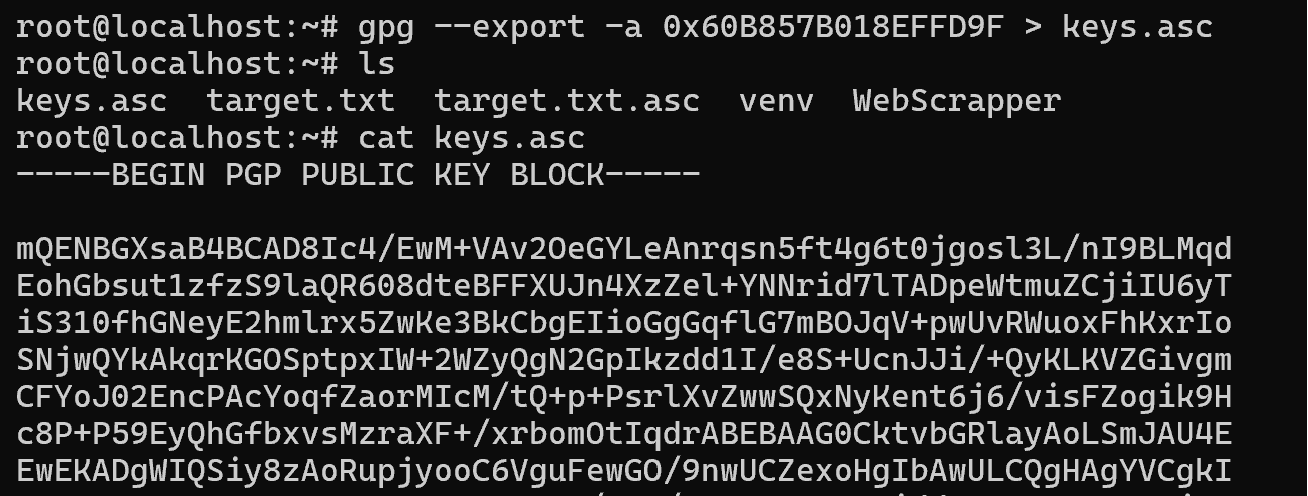
To view the key, enter the command:
cat keys.ascNow there are two options for data distribution, because of the threat of public key spoofing, in the initial transmission we need to work through intermediaries or trust the source key. Consider the Web-of-Trust model, which involves trusting sources based on user ratings. We place our key on our own or WoT site, and distribute it on users' request.
In the scheme with the certification centre, we need to register our public key and get a certificate, which will contain a new EDS from the certification centre. If the user trusts the CA, the signature is decrypted and verified accordingly.
Once you have the key, you need to import it with the command:
gpg --import key.asc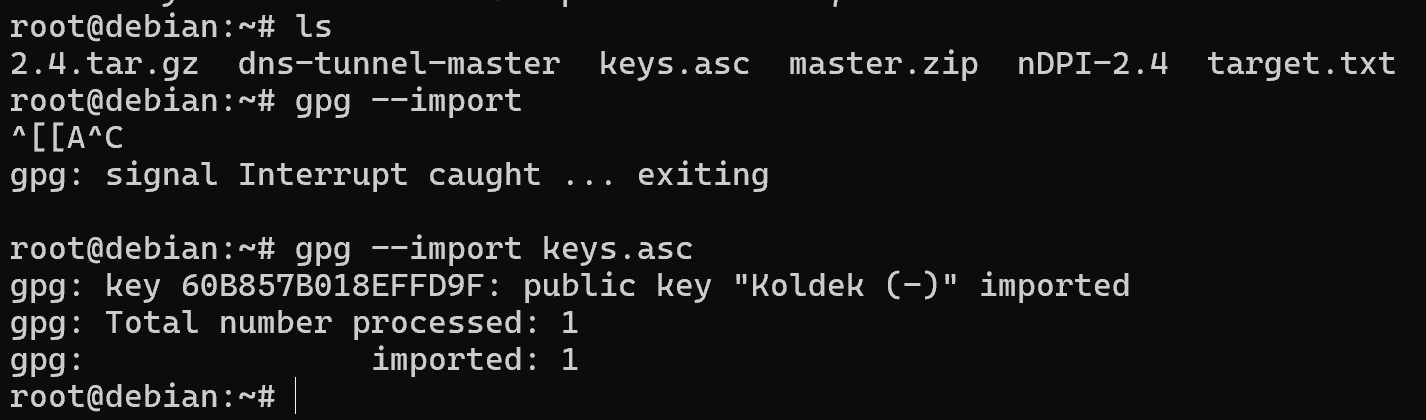
After importing we see the key number and name, which we can also verify for authentication:
If we try to verify a test message, we will get a warning about the unknown origin of the key. To verify that the keys are trusted, a database or trusted gpg is used to store a list of keys and their trust level.

Let's write the trust level manually by changing the key parameters with the command:
gpg --edit-key Koldek And then select the item you want to edit - trust:
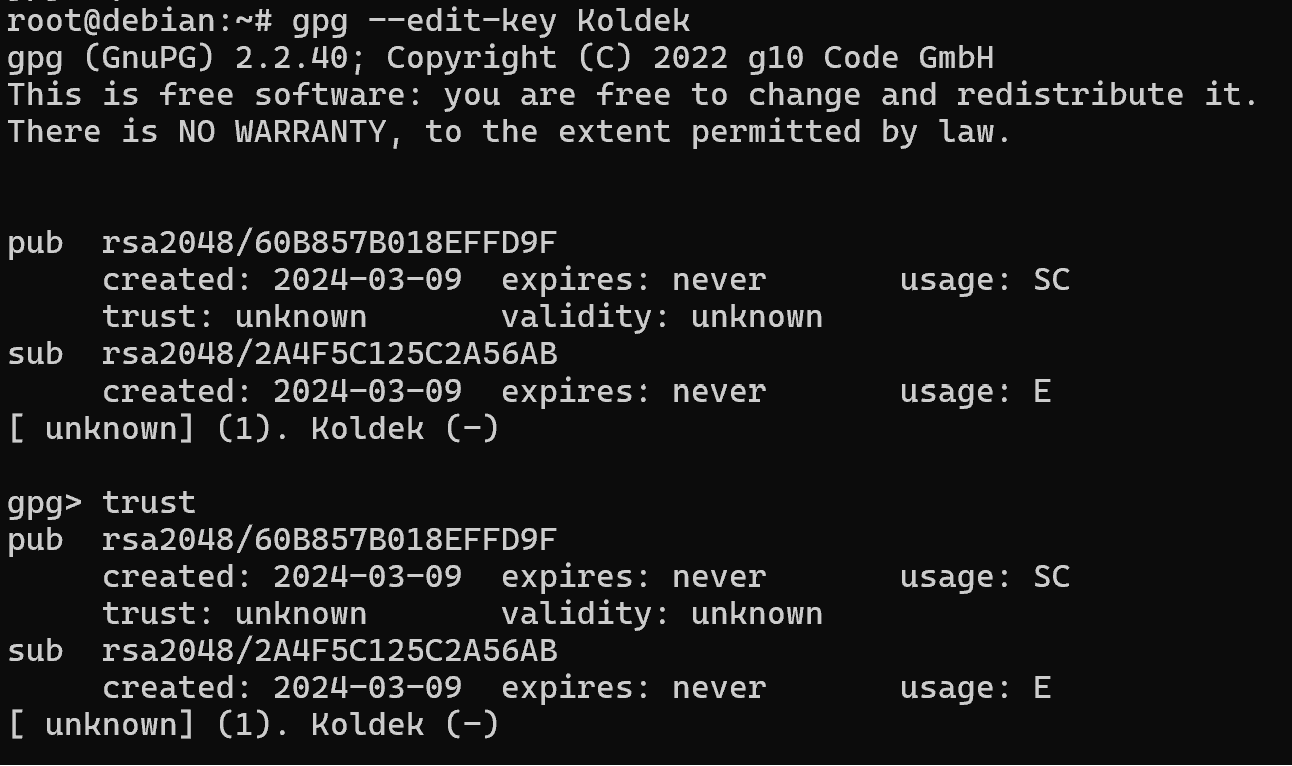
To fully trust the key, you should select item 5, but before that, check the hash values and the key data! And confirm your choice:
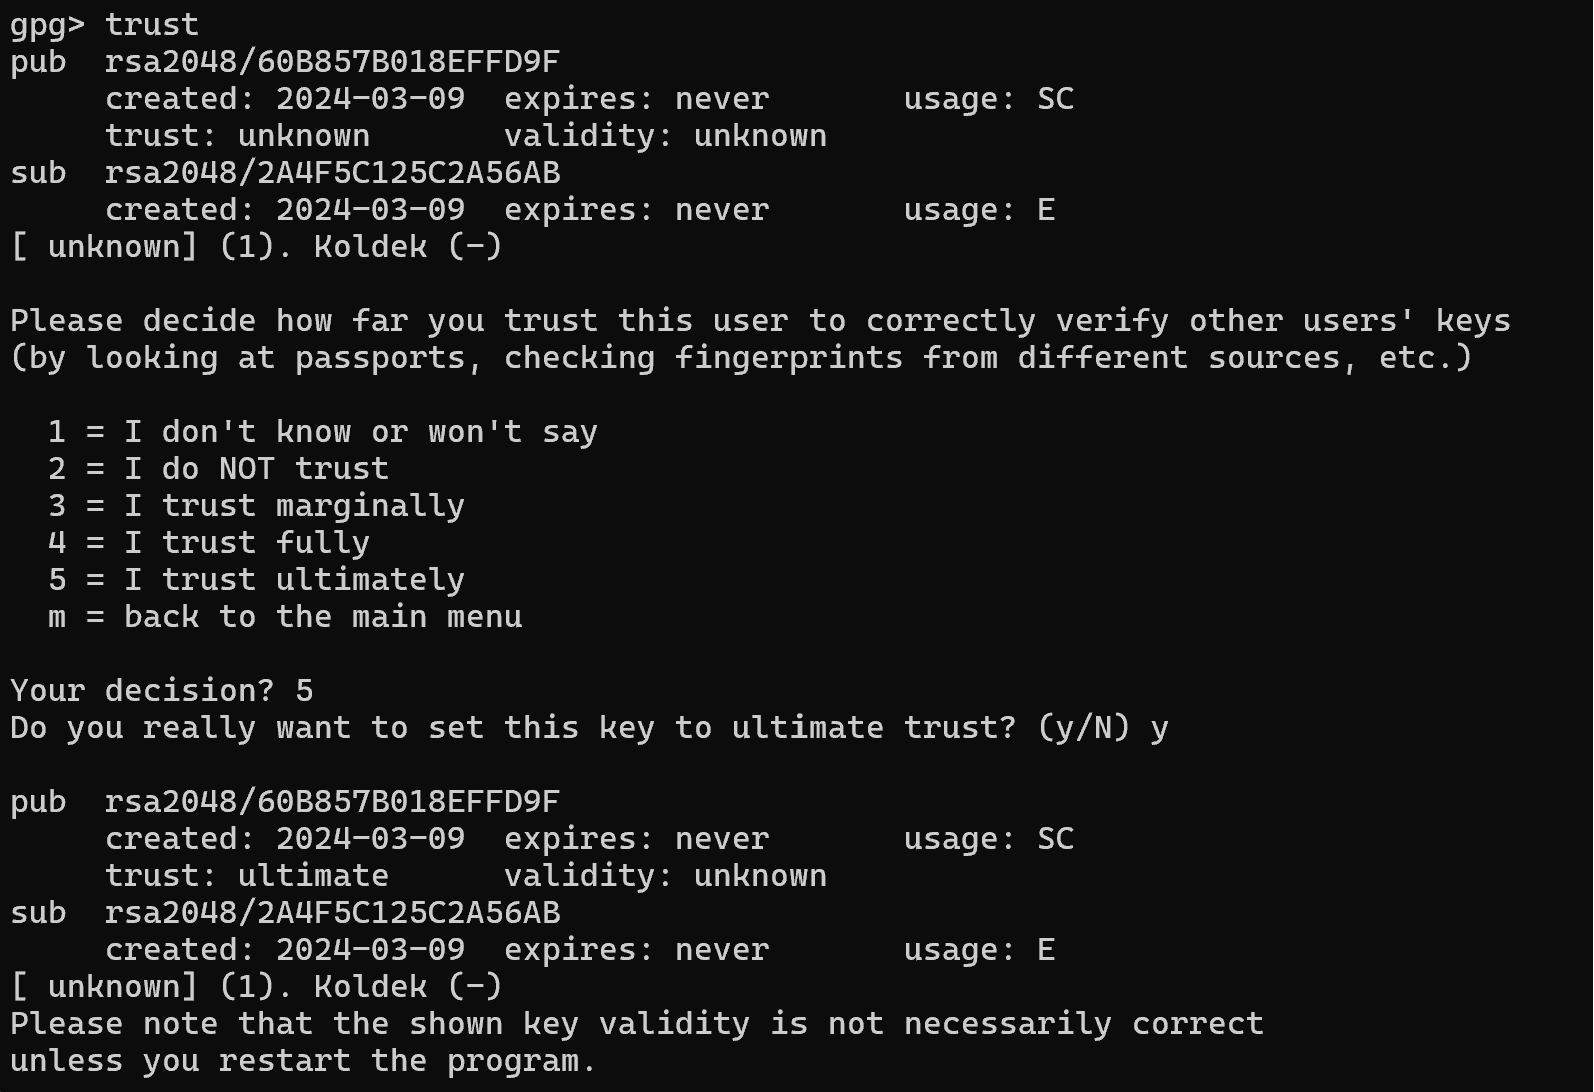
At the bottom we see a note that the key trust will change after restarting the utility, which we will do.
How can I create and verify a GPG signature?
Let's go back to the previous machine where we generated the keys and sign the first message!
There are three options on how you can sign a message:
- сreate a blank signature in the message itself;
- create a separate signature in a file;
- create a signature in a file combined with text.
The first way is a file in which the message itself and the signature are separated, no special means are required to read the file. Only to confirm the signature. Let's write the command:
gpg -a -u Kolded --clear-sign target.txt 
After signing, transfer the file in any convenient way and verify the message in the file already on the recipient's side:
gpg --verify target.txt.asc 
As you can see now warnings and errors do not appear and the date of message signing is set. However, without a time server, it is possible to spoof these values, as they are stored in the metadata of the file and are not verified like the message itself.
The next method, a separate file with the signature, which can be convenient for software packages when it is not necessary to modify them with a signature. All you need to do is download a separate file for verification:
gpg -a -u Koldek -b target.txt > target.txt.asc For the sake of clarity, let's immediately verify its authenticity with a command:
gpg --verify target.txt.asc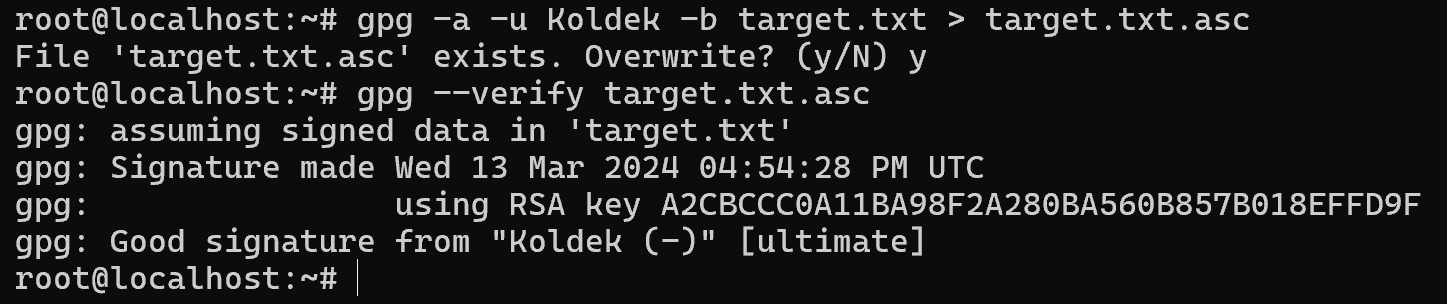
Note that now we need to transfer the message itself and its signature to the machine, preferably in the same folder.
But how to ensure confidentiality, integrity and authenticity of the transmitted signature at the same time? It is enough to encrypt it after creating it! This will ensure the confidentiality of our message, file or document. To do this, let's write the command:
gpg -a -u Koldek -r Raider -se target.txtA file will be generated in which the message and signature will already be integrated, now you need to verify and decrypt it with the command:
gpg -d target.txt.asc 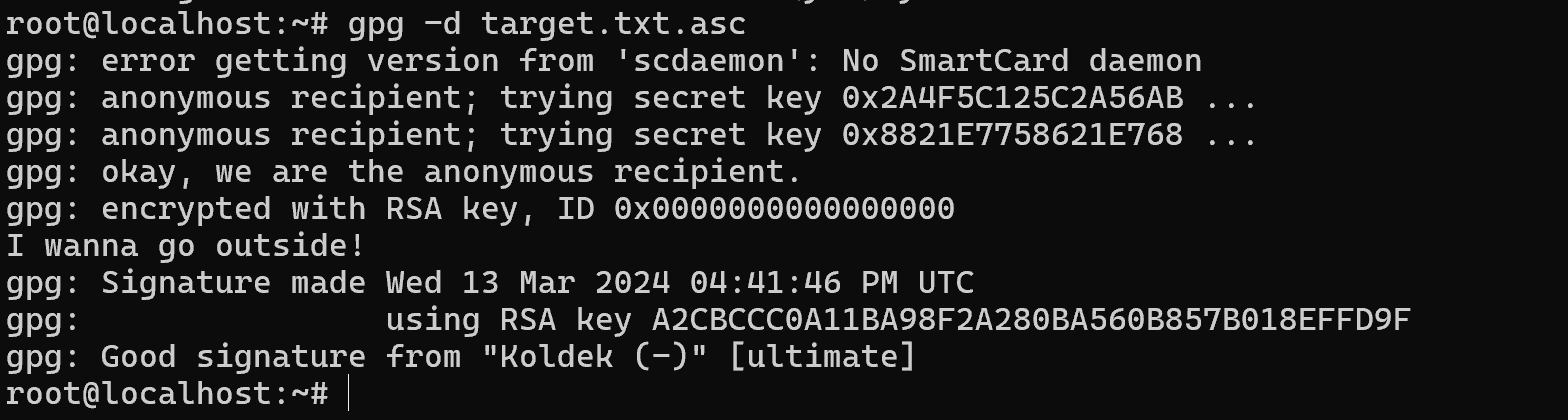
In the creation of digital signatures using GPG, we see a powerful tool for ensuring security and trust in information exchange. This process guarantees the integrity of data and confirms authorship, opening up new possibilities for secure messaging and file sharing in the digital world.


