Introduction
The process of adding a user account to a computer is necessary in many cases, such as if you intend to share a device with other people or if you want to set different levels of access for each person. Creating multiple accounts and assigning administrative rights to specific individuals allows everyone using the computer to work efficiently without disturbing others. In addition, having individual accounts ensures that sensitive information is protected from accidental or intentional access by other users. This means that if you're working on something important and want to make sure that someone else can't access your files, etc., it's best to create a separate account for yourself rather than using the standard administrator password (which should never be shared).

Setup
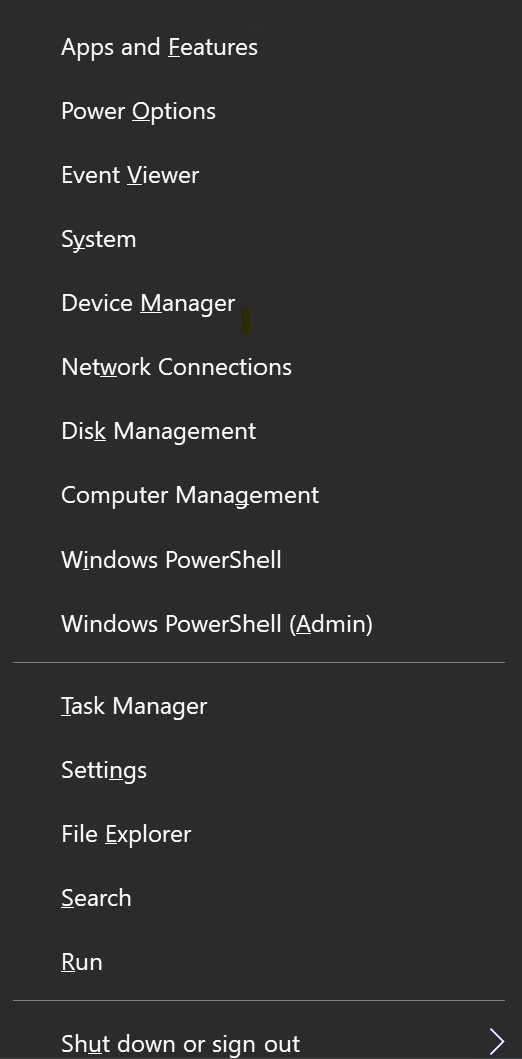
At the first we need to press combination Win + X of button to open utility, also we can find them entering to a search bar phrase Computer management:
Click on the popup tab and wait to load window with tools, look at the left menu:
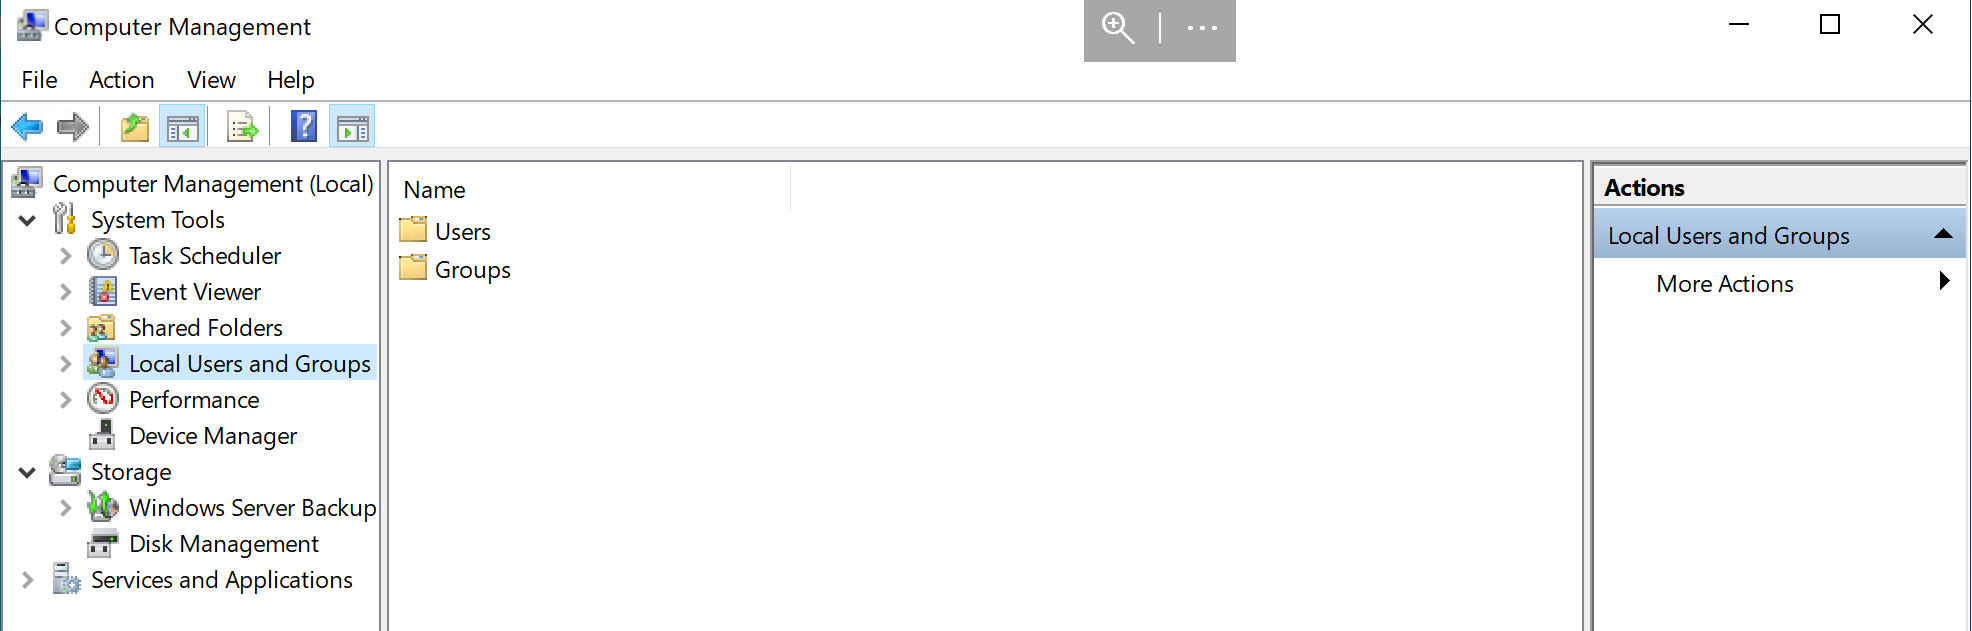
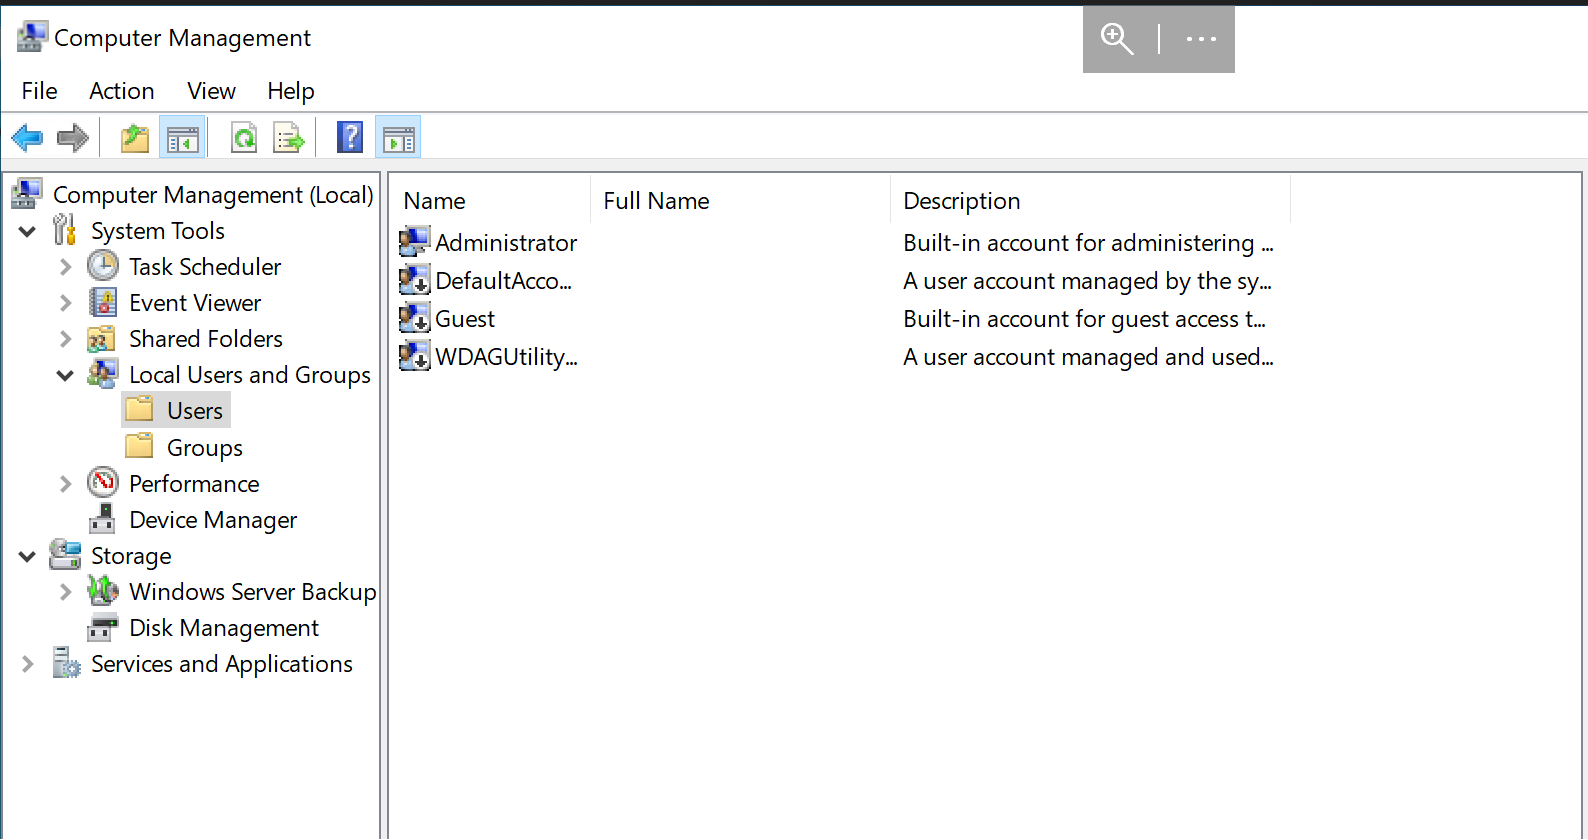
We need to choose Local Users and Groups, where we can see folders with label users and groups, in the current instruction we will consider first folder. Doble-click on the Users. At the default settings we will have 4 accounts, some of them disabled, that you can notice by icon near the rows.
For create new user we can click by the right mouse button and we can see pop-up window.
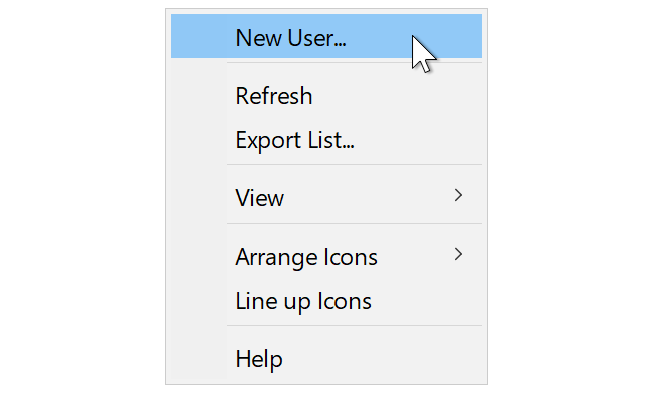
Click at the New user... and wait load module form.
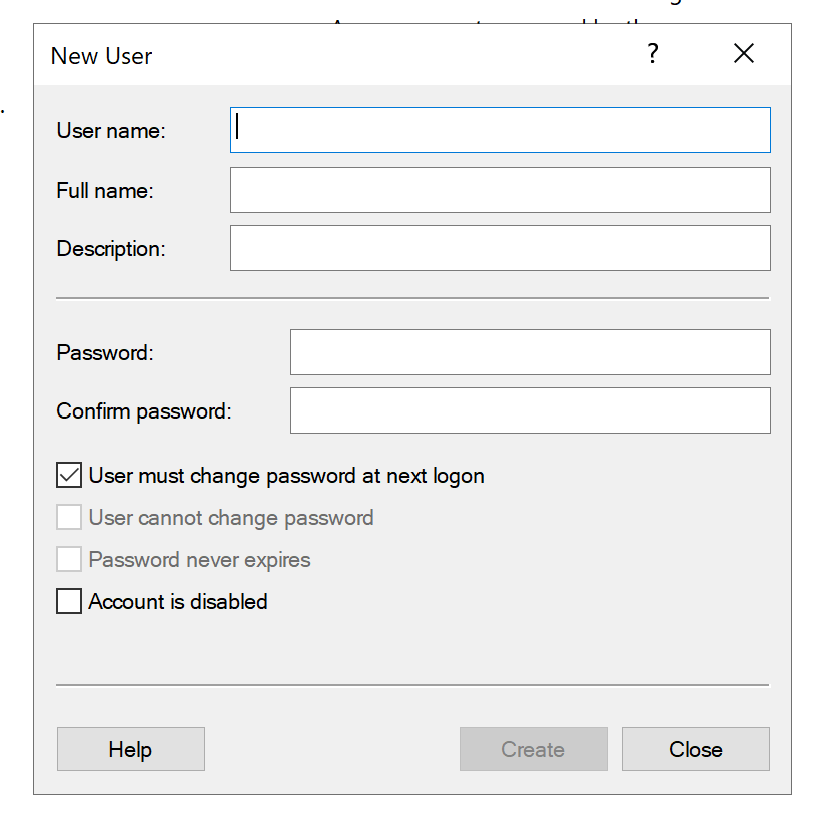
When creating a new user account on the computer, you must provide basic information about yourself, such as a name and password. In these dialog boxes, you can set other parameters, for example, turning off the computer after a certain number of minutes, requiring you to enter a password when restarting the computer, etc., but all these parameters are optional and depend on the user's personal preferences. The main fields that need to be filled in when creating a new account include:
Name: This is a name that other users and you yourself can use to address this person, so as not to confuse him with other users of the machine, etc., so it's best to choose something simple but unique. For example, if your name is John, then you can call yourself "John", not "john_doe", etc. This will make it easier for everyone to contact the owners of certain files, etc. on the device.
Password: This password will be required every time a specific user wants to log in to their account, rather than using another person's administrator credentials, so it's important to choose something reliable and unique that others won't be able to guess easily. For example, if you are creating an account for another person, it is best to give him his own password, which he created himself, i.e. one that cannot be obtained or found out.
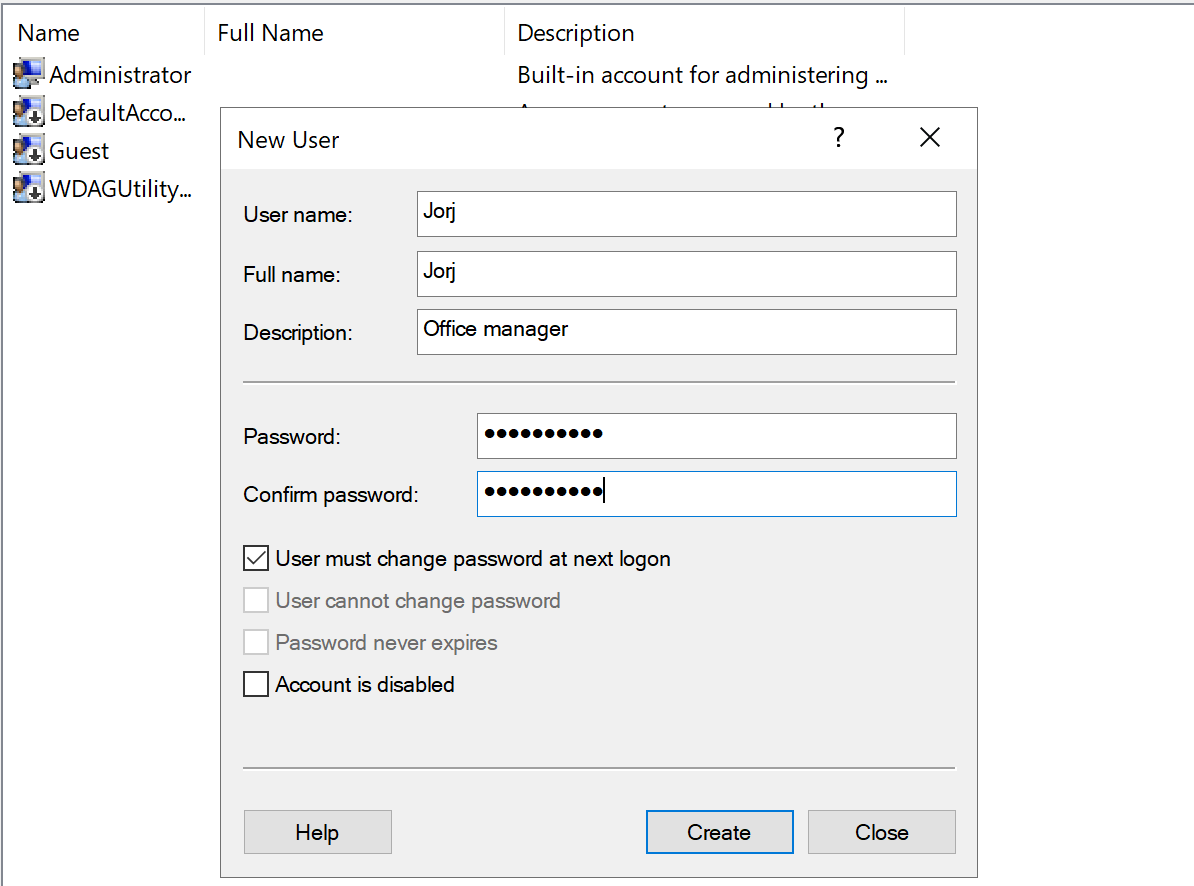
Click on the button Create and wait until the system update the data. After that click on the previous window and by the right button mouse open menu. Where you need to click on the Refresh.
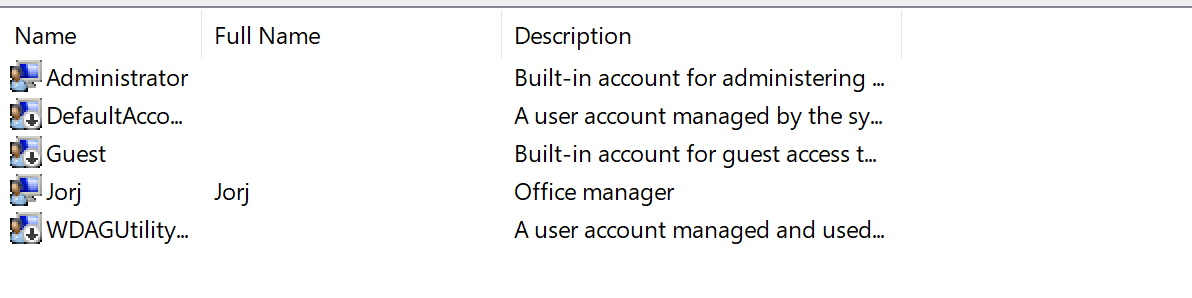
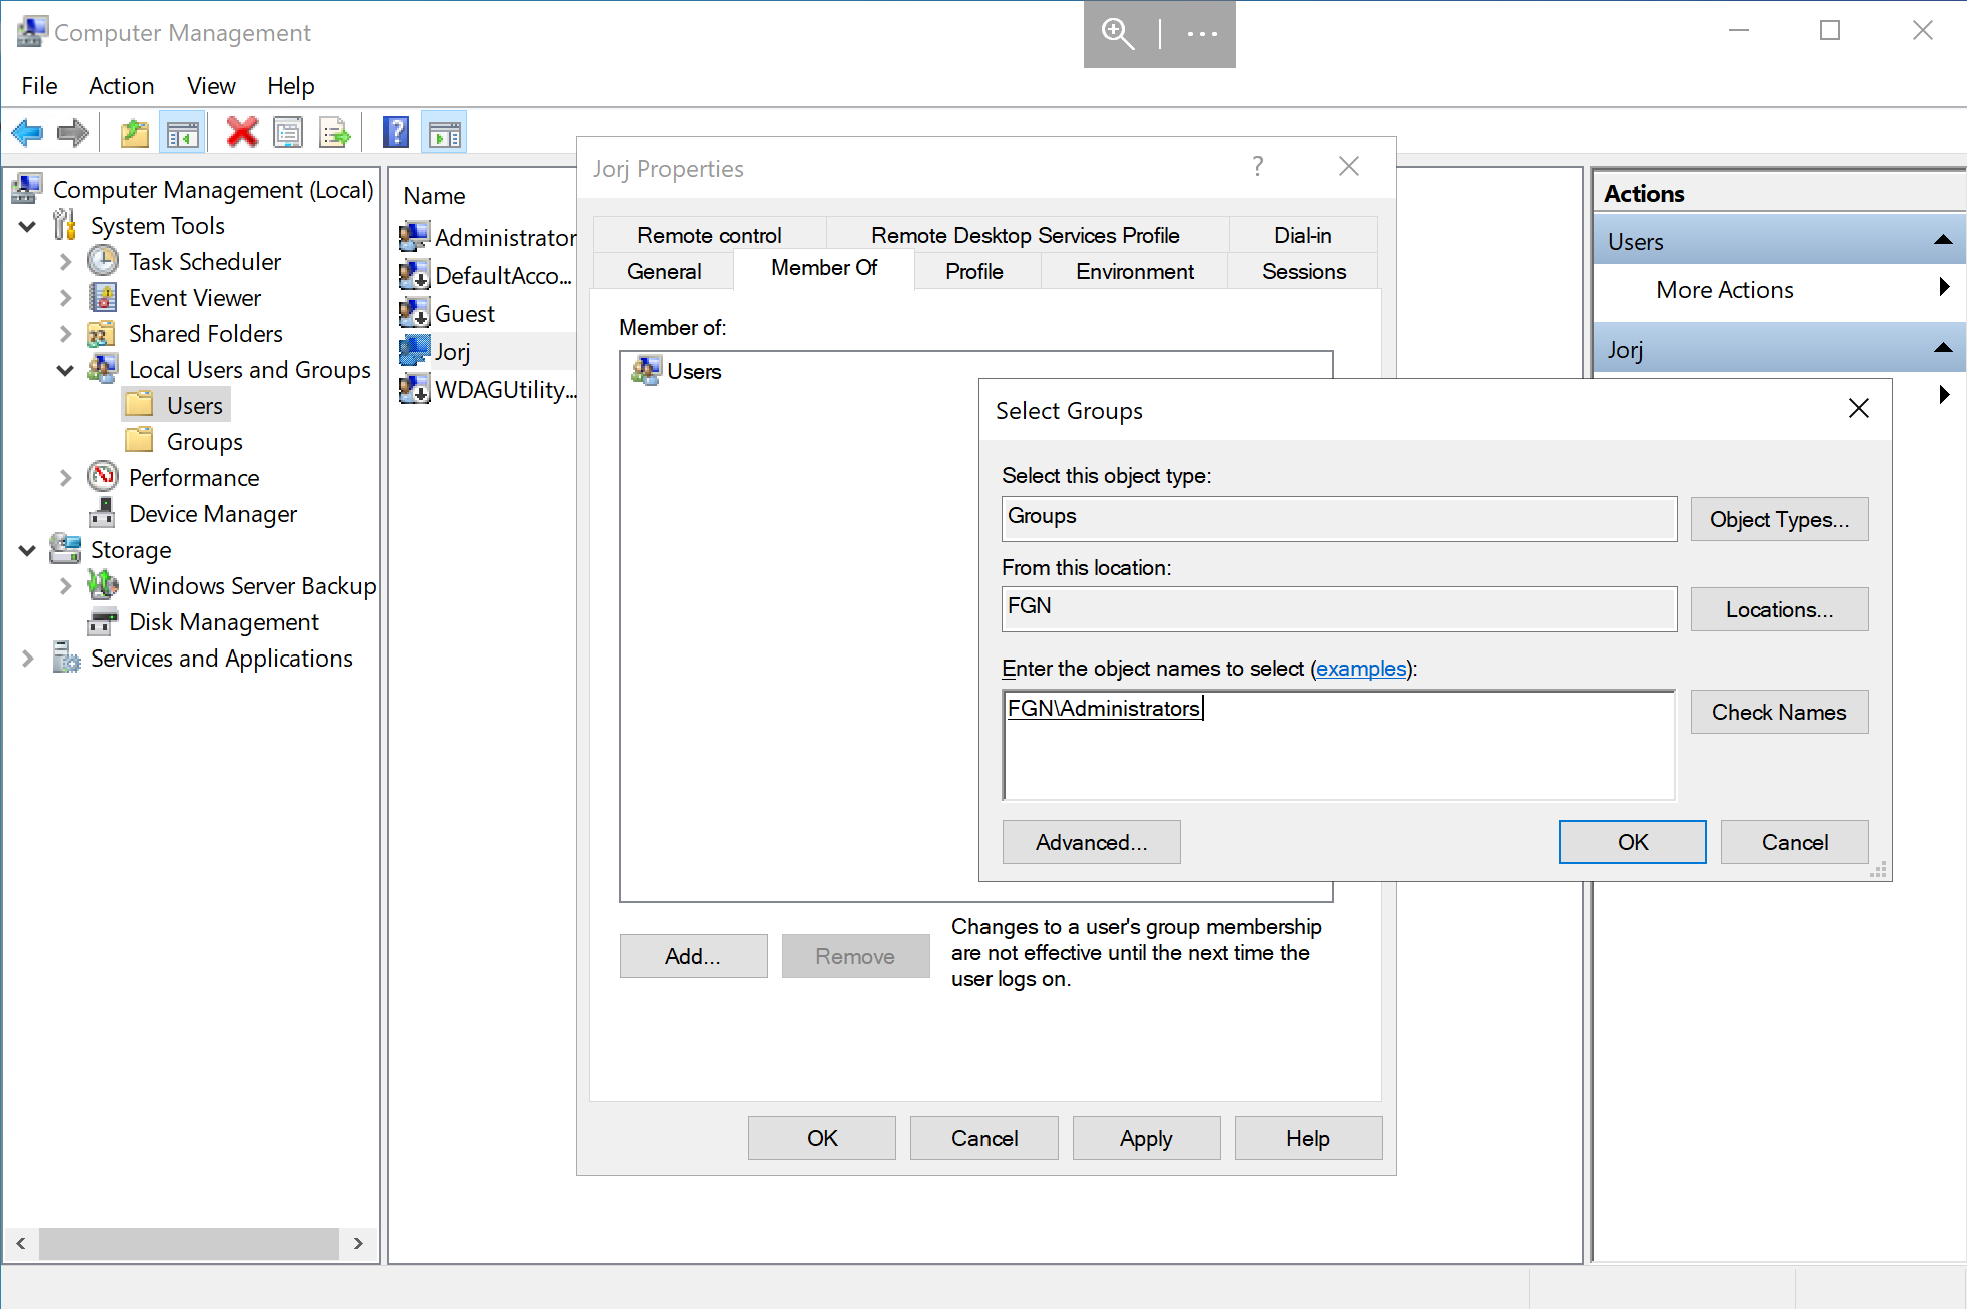
Alright, we can see them. But now, we don't indicate any privileges and settings. Let's fix that, click on the Jorj by the right mouse button and at the menu click on the Properties:

Other field we don't touch, due to reason - another functionality! At the new window, you will see bunch of information, don't scared. Look at the tabs above and choose Member Of. Click on the button add below and enter row Administrators. Check name and wait result, you will see screen like that:
Press OK at each window, and now you can login into the system, by your new credentials.
Conclusion
Adding new user accounts on Windows Server is a fundamental task for managing access, security, and collaboration within an organization or home environment. By creating separate accounts with appropriate permissions, you ensure that users can work independently without risking unauthorized access to sensitive data. This guide has shown how to efficiently add and configure user accounts using the built-in Computer Management utility, making it simple to maintain a secure and organized system. Following these best practices helps keep your server environment safe and your users productive.
FAQ
- Q: Can I create a user without administrator privileges?
A: Yes, by default, new users have standard user privileges. You can assign or remove administrative rights later through the “Member Of” tab in the user’s properties. - Q: How do I reset a user password if they forget it?
A: You can reset a user’s password by right-clicking the user account in Computer Management, selecting “Set Password,” and entering a new one. - Q: Can I create users remotely on a Windows Server?
A: Yes, if you have the necessary administrative privileges and remote management tools enabled, you can manage users remotely via Remote Desktop or PowerShell. - Q: Is it possible to automate user creation in Windows Server?
A: Absolutely. You can use PowerShell scripts or group policies to automate the creation and configuration of multiple users. - Q: Why shouldn’t I share the administrator password among users?
A: Sharing the administrator password increases security risks and makes it difficult to track changes or actions taken by individual users. It’s best practice to create individual accounts with tailored permissions.


