To protect information there are many different protection systems, one of the subsystems of protection is cryptographic means. VPN network technologies, operating system loaders with encryption function, electronic digital signature, encryption programmes for local files on the device. All of them are united by the use of various cryptosystems based on mathematical algorithms.
Cryptosystem is a model containing a set of cryptographic algorithms, which has the ability to perform two-way conversion in order to preserve confidentiality, integrity and availability of data.
Let's consider one of the standards of the OpenPGP cryptosystem!
What is PGP for?
PGP or Pretty Good Privacy is a software implementation of the OpenPGP cryptosystem that contains a set of cryptographic algorithms. It is distributed under a commercial licence and is available for purchase, the free alternative is GPG or GNU Privacy Guard! It is based on the same cryptosystem, to install the packages we write the commands:
apt update && apt upgrade -y apt install gnupg -y 
Before we start a test machine, which we can do on Serverspace cloud platform which will help in easy deployment, also you can skip this step if you have a cloud server. To create the node we need to find the cloud platform from the left menu which you can choose depending on your requirement. We choose vStack or VMware platform and click on Create Server button.
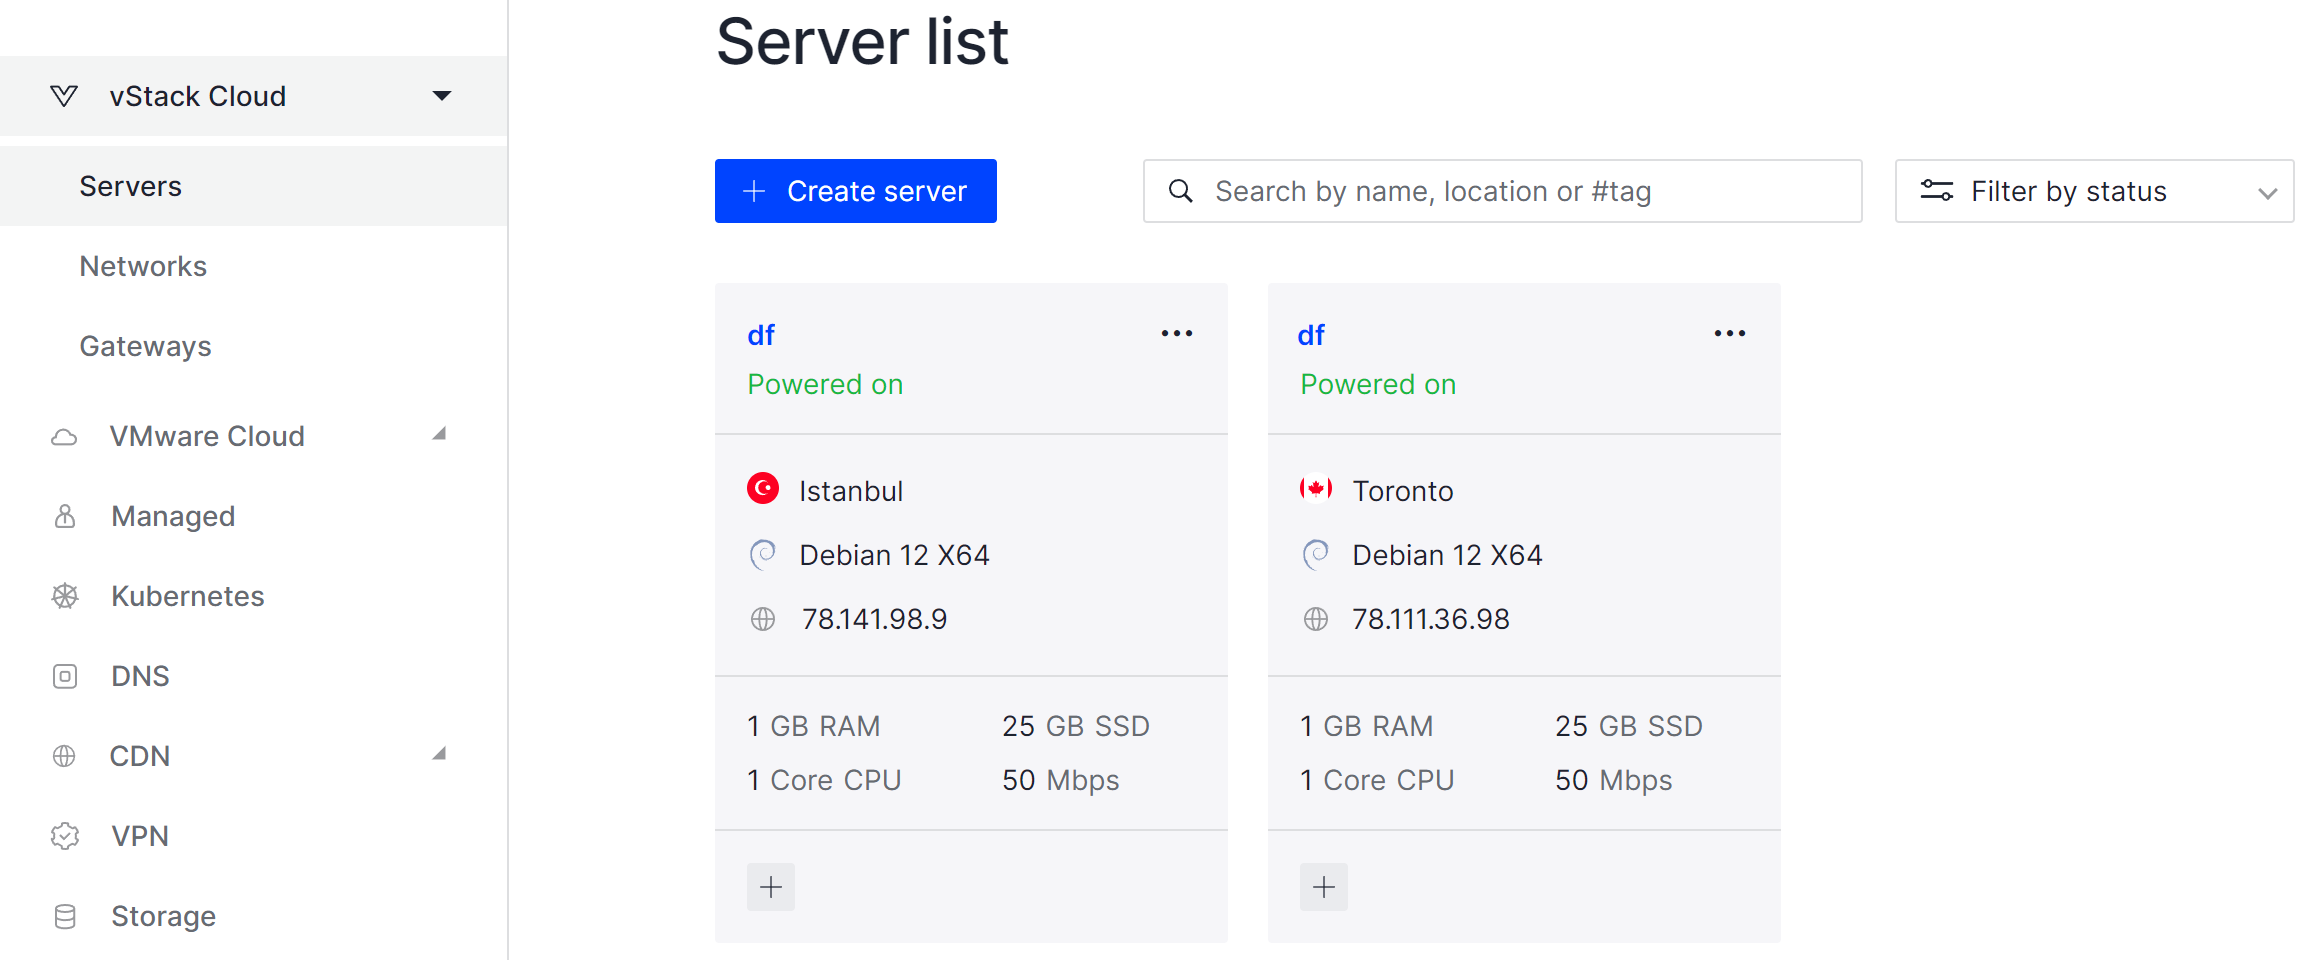
It will take some time to deploy server capacity. After that you can connect in any of the convenient ways. Let's return to our terminal with the utility already installed, to familiarise ourselves with the syntax we will write the command:
gpg -h 
As you can see, the list of options is quite extensive. Therefore, let's focus on the main options and functions of the command, which may be needed in the course of performing basic actions.
Creating gpg keys
For secure and efficient key management, a keyring mechanism or literally a keychain is used. It is a database that stores public, private, and trusted keys. This centralisation mechanism allows you to control access to keys based on a password that is set by the user. Therefore, the entire confidentiality of the processes depends on the complexity of the password that is set by the user. It is desirable to choose
In GPG (GNU Privacy Guard), each key can have several components that define its function. These components are represented in brackets in the output of the command gpg --list-keys or gpg --list-secret-keys.
But from the beginning we will not see any keys, as the database is empty, let's create keys! There are two ways to encrypt information: using symmetric and asymmetric algorithms, which create different key pairs! To create keys using the asymmetric algorithm, you need to write the command:
gpg --full-generate-key --expert 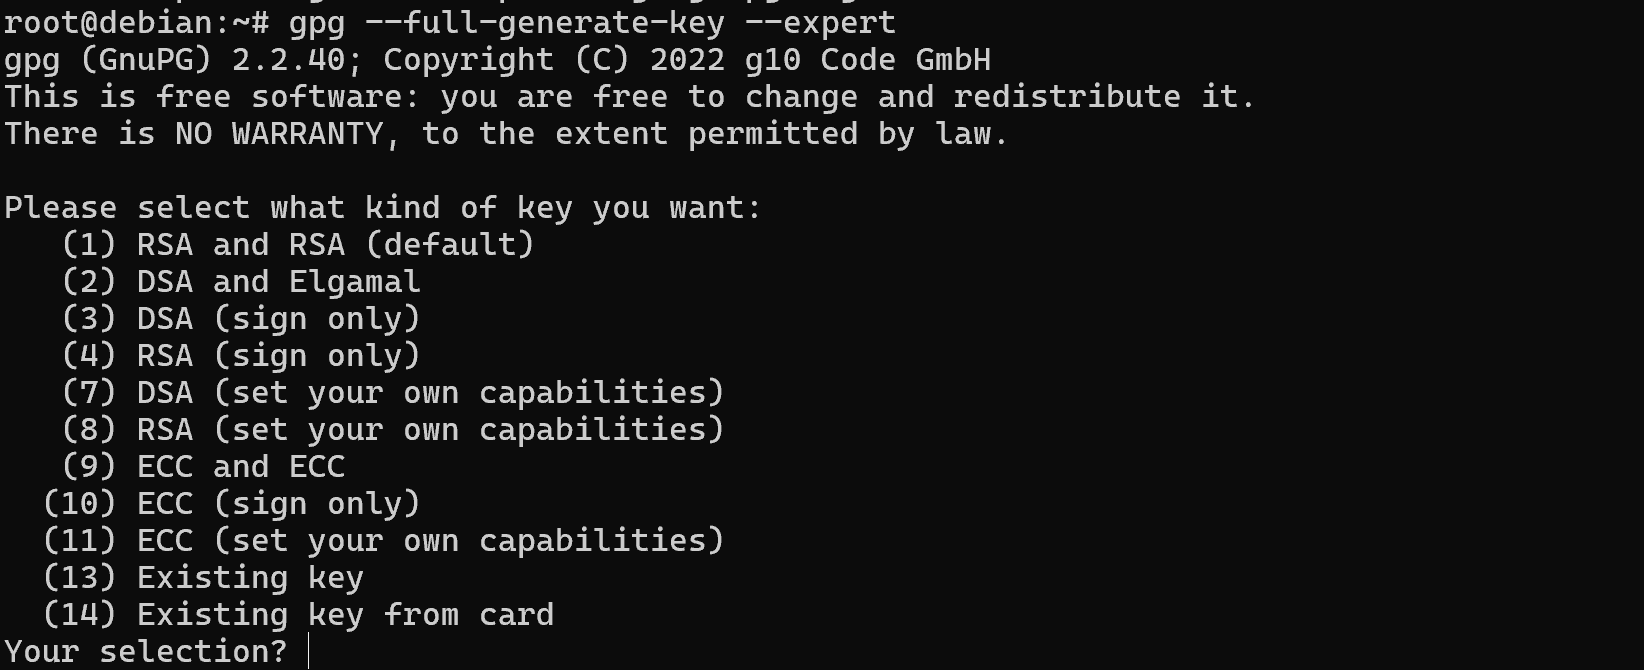
This combination of options --full-generate-key --expert will open the full list of settings when creating a key. The screenshot shows encryption and electronic signature algorithms, choose the one that suits your needs.
Please note that options 3,4 and 10 are for digital signature only! Note that you are selecting a pair of algorithms, where the first algorithm is for encryption and the second for signing.
Let's choose a default set of RSA keys and continue with their configuration:
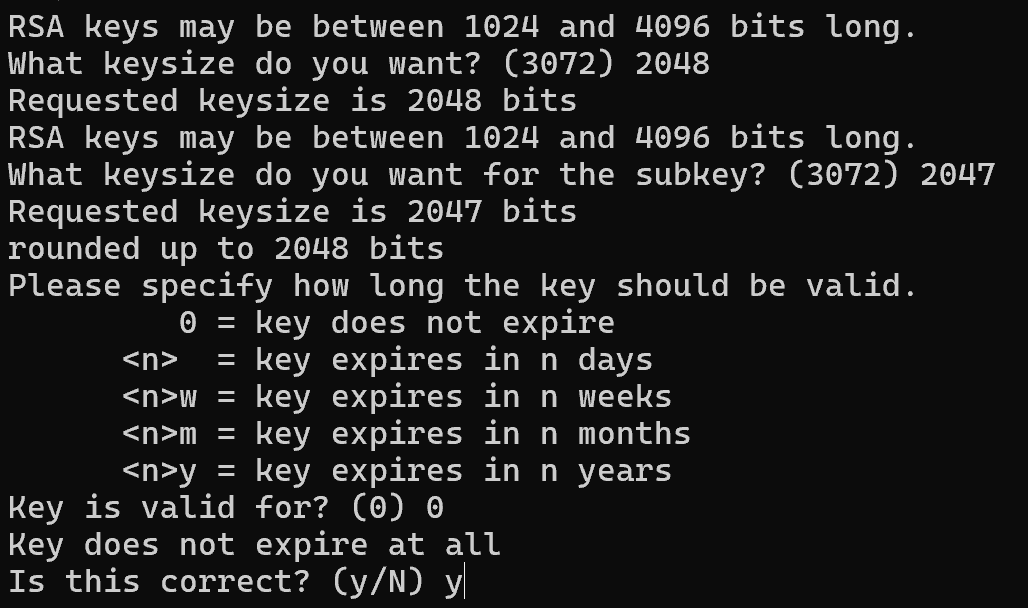
Now let's choose the length of the key, the size of which determines the cryptographic strength or the indicator that the length of the key will not allow using current technologies to quickly search its value and decrypt the data. Accordingly, the longer the key, the lower the probability of data confidentiality disclosure! The minimum threshold is considered to be 2048 symbols, which we will specify, but it is possible and more up to 3072. Then it is necessary to select the validity period of the key, counting from the date of its creation, for the test we will specify indefinite validity by specifying 0.
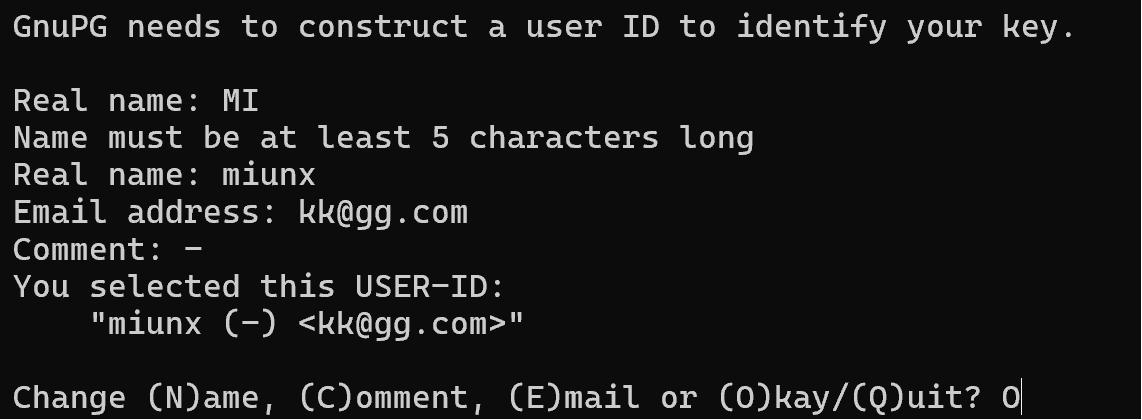
In order to identify the key, you must specify the listed parameters for the user. If you are creating a key for a user so that he can read messages encrypted for him, specify his details. You must then confirm or make changes to the configuration of the key you are creating. Select O to continue.
At the moment of key creation, you can move the mouse, enter random values, so that the pseudo-random sequence generator will generate a key with more entropy or randomness. The lines revocation certificate stored as indicate a revocation certificate that can revoke your public key, but it will still remain in the users system but will not be used.
To create your own revocation certificate, use the command:
gpg --gen-revoke <key_id> > revcert.asc In <key-id> specify your key id, then a revcert.asc certificate will be created which will mark your old key as revoked. Let's go back to the screenshot with the key generation, where it is indicated that the public and secret keys have been created, in our case there are 4 keys. Two for encryption and two for digital signature. Let's analyse the line below:
- pub - means public key and is used for signing;
- sub - means sub public key and is used for encryption;
- sec - means a secret key and is used for signing;
- ssb - means under the secret key and used for encryption;
And also next to them we can see encryption algorithm rsa2048, hash key A8.....EDB9, creation date 2024-03-01, and also parameters for the purpose of their use:
- S (Signing): This component of the key allows it to be used to create electronic signatures. An electronic signature can be attached to a message to confirm its authorship and integrity.
- C (Certification - Key Signature): This component indicates that a key can be used to sign other keys. This is used in the process of building a trust network when a user trusts another user's key.
- E (Encryption): This component allows the key to be used to encrypt messages for the recipient. It is used to ensure confidentiality of messages.
- A (Authentication): This component can be used to authenticate the user. It is commonly used in other protocols such as SSH (Secure Shell) to authenticate the user.
Once we have decided on the key metadata and its purpose let's move on to encrypting and securely transmitting or storing the data!
GPG encryption
The main purpose of encryption is to preserve the confidentiality, integrity and in some cases the authenticity of the transmitted data. To create a ciphertext or encrypted message, use the command:
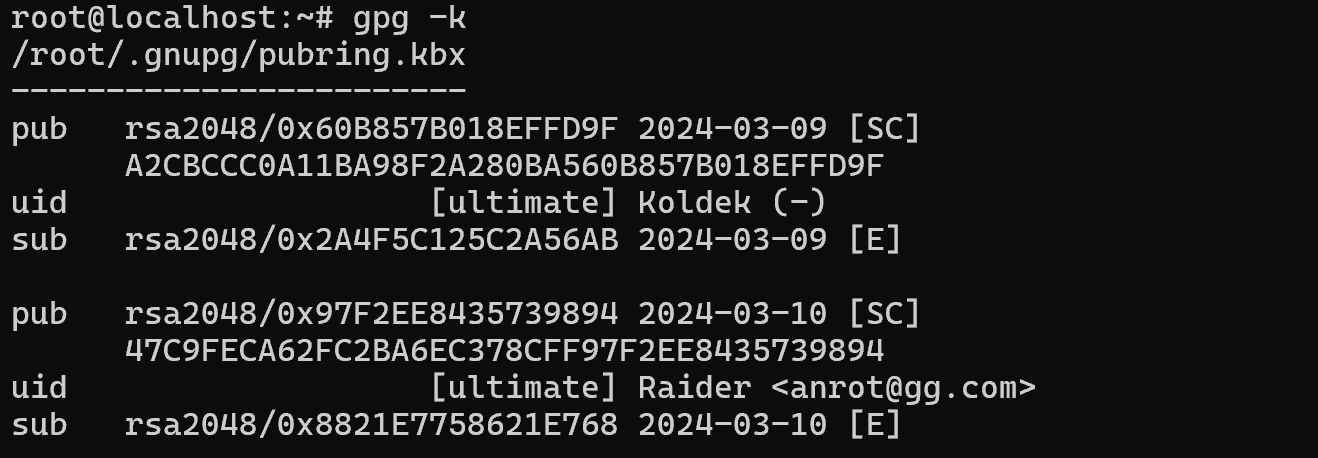
gpg -k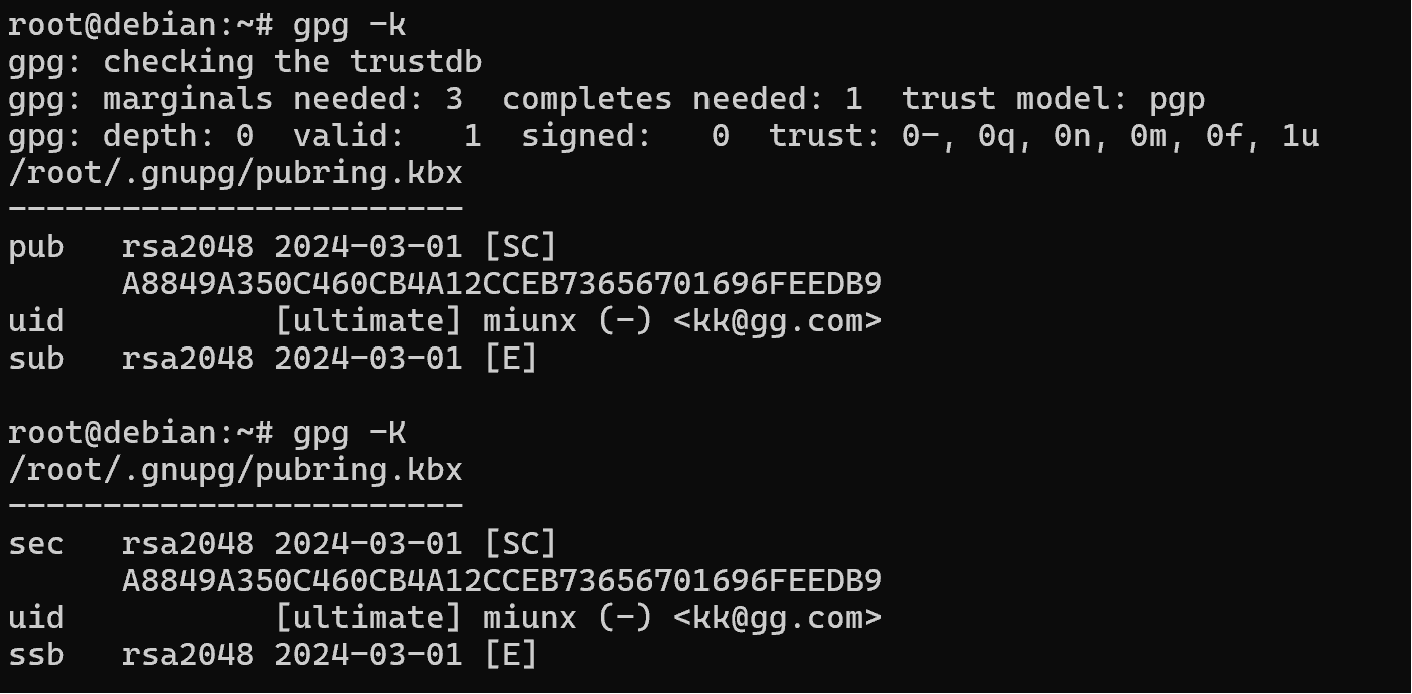
To view the id of the key owner, in our case it will be Koldek, who we will specify next:
gpg -r <key-id> -a -e target.txt > target.txt.asc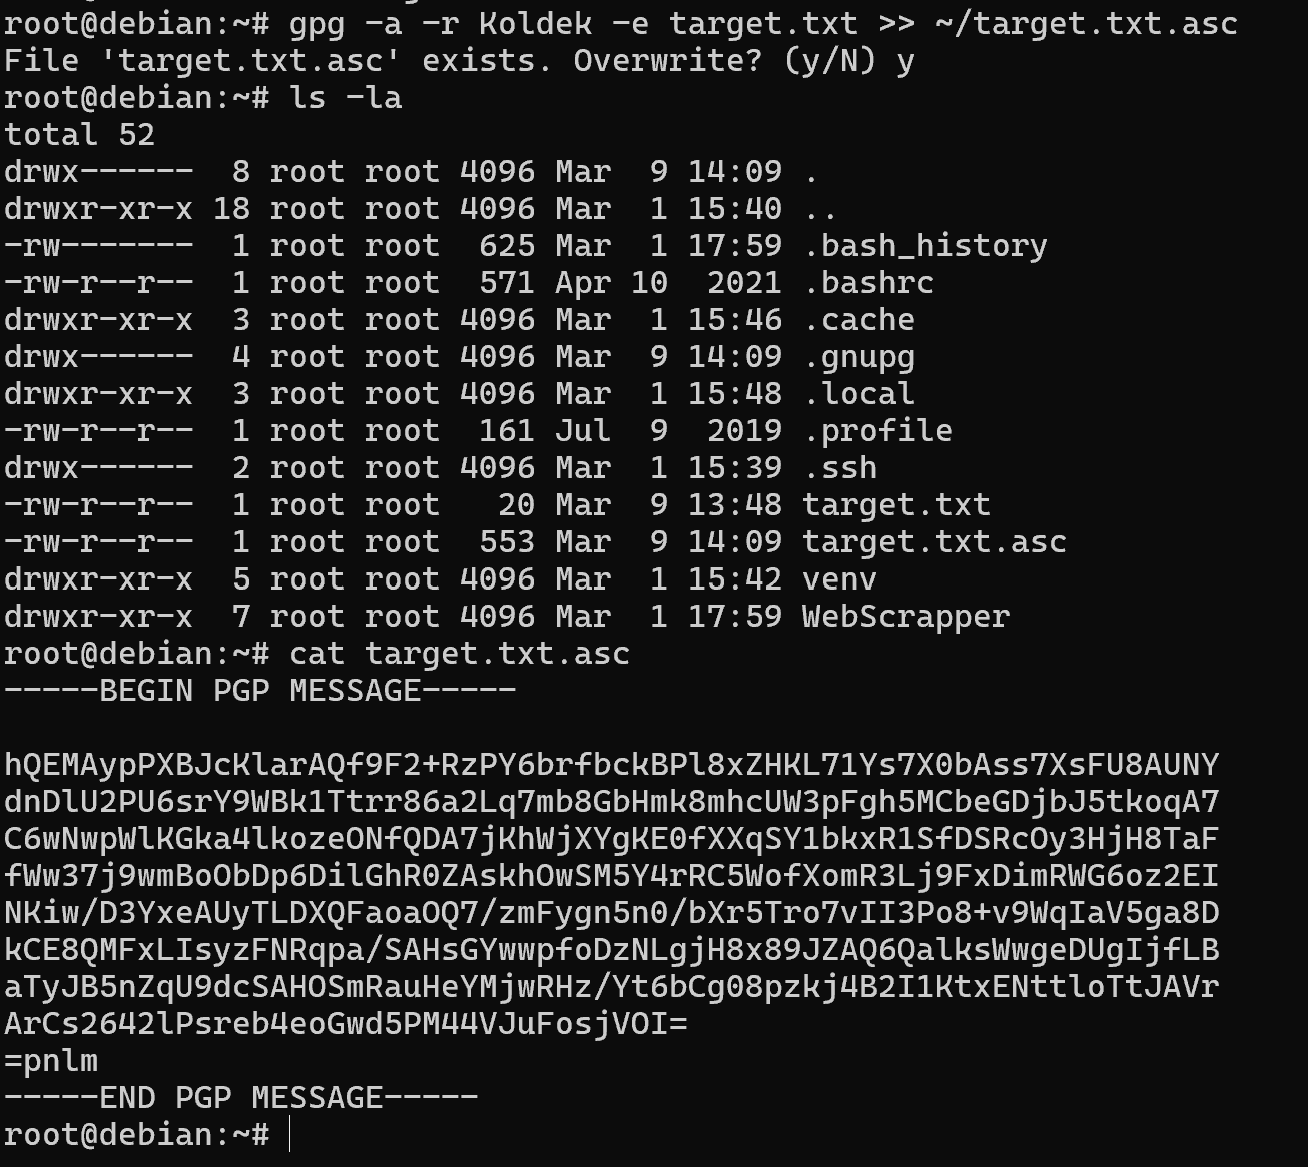
In this case, we specify the key we will use to encrypt the message, the -a parameter will encode the ciphertext in ASCII instead of binary GPG and will allow transmission through many means of communication! The -e parameter indicates encryption with asymmetric algorithm and the standard STDOUT output will be redirected by file descriptor to target.txt.asc. Accordingly, the encrypted message with its metadata will be stored in this file.
How to view the gpg key? Next, the cat command displays the contents of the target.txt.asc file, which allows us to view the encrypted message! Now we need to pass the ciphertext and the public key to the recipient. If the encrypted message can be transmitted in any convenient way, the key must be publicly posted and must be trusted by the users or the recipient. Either through a third party - a certification centre, or from the company itself, the key on the site and hope for a TLS connection.
Key export and gpg decryption
Export the public key:
gpg -r <key-id> -a --export > key.asc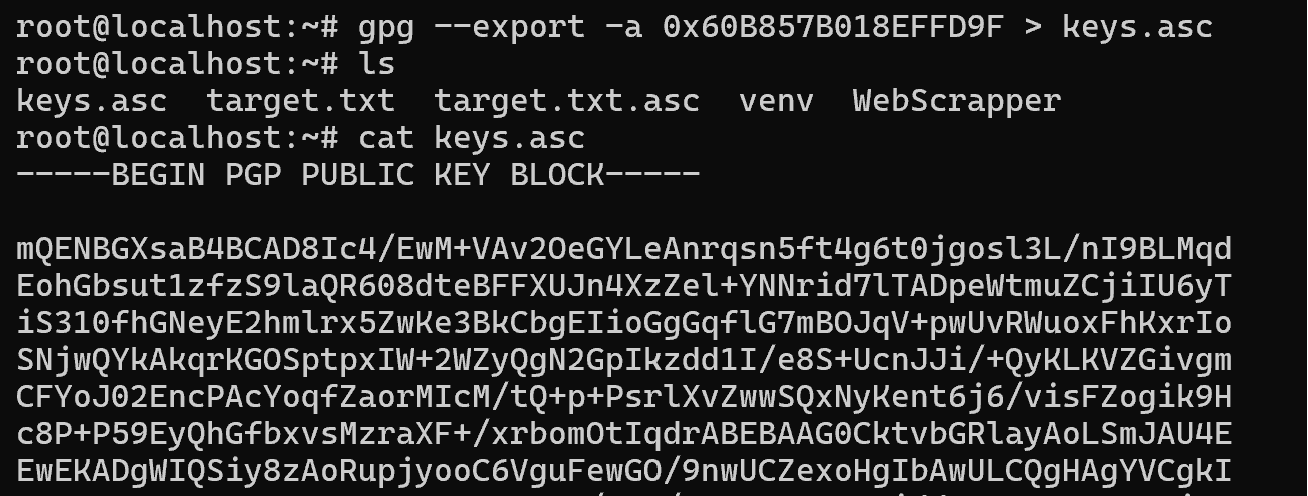
Import the key and decrypt the ciphertext on the user's machine using the commands:
gpg --import key.asc gpg -r Kolded -d target.txt.asc Eventually we should see the decrypted text:

You may have noticed different lines from yours in the output, such as anonymous recipient. What does it mean that there is no metadata about the user in the file, how can I adjust this?
Configuration of gpg
In order that our recipient will not be harmed when intercepting the metadata of the message, we will specify in the settings the prohibition to add comments from UID and remove the hash key:
 echo "keyid-format 0xlong

throw-keyids

no-emit-version

no-comments" > ~/.gnupg/gpg.conf
This command will overwrite the file, if you have your own settings, then use >> file descriptor which will allow for additional writing rather than overwriting.
PGP (Pretty Good Privacy) is a program and library of functions that provides encryption and digital signing of email, files, discs and other data. PGP uses symmetric and asymmetric encryption algorithms, ensuring high confidentiality and integrity of information. It is used to protect sensitive information, authenticate users and ensure unbreakability. PGP is an essential information security tool available to all levels of users.


