Introduction
The purpose of SSH tunneling is to provide secure data transfer between systems over untrusted or public networks such as the Internet. SSH tunnels create encrypted communication channels that safely forward traffic between internal and external networks.
Common use cases for SSH tunneling include:
- Secure port forwarding — forwarding local or remote ports through an encrypted SSH connection;
- Traffic protection — encrypting transmitted data to prevent interception;
- Bypassing network restrictions — accessing services blocked by firewalls or network policies;
- Secure proxy access — creating a SOCKS proxy for anonymous and encrypted browsing.
Overall, SSH tunneling is a versatile technique for securing data transmission and remote access in restricted or insecure network environments.

Requirements
- Root rights;
- Debian 11 or higher version;
- Several knowledge about work OS ;
- Internet connection.
Preparing the System for SSH Tunneling
For the securely transfer we think more complex about our guard system and we need to update, upgrade all packages before using utility:
apt update && apt upgrade -yUpdating the system ensures the latest security patches and SSH components are installed.

For making tunnel via SSH we need to form public and private key, that help to authorize user more securely and automate process. We will run command ssh-keygen:
ssh-keygen -t rsa
In that part choose path to save public and private keys to connection via SSH, by the default settings they will save in /root/.ssh/ folder. Then enter passphrase if you want make way more complicated to compromises private key:
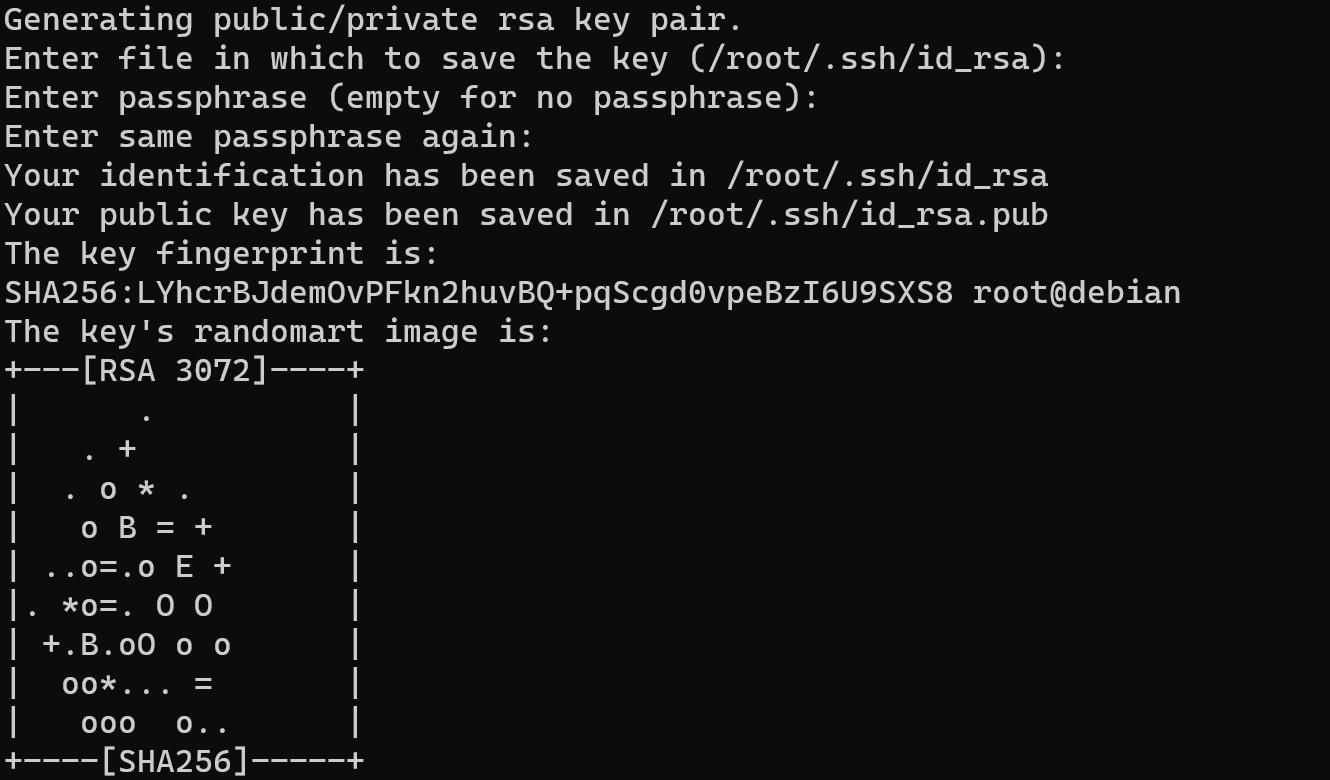
Also you can see fingerprint as result of hashing your public key, that can help to identify your personality and rights to having that one. But the main purpose of hashing public keys in the context of SSH is the convenience and efficiency of key authentication. After the hash of the client's public key is stored on the server, the server can quickly and efficiently compare the hash with hashes that are already stored in its database. Although hashing public keys does not provide additional security in the sense that it does not make keys secret (public keys must always remain public), it provides protection against accidental or malicious key changes or copying errors.
After that you need to copy your public key and save into the target server via command bellow
nano /root/.ssh/id_rsa.pubAfter you enter command you will see long line with different symbols, in nano text editor you need to press Alt + 6 and then press combination of button Ctrl + X!

Change windows of terminal and past file into the needed directory by the default setting it's /home/user/.ssh/id_rsa.pub on the target machine or usually for that purposes we can send right through to the target server via command bellow:
ssh-copy-id root@94.141.96.47In that command you need to replace IP-address yours target machine and add public key. In that moment that server will compare his base of hash keys and your hash of public key. In our situation we don't add file to the server and connect at the first time:
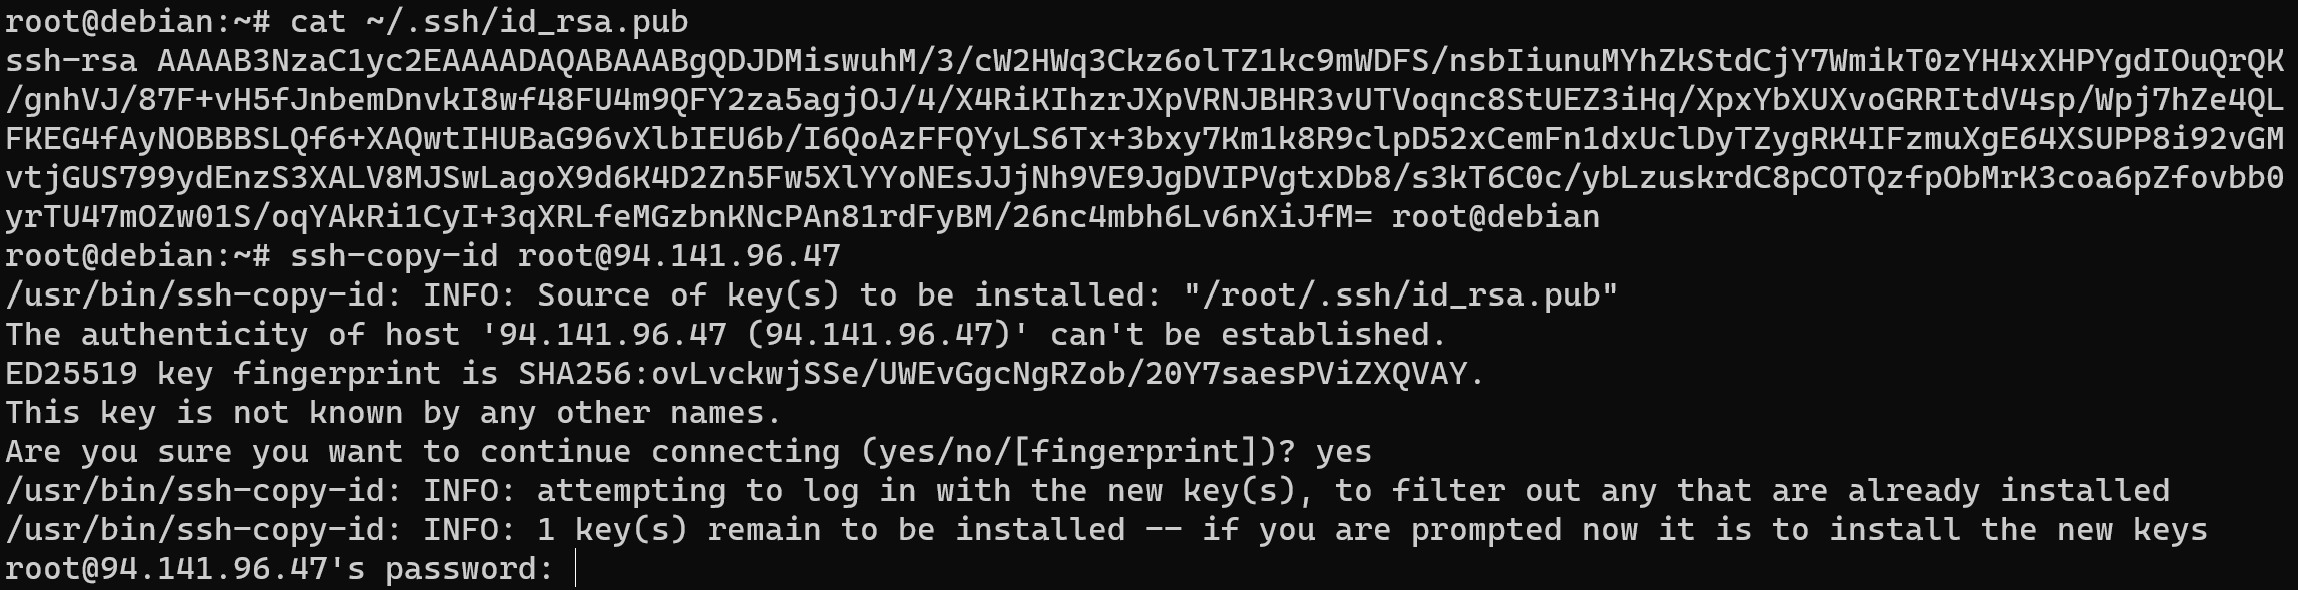
For confirmation that you have permission add key to that account - type accordance credential.

No we have seen added key to our server, therefore next process of authentification will be easy: we need to type credentials as we consider before and target will check hash, reliability bundle of public and private keys.
Change SSH port
Changing the default SSH port from 22 to a non-standard port is a straightforward yet effective practice to bolster security and protect against automated scanning and brute-force attacks. It enhances the organization's security posture by deterring opportunistic attackers and reducing log clutter. Although it is not a standalone security solution, changing the SSH port serves as a proactive measure that contributes to a comprehensive security strategy, promoting a safer and more resilient computing environment. For that open configuration file on your machine:
nano /etc/ssh/sshd_config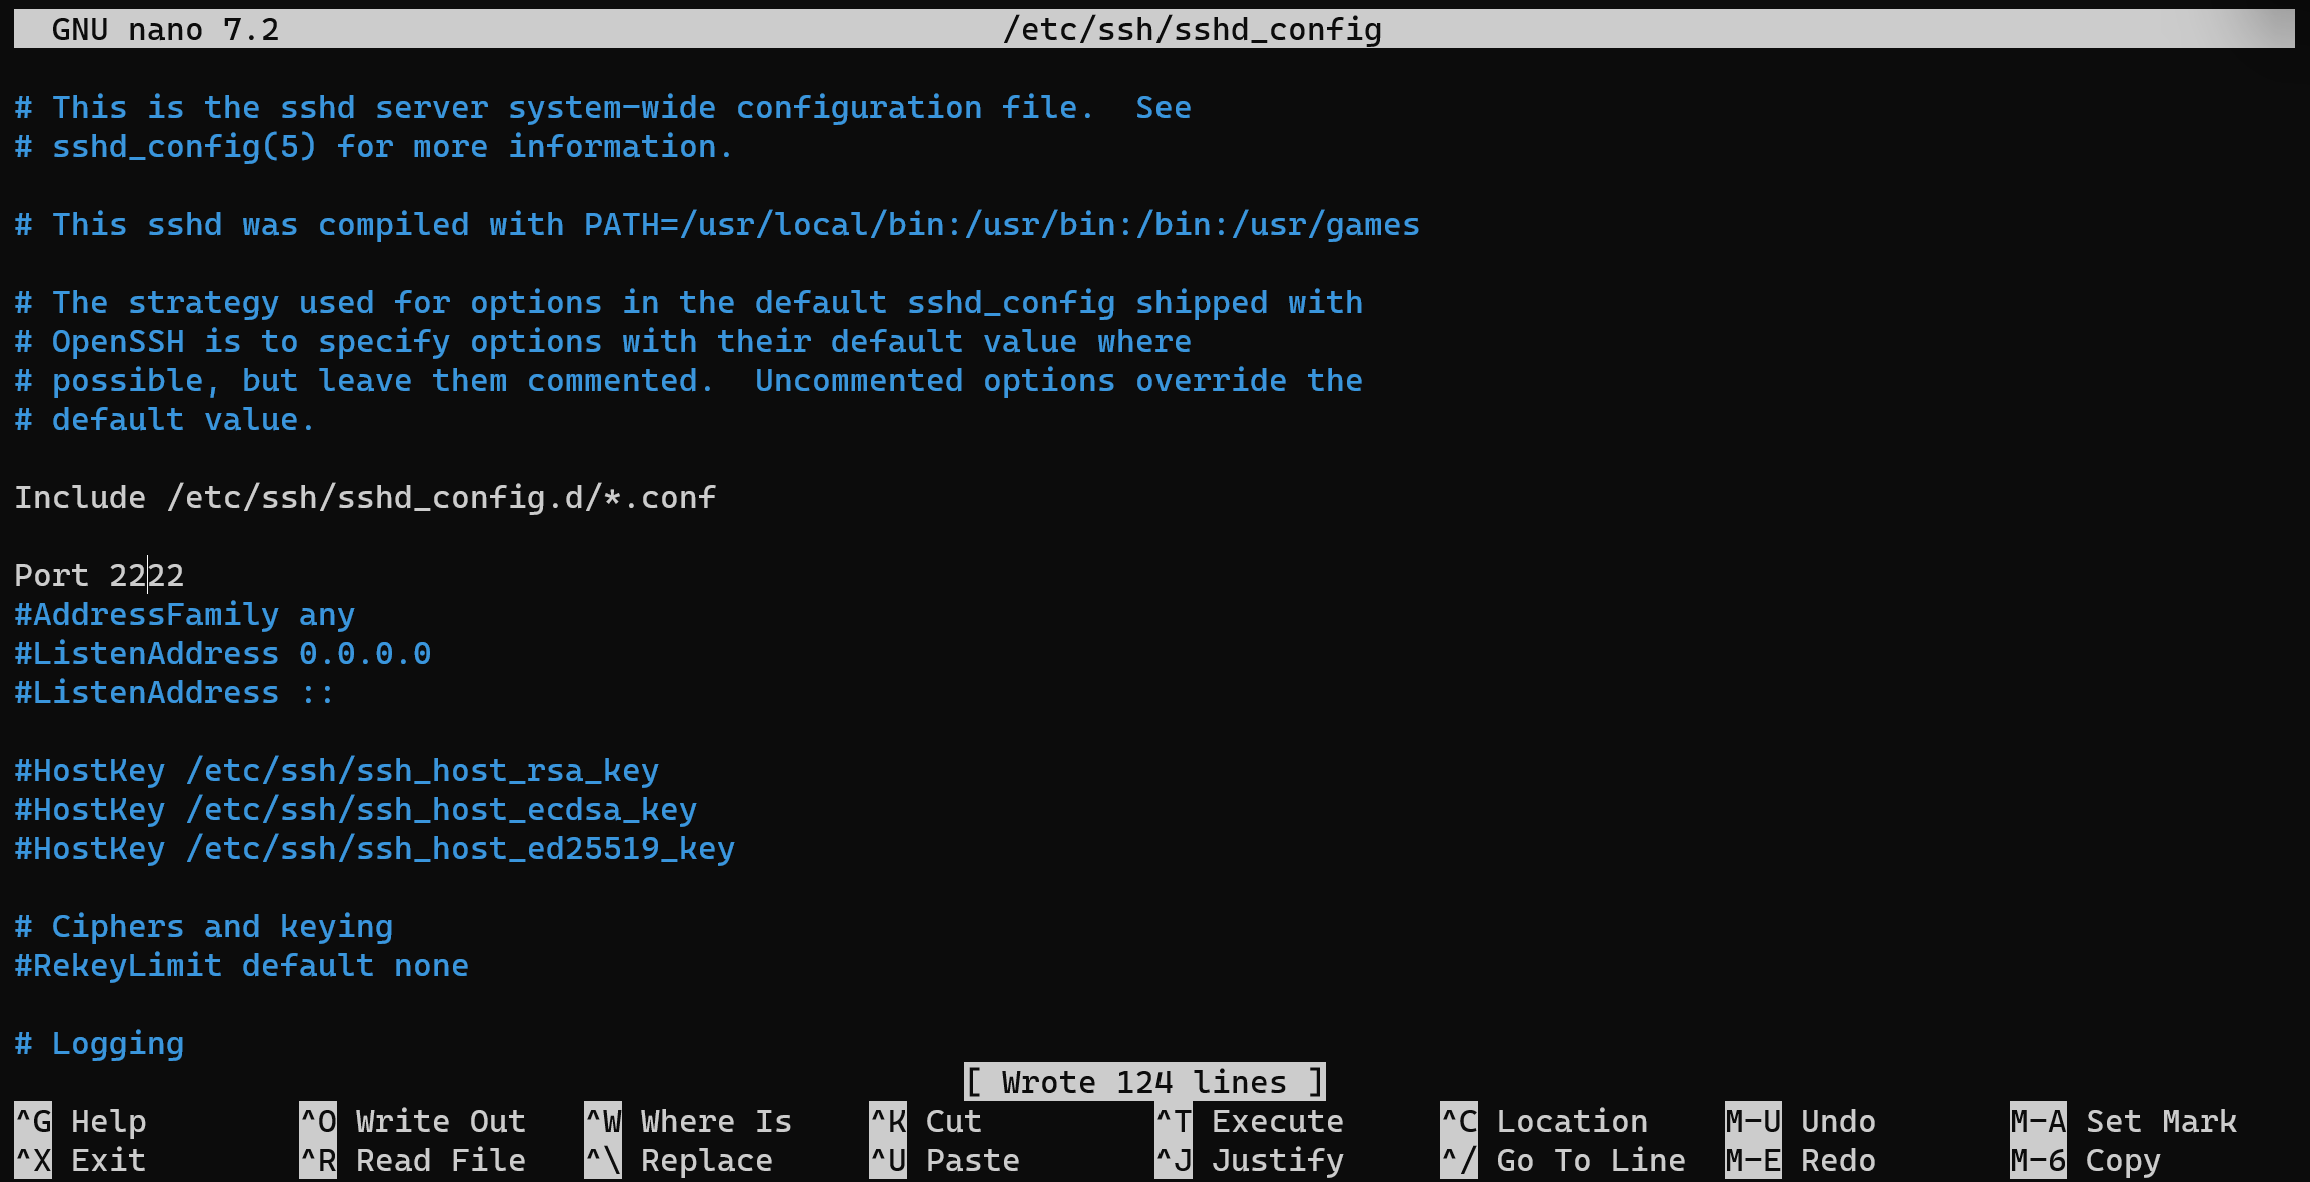
In opened window delete hashtag infront of Port and change value for your preferred. After that press Ctrl+O for save file and restart ssh service via command below:
systemctl restart sshNow you port for SSH was modified and you can use it for setup connection!
Usage of SSH tunnel
Except control and transfer data to another machine with tunneling we can use it for redirect traffic and represent our tunnel as proxy server.
SSH port forwarding allows users to securely access services running on a remote server, even if they are not directly exposed to the internet. Through SSH tunneling, services such as web applications, databases, or remote desktops can be forwarded to a local machine, enabling efficient management and administration of remote systems. For that purposes type command:
ssh -L 9999:127.0.0.1:80 root@94.141.96.47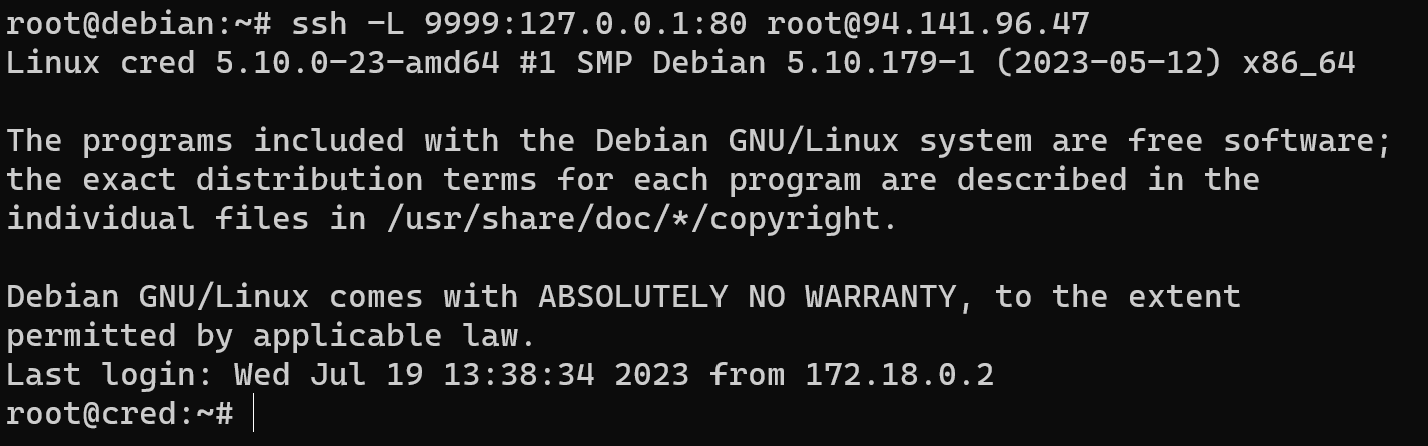
Besides a detailed explanation:
- When you execute the specified command, it initiates an SSH connection to the remote server on behalf of the user. Once the connection is established, your local machine starts listening on port 9999;
- Whenever a request is made to port 9999 on your local machine, SSH redirects that traffic through the established SSH connection to the remote server. The remote server then redirects the traffic to port 80, which is typically used for HTTP servers;
- So, when you access "127.0.0.1:9999" (localhost:9999) on your local machine, the traffic is actually forwarded to the remote server and connects to its port 80. This functionality becomes beneficial when you need to access a web server on the remote machine that is not directly reachable from the internet but can be accessed via the SSH tunnel.
By setting up a dynamic SSH tunnel and configuring it as a SOCKS proxy server, we can efficiently route network traffic from our local machine through the remote server. This enables any application or service on the local machine that supports SOCKS proxy settings to utilize the tunnel as its proxy server. To achieve this, you can use the specified command:
ssh -D 8888 root@94.141.96.47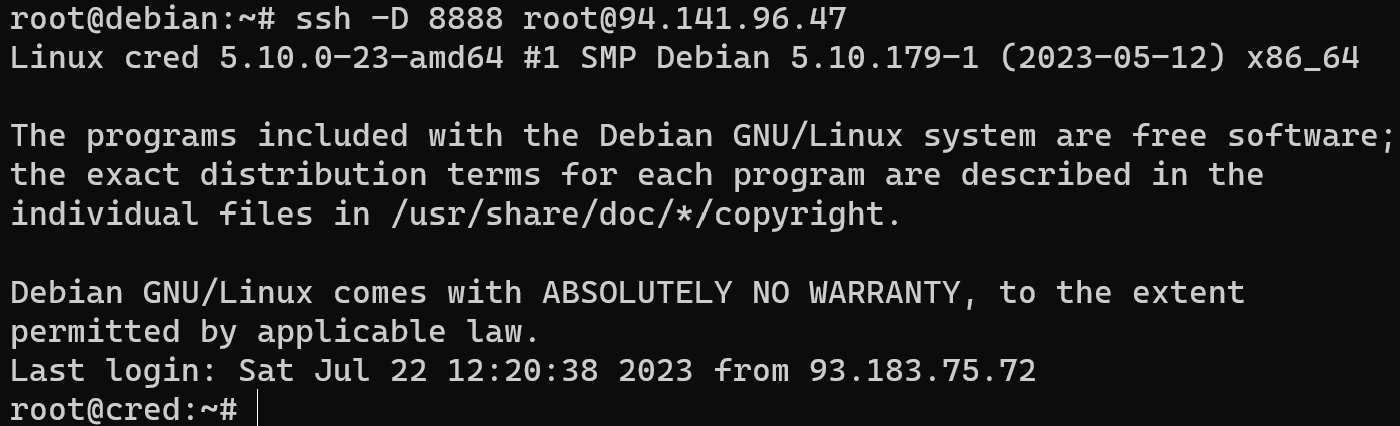
When you execute the specified command, it initiates an SSH connection to the remote server on your behalf. Once the connection is established, your local machine sets up a listening port, which in this case is port 8888.
Unlike local port forwarding that we discussed earlier (using the -L option), dynamic port forwarding (using the -D option) creates a SOCKS proxy server directly on your local machine. When an application on your local machine attempts to access the internet, it can use this SOCKS proxy server by configuring it to connect through localhost:8888.
As a result, all network traffic from your local machine will be redirected through the established SSH connection to the remote server. The remote server will then handle the outgoing traffic and forward it to its final destination on the internet.
This dynamic port forwarding technique provides your applications with a secure and encrypted internet connection via the remote server. It can be particularly useful when certain internet servers or resources are inaccessible due to restrictions or firewalls on your local network. By using dynamic port forwarding, you can bypass these restrictions and access the internet securely through the remote server.
Conclusion
SSH tunneling is a powerful method for securing data transmission and remote access across untrusted networks. By using encrypted tunnels, port forwarding, and proxy capabilities, administrators can protect sensitive data, access internal services securely, and bypass network restrictions when necessary.
Proper use of SSH tunneling significantly improves security, privacy, and flexibility in modern Linux environments.


