An introduction
Squid is famous solution to content delivery. There are many purposes to using it could be. Popular aims are improving privacy, make connection more secure or faster. E.g., you can take this to parse website's content not from your own IP-address. Proxy could be useful to avoid geographical restrictions or research "target" host behavior depended of client location.
Preparing
Before start the process you should ensure you have:
Machine under Ubuntu 20.04, root privileges or sudo group membership for your account. "External" access via FQDN is optional but IP only is possible too.
Service setup
Firstly, please authorize as root and update system package cache
sudo –s

apt-get update
Squid has been included into Ubuntu base repos long time ago, so maintainers made pre-built release of this package and you can install it in “just one click”
apt-get -y install squid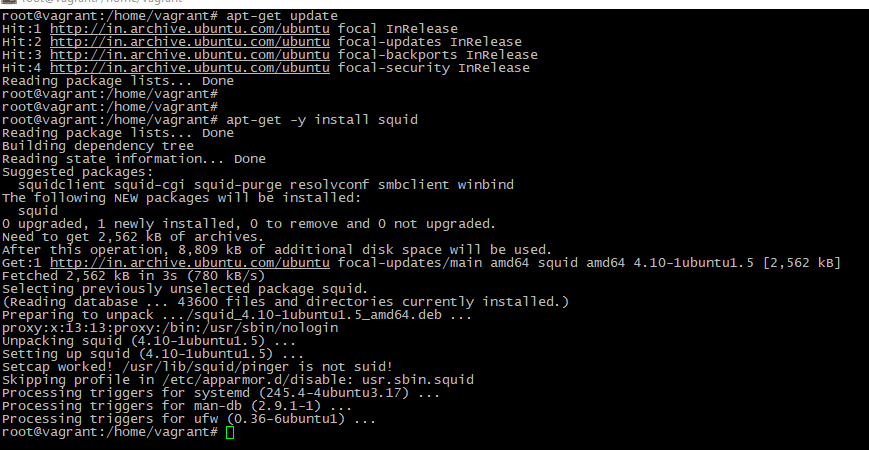
To make a daemon which autostarts every machine reboot just run
systemctl enable squidSettings update
Squid will "read" its service parameters from the file /etc/squid/squid.conf. So, edit it via nano, look for the parameter http_port option and change pre-defined value to the unused port number above 1024
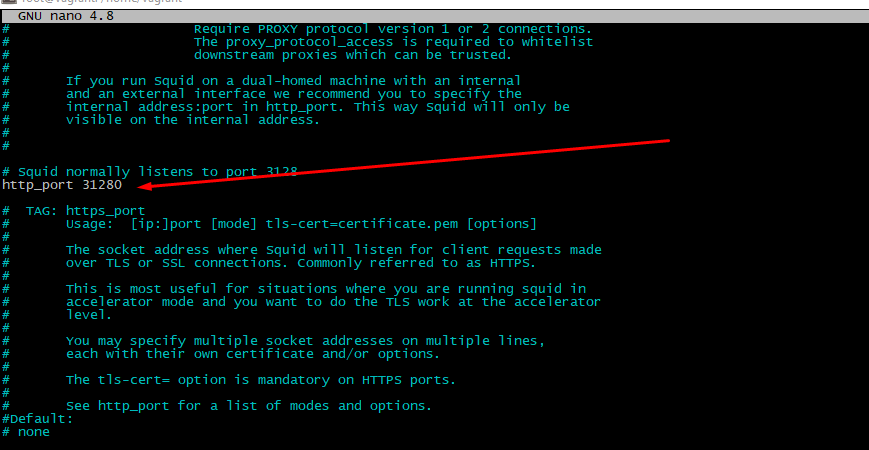
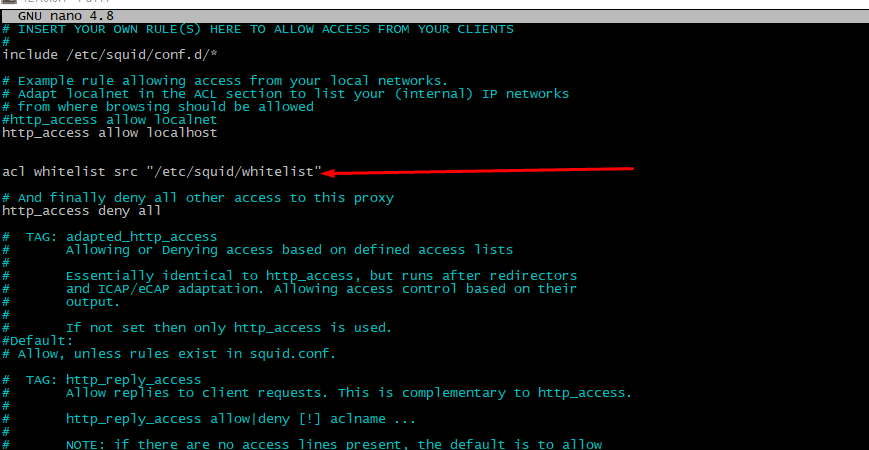
Then find http_access deny all" words. Further doings depend of expected result. To pass everyone access just set this to "allow all". More secure is accept data for some "trusted" IPs only. To include this option put directive acl whitelist src "/etc/squid/whitelist" before "http_access deny all"
Don't forget to pass squid traffic through the system firewall
ufw allowThen put your IP-address to the /etc/squid/whitelist file and reload the service
curl ifconfig.me >> /etc/squid/whitelist

service squid restart
Integrate user authorization
Most proxy services from one hand, and much clients applications (like web-browsers e.g.) from other hand, supports authorization mechanism today. It could be tokens or dedicated auth-servers, but mostly used it is simple login-password dual. There is possible to create this via internal operation system functional. Just make a file with name /etc/squid/pswds and "show it" to the proxy service.
First step is necessary tools installation
apt-get install apache2-utils -yThen is time to do access credentials. Type in terminal
htpasswd -c /etc/squid/pswds <user>Utility will ask user about password. Create and remember, then type it twice.
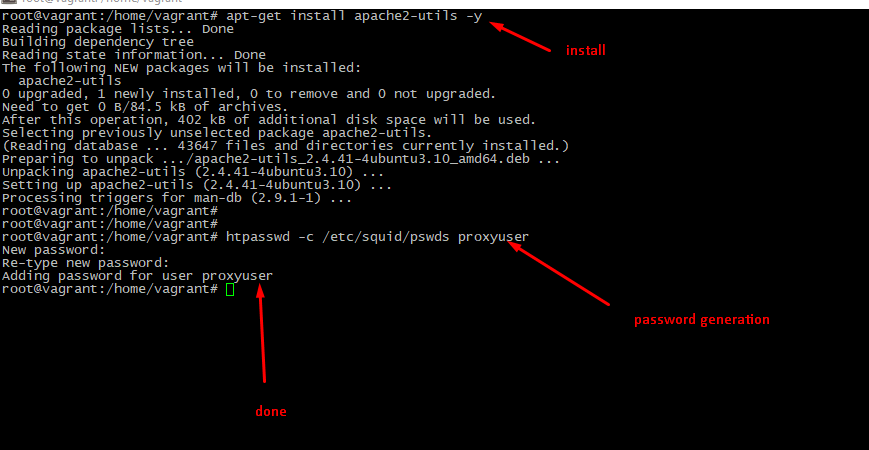
Next step is "integrate" this security mechanism with squid daemon. Edit config file again, uncomment (or create if it's not exist) these rows:
auth_param basic program /usr/lib/squid3/basic_ncsa_auth /etc/squid/pswds

auth_param basic realm proxy

acl authenticated proxy_auth REQUIRED

http_access allow authenticated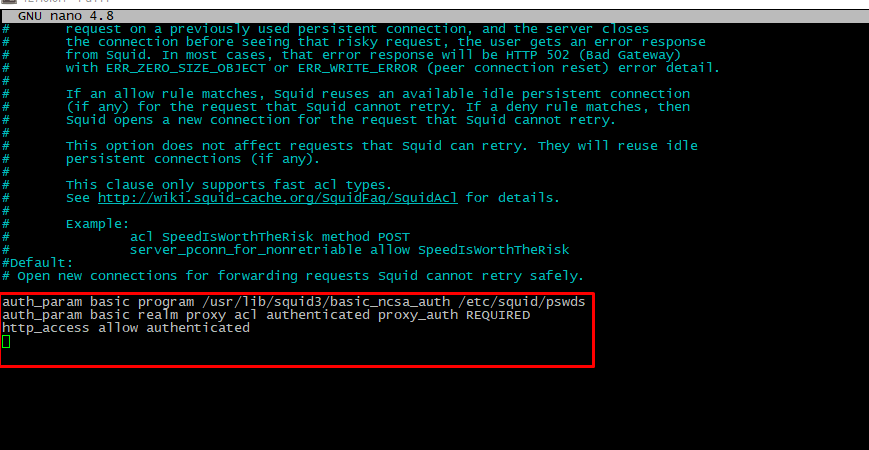
Remember, system will "read" configuration file "from top to the bottom", so this options must be placed before "http_access deny all" directive. Please restart service when finish editing
service squid restartFinal testing
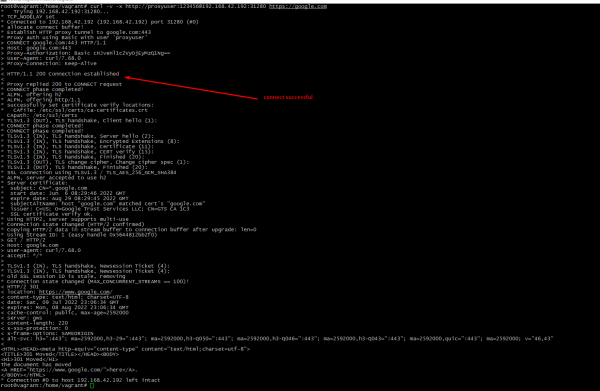
The fastest method to test is curl utility. Run it:
curl -v -x http://<username>:<password>@<IP-address>:<port> https://google.com
Client setup
If previous step is successful, we're ready to setup "user-friendly" client. Very popular case is using proxy in browser. My favorite browser is Chrome. To "teach" it how to work passthrough the proxy please do follow:
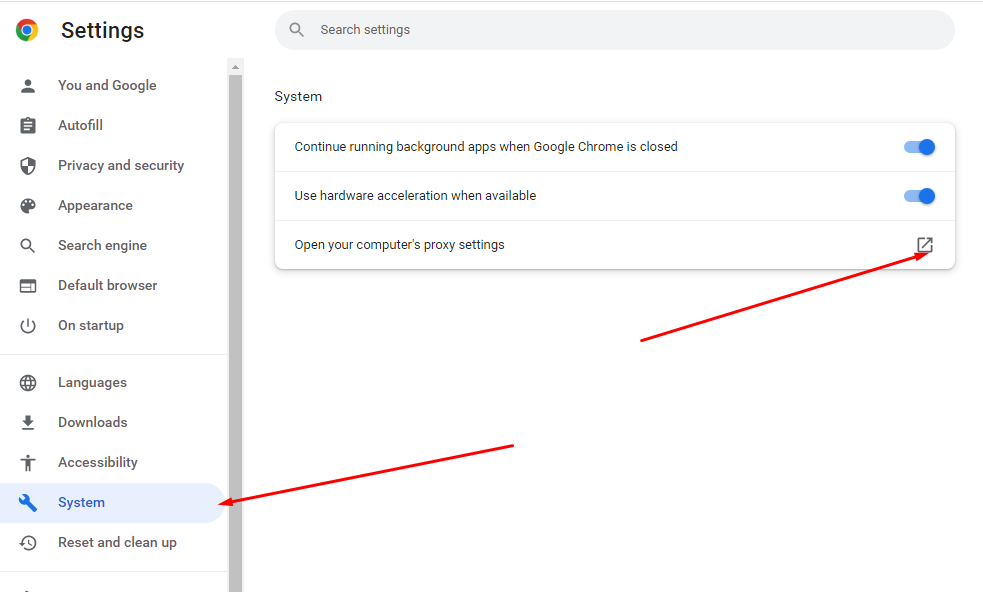
- Open browser settings (3 dots in top-right window corner, then Settings)

- Go to “System” tab and click to the “Computer proxy settings”
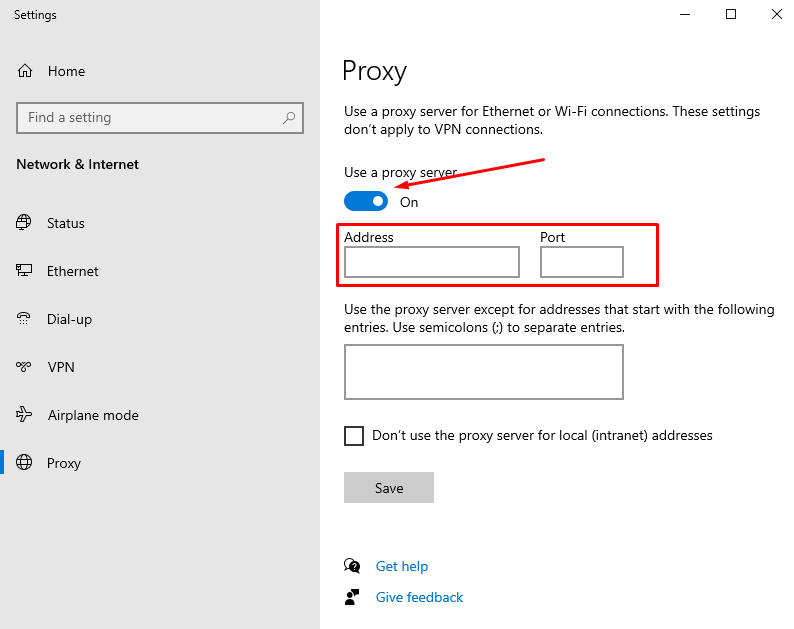
- System preferences will open. Click to the “Manual settings, then type your server’s IP and proxy port into the relevant fields
- Open the URL https://whoer.net in Google Chrome. You should see squid IP as “exit node”
At the end
In this instruction you've learned how to deploy a stable software for proxyfiing traffic almost without any overhead. You know way to secure and resject connects from non-trusted users. And now you could use web-browser in a proxy client role and “hide” your real IP behind self-created anonimiser service.


