Consider setting up pfSense. First, I think it's worth explaining what pfSense and Site-to-Site VPN are and what the advantages are. Then move on to implementation.
PfSense is a firewall distribution based on the FreeBSD operating system. The distribution allows implementing mechanisms such as NAT, CARP, and VPN (including PPTP, IPsec, OpenVPN), Captive portal. In addition, it performs the functionality of a classic firewall, dynamic DNS, DHCP and proxy server. Easy to deploy.

Why Site-to-Site?
Site-to-Site allows you to configure only gateways in remote subnets, and you do not need to configure the network nodes themselves. In simple terms, the Site-to-Site method connects two offices to a single network, and the Point-to-Site method connects remote employees to the office. In this article, we will consider an example of connecting two existing networks — physical and virtual.
The setup process is conditionally divided into two stages:
- Configuring pfSense and configuring private networks; 2.
- Site-to-Site implementation.
Let's start.
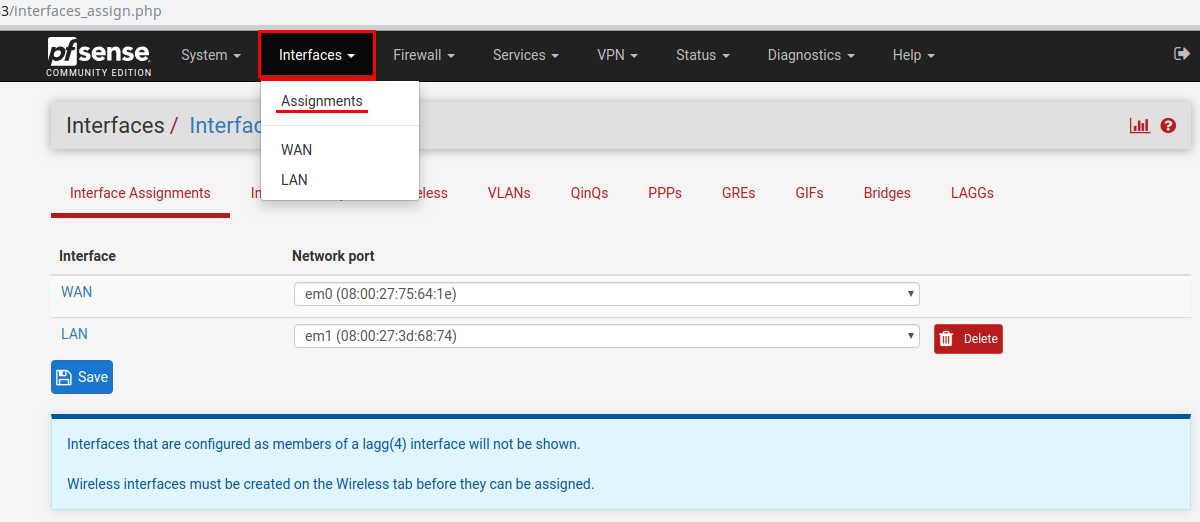
First, configure the internal LAN and the gateway interface. To do this, in the browser, go to the server IP address or domain name if any. Enter the username and password and get to the Home screen (Dashboard). In the program menu, go to the interfaces section Interfaces -> Assignments. In our example, only two interfaces are already distributed - we leave it as it is. If you have several interfaces, you should select the necessary interface by mac-address and click the Add button.
Assign an IP address to the interface “looking” to the local network. In the program menu, go to the interfaces section-> LAN. At the end of the setup, click the Save button.
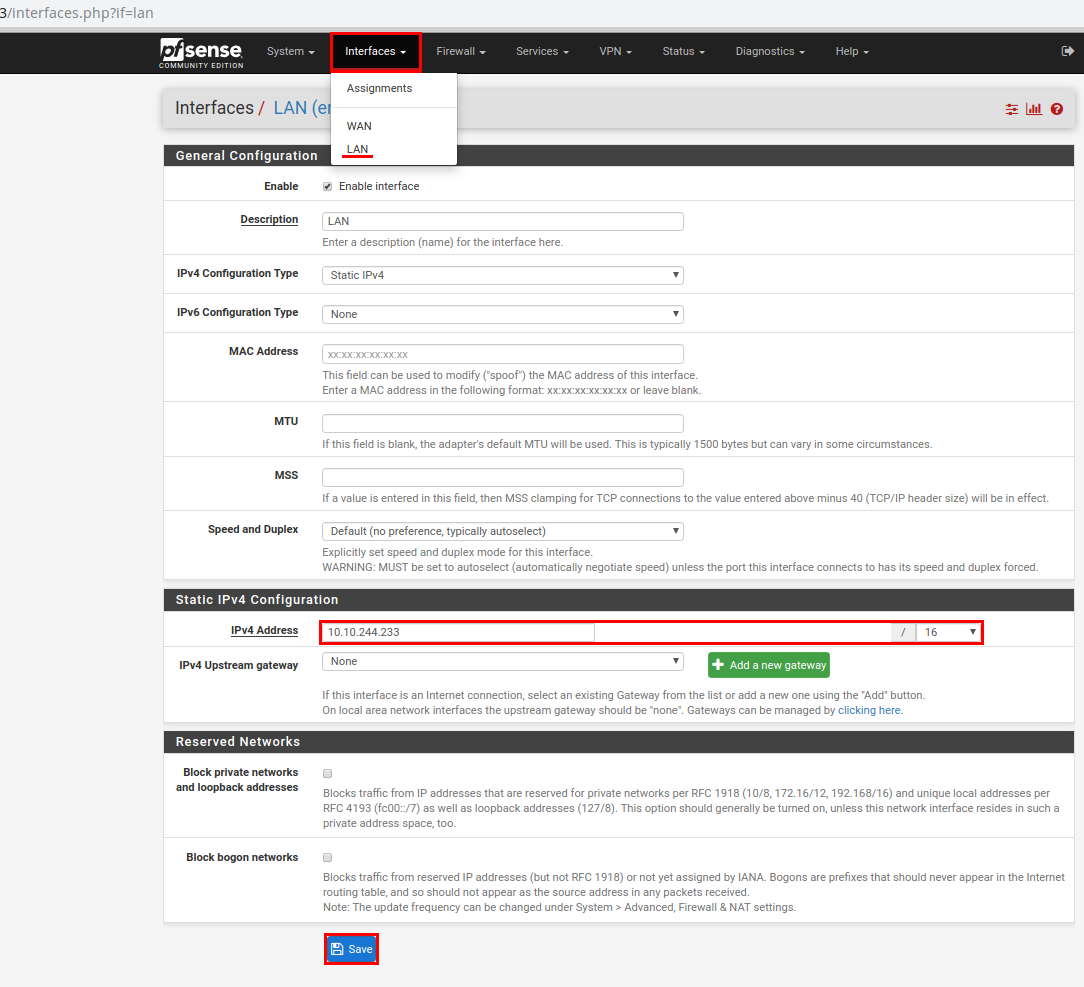
For all servers in the local network, as the default gateway set the IP address specified in the LAN.
Important! If you use cloud services, then you need to unite the network nodes from the administration panel of the cloud service through “Virtual Networks”.
Configuring Firewall for local connections
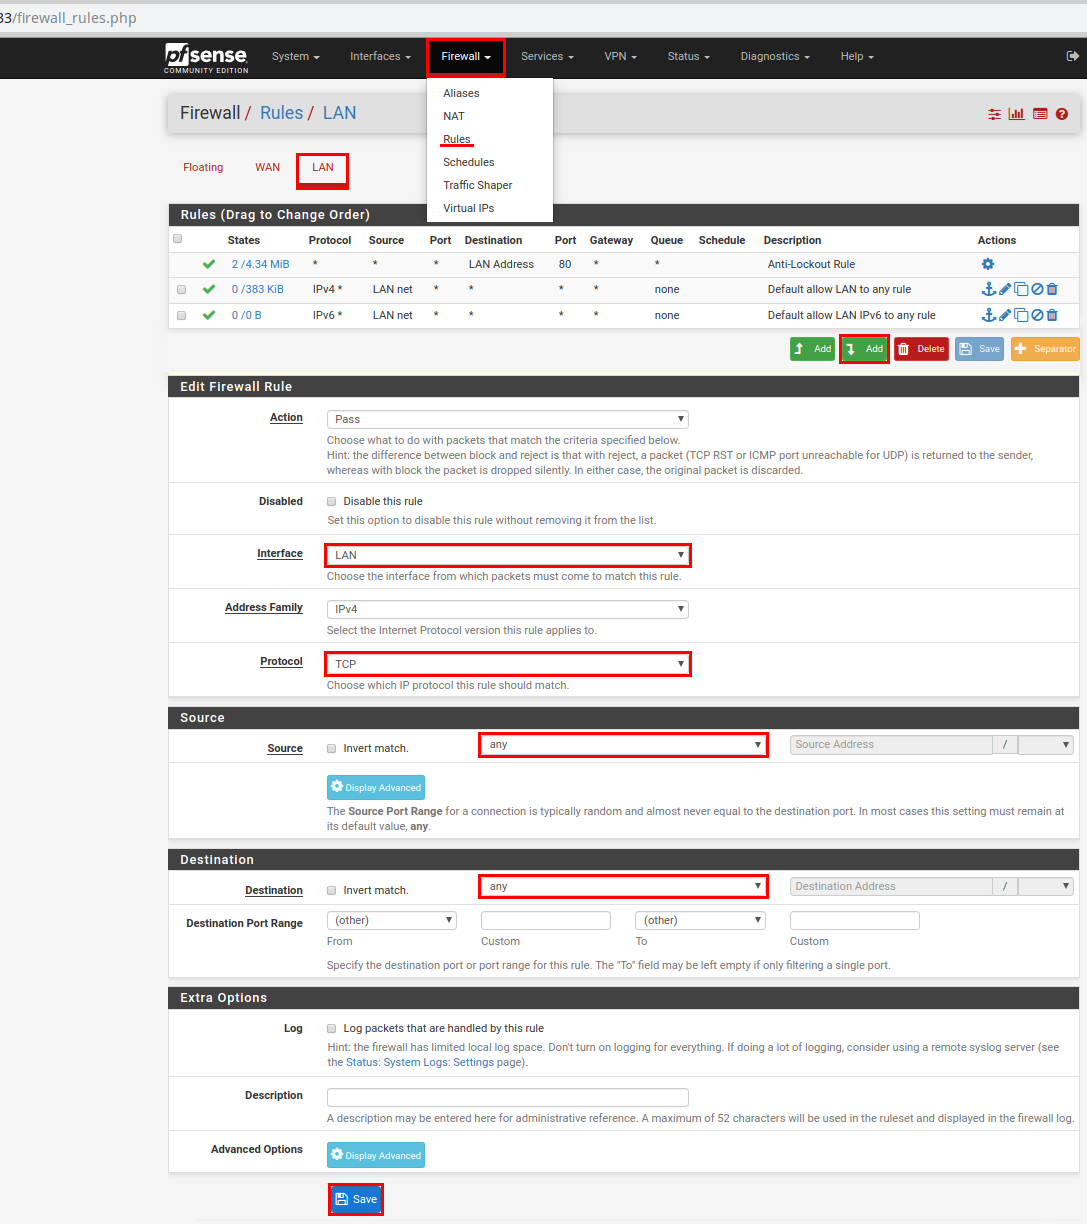
In the program menu, select Firewall -> Rules -> LAN. Click the Add button.
On the new page we check the parameters:
customizable interface - LAN;
Protocol-TCP, but you can also use Any;
Source - Any;
Destination - Any.
Save the settings by clicking on the Save button.
It should be noted that the same settings must be made on all remote pfSense servers connected to a single network.
Start configuring the site-to-Site tunnel
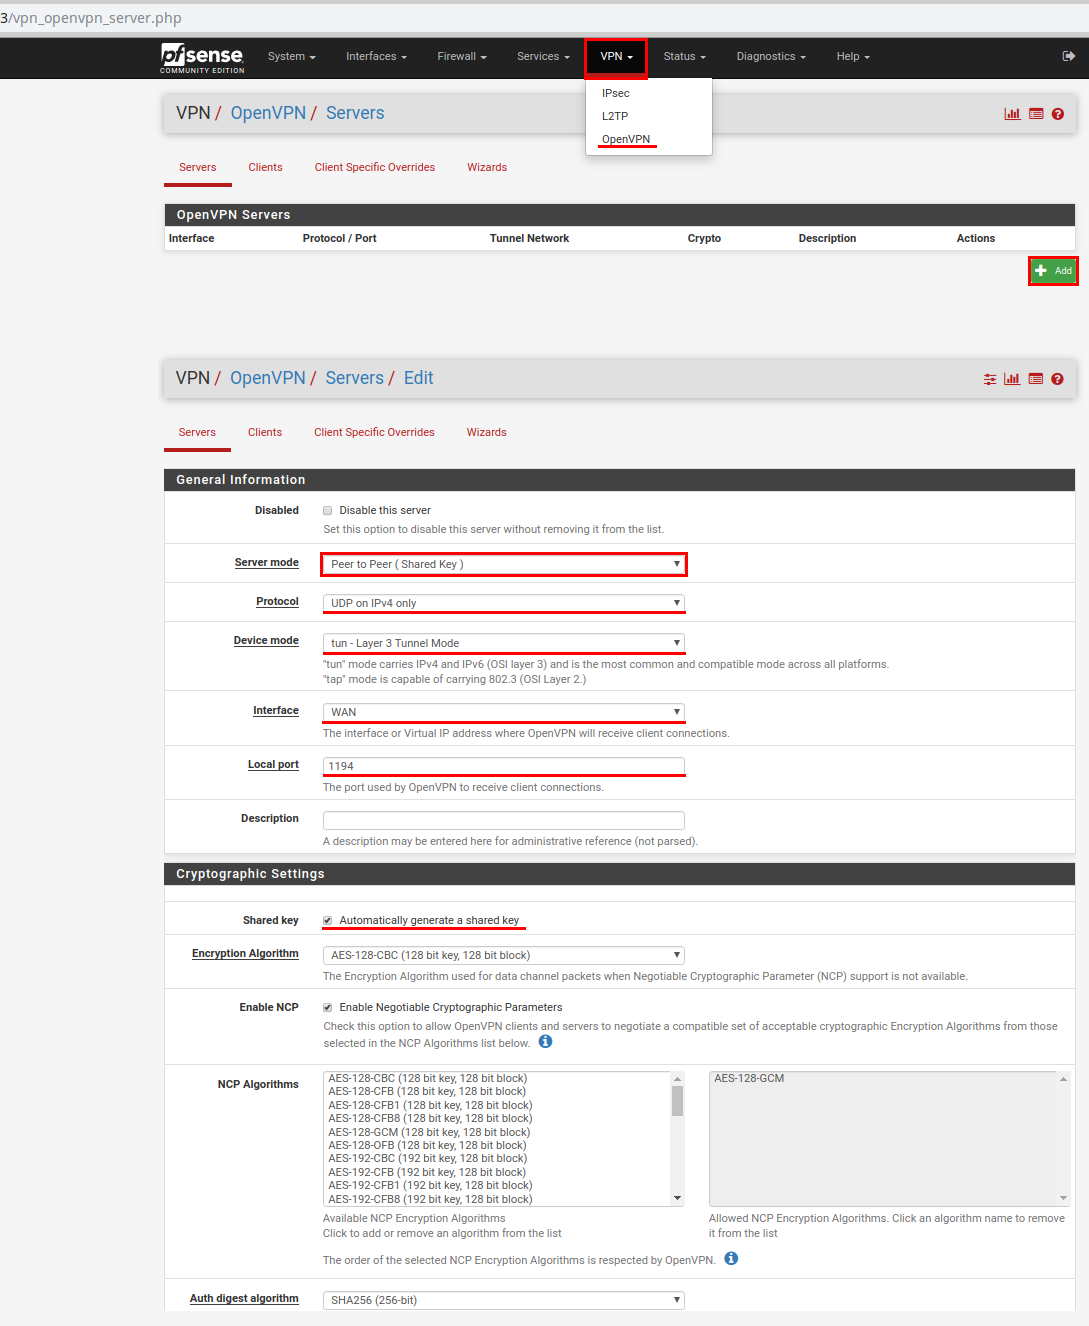
In the beginning, we configure OpenVPN. In the main menu, select VPN -> OpenVPN and click on the Add button.
On the new page, select:
Server mode - Peer to Peer (Shared Key);
Protocol - UDP on IPv4 only;
Device mode - tun - Layer 3 Tunnel Mode;
Interface - WAN
Local port - 1194;
Shared key - Set the checkbox opposite Automatically generate a shared key;
Encryption algorithm - leave by default;
Hardware Crypto - No hardware crypto acceleration;
IPv4 Tunnel Network: 10.0.10.0/24 - specify the addresses used in the tunnel;
IPv4 Remote networks: 10.0.1.0/24 - specify the network address located behind the remote pfSense gateway.
We save the settings and do not forget to click on the green button Apply Changes.
Configure Firewall for the new interface
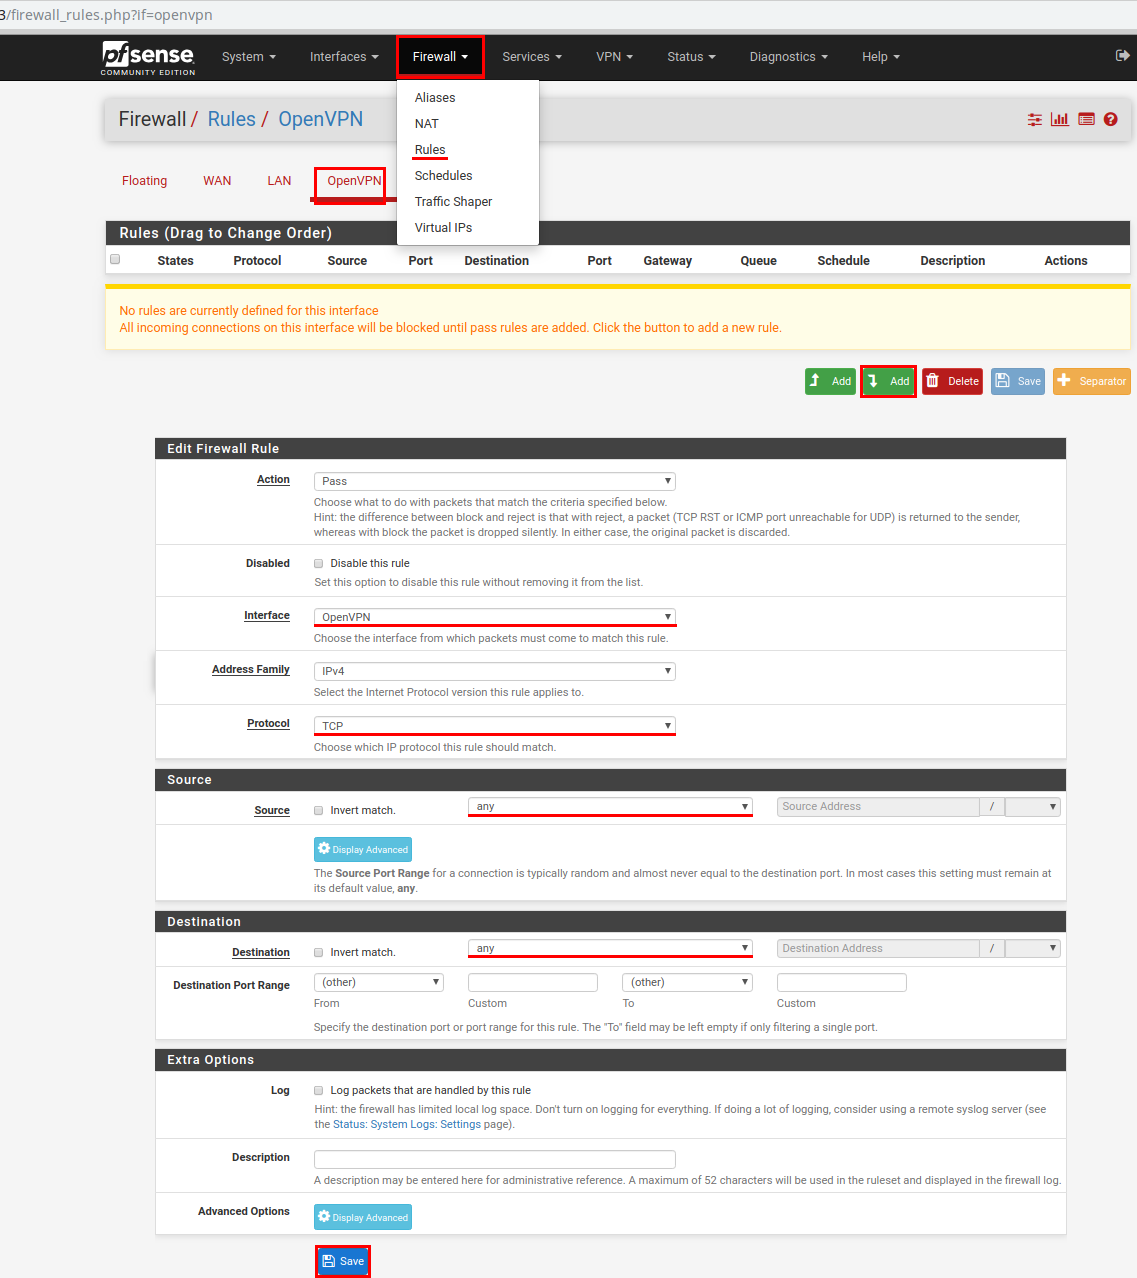
In the main menu, select Firewall - > Rules. Select the OpenVPN item and click on the Add button.
On the updated page, check the parameters:
Interface - OpenVPN;
The protocol is TCP, but Any is better;
Source and Destination - Any.
When finished, click on the Save button. Do not forget to click on the green button Apply changes.
Configure Firewall for the WAN interface
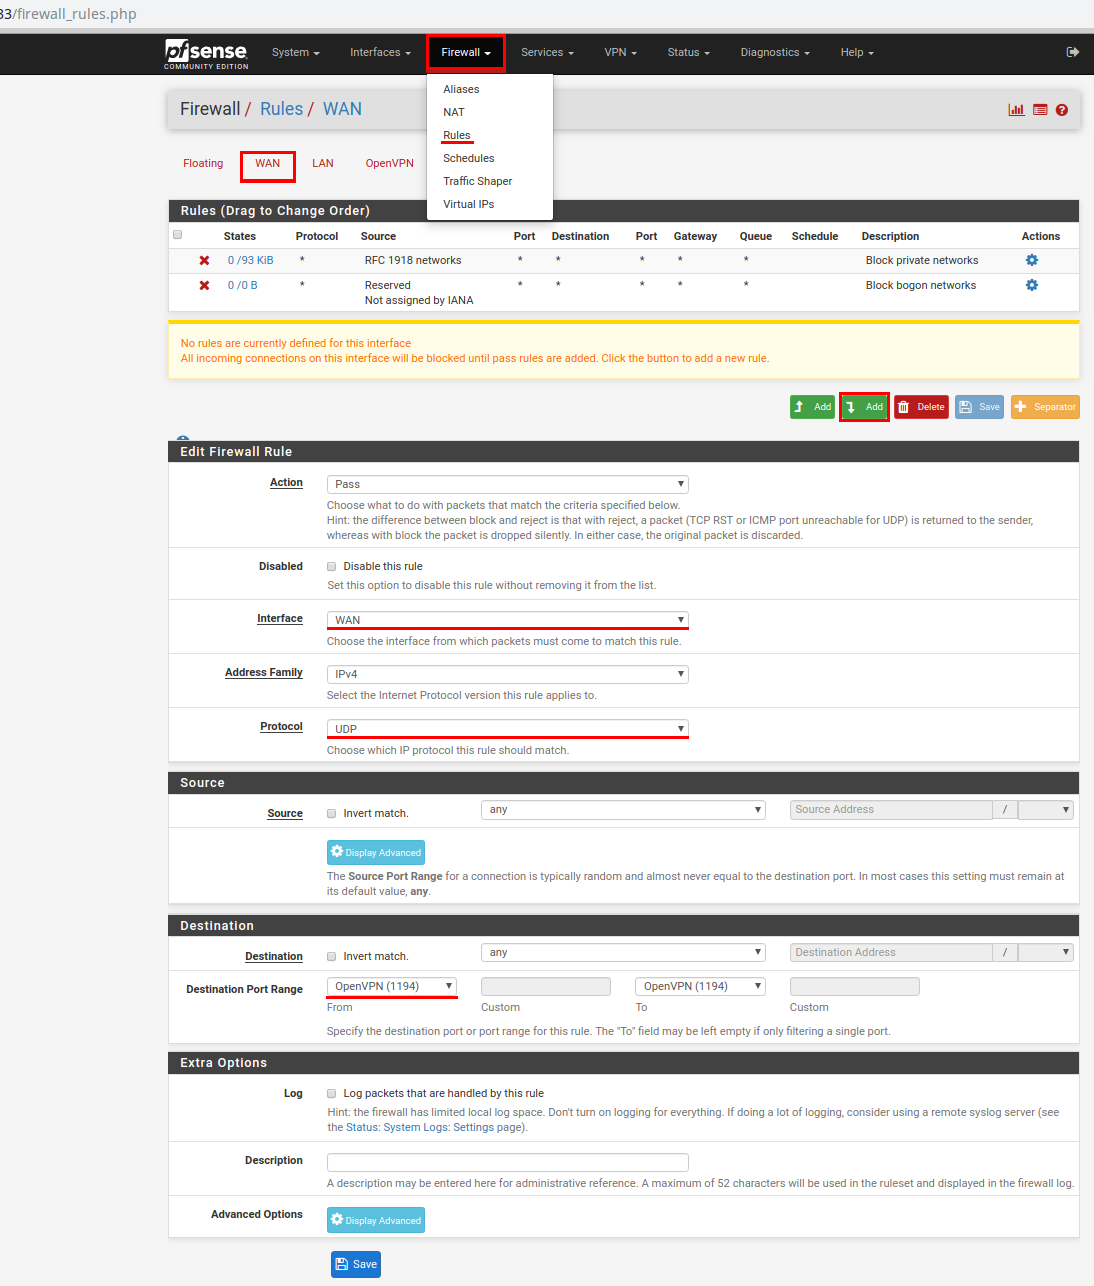
In the main menu, select Firewall - > Rules. Select the OpenVPN item and click on the Add button.
Interface - WAN;
Protocol - UDP;
Destination port range in both drop-down lists (From and To), select OpenVPN (1194).
Save the settings. Do not forget to click on the green button Apply changes.
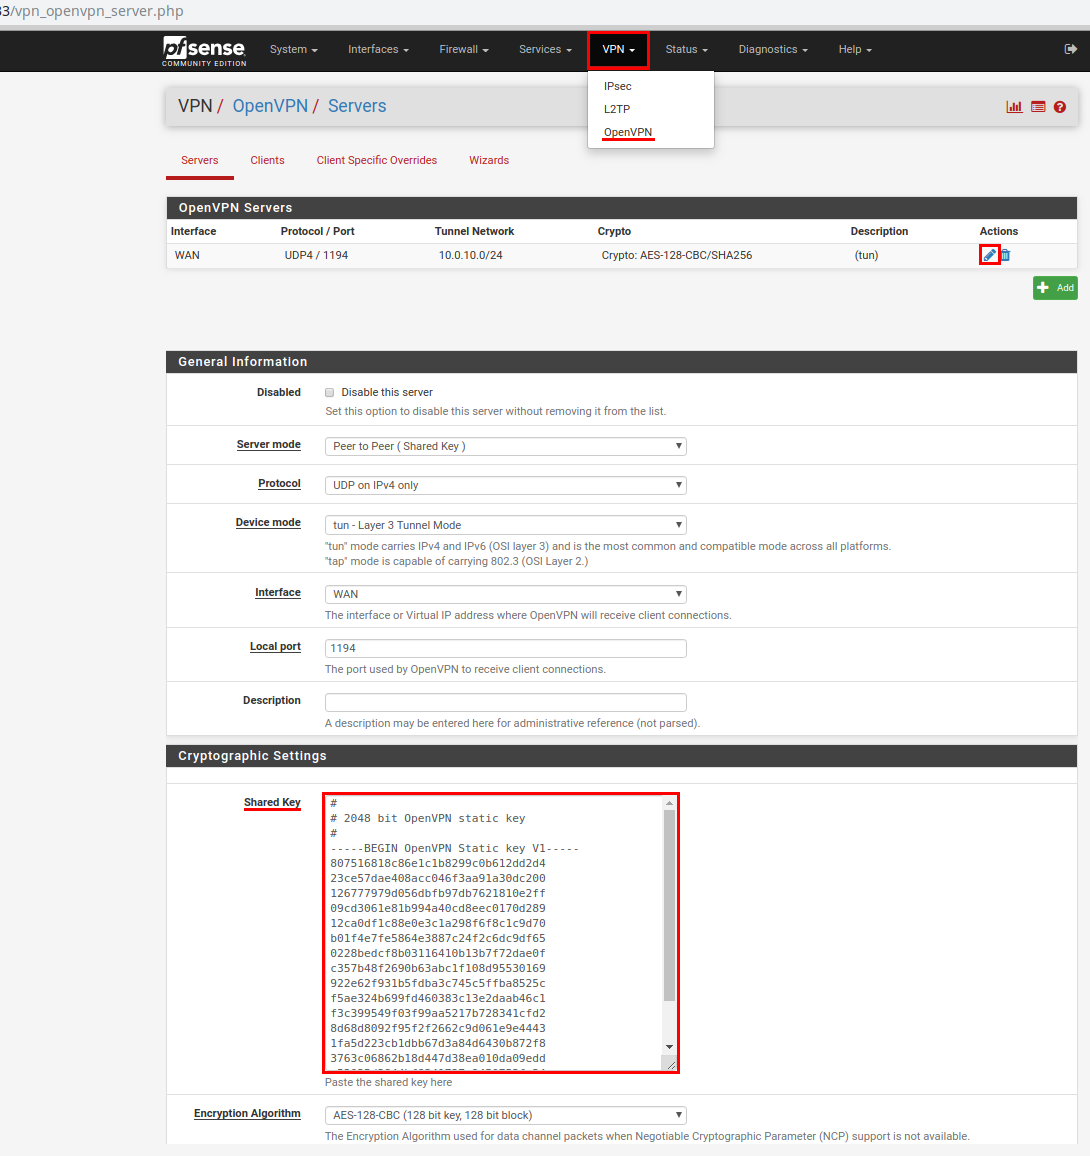
Now copy the generated key to transfer it to the remote router. In the main menu, select VPN -> OpenVPN. Click on the “Pencil” icon (edit). On the updated page, from the Shared Key item, copy the entire contents of the field into a text editor, for example, Notepad.
It remains to configure the remote pfSense gateway as a client.
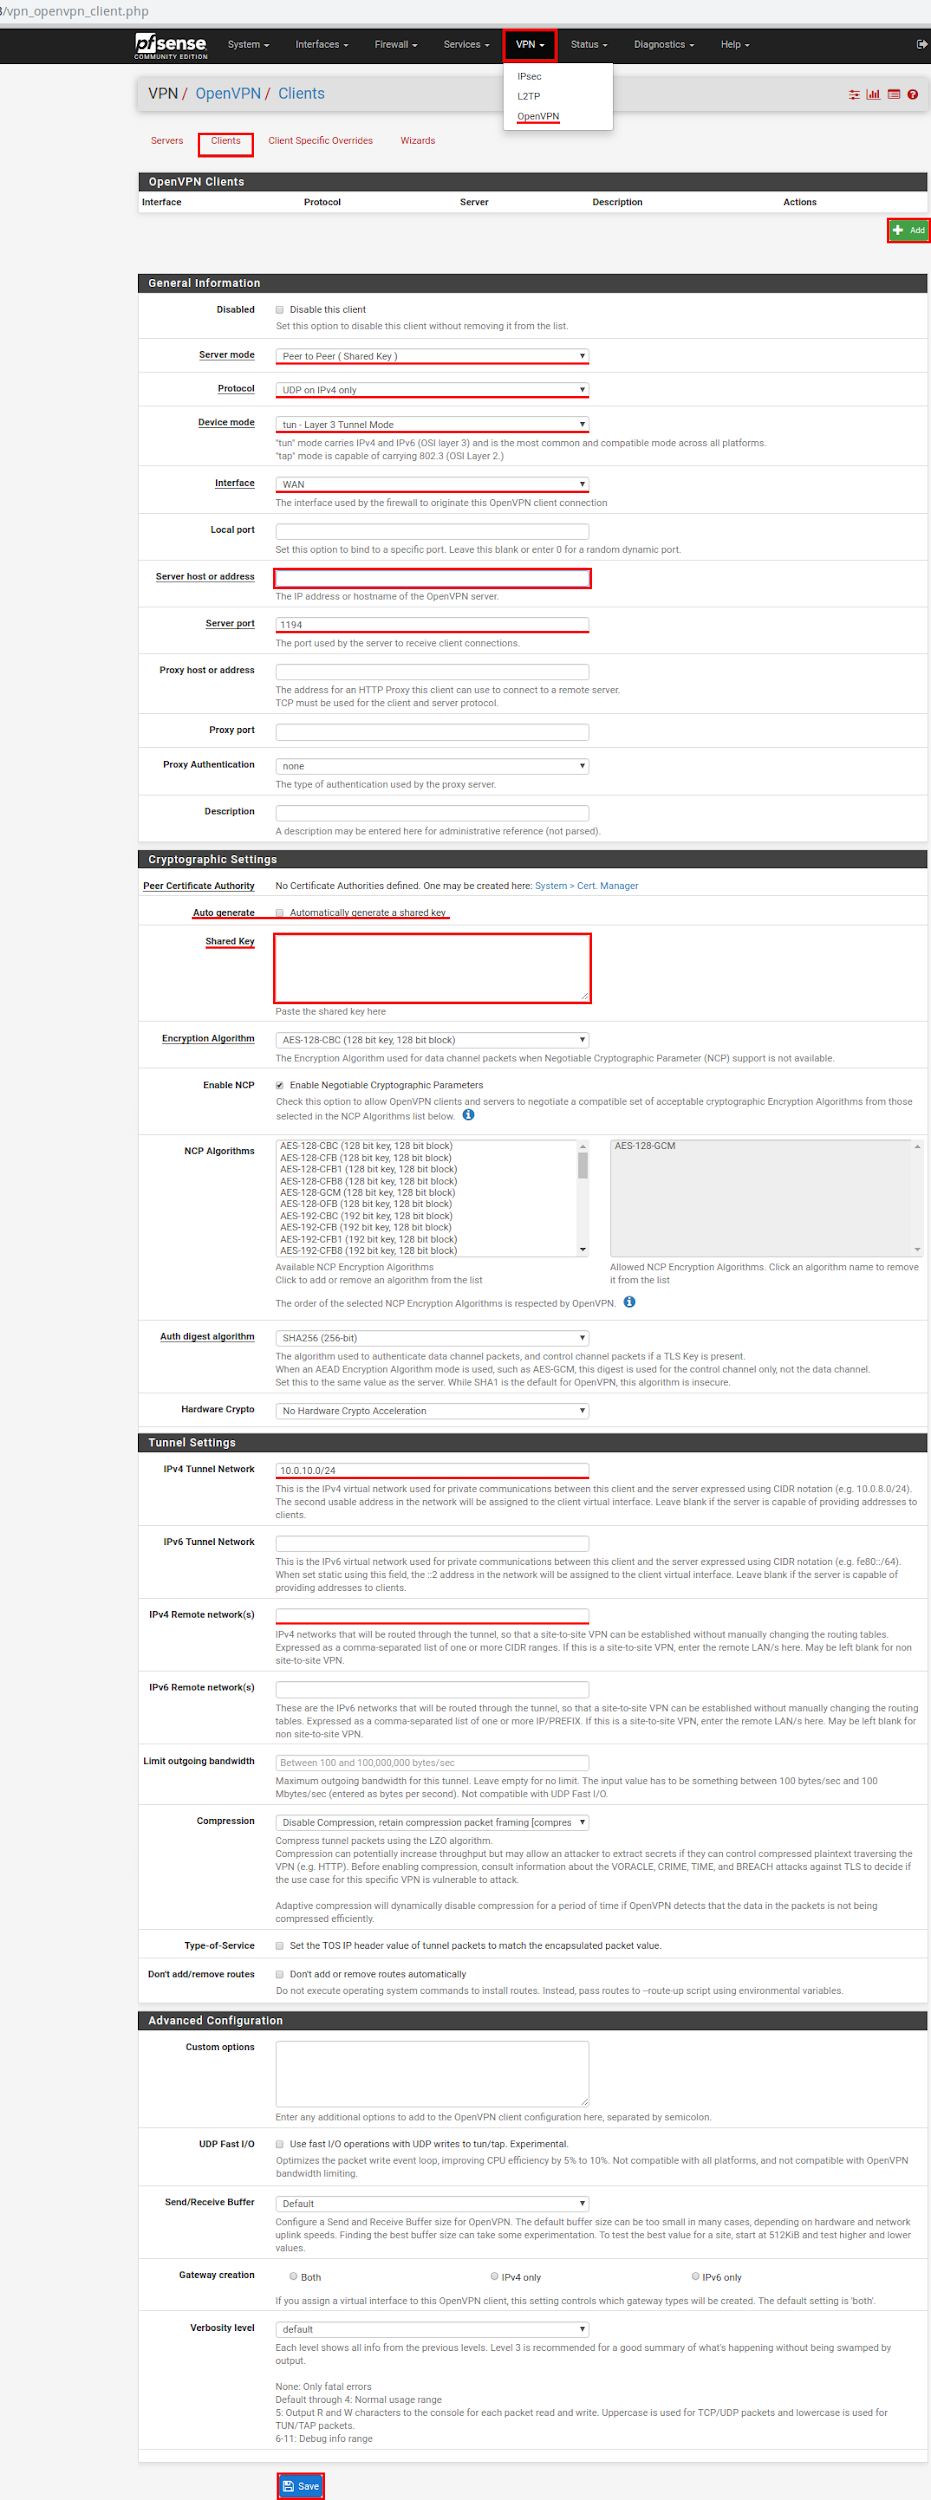
In the main menu, select VPN - > OpenVPN and click on the Clients item, then on the Add button.
On the page that opens, check the parameters:
Server mode - Peer to Peer (Shared Key);
Protocol - UDP on IPv4 only;
Device mode - tun - Layer 3 Tunnel Mode;
Interface - WAN;
Server host address-specifies the server's WAN interface that was configured earlier;
Local port - 1194;
Shared key - Take off the tick in front of Automatically generate a shared key;
Encryption algorithm - leave by default;
Hardware Crypto - No hardware crypto acceleration;
IPv4 Tunnel Network: 10.0.10.0/24 - specify the addresses used in the tunnel;
IPv4 Remote networks: specify the network address located behind the remote pfSense gateway server.
Click Save. Then click the green button to Apply changes.
This completes the setup.


