
Introduction
Serverspace allows you to quickly deploy a server with MongoDB pre-installed
MongoDB is one of the most popular NoSQL database management systems. When combined with the Kubernetes orchestrator, it becomes a highly scalable and versatile solution for handling modern application data across distributed environments.

Requirements
To work with MongoDB in Kubernetes, you'll need a server running any operating system (preferably Linux with root access or sudo privileges) to manage the Kubernetes cluster (see the next step).
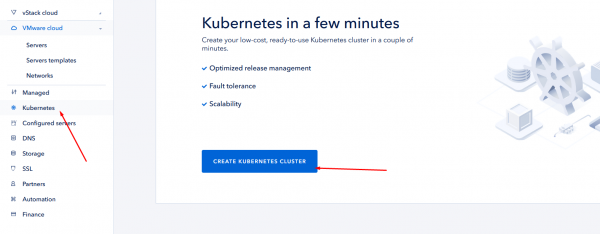
Kubernetes instance creation
Before deploy MongoDB you need to have Kubernetes. To create it in ServerSpace infrastructure, just login into your client area, then click to Kubernetes link and create an instance:

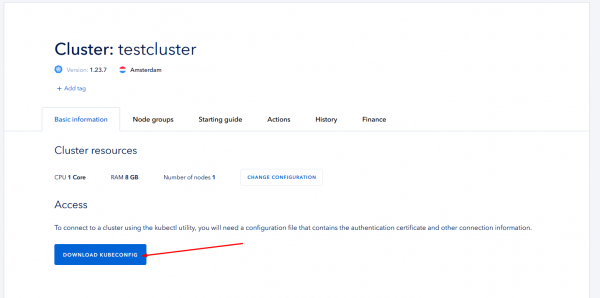
Process may take a time, please be patient. When finished, you will see cluster parameters and should download access credentions file:
Instance setup
To install database service on your Kubernetes cluster please do follow:
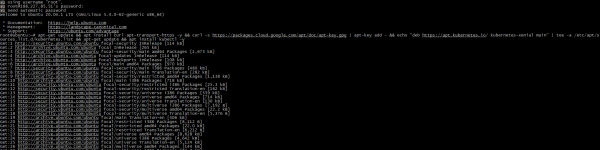
- Login to your management server as privileged user and install necessary tools:
sudo -s

apt-get update && apt install curl apt-transport-https -y && curl -s https://packages.cloud.google.com/apt/doc/apt-key.gpg | apt-key add - && echo "deb https://apt.kubernetes.io/ kubernetes-xenial main" | tee -a /etc/apt/sources.list.d/kubernetes.list && apt-get update && apt install kubectl -y
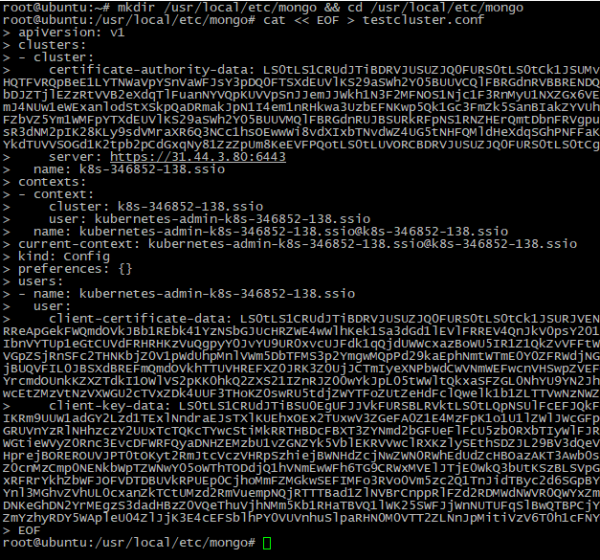
- Make a file which stores cluster access data and set this as system variable:
mkdir /usr/local/etc/mongo && cd /usr/local/etc/mongo

cat << EOF > testcluster.conf

<PASTE CONFIGURATION DATA HERE>

EOF

echo "export KUBECONFIG=testcluster.conf" >> ~/.bashrc
- To check connection just run:
kubectl cluster-info
If output looks like picture below - connection is successful

- MongoDB needs storage to save it's data. Storage creating process describes in special configuration files. You can customize it by your needs:
cat << EOF > PersistVolClaim.yaml

apiVersion: v1

kind: PersistentVolumeClaim

metadata:

name: mongodatapv # Should be the same with name in previous file

spec:

accessModes:

- ReadWriteOnce

resources:

requests:

storage: 1Gi # Should be the same with capacity in previous file

EOF

Next step is creating credentials file, which stores access to MongoDB:
cat << EOF > Creds.yaml

apiVersion: v1

data:

username: <BASE64_ENCODED_LOGIN>

password: <BASE64_ENCODED_PASSWORD>

kind: Secret

metadata:

creationTimestamp: null

name: creds

EOF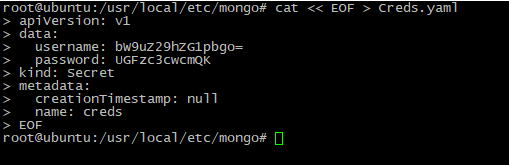
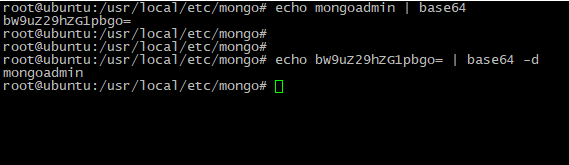
Tip: To encode and decode data you can use simple commands:
echo <DATA> | base64 # to crypt data via base64 tool

echo <BASE64_ENCRYPTED_DATA> | base64 -d # to decrypt it
- Then create an instance deployment file:
cat << EOF > Deploy.yaml

apiVersion: apps/v1

kind: Deployment

metadata:

labels:

app: mongo

name: mongo

spec:

replicas: 1

selector:

matchLabels:

app: mongo

strategy: {}

template:

metadata:

labels:

app: mongo

spec:

containers:

- image: mongo

name: mongo

args: ["--dbpath","/data/db"]

livenessProbe:

exec:

command:

- mongo

- --disableImplicitSessions

- --eval

readinessProbe:

exec:

command:

- mongo

- --disableImplicitSessions

- --eval

env:

- name: MONGO_INITDB_ROOT_USERNAME

valueFrom:

secretKeyRef:

name: creds

key: username

- name: MONGO_INITDB_ROOT_PASSWORD

valueFrom:

secretKeyRef:

name: creds

key: password

volumeMounts:

- name: "datadir"

mountPath: "/data/db"

volumes:

- name: "datadir"

persistentVolumeClaim:

claimName: "mongopvc"

EOF
- To launch MongoDB please run command:
kubectl apply -fSuccessful output looks like at picture below:

Connection check
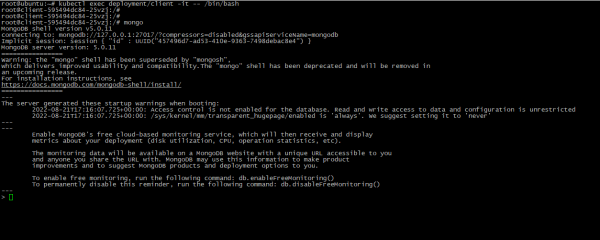
- Now instances is deployed, so you should check connection. Just run:
kubectl exec deployment/client -it -- /bin/bash

mongo
In case you see MongoDB prompt, connect is succesful:
- To create new database just "switch" to the new database. NOTE: Data will not be saved until you add something into the database:
use NEW_DATABASE_NAME

db.createCollection("newdata") # example to add data

show dbs # check is database exist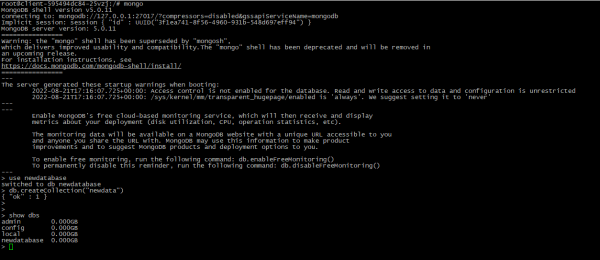
Conclusion
After reading this article, you’ve learned how to create a Kubernetes cluster using the Serverspace client area, deploy the MongoDB service into the cluster, create a new database, and insert data into it. This setup provides a solid foundation for building scalable and cloud-native applications using a flexible NoSQL solution.
FAQ
- Q: Do I need prior Kubernetes experience to follow this tutorial?
A: No, the article is beginner-friendly and provides step-by-step instructions. However, basic knowledge of servers and command-line operations will be helpful. - Q: Can I deploy other databases in the same Kubernetes cluster?
A: Yes, Kubernetes allows you to run multiple services and databases in isolated pods. You can deploy PostgreSQL, MySQL, or any other supported database alongside MongoDB. - Q: Is this setup suitable for production use?
A: While the guide covers the basics, additional configurations such as persistent storage, security hardening, and backups are recommended for production environments.


