In this article we are going to tell how to migrate your VMware Virtual Machine
For the migration you need to convert your virtual server in the file with OVF or OVA format.
OVF (Open Virtualization Format) — standart for storage and distribution of virtual machines. OVA is a TAR archive of the OVF package directory.
Requirements for a OVA/OVF files:
- Disc type scsi.
- Hardware version not higher than 13.
If you use one of the products of the VMware company for virtualization of your servers and/or desktop computers, such as VMware Workstation, VMware Fusion, VMware Server, VMware Player, the conversion process will not be laborious.
All products is supported with standart export of machines in the necessary format.
VMware Workstation
The necessary conditions:
- Make sure the virtual machine is not encrypted. You cannot export an encrypted VM to OVF format.
- Make sure the virtual machine is turned off.
Procedure:
- Select the virtual machine and then File > Export to OVF.
- Enter a name for the OVF file and select a directory to save the file.
- Click Save to start the OVF export process.
The process may take several minutes. The status bar shows the progress of the export process.
VMware Fusion
The necessary conditions:
- Make sure the virtual machine is not encrypted. You cannot export an encrypted virtual machine to OVF format.
- Make sure the virtual machine is turned off.
Procedure:
- Select the virtual machine and then File > Export to OVF.
- Enter a name for the OVF file and select a directory to save the file.
- Click Save to start the OVF export process.
The process may take several minutes. The status bar shows the progress of the export process.
vSphere Client
- Choose a virtual machine and nextly do: File > Export > Export OVF Template.
- In the dialog window “Export OVF Template” enter a name of template.
Note: while the export of the template OVF with the name wich contains stars(*), this characters converts to the underscore characters(_). - Choose a directory for saving a template file, or click "..." for a location selection.
- In the pole Format choose type OVF or OVA.
OVF - choose this formart, if you want to save the template in the kit of files (.ovf, .vmdk and .mf) This formart is optimal, if you are planning to publish the files on the web-server or in the disk storage. The package can be imported, for example, in the vSphere by publishing the URL in an .ovf file.
OVA - choose this formart for more comfort OVF package distribution like a separate file, if it needs to be downloaded from the web or moved using USB. In fact is an OVF archive. - In the Description pole enter the description of your virtual machine.
By the default text from the panel "Notes" from the tab "Virtual Machine Overview" will appear in that text pole. - Place a checkbox, if you want to turn on graphical files attached to the floppy and CD/DVD in the OVF package.
Note: that checkbox will only be visible if ISO file is connected to the virtual machine or an image is attached to the drive. - Press "OK".
The status bar shows the progress of the export process.
VMware OVF Tool
VMware OVF Tool is a solution for importing and exporting OVF packages from VMware products. We will use this utility to convert a vmx file to an OVF file, because it allows you to create virtual modules from virtual machines.
Upload VMware OVF Tool Installer from the VMware company site.
Choose a necessary version.

Go to the «Downloads» folder and start the downloaded file.
After the installation open Windows PowerShell. For the conversation you need a ovftool.exe file, wich is located on the path specified during installation. For example:
C:Program FilesVMwareVMware OVF Toolovftool.exeGo to the catalog «VMware OVF Tool» using cd program:
cd 'C:Program FilesVMwareVMware OVF Tool'At the command prompt, enter the command with the following syntax:
.ovftool.exe <path to the vmx file> <path to the OVF file>For example:
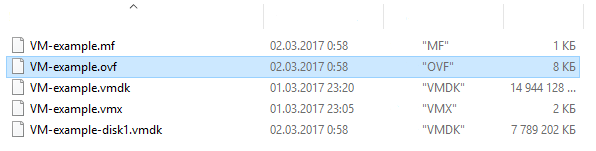
.ovftool.exe "C:VMVM-exampleVM-example.vmx" "C:VMVM-exampleVM-example.ovf"
After the conversation the OVF file with your virtual machine will appear.