WAMP Server is a Windows-based alternative to the classic LAMP stack, designed for local web development on the Windows operating system. It combines Apache, MySQL, and PHP into a single, easy-to-install package, allowing developers to quickly set up a functional development environment. WAMP also includes a built-in extension installer that simplifies the management of PHP modules and additional components, making it a powerful and user-friendly solution for testing and building websites locally.

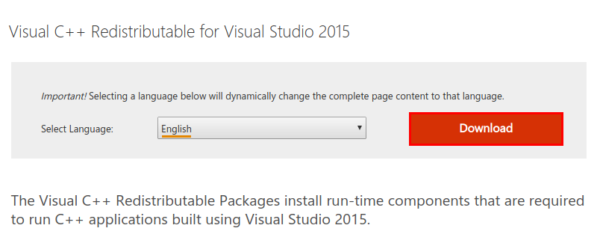
Before installing the WAMP server, install the missing libraries - Visual C ++ Redistributable for Visual Studio 2015. To do this, go to the link. For convenience, select the page display language, click on the Download button.
The page will refresh, select the bit size of the distribution kit and click on the Next button.
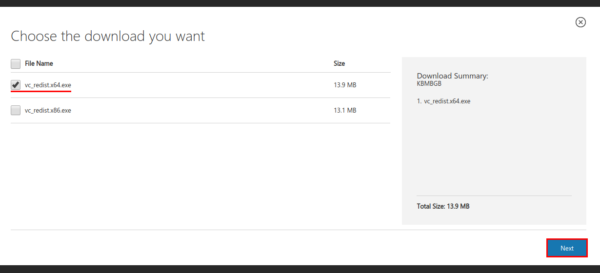
We are waiting for the complete download of the package. Install it on a “Next-Done” principle.
Similarly, install:
- Microsoft Visual C++ 2008 SP1 Redistributable Package (x64)
- Microsoft Visual C++ 2010 SP1 Redistributable Package (x64)
- Visual C++ Redistributable for Visual Studio 2012 Update 4
- Update for visual C++ 2013 Redistributable Package
We go to the WAMP project website at the link. We open the section "Download"
We are waiting for the full download of the file and run it.
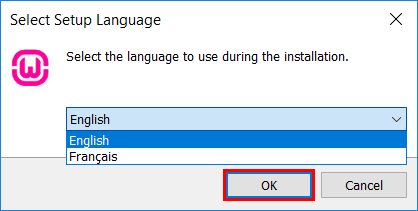
At the very beginning, the program suggests choosing a language for the entire installation process. We choose according to convenience. In our case, it will be English. Click on the “OK” button.
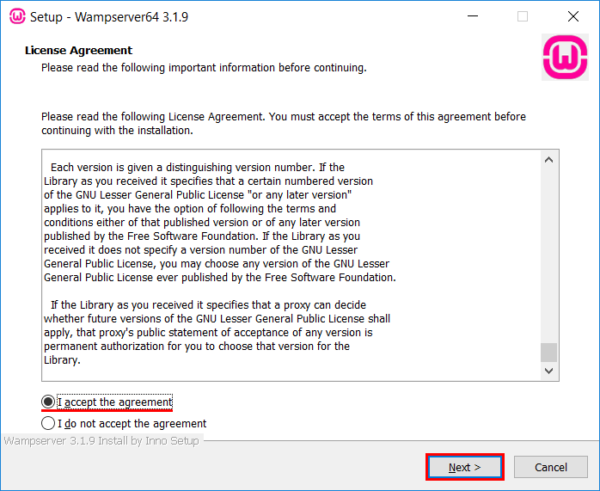
We carefully read the license agreement. If everything suits you, we accept the conditions and continue the installation.
At the next stage, the program will offer you to get acquainted with the installation information.
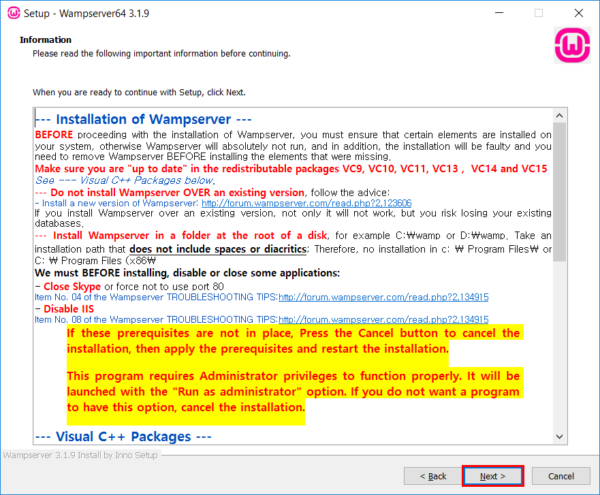
This information reminds you of the need to disable the IIS server and update Visual C ++ packages.
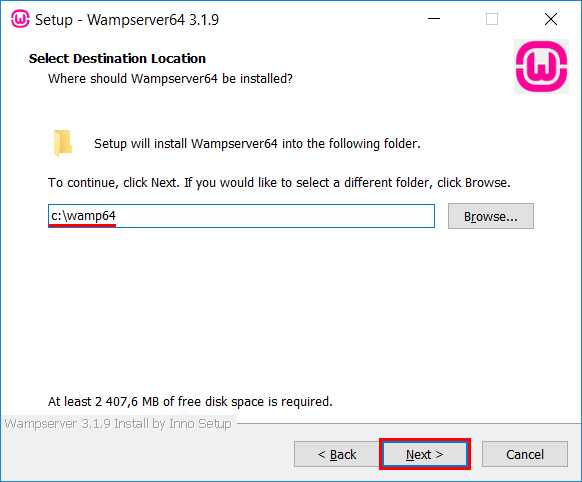
Choose the installation path. The default is “C: wamp”. The disk must have more than 2.5 GB of free space. If everything suits, click “Next”.
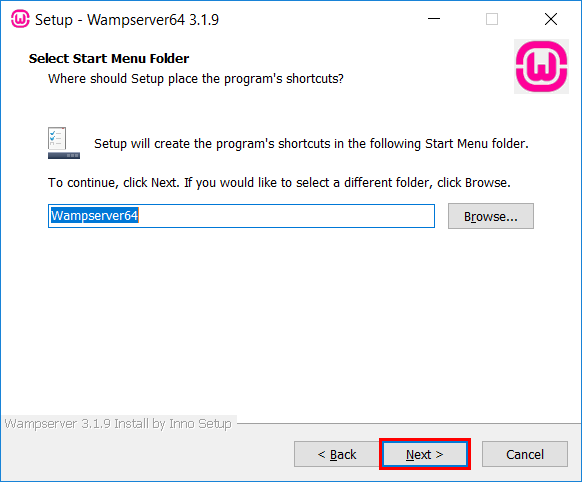
In the next step, the program will offer to create a shortcut in the Start menu. Click “Next”.
We check the installation parameters and click “Install”.
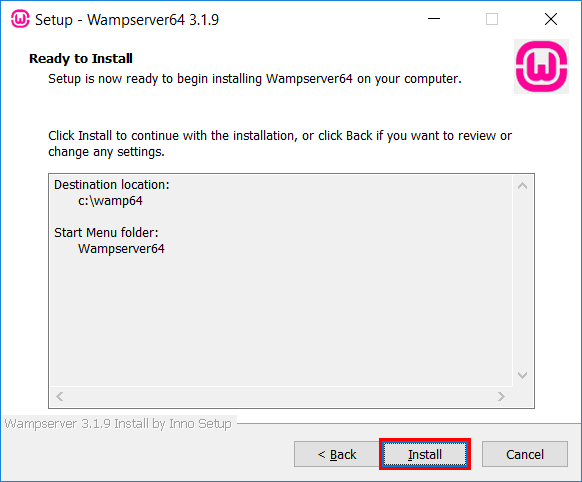
Waiting for the installation process to finish.

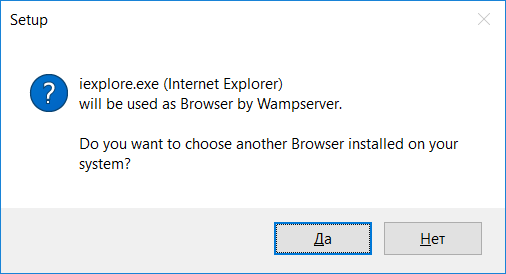
During the installation process, you may be asked to use Internet Explorer as a browser for a WAMP server. If you want to select another browser, click the “Yes” button. In this case, it will be necessary to specify the exe file of the new browser.
If all of the above updates are installed, the WAMP server will start in the system tray.

Check the operation of the server. To do this, click on the link http://127.0.0.1.
Let's сonfigure Apache
Let the connection be for everyone, not just local users. Edit the file C: wamp64binapacheapache2.4.39confhttpd.conf.
In this configuration file, you need to find the section <Directory «${INSTALL_DIR}/www/»>. Replace the value “Require local” with “Require all granted”.
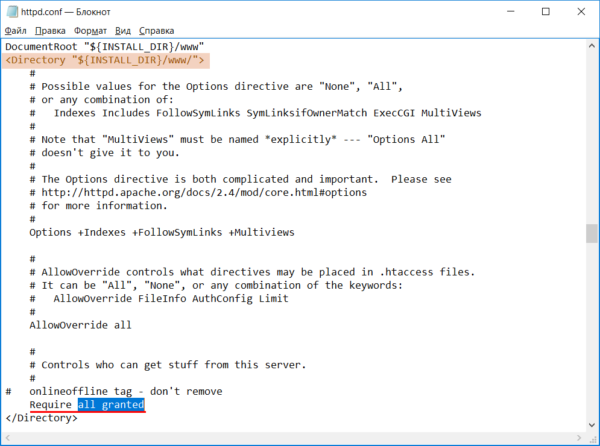
Save and close the file.
Now edit the file C: wamp64binapacheapache2.4.39confextrahttpd-vhosts.conf. Replace the parameters and values of the Directory section with:
Options FollowSymLinksAllowOverride AllOrder deny,allowallow from all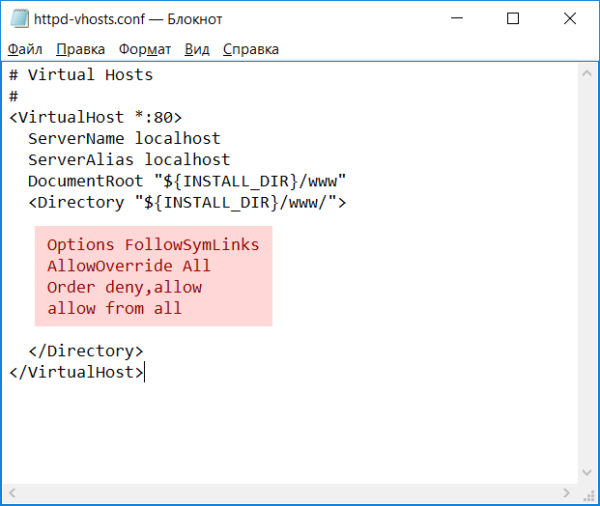
Save and close the file.
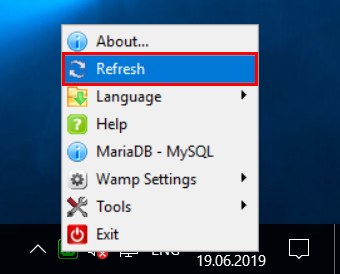
We restart the WAMP server. To do this, click on the tray icon with the right mouse button and select Refresh.
To check the operation of the www-server, create an html-file in the root of the site. To do this, open Notepad and fill it with html-code. Then save the file along the path C:wamp64wwwindex.html
Now from another computer, open the file. This can be done by domain name, if purchased and configured, or by IP address. As an example:
http://<domain_name>/index.htmlhttp://<IP-address>/index.htmlTo find out your IP address, just open a command prompt or PowerShell window and run the command:
ipconfigOpen.
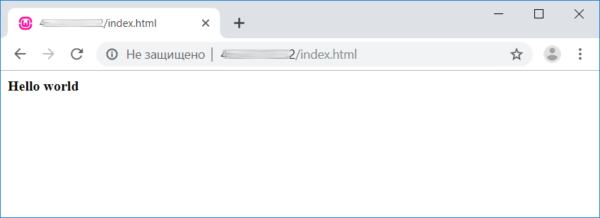
Important! Windows Firewall rules must allow connections to 80 and 443 TCP ports.
Configuring phpMyAdmin
On the server’s main page, at the very bottom, on the left, in the Tools section, click on phpmyadmin.
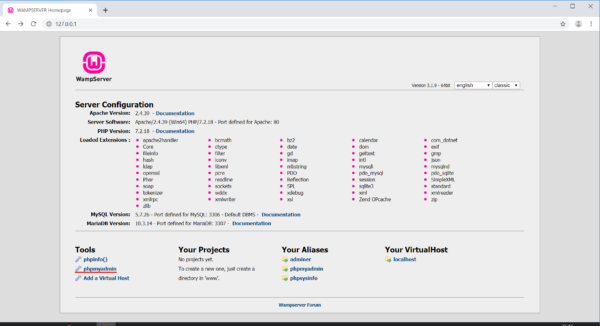
The page will open at http://127.0.0.1/phpmyadmin/.
The web application will request a username and password. By default, the login is root, the password should be left blank. You should also select the used DBMS and click on the “Forward” button.
After successful authorization, you can add users, if necessary, and also change the password of the root user. Go to the “User Accounts” tab. In the root user line, click on edit privileges.
The page will refresh, click on “Change Password”. We enter the password and its confirmation. Click on the “Forward” button.
It is important to understand that root is the user with the highest privileges. Password must be complicated.
At the end of the settings, restart the server in the same way as shown above.
Conclusion
Installing and configuring WAMP Server on Windows provides a powerful, all-in-one solution for local web development. With Apache, MySQL, and PHP bundled together, developers can test websites and applications in a safe, offline environment before deploying them live. By following this step-by-step guide, you ensure your system is properly set up, secure, and ready for productive work. Whether you're developing dynamic websites, testing PHP scripts, or managing databases via phpMyAdmin, WAMP offers a convenient and efficient workflow for Windows users.
FAQ - Frequently Asked Questions
- What is the difference between WAMP and LAMP?
WAMP is specifically designed for Windows and includes Apache, MySQL, and PHP. LAMP is the Linux-based counterpart. Both serve the same purpose but run on different operating systems. - Do I need to install all Visual C++ Redistributables manually?
Yes, for WAMP Server to work correctly, several versions of Visual C++ Redistributables must be installed. These packages ensure compatibility with required libraries used by Apache, PHP, and MySQL. - How do I know if WAMP is running correctly?
If the WAMP icon in the system tray turns green, it means all services (Apache, MySQL, PHP) are running. You can also check by visiting http://127.0.0.1 in your browser. - Is WAMP safe for production use?
No, WAMP is intended for development and testing environments only. For production, you should use a properly secured server environment such as a LAMP or cloud hosting solution. - How can I access my local site from another device?
Ensure your firewall allows incoming traffic on ports 80 and 443, find your IP address with ipconfig, and access the site via http://<your-ip>/index.html from another device on the same network.


