How to Install and Configure TightVNC Server on Ubuntu 20.04 (Step-by-Step Guide)
TightVNC Server is a popular solution for setting up remote desktop access on Ubuntu 20.04, especially on server installations without a graphical interface. It allows system administrators and developers to remotely manage Linux servers using a lightweight and efficient VNC protocol.
In this step-by-step guide, you’ll learn how to install and configure TightVNC Server on Ubuntu 20.04, set up a desktop environment, enable automatic startup, and connect securely to a remote desktop.
When should you use TightVNC on Ubuntu 20.04?
- Remote administration of Ubuntu servers
- Accessing a GUI on headless Ubuntu Server
- Lightweight remote desktop over low-bandwidth connections

TightVNC vs other VNC servers
Compared to alternatives like TigerVNC or RealVNC Server, TightVNC is lightweight, easy to install, and well suited for basic remote desktop tasks on Ubuntu 20.04. It is often chosen for servers where performance and simplicity matter more than advanced graphical features.
Preparation
All commands in this guide are executed as the root user or using sudo on Ubuntu 20.04.
If your firewall is enabled, you need to open ports for incoming VNC connections. For one connection, it is enough to open 5901 as shown below. If you need more concurrent connections, open 5902, 5903, etc.
ufw allow 5901/tcpInstalling TightVNC Server
Update system packages:
sudo apt update && sudo apt upgradeThe graphical environment is not installed by default on server versions of Ubuntu. Therefore, if we want to connect to a remote desktop, we need to install a graphical shell. Let’s install the TightVNC Server itself at the same time.
apt install xfce4 xfce4-goodies tightvncserverConfiguring TightVNC Server
Let's start the TightVNC Server for the first time. It will create the files necessary for work and ask to create a password.
vncserverSet a password and confirm it. If you need to restrict remote desktop control, select a read-only password.
Now stop your TightVNC session to adjust other settings.
vncserver -kill :1Open the TightVNC config file.
nano ~/.vnc/xstartupAdd the following line to the end.
startxfce4And start the server again.
vncserverSetting up autorun
By default, TightVNC does not have a daemon and does not turn on after a system reboot. To fix this, let's create a new unit in systemd.
nano /etc/systemd/system/vncserver.serviceInsert the following config there:
[Unit]

Description=TightVNC server

After=syslog.target network.target

[Service]

Type=forking

User=root

PAMName=login

PIDFile=/root/.vnc/%H:1.pid

ExecStartPre=-/usr/bin/vncserver -kill :1 > /dev/null 2>&1

ExecStart=/usr/bin/vncserver

ExecStop=/usr/bin/vncserver -kill :1

[Install]

WantedBy=multi-user.target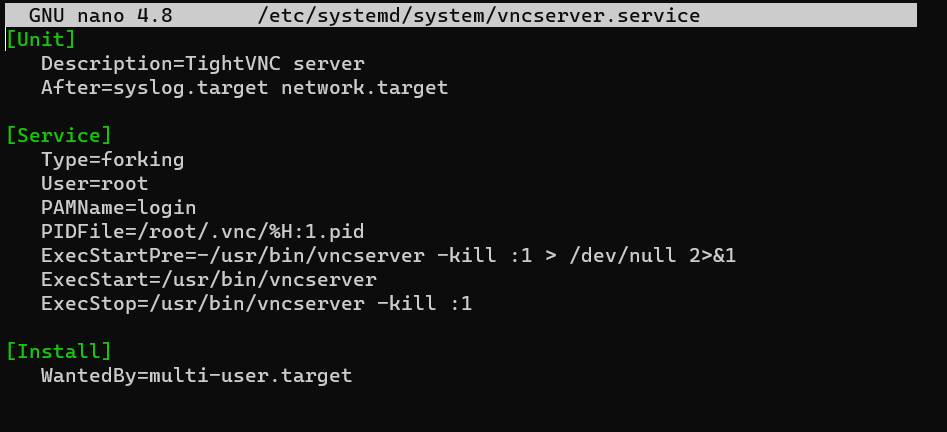
Reload systemd:
systemctl daemon-reloadEnable autorun of the TightVNC server and start it.
systemctl enable --now vncserverConnecting to a remote desktop
Start any VNC client. For Windows, you can use RealVNC or TightVNC Viewer. For Linux - Remmina. Use the IP address of your server with port 5901 as the VNC server.
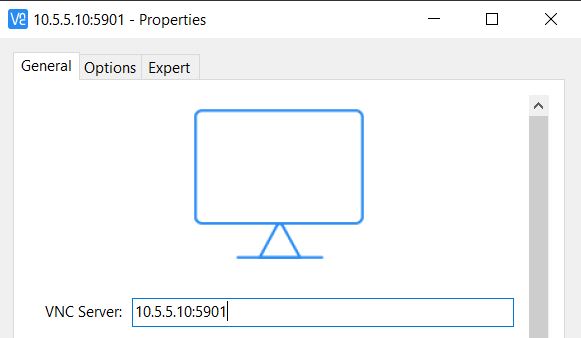
Enter the password you created earlier and you will see the remote desktop.
To secure the connection — see How to Establish VNC Connection over SSH Tunnel on Ubuntu 20.04.
FAQ: TightVNC Server on Ubuntu 20.04
- Q1: What is TightVNC Server used for?
TightVNC Server allows you to connect to and control a remote Ubuntu desktop environment. It’s commonly used for remote administration, technical support, and accessing a server with a graphical interface. - Q2: Which port does TightVNC use by default?
By default, the first VNC session runs on port 5901. Additional sessions will use 5902, 5903, and so on. You need to open these ports in your firewall if multiple users will connect simultaneously. - Q3: Do I need a graphical environment for TightVNC to work?
Yes. Since Ubuntu Server does not include a graphical desktop by default, you must install a desktop environment (e.g., XFCE) along with TightVNC Server to access a full GUI remotely. - Q4: How can I make TightVNC start automatically after reboot?
You need to create a systemd service unit for TightVNC Server, enable it with systemctl enable, and start it. This ensures the VNC server launches automatically when the system boots. - Q5: How do I securely connect to TightVNC?
The default VNC protocol is not encrypted. To secure your session, you should establish a connection via an SSH tunnel. This ensures your data and password are protected during transmission. - Q6: Can I restrict remote users to view-only mode?
Yes. When setting up the VNC password for the first time, TightVNC allows you to create a view-only password that prevents remote users from controlling the desktop. - Q7: Which clients can I use to connect to TightVNC?
On Windows, popular clients include RealVNC Viewer and TightVNC Viewer. On Linux, tools like Remmina are commonly used. - Q8: Can I use TightVNC on Ubuntu cloud servers?
Yes. TightVNC Server works well on cloud-based Ubuntu 20.04 servers, including VPS and virtual machines, as long as required ports are open and a desktop environment is installed.
Conclusion
This guide showed how to install and configure TightVNC Server on Ubuntu 20.04 step by step — from preparing the system and installing a desktop environment to enabling autorun and connecting securely to a remote desktop.
TightVNC remains a practical solution for remote administration of Ubuntu servers. For better security, always consider using SSH tunneling and firewall rules when exposing VNC services.


