How to Install Memcached on Ubuntu 20.04 (Step-by-Step)
What is memcached and why should you use it
By default, many applications store temporary or frequently accessed data on the disk. Even with modern SSDs, disk I/O operations can become a bottleneck, especially under high load. One effective way to boost overall system performance is by caching this data in RAM, which is significantly faster than any disk storage. Memcached is one of the most popular and lightweight tools designed specifically for this purpose — it allows you to store key-value pairs directly in memory, reducing database load and accelerating data access for dynamic web applications.
Before the installation
To install secure service for caching you need:
- Server with Linux operation system, e.g. Ubuntu 20.04
- Privileged access credentials (root access or sudo permissions)
- Optional - system firewall enabled
Install the service and tools
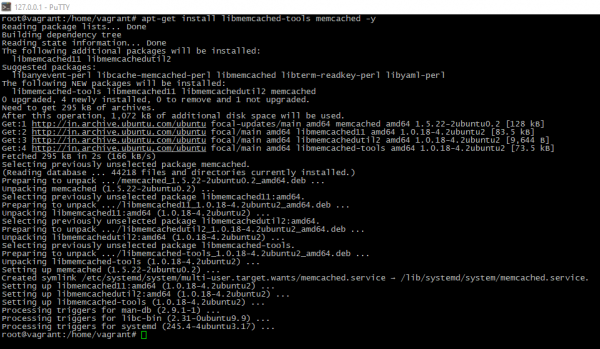
Setup procedure is very-very simple. Just do this:
sudo -s

apt-get update
apt-get install libmemcached-tools memcached -y
Basic configuration
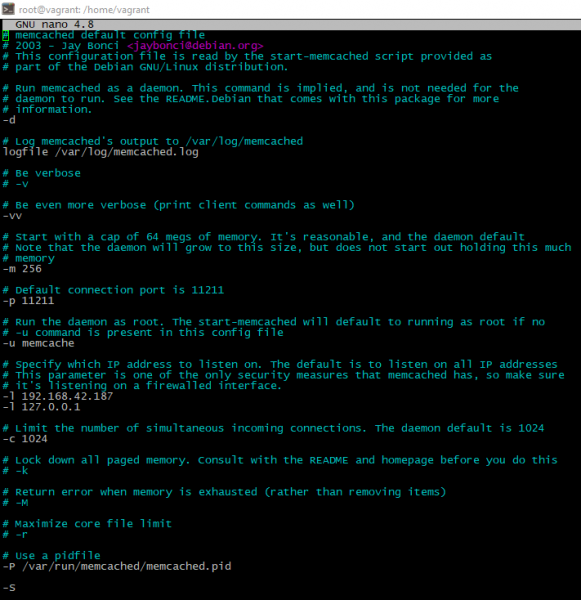
Caching service stores its settings into the file /etc/memcached.conf. The most interesting options is:
-m # how much memory is reserves into the RAM for caching

-p # used TCP-port which service will listen

-U # UDP-port (optional)

-l # service-listening IP-address, usually 127.0.0.1 for local services or "external" address for "remote"

-c # how much simultaneous connections are allowed

-S # this flag needed to use authentication (see below)
To accept incoming connections please permit this on the system firewall side:
ufw allow <PORT>
Increase the safety
In case your server is accessible from the outside, some carrying about security would be nice. In next steps we will implement simple authentication for memcached. Make follow steps to do it:
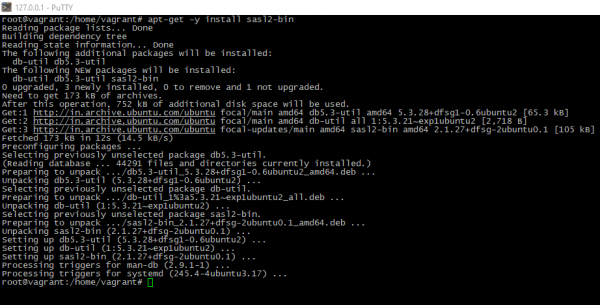
- One-line installation:
apt-get -y install sasl2-bin
- Adding the configuration:
mkdir /etc/sasl2; nano /etc/sasl2/memcached.conf
- Next step you can add the password and fix file ownership. NOTE: it is not system user, memcached has separate authorization:
saslpasswd2 -c -f /etc/sasl2/memcached-sasldb2 -a memcached <MEMCACHED_USERNAME>

chown memcache:memcache /etc/sasl2/memcached-sasldb2
- To apply all changes service restart needed:
service memcached restartCheck the result
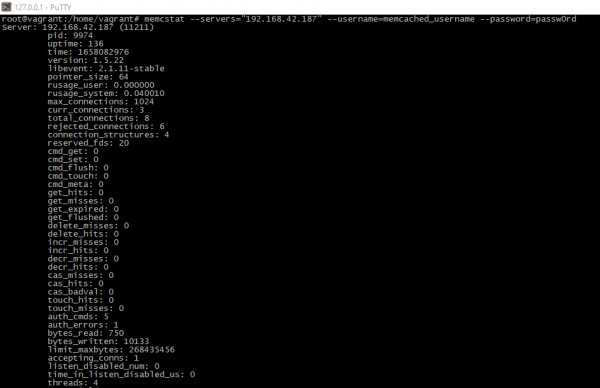
You can simply check is caching service run or not. Just run:
memcstat --servers="<LISTENING_IP>" --username=<MEMCACHED_USERNAME> --password=<MEMCACHED_PASSWORD>You should see something like this

Summary
This guide will help you understand what caching is, its purpose, and how to effectively set up, optimize, and secure a Memcached instance on your Ubuntu 20.04 system. Whether you're running a high-traffic website or a resource-intensive application, proper caching can dramatically improve performance and reduce server load.
 700
300
 700
300
 700
300


