
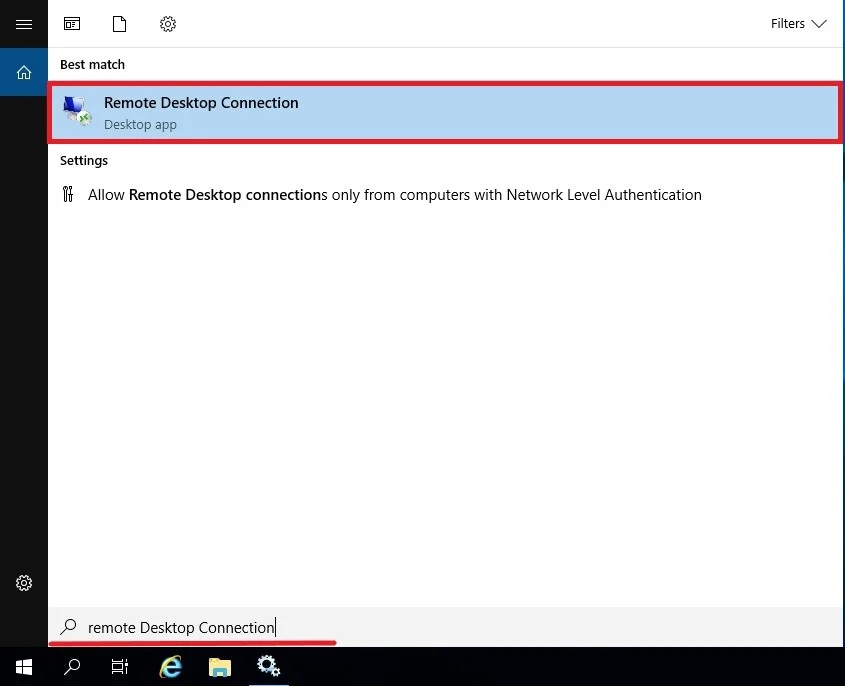
Depending on your Remote Desktop Protocol (RDP) server setup, you may experience issues with your microphone not working during RDP sessions. This often happens because the microphone feature is disabled by default and requires manual activation. In this step-by-step guide, we will show you how to enable microphone access in Remote Desktop, troubleshoot common microphone problems, and ensure smooth and reliable audio input during remote desktop connections. Follow these instructions to fix microphone issues and improve your remote work experience with Windows RDP.

Configuring Device Redirection Services
To configure settings, open gpedit.msc on the local machine you will use to connect to the remote terminal.
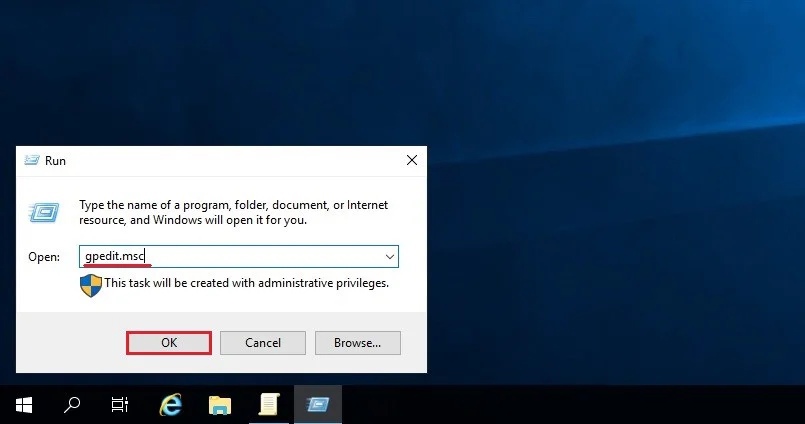
Attention: If you had an error saying that "can't find group policy editor" use this instruction
Go to the path:
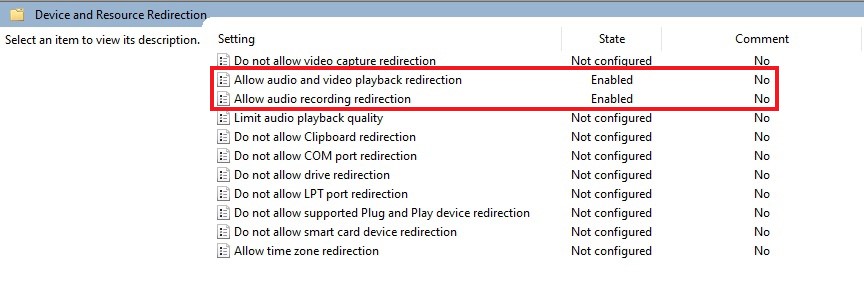
Local Computer Policy -> Computer Configuration -> Administrative templates -> Windows Components -> Remote Desktop Services -> Remote Desktop Session Host -> Devise and Resource Redirection-> Enable "Allow audio recording redirection" и "Allow audio and video payback redirection".
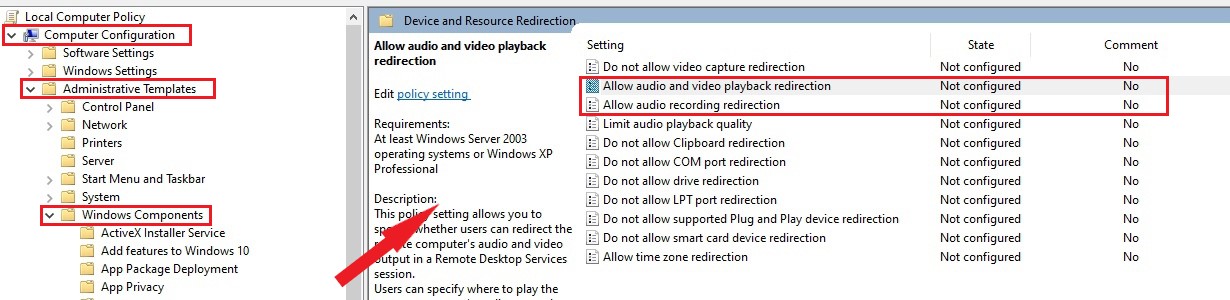
Same policy you have to enable on the remote server.
Attention: Service should be enabled on local and remote servers
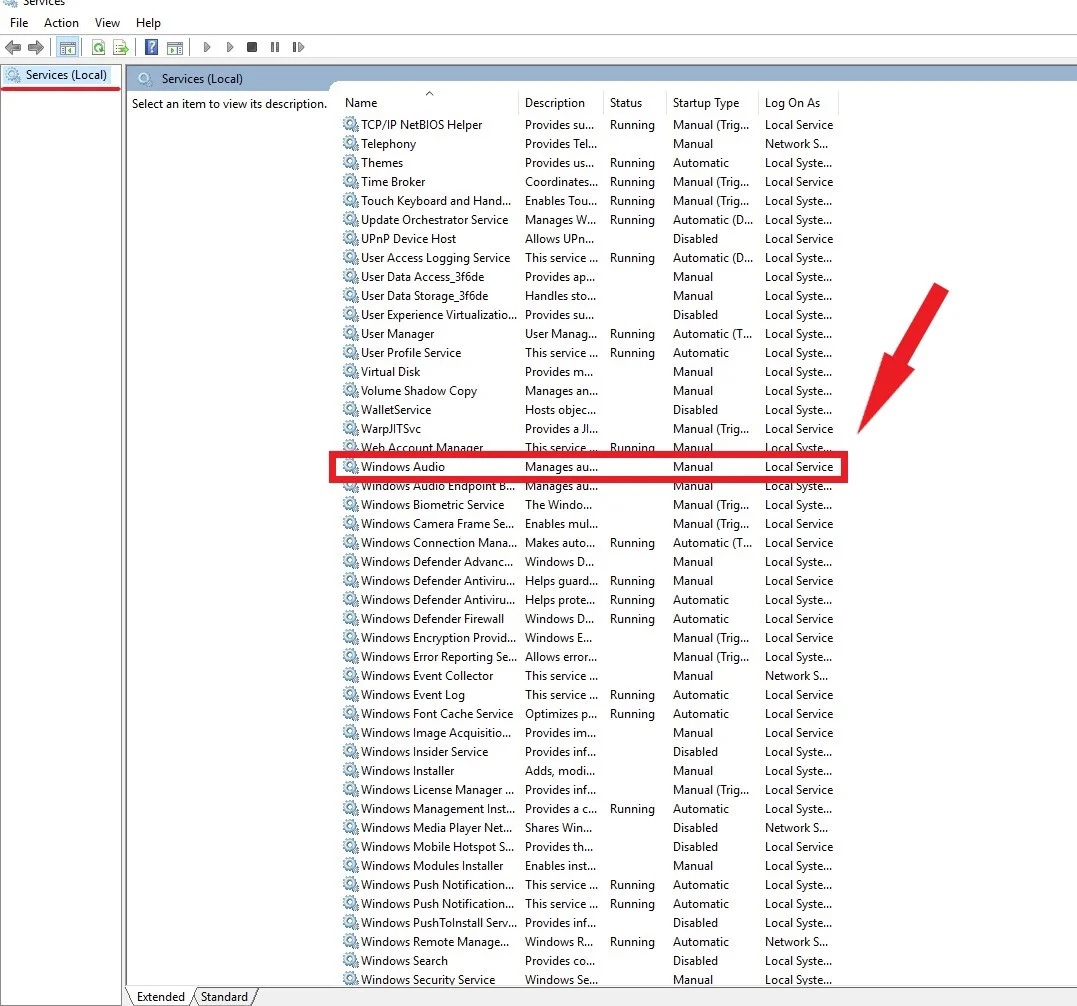
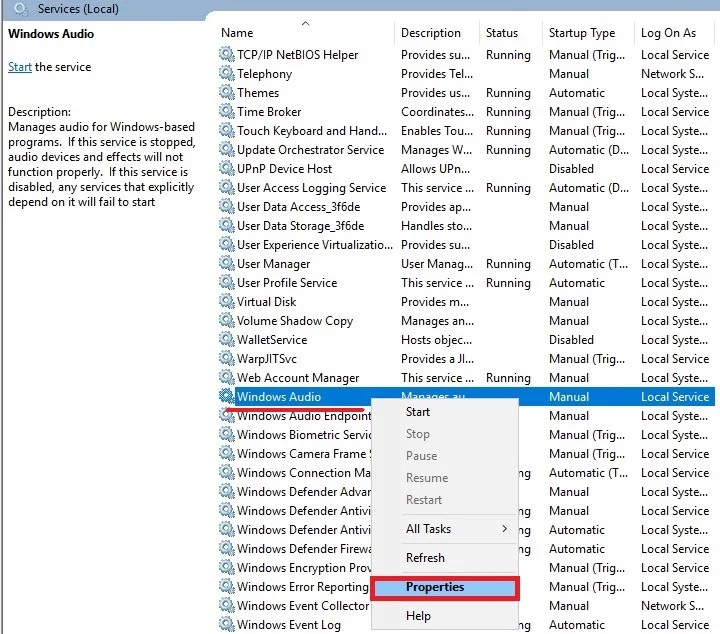
Enabling Windows Audio Services
On the both machines you have to enable Windows Audio service. Go to the Start menu and in a searching bar look for "Services":

Scroll Down and find Windows Audio Service:
After in the menu of that service click on "Properties":
In the opened menu in the "Startup type" choose "Automatic". Now service is automatically on when system start:
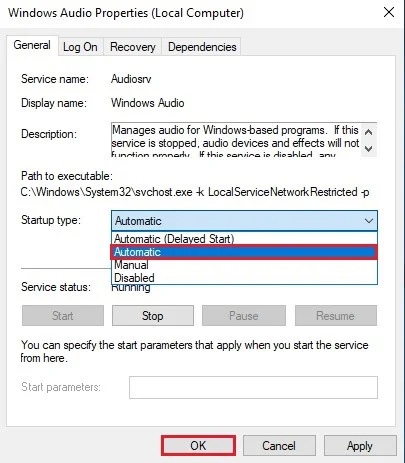
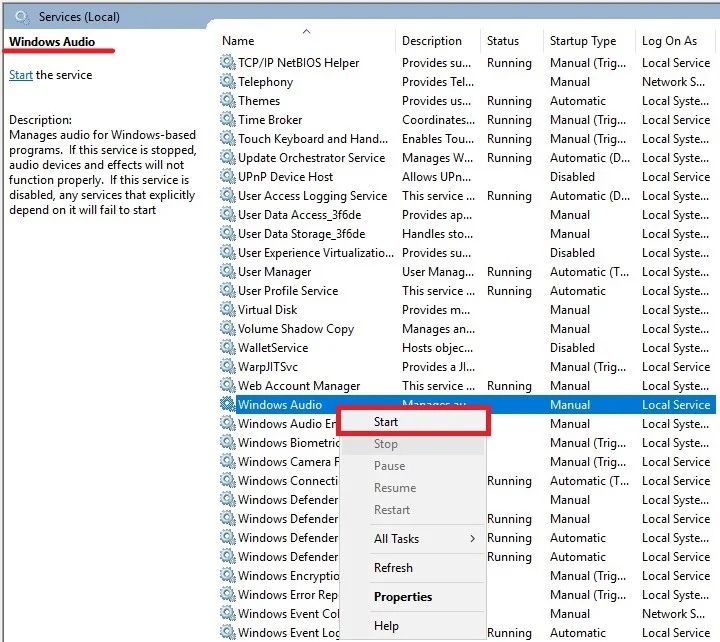
After that reboot service:
Updating registry settings.
On the next step we have to update registry settings.
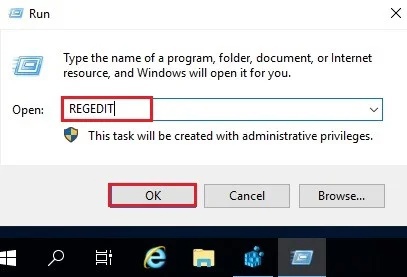
Firstly, with Win + R run REGEDIT command:
After that go to the path:
HKEY_LOCAL_MACHINE\SYSTEM\CurrentControlSet\Control\Terminal Server\WinStations\RDP-TcpFind file fDisavleAudioCapture:
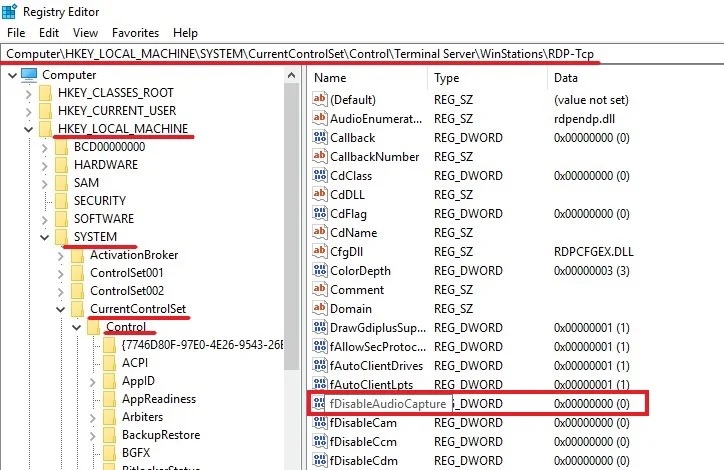
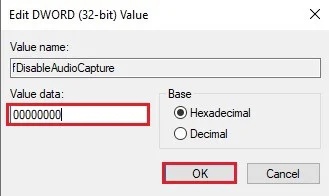
Click twicely on the file and in the opened menu change "Value data" to the eight zeros "00000000":
Adding role "Remote Desktop Session Host"
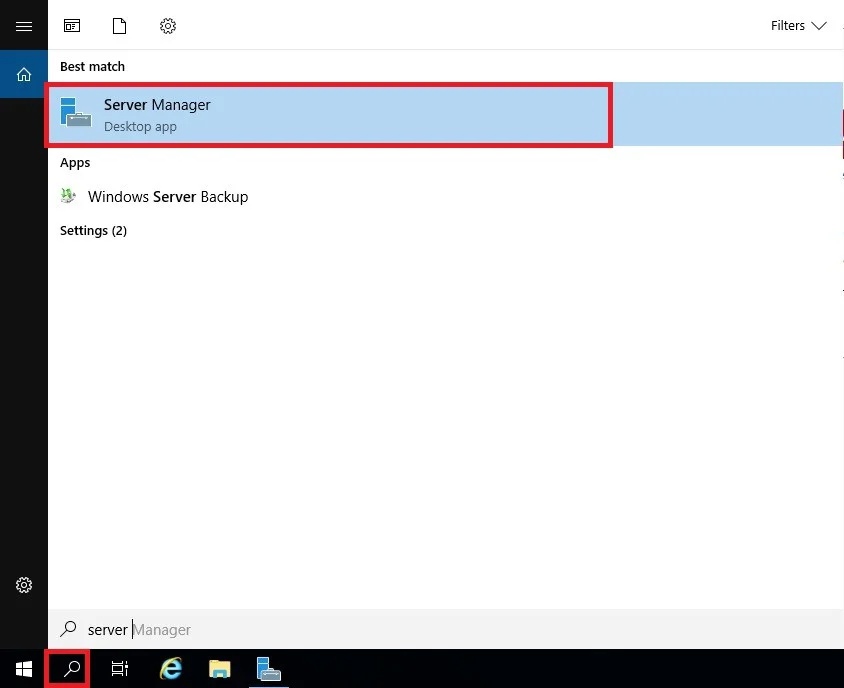
In the Start menu look for a "Server Manage":
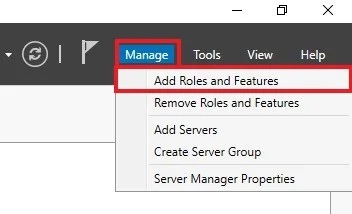
In the right corner click on the "Manage" menu and choose "Adding roles and Features":
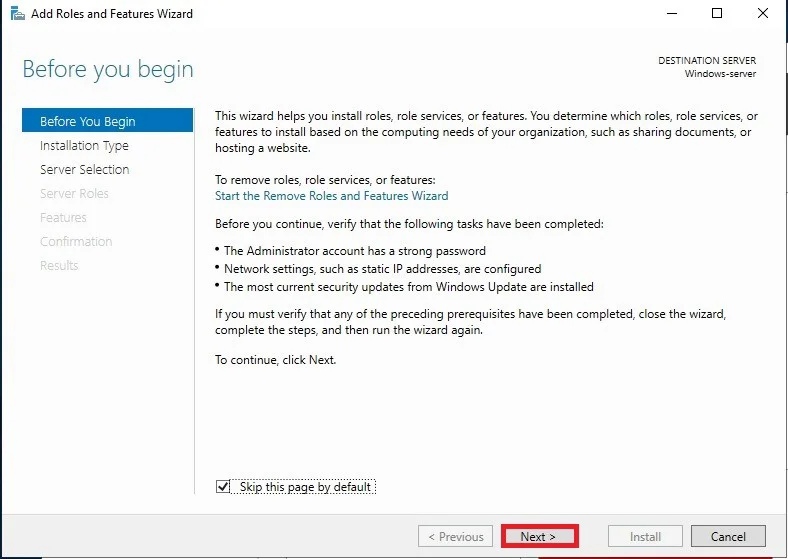
After that, in the opened menu, click "Next":
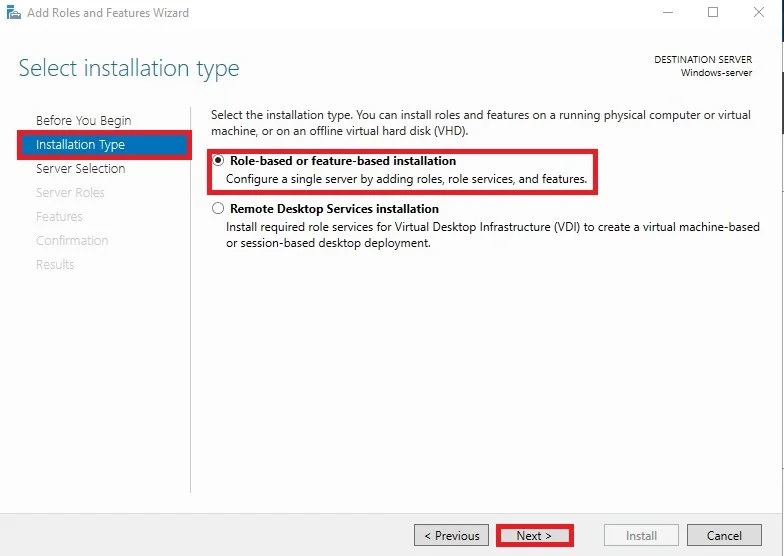
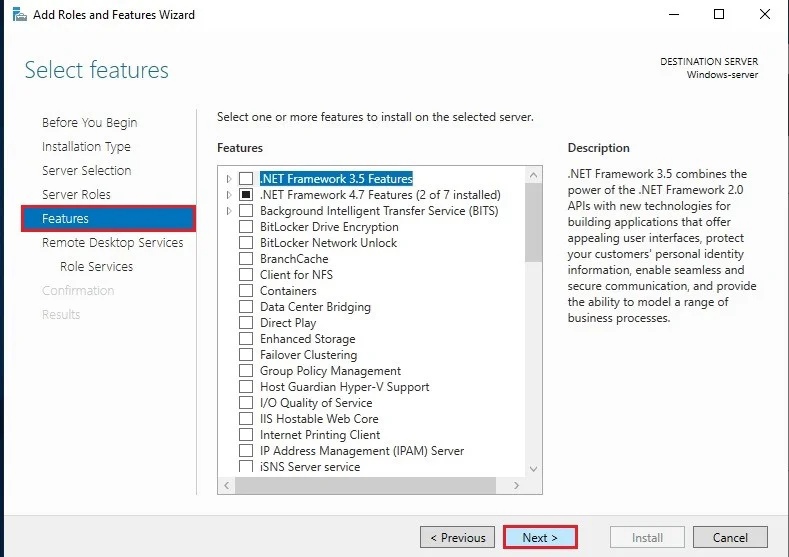
In the menu "Installation Type" choose "Role-based or Fearure-based installation", as it shown on the screenshot:
Next, put a tick in the menu "Remote Desktop Services", after that click "Next":
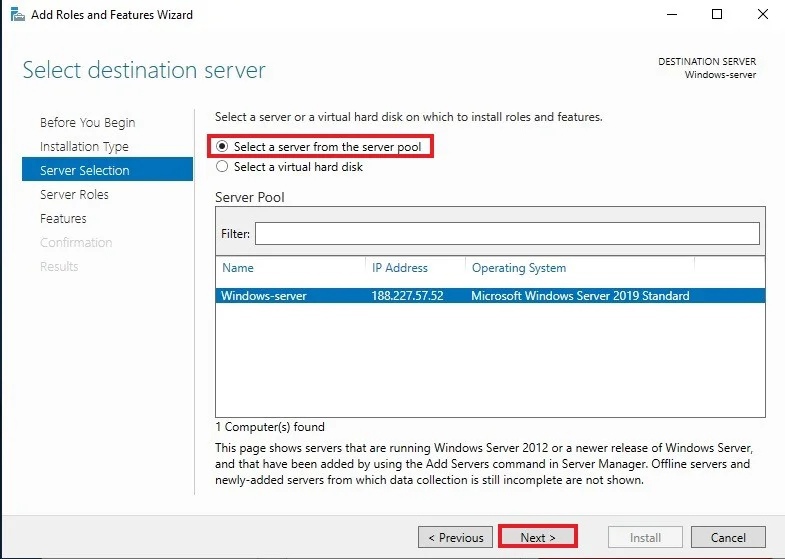
As a next step, put a tick on "Remote Desktop Services":
Next just click "Next":
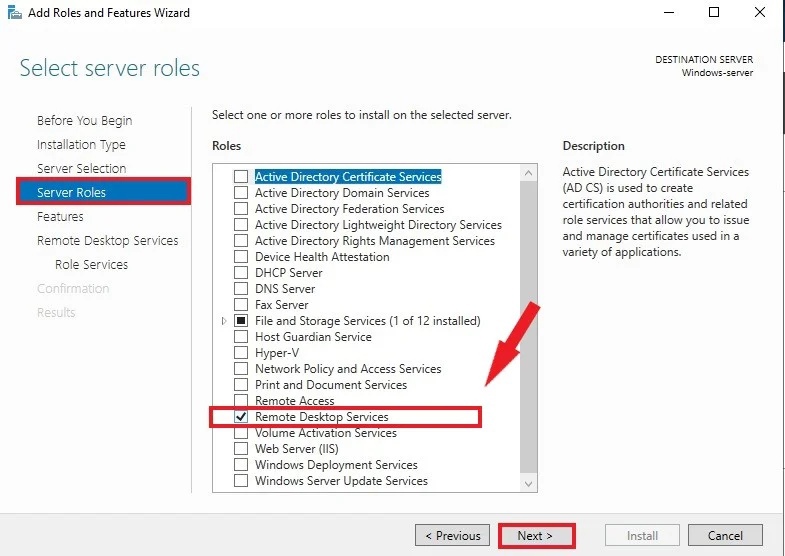
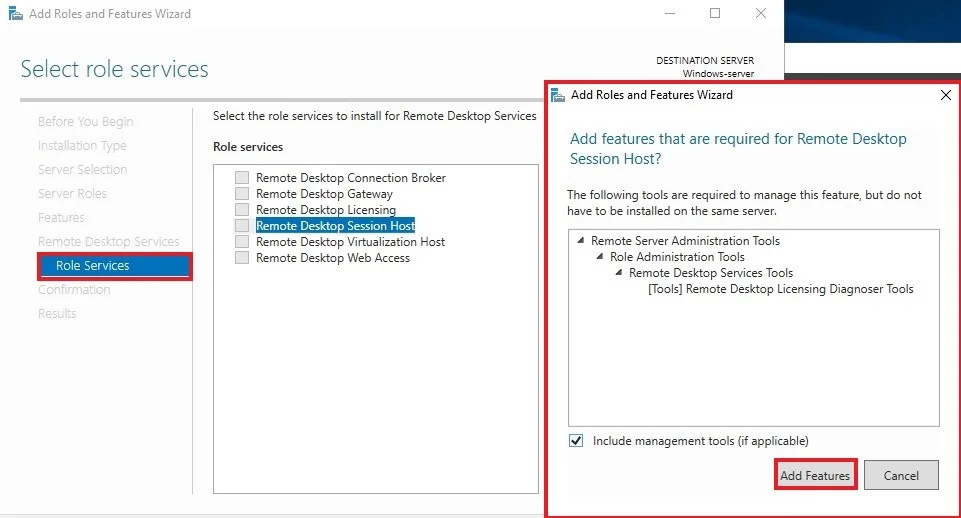
On a step "Role Services" choose "Remote Desktop Session Host" and in an opened menu click on "Add features":
Now just click "Next".
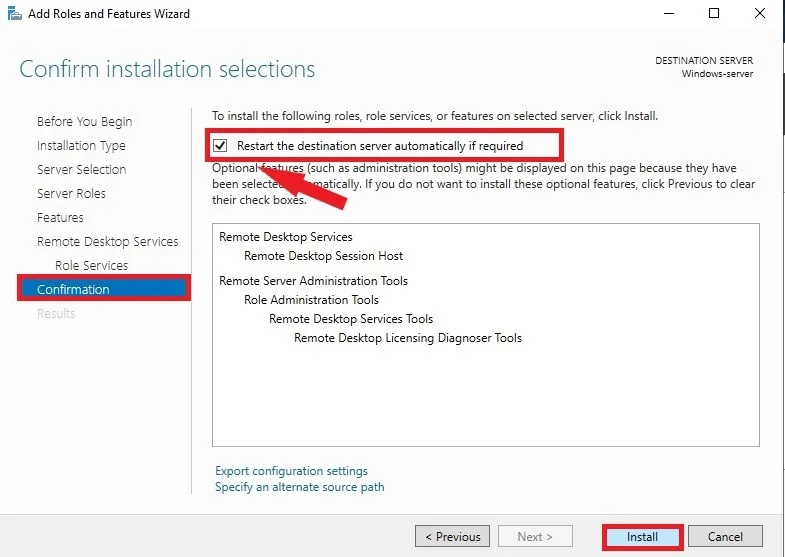
On the "Confirmation" step put a tick in the pole "Restart the destination server...", then click "Install":
After that installation is going to start:
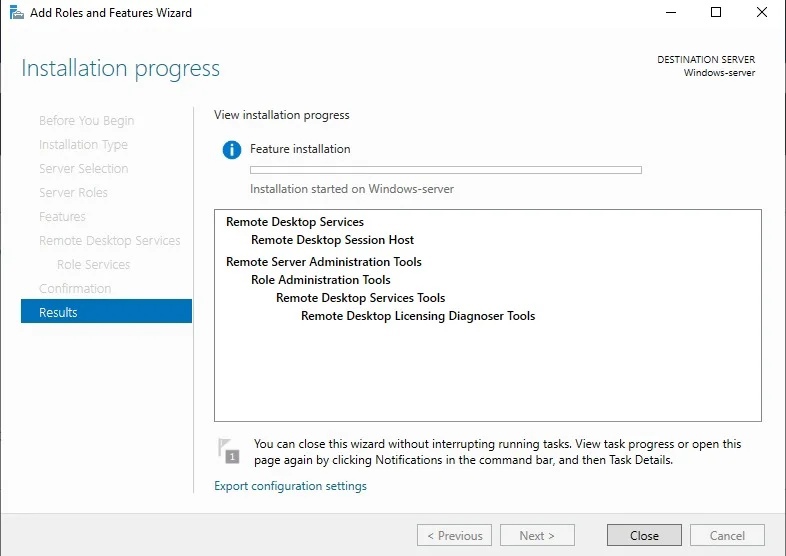
Server is going to restart, role will be enabled.
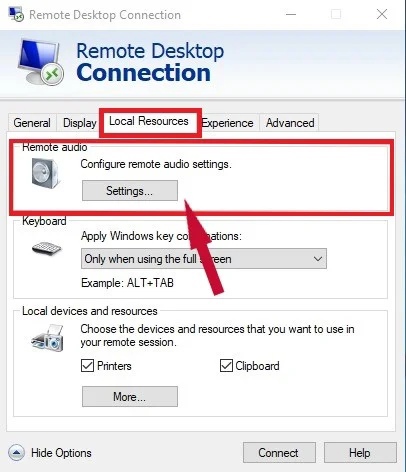
Remote Audio settings.
Next, open the Remote Desktop Connection settings on your local server:
Click on the "Show options" button, then go to "Local resources" and select "Remote Audio":
Then, in the settings, select the items "Play on this computer" and "Record from this computer":
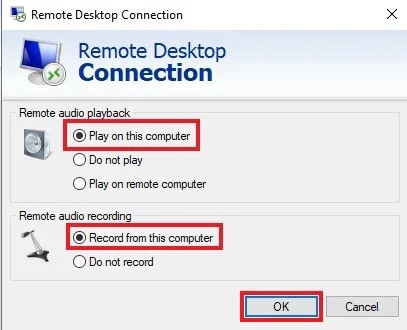
Click "OK".
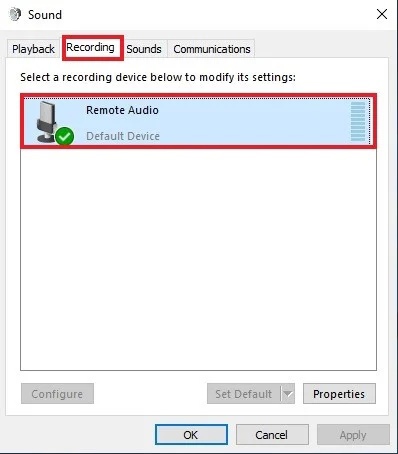
Click on the sound icon with the right mouse button and select the "Sound" menu:
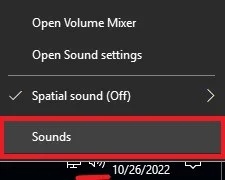
In it, go to the "Recording" tab. And check the presence of "Remote Audio".
Congratulations! We will now be heard on the remote terminal. In order for it to work correctly, use the default microphone in applications.
FAQ: Microphone Issues in Remote Desktop (RDP) Sessions
- Q1: RDP microphone not working — what should I check first?
A: Start with the RDP client settings: open Remote Desktop Connection (mstsc) → Show options → Local Resources → Remote Audio → Settings, then set Record from this computer (and optionally Play on this computer for speakers). This fixes most cases without touching server settings. - Q2: Why is “Remote Audio” missing in Recording devices on the remote PC?
A: Usually because audio recording redirection is disabled on the remote server (Group Policy) or blocked by security policy. Enable Allow audio recording redirection (and playback redirection if needed) under:
Local Computer Policy → Computer Configuration → Administrative Templates → Windows Components → Remote Desktop Services → Remote Desktop Session Host → Device and Resource Redirection. - Q3: Do I need to enable settings on both the local and remote machines?
A: In most environments, the key settings are on the remote server (it must allow redirection). On the local PC, make sure nothing is explicitly blocking redirection (common in corporate policies), and confirm the RDP client is set to Record from this computer. - Q4: Which Windows services must be running for RDP audio input/output?
A: On both machines, make sure Windows Audio is running. If audio still fails, also check Windows Audio Endpoint Builder. Set both services to Automatic and restart them if needed. - Q5: Can I use any microphone during an RDP session?
A: Most built-in and standard USB microphones work. Some specialized USB audio devices, virtual audio drivers, or “app-only” devices may not redirect reliably. For best results, use a microphone that Windows detects as a standard recording device. - Q6: RDP mic worked before, but stopped after updates — why?
A: Windows updates, RDP client updates, or domain policies can reset or tighten audio redirection rules. Re-check the RDP client (Record from this computer) and confirm the server still allows audio recording redirection via Group Policy. - Q7: I don’t have gpedit.msc (Windows Home). Can I still enable microphone redirection?
A: Yes, but you’ll need to rely on RDP client settings first. If the remote server allows redirection, that may be enough. If the remote side requires policy changes, you’ll need admin access on the server (where gpedit is available) or use registry-based configuration where applicable. - Q8: The mic is redirected, but apps still don’t see it — what now?
A: Make sure the correct device is set as the default microphone on the local PC before connecting. Then, inside the remote session, reopen the app (some apps detect devices only at launch). Also check the app’s own audio input selector and pick the default device. - Q9: Can I use multiple microphones over RDP?
A: Typically, RDP uses the default recording device from your local computer. If you have multiple mics, set the one you want as default before starting the RDP session. - Q10: Can incorrect microphone settings break speaker output too?
A: Yes. Audio input and output are configured in the same Remote Audio settings. If sound output is also missing, set Play on this computer and confirm the server allows audio and video playback redirection


