Using the DD Command to Back Up Windows Systems: A Complete Guide
Learn how to create full disk backups on a Windows Server using the Unix-like dd utility. This comprehensive guide walks you through the entire process of using dd — a powerful low-level disk imaging tool — to create bit-for-bit backups of your Windows Server drives.
You’ll learn how to run dd from a Linux live environment or via Windows Subsystem for Linux (WSL), how to correctly identify your target and destination disks, and how to store the resulting image securely. We’ll also cover important considerations such as compression, splitting large image files, verifying backup integrity, and restoring from the image in case of system failure. Whether you're preparing for disaster recovery or migrating a server, this guide helps ensure your data remains safe and recoverable.
Introduction
The backup system is an important component of data security. The choice of backup methods and forwarding methods depends on your needs and conditions of use. When setting up a backup, you should take into account the level of data criticality, available storage space, access speed, as well as the level of protection that is required for your data.
The DD utility is primarily designed for Linux—based operating systems, and it offers various commands with specific operands to facilitate file copying. Being one of the oldest utilities, DD creates backups that are compatible with numerous software applications. However, its functionality in the Windows operating system is comparatively limited compared to its Linux counterpart. Notably, the Windows version lacks support for file conversion and block device usage.

Download utility
First of all, we need to download utility then check them for malicious software, unfortunately that step is sufficiently for your security. You need to choose archive in the downloaded files and attach to the service, wait for results. If you will see report like this, then everything is OK:
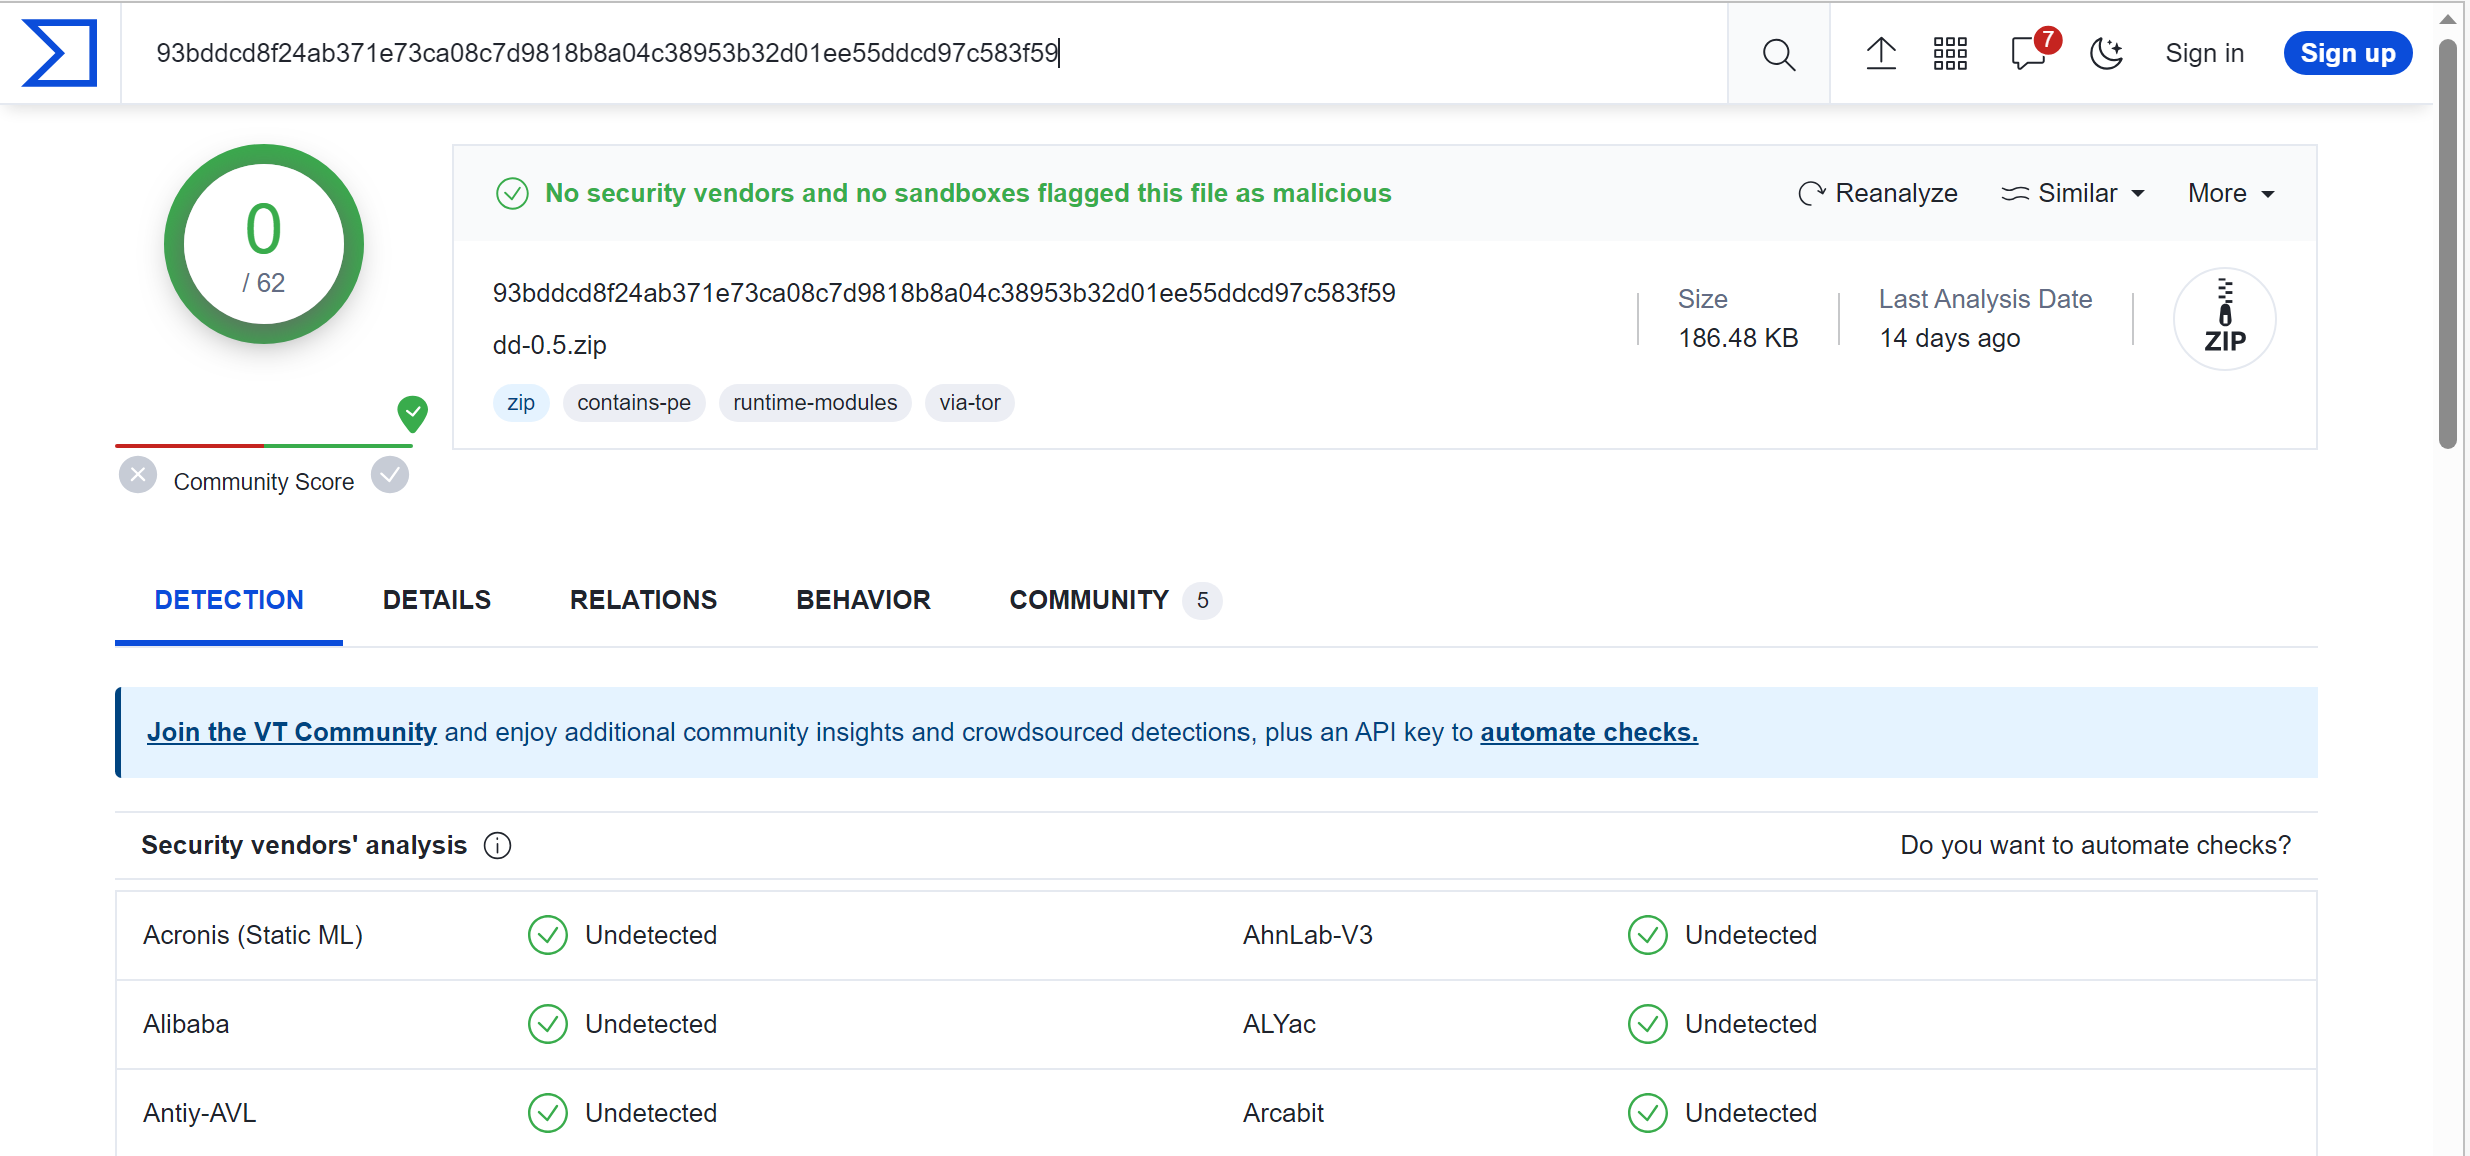
Warning! We do not take responsibility for the program available on the site due to the lack of control over the file, download the utility at your own risk.
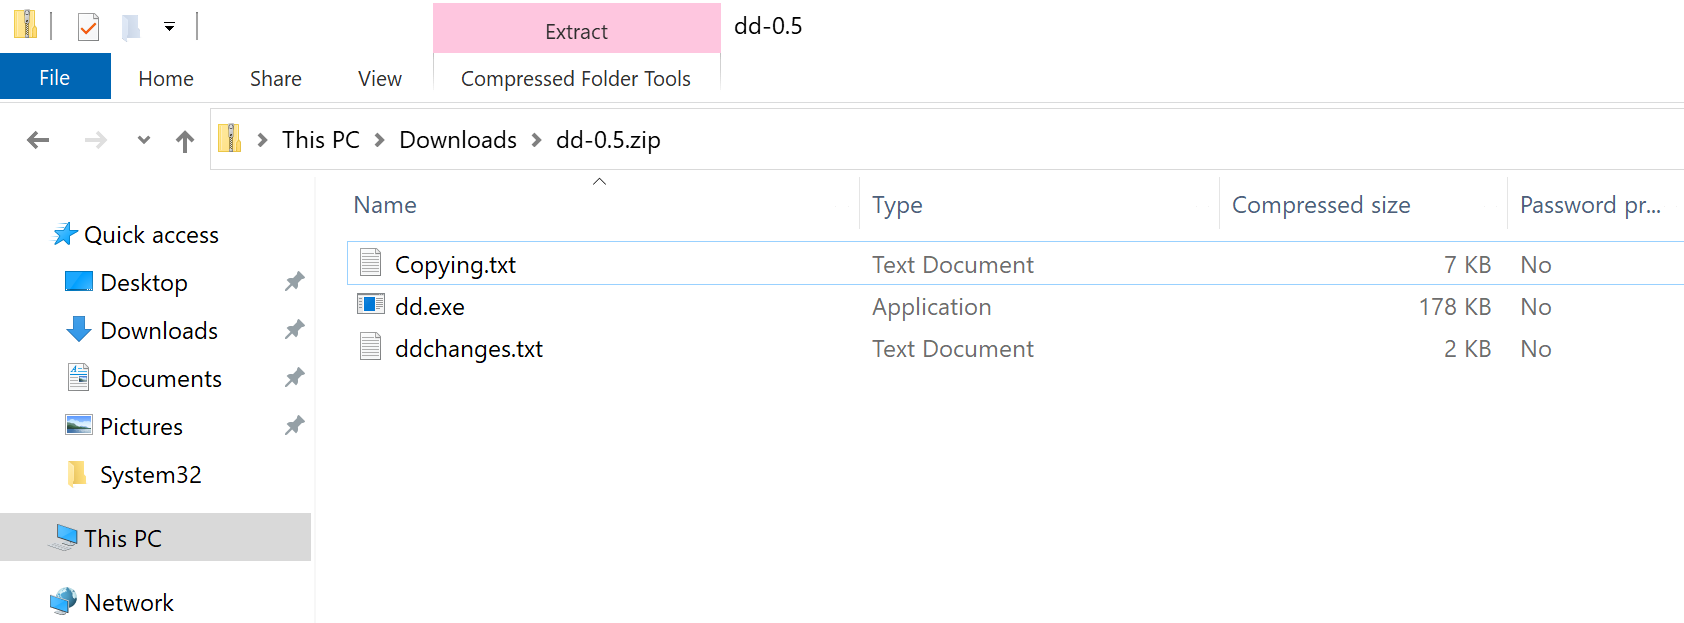
By opening archive you will see three files, we need to open with .exe format:
Create backup
For start using utility you need to type that command below, but before go to the executable folder:
cd C:\Users\Administrator.WIN22\Desktop && dd.exe --list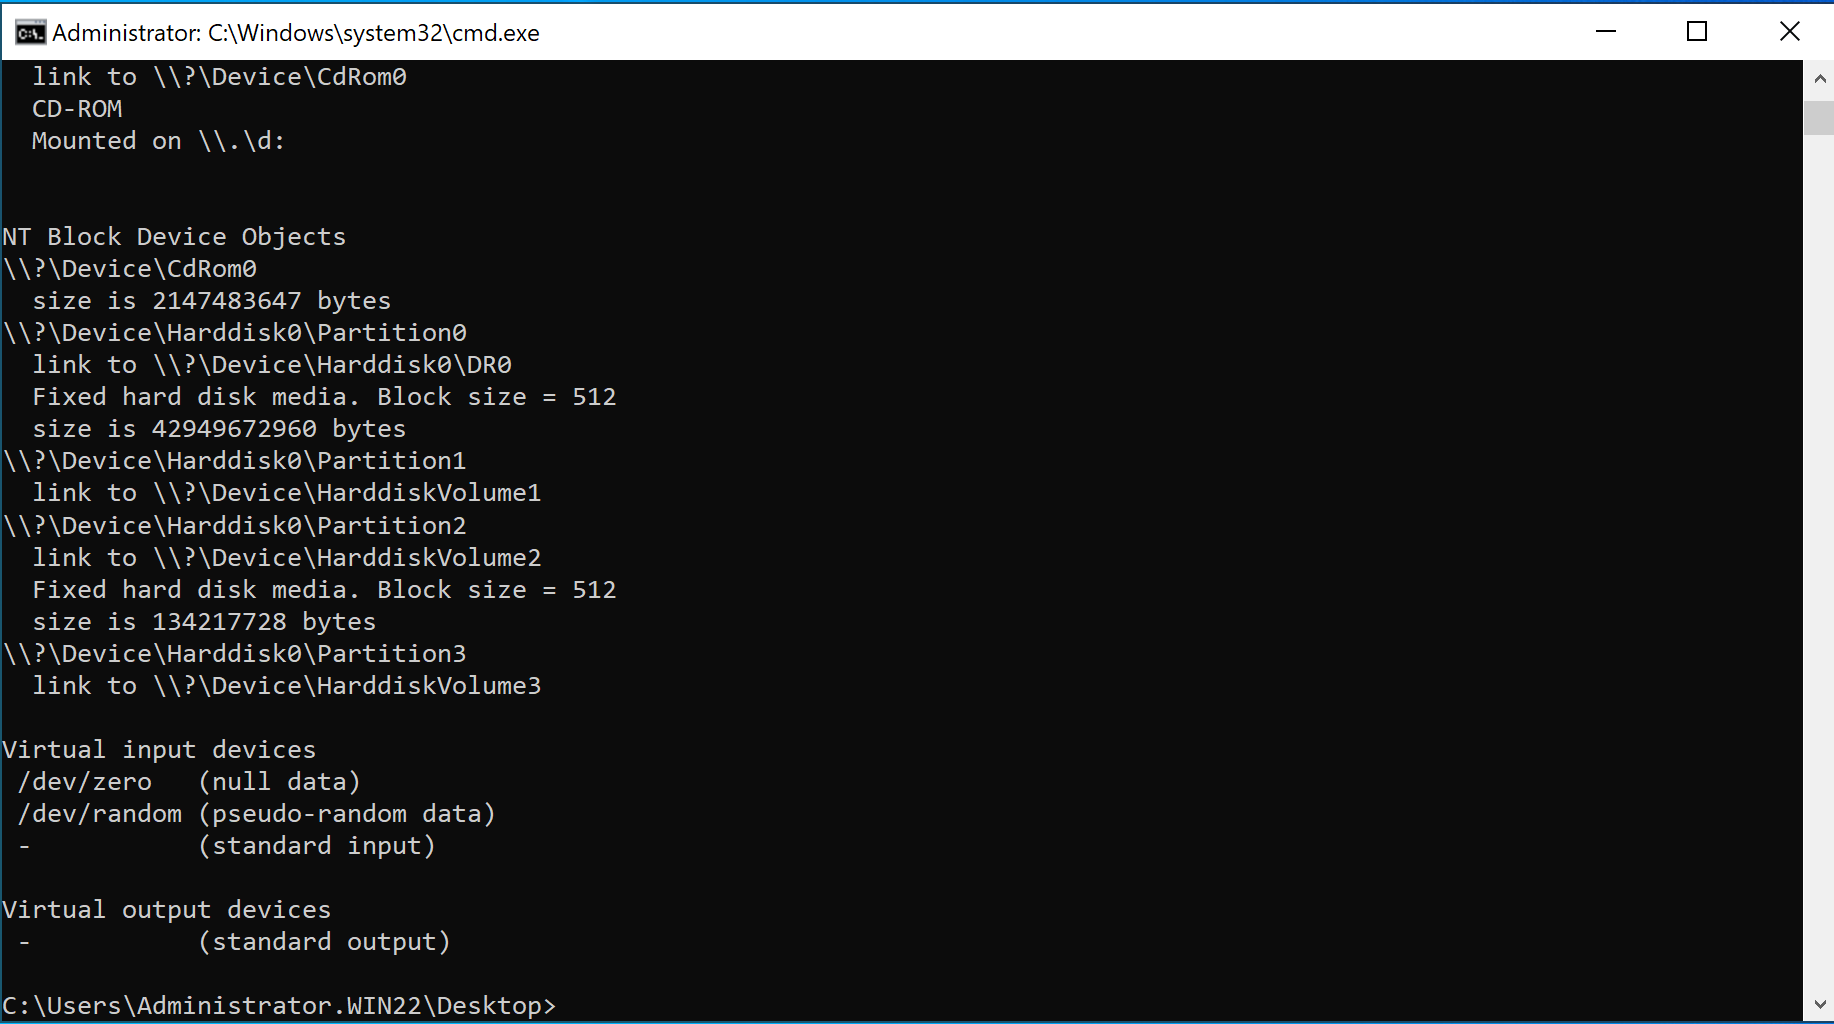
You can see various of options that you can use with that command, let's solve the problem and task of creation file of folder C disk. For that type the command:
dd if=\\.\c:\tt\1.zip of=c:\tt\disk1.img bs=1440k
Let's break down the command step by step:
- dd: This is the command itself, indicating that you want to use the dd utility.
- if=\\.\c:\tt\1.zip: The if parameter stands for "input file," and \\.\c:\tt\1.zip is the input source. In Windows, \\.\ is used to access a physical device directly, and c:\tt\1.zip represents the path to the source file. It indicates that the data will be read from the file 1.zip located at c:\tt\ on drive C:.
- of=c:\tt\disk1.img: The of parameter stands for "output file," and c:\tt\disk1.img is the output destination. It specifies that the copied data will be written to the file named disk1.img in the c:\tt\ directory on drive C:.
- bs=1440k: The bs parameter stands for "block size." This parameter determines the size of the data blocks that dd reads and writes at a time. In this case, the block size is set to 1440 kilobytes (1440k), which means dd will read and write data in 1440 KB chunks.
Please note: before creating backups, you need to make sure that there is enough unallocated space on the desired disk.
Let's restore information from disk1.img by the command below:
dd if=c:\tt\disk1.img of=\\.\c:\tt\new bs=1440k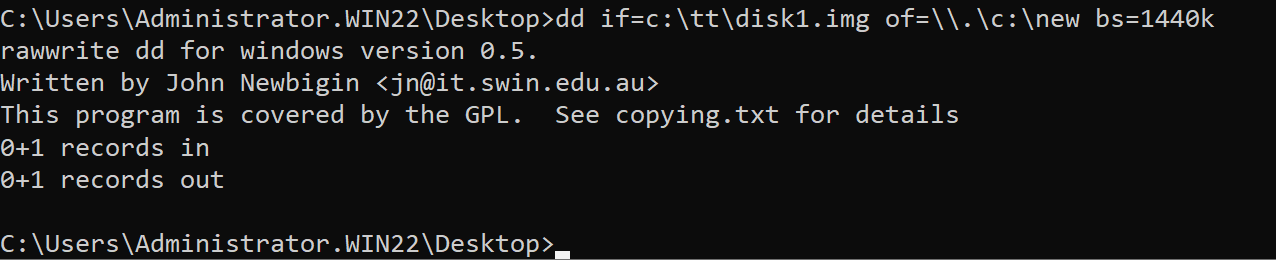
Let's break down the command step by step:
- dd: This is the command itself, indicating that you want to use the dd utility.
- if=c:\tt\disk1.img: The if parameter stands for "input file," and c:\tt\disk1.img specifies the input source. This path indicates that data will be read from the file named disk1.img located at c:\tt\.
- of=\\.\c:\tt\new: The of parameter stands for "output file," and \\.\c:\tt\new specifies the output destination. In Windows, \\.\ is used to access a physical device directly. Here, it's followed by the path c:\tt\new, which suggests that the data will be written to a file named new at c:\tt\.
- bs=1440k: The bs parameter stands for "block size." This parameter determines the size of the data blocks that dd reads and writes at a time. In this case, the block size is set to 1440 kilobytes (1440k), meaning that dd will process data in 1440 KB chunks.
Create scheduler
Search in windows bar application Task Scheduler and open it:
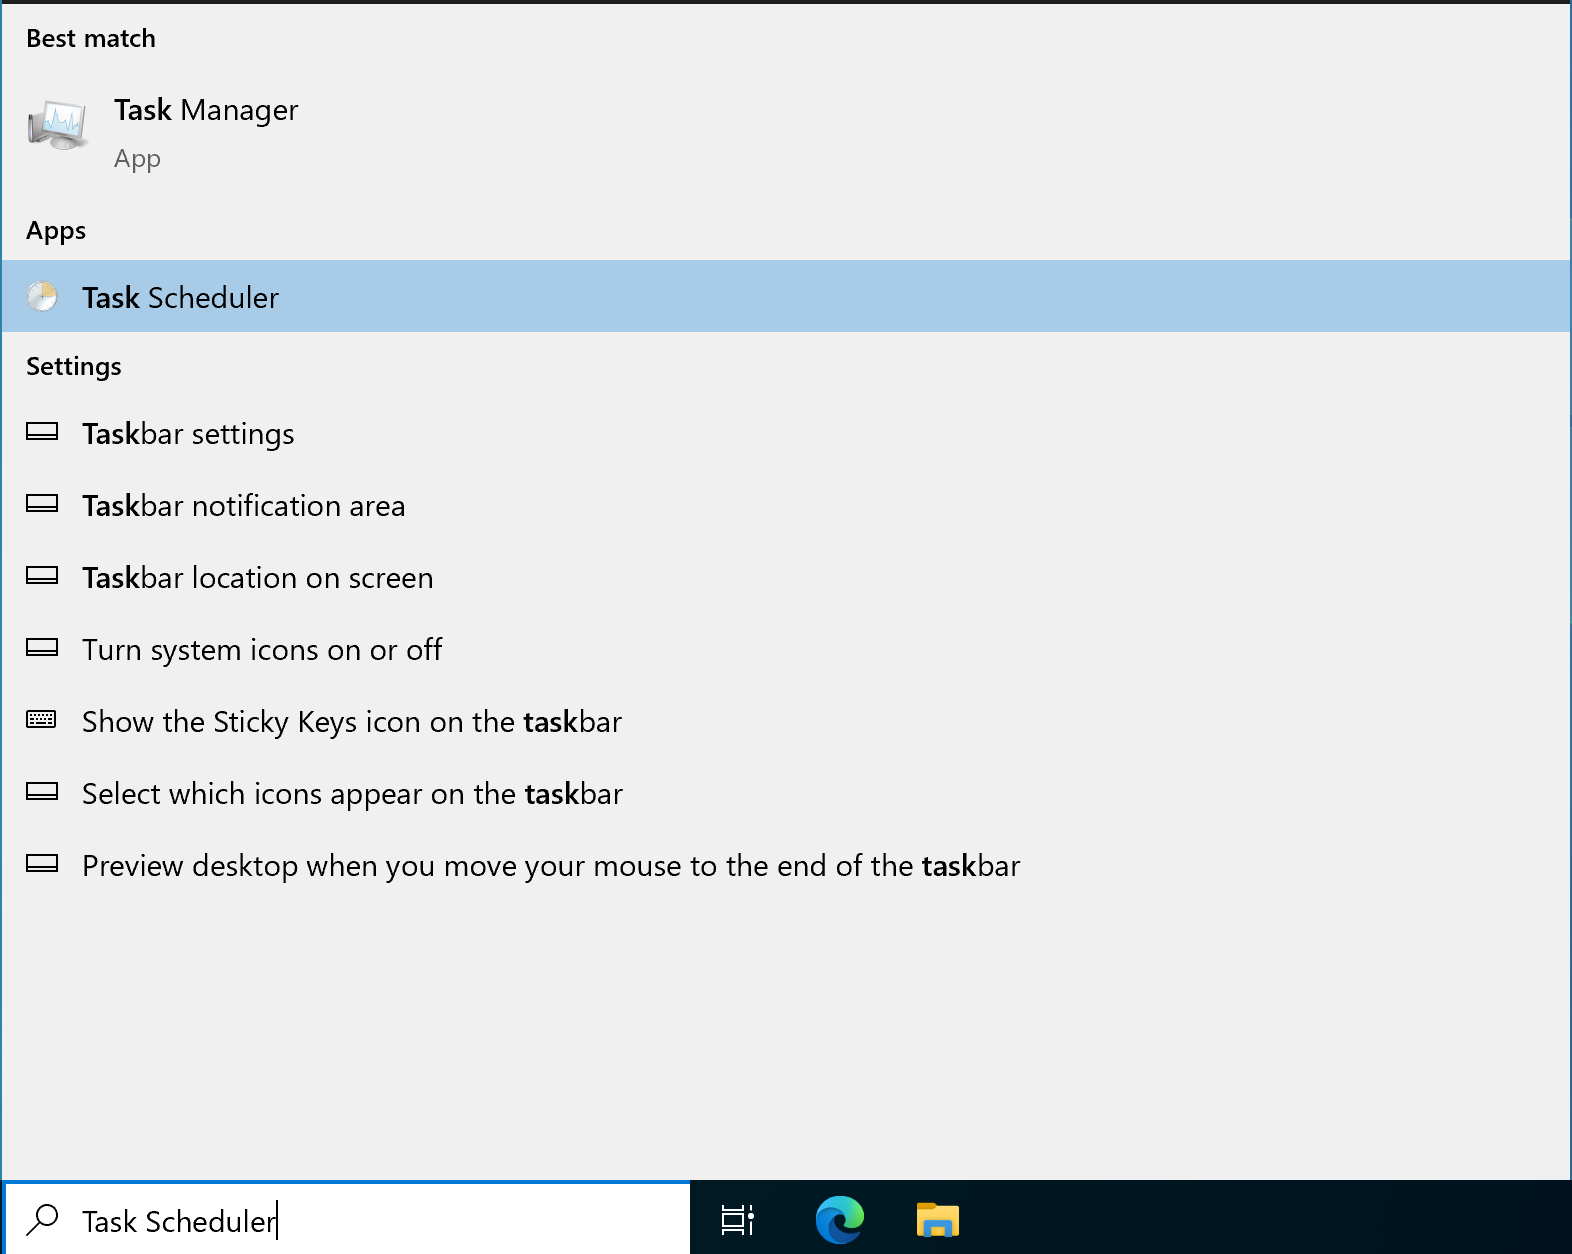
After that you will see pop—up window with main field and tab for next configuration, create task:
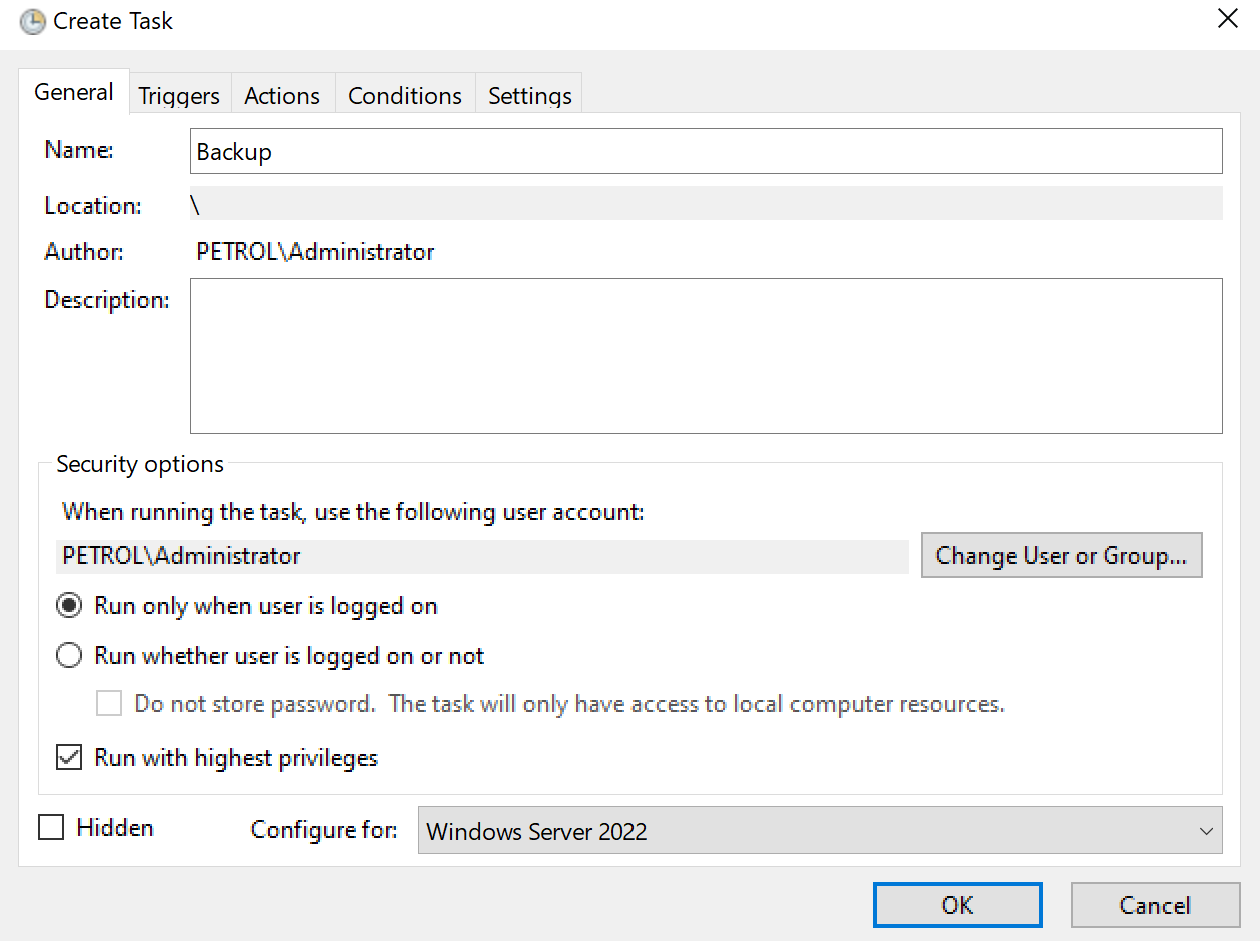
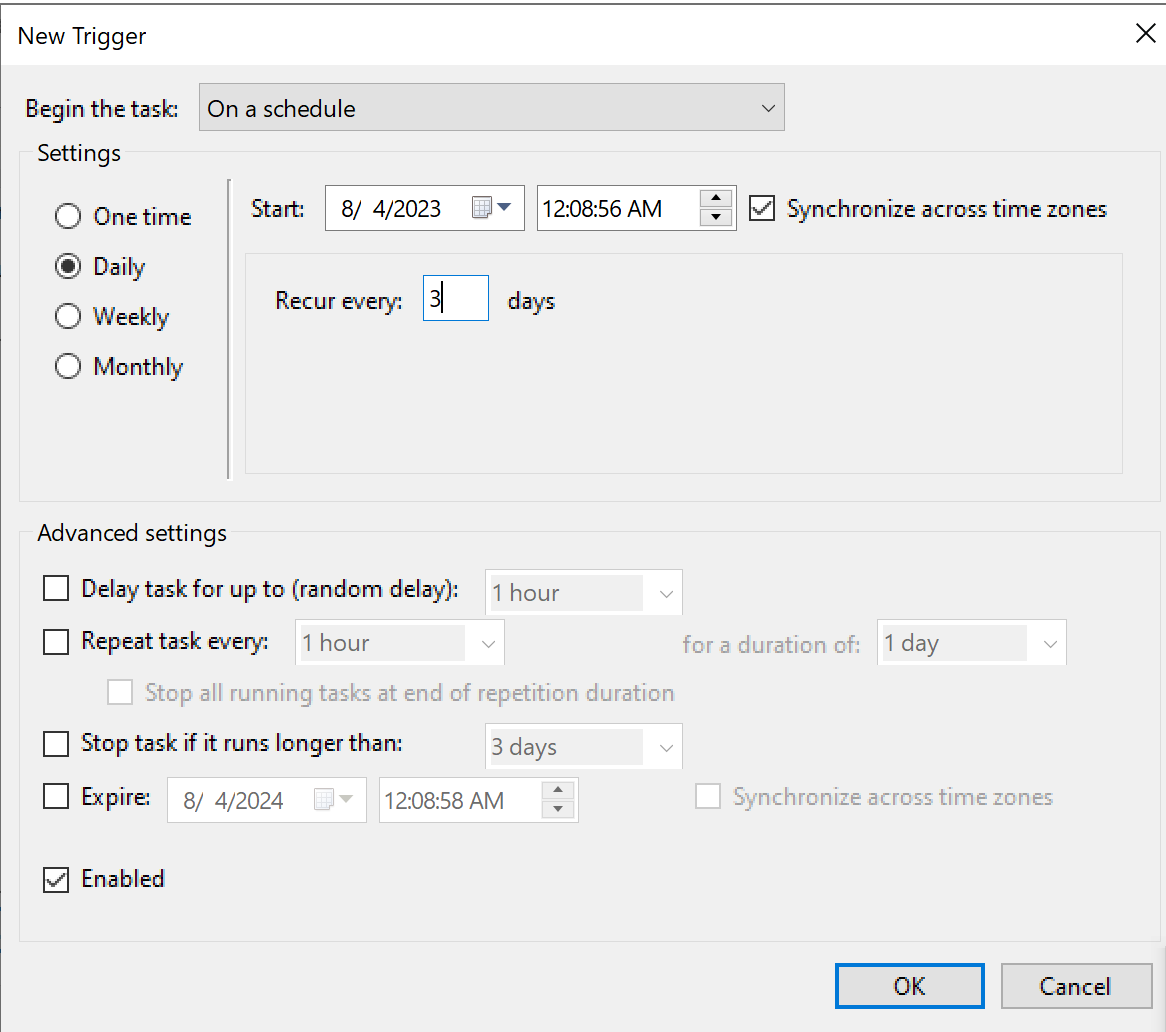
Give a Name to a task for recognize process that you start, also you can add description to filed and check the box Run with highest privileges. Set triggers for starting script that we will write after that:
Create new text file and enter the lines of code:
 # Set the source and destination paths

$sourcePath = "c:\tt\1.zip"

$destinationPath = "c:\tt\disk1.img"

# Read the data from the source file and save it to the image file $sourceContent = Get-Content -LiteralPath $sourcePath -Encoding Byte Set-Content -LiteralPath $destinationPath -Value $sourceContent -Encoding Byte

# Set the source and destination paths for writing back to the floppy disk $sourcePath = "c:\tt\disk1.img" $destinationPath = "c:\new"

# Read the data from the image file and write it back to the floppy disk $sourceContent = Get-Content -LiteralPath $sourcePath -Encoding Byte Set-Content -LiteralPath $destinationPath -Value $sourceContent -Encoding Byte 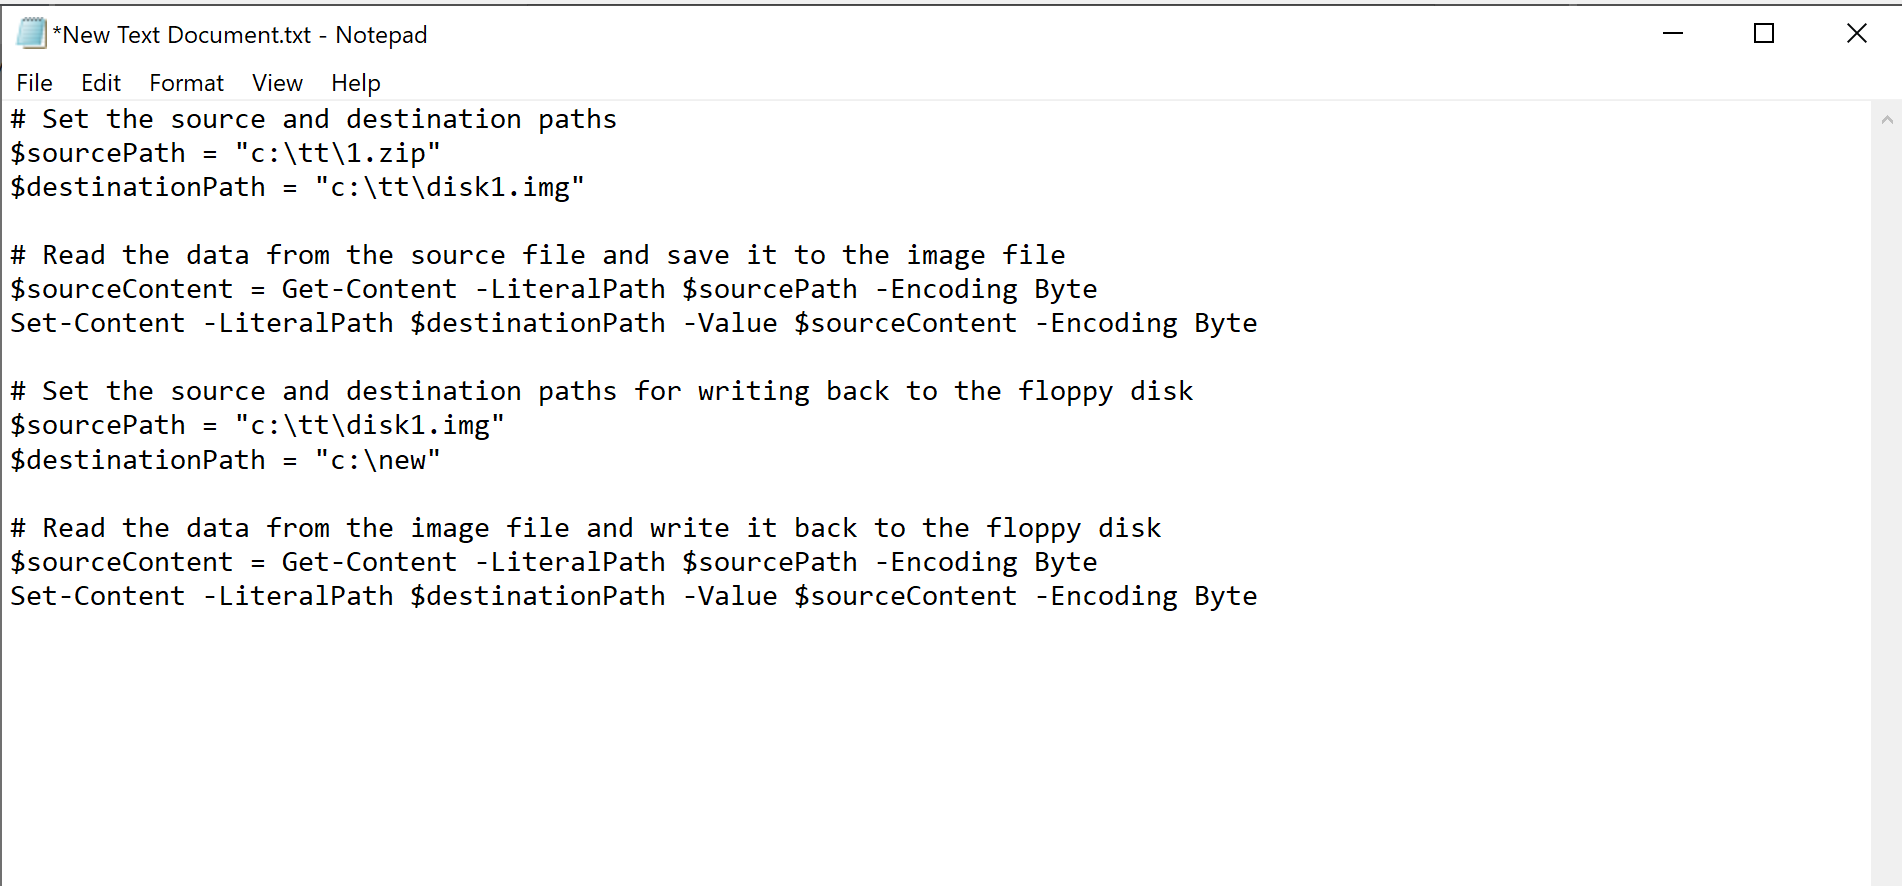
Save as .bat file, just rename it and replace .txt to .bat, after this copy path to file and enter in the tab Actions in the Scheduler:
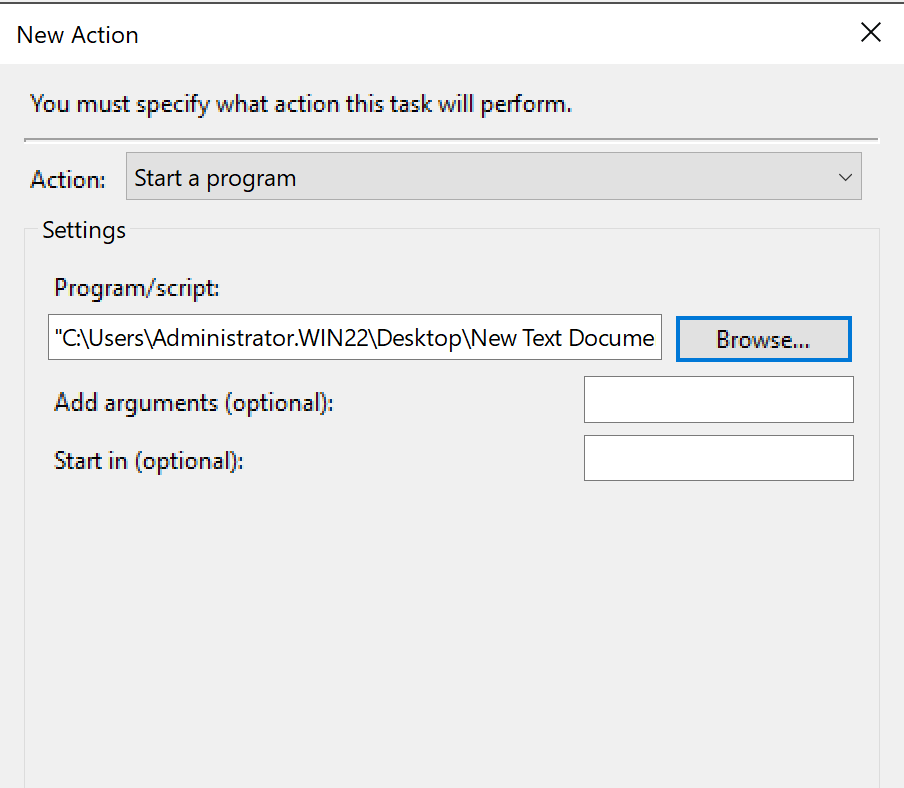
Enter path to the field Program/script or Browse and search script. Go to the next tab Settings:
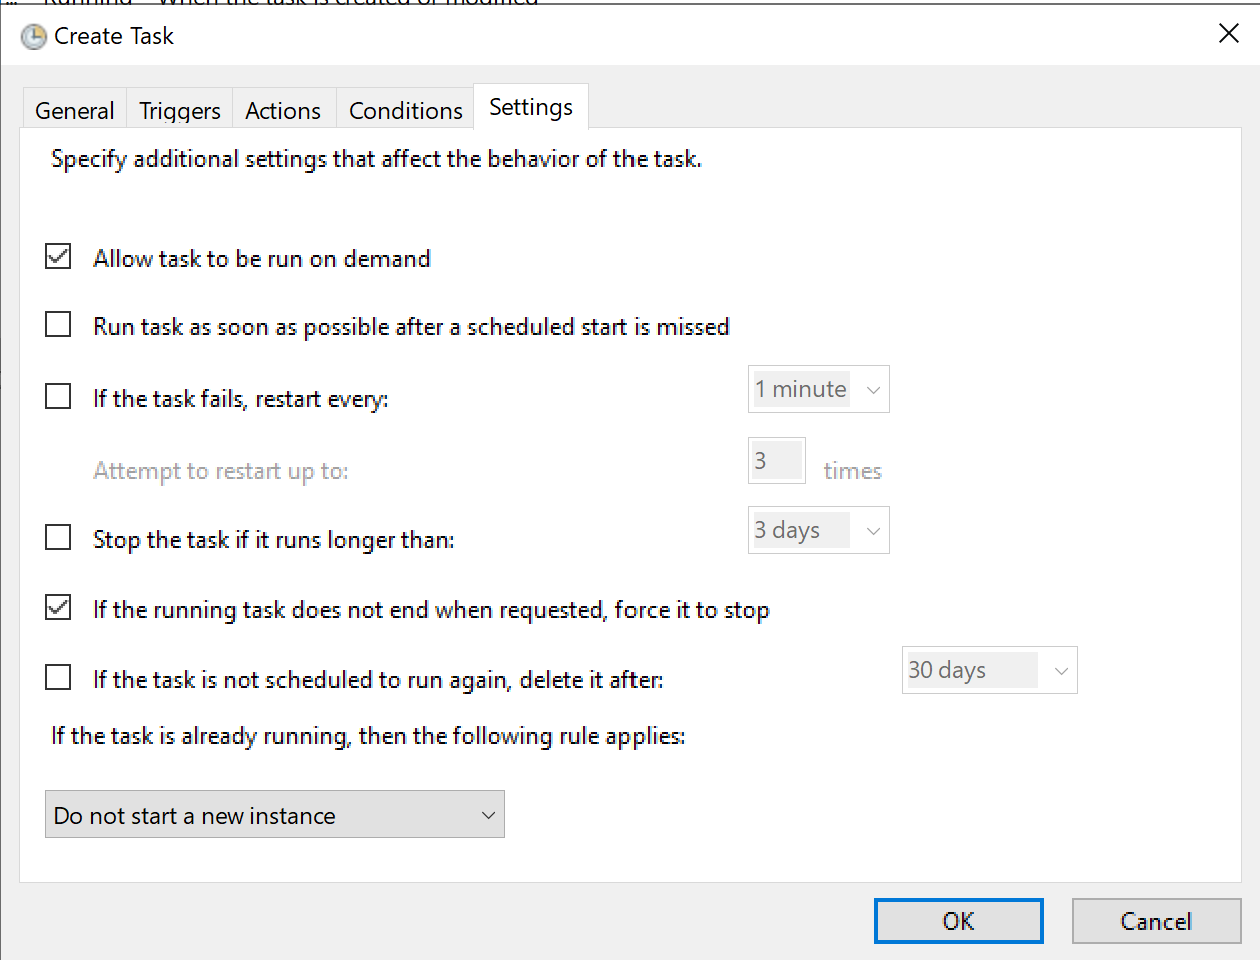
And press OK, now we have scheduler task that will run by timer!
Conclusion
The process of creating backups on a Windows Server using the Unix—like dd utility involves a series of steps designed to ensure data security and availability. The backup system holds paramount importance in safeguarding critical data against loss or corruption. Choosing appropriate backup methods and forwarding techniques depends on factors such as data criticality, storage capacity, access speed, and required security levels.
Although the dd utility is primarily intended for Linux—based systems, it can be employed on Windows Servers to achieve data copying. While dd provides various commands and operands for efficient file copying, it's important to note that its functionality on Windows may be less extensive compared to its capabilities on Linux. For instance, certain features, like file conversion and block device usage, might be limited or absent in the Windows version.
FAQ
- Can I use dd directly on a running Windows system?
Using dd on a running system is risky because it can result in inconsistent or corrupted backups due to active file changes. For full disk backups, it's recommended to boot into a Linux live environment or use Windows PE to ensure the disk is not in use. - Does dd compress the backup image?
No, dd does not perform compression by default. However, you can pipe the output through tools like gzip or xz to reduce the file size, e.g., dd if=... | gzip > backup.img.gz. - How do I verify that my backup is valid?
You can verify a backup by restoring it to a separate disk or using checksums (e.g., md5sum or sha256sum) before and after imaging. Always test your backup restoration procedure. - Is it safe to use dd on SSDs or NVMe drives?
Yes, but be cautious: dd performs raw reads and writes, which can wear out SSDs if used excessively. It's best suited for occasional full-disk backups. - What if the disk image is too large?
You can split the image into parts using tools like split on Linux or manually configure dd to write smaller chunks. Be sure to keep all parts together for proper restoration. - Can I use dd to clone one physical disk to another?
Yes. For example: dd if=\\.\PhysicalDrive1 of=\\.\PhysicalDrive2 bs=4M — but be extremely careful with disk identifiers to avoid overwriting the wrong drive.


