
What is keepalived
Keepalived is service, designed for crashless infrastructure making and support. It is not all-sufficient entity and need balancer service to supply access to the "target" content. In this article I'll show how to setup a bundle "keepalived + haproxy + webserver" on Ubuntu 20.04 LTS.

Preparing procedures
Before installation we need to prepare our infrastructure:
- Two servers for identical content and two servers for keepalive daemon and haproxy balancer;
- Ubuntu 20.04 OS and privileged account access on all these servers;
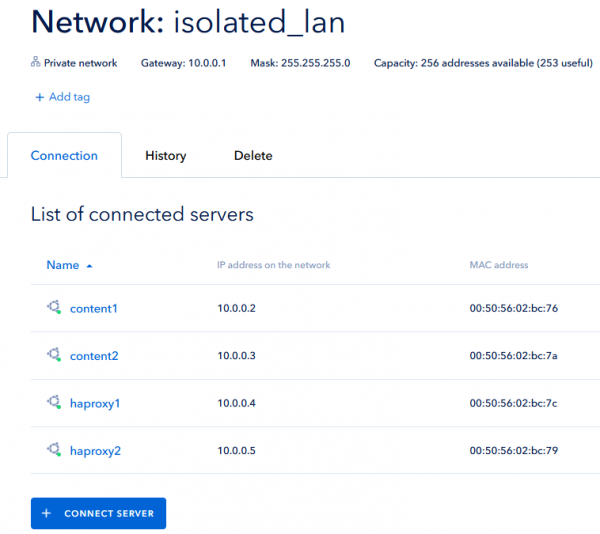
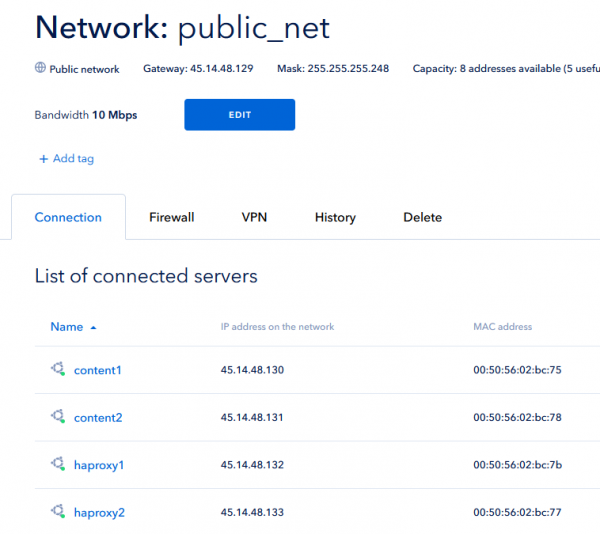
- Two subnets, one public and one private. Content servers for security reasons will be not accessible via public subnet, access servers should be connected to both networks;
- One additional public IP-address, routed to the public subnet and not assigned to any access-server;
- Domain name, "pointed" to this "additional" IP.
Lets start to prepare:
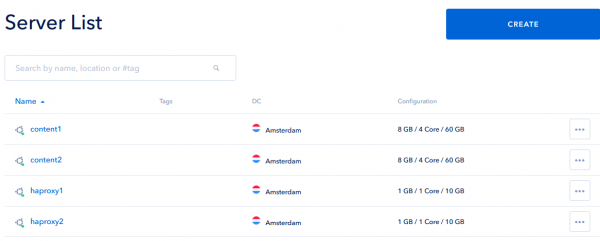
- Create four servers via ServerSpace client area. All of them should be located in one datacenter;
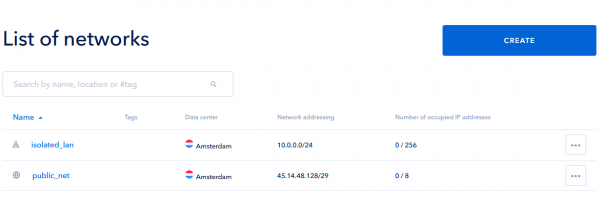
- Make two subnets as described;

- Connect all servers to created networks. Then reinstall OS, it is the fastest way to apply settings "inside" the OSes;


- As a result you will see all assigned addresses in subnets details. Remember these IPs, it is needed further. Also, one unused IP (e.g. 45.14.48.134 in my example) will be used as "floating" address for keepalived;
- Create firewall rule to block all incoming traffic to the "backend" servers via public interface, besides assigned subnet. Don't forget "whitelist" your own IP, it'll make servers management more comfortable. The easiest way to do this - go to your server details settings, add the rules and click to the SAVE button. Remember, rules with "allow" action should be placed "upper" then block rules;
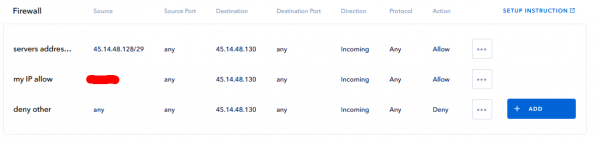
- Repeat this step for server "content2".
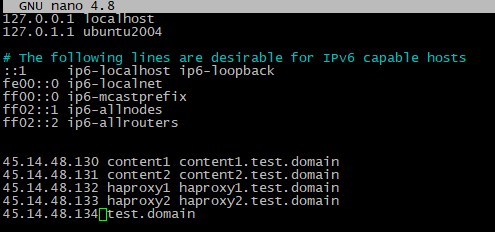
- Edit /etc/hosts on each four servers, just add follow lines at the end:
<backend_server_one_IP> content1 content1.your.domain

<backend_server_two_IP> content2 content2.your.domain

<balancer_server_one_IP> haproxy1 haproxy1.your.domain

<balancer_server_two_IP> haproxy2 haproxy2.your.domain

<1st_floating_IP_for_keepalived> your.domain

<2nd_floating_IP_for_keepalived> your.domain
Bundle "webserver, balancer and watch daemon" setup
- Install your project to the content servers. Identical content should be placed on the both backends. As this article is just example, I'll install nginx webserver with one change - index files will be differ to show how everything are working;
apt-get update; apt install -y nginx
echo $(hostname) > /var/www/html/index.nginx-debian.html  # path may be different, it is website working directory and index file

- Open SSH-sessions on the first balancer server and install haproxy package.
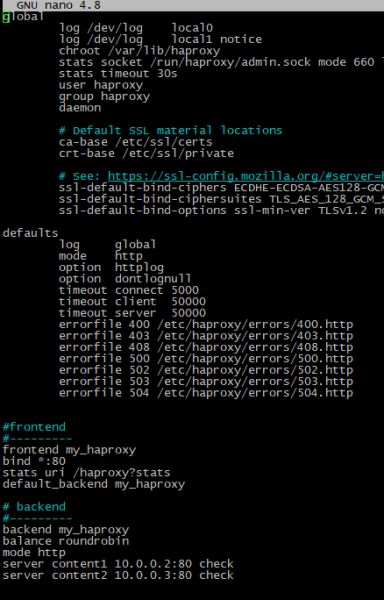
apt -y install haproxy- Edit nano /etc/haproxy/haproxy.cfg config-file and add follow lines;
#frontend

#---------

frontend my_haproxy

bind *:80

stats uri /haproxy?stats

default_backend my_haproxy
# backend

#---------

backend my_haproxy

balance roundrobin

mode http

server content1 <1st_backend_server_private_IP>:80 check

server content2 <2nd_backend_server_private_IP>:80 check
- Restart haproxy services
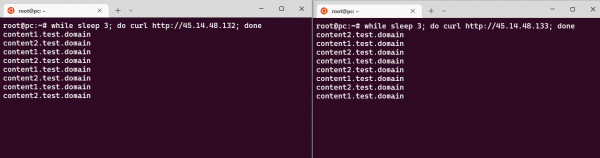
service haproxy restart- Open two separate windows of any terminal on your local computer and run this commands (one per window):
while sleep 3; do curl http://<1st_balancer_public_IP>; done
while sleep 3; do curl http://<2nd_balancer_public_IP>; done
If you see interleaved "answers" in both terminal windows - haproxies are working, go to the next step;
- Install on both balancers keepalive daemon software package:
apt install -y keepalived- Find and remember public interface names on both balancer servers;
ip a | grep <server_public_IP>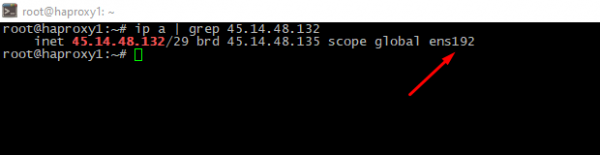
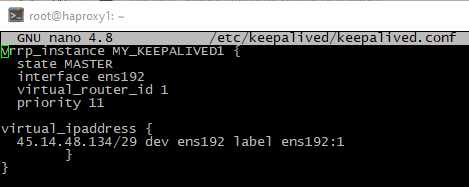
- Create parameters file on the first balancer and past the follow code inside:
nano /etc/keepalived/keepalived.conf
vrrp_instance MY_KEEPALIVED1 {

state MASTER

interface ens192

virtual_router_id 1

priority 11
virtual_ipaddress {

45.14.48.134/29 dev ens192 label ens192:1

}

}
Parameters description:
vrrp_instance - any name without spaces,
state - server role,
interface - network interface name, you knew it upon tle previous step,
virtual_router_id - instance identifier, should be identical on the all balancers,
priority - using order, master-server should have higher priority ,
virtual_ipaddress - one of unused IPs in the subnet, your domain should be "pinned" to this address.
- Make configuration file for the second balancer server:
vrrp_instance MY_KEEPALIVED1 {

state SLAVE

interface ens192

virtual_router_id 1

priority 10
virtual_ipaddress {

45.14.48.134/29 dev ens192 label ens192:1

}

}
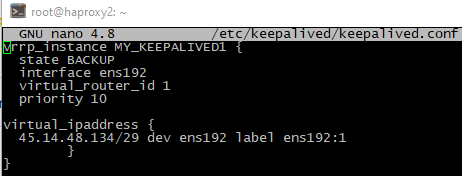
Pay attention to the config text - "priority" and "state" parameters are "swapped", all other points are stay identical.
- Enable autoload and restart the services to both front servers;
systemctl enable haproxy && service haproxy restart; systemctl enable keepalived && service keepalived start
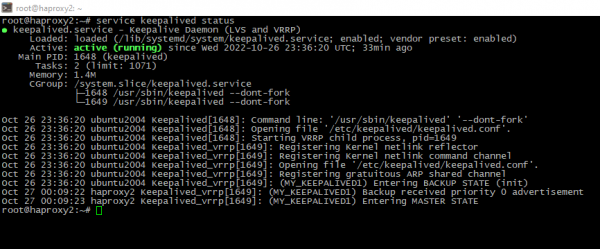
- Check the status. Picture like below shows the services are running;
systemctl status haproxy && service keepalived status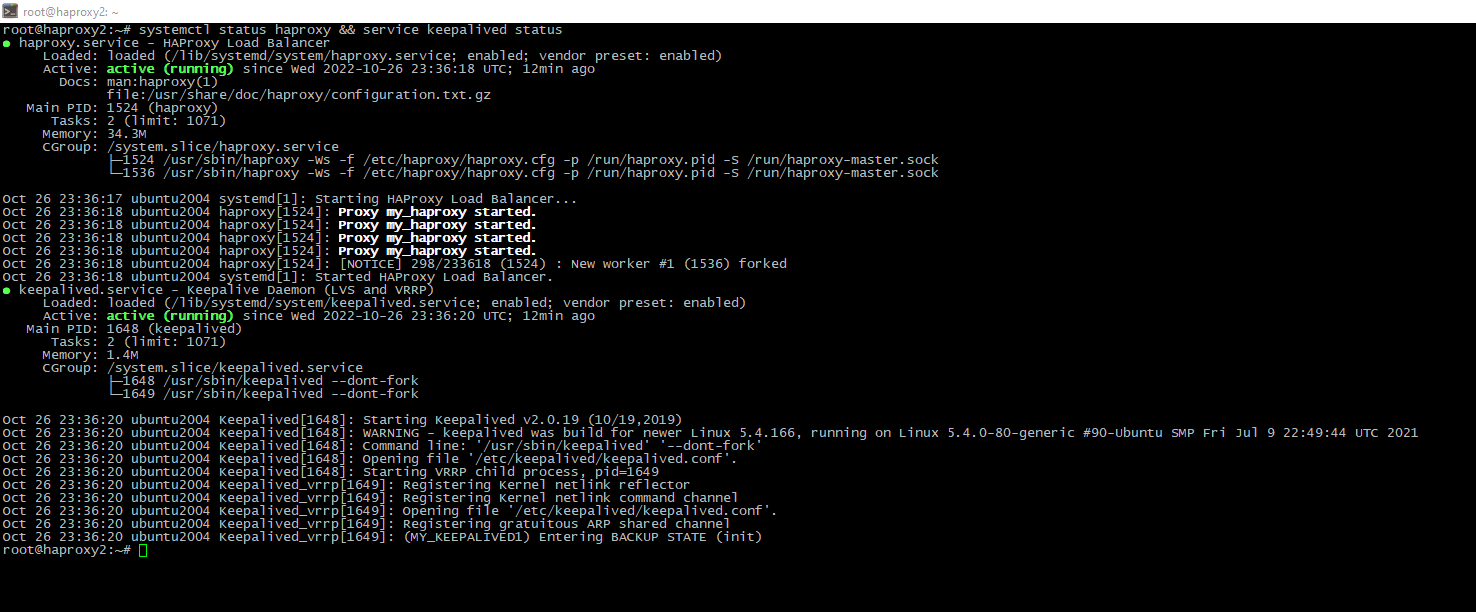
Checking and disaster simulation
So, time to check our work.
- Open terminal on your computer again and run
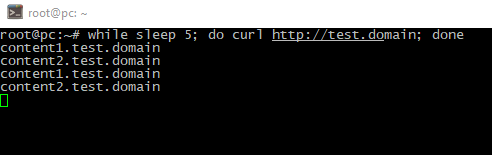
while sleep 5; do curl http://<your_domain>; done
Both servers are working and in-turn answering;
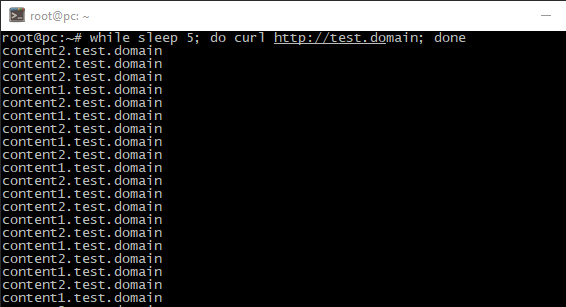
- Stop master-balancer;
systemctl stop haproxy && service keepalived stop As we see, backup-balancer turns to master, no сontent delivering interrupts;
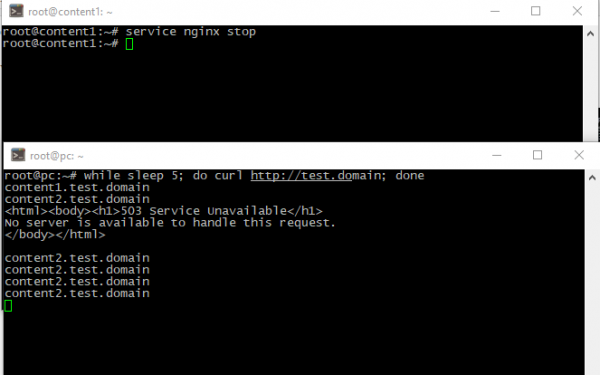
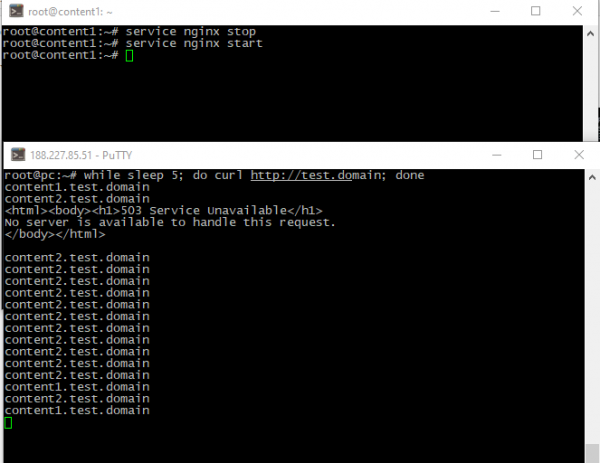
- Lets "drop" one content node;
service nginx stopAs we see, just one package was dropped, then our project continue to deliver content from second node;
- When "failed" server returns, its content returns too;
- And finally, if "fallen" balancer returns, it takes master role again.
systemctl start haproxy && service keepalived start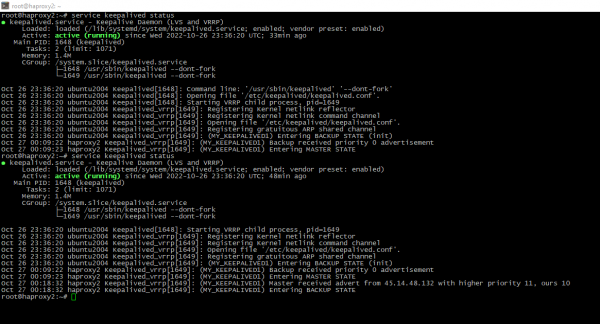
Conclusion
In this tutorial I explained what is keepalive daemon and how to make crashesproof infrastructure with nginx, haproxy and keepalived packages on Ubuntu 20 LTS.


