Java and JVM (Java Virtual Machine) are required for many types of software, including Tomcat, Jetty, Glassfish, Cassandra and Jenkins.
This guide will help you learn how to install different versions of the Java Runtime Environment (JRE) and Java Developer Kit (JDK) with apt.
How to install Java with apt on Ubuntu 18.04:

Java Runtime Environment
The easiest way to install Java is to use the version included in the Ubuntu package. By default, Ubuntu 18.04 includes Open JDK (open source JRE and JDK version).
This package installs OpenJDK version 10 or 11.
- Until September 2018, OpenJDK 10 was installed.
- After September 2018, OpenJDK 11 is installed.
First, update the package lists:
sudo apt update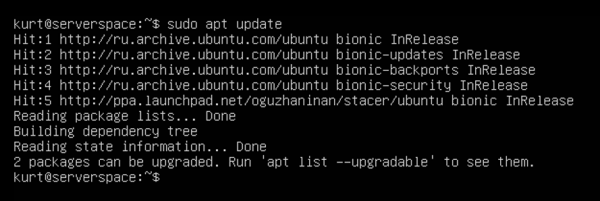
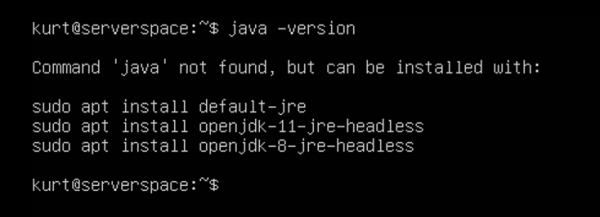
Then you need to check if Java is already installed:
java -versionIf Java was newer installed, yo’ll see the following results:
Run the following command to install OpenJDK:
sudo apt install default-jre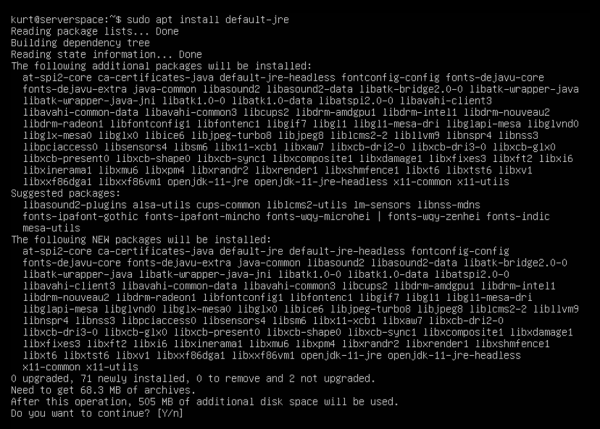
Type y (yes) and press Enter to resume installation.
This command installs the Java Runtime Environment (JRE). It allows you to run almost any Java software.
Now check the Java version:
java -version
JRE is installed!
Java Development Kit
To compile and run some specific Java programs in addition to the JRE, you may need the Java Development Kit (JDK). To install the JDK, run the following command, which also installs the JRE:
sudo apt install default-jdk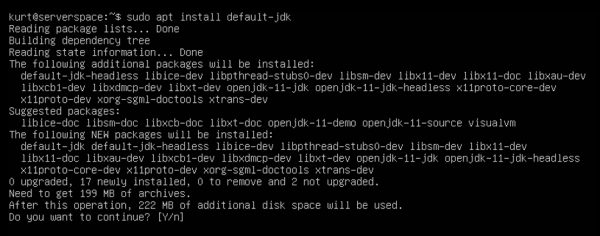
Type y (yes) and press Enter to resume installation.
This command installs the Java Development Kit (JDK).
Now check JDK version with command:
javac -version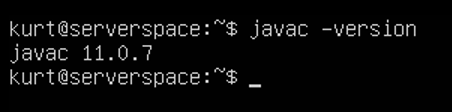
Java Development Kit (JDK) installation completed!
Conclusion
Installing Java on Ubuntu 18.04 with apt is simple and straightforward. Whether you need the Java Runtime Environment (JRE) to run Java applications or the full Java Development Kit (JDK) for development, Ubuntu’s package manager provides easy access to multiple Java versions. By following this guide, you can quickly set up the Java environment that suits your project needs and manage different versions with ease.
FAQ
- Q: What is the difference between JRE and JDK?
A: JRE (Java Runtime Environment) allows you to run Java applications, while JDK (Java Development Kit) includes JRE plus tools needed to develop and compile Java programs. - Q: How do I check the installed Java version?
A: Run the command java -version to see the active Java version on your system. - Q: Can I have multiple Java versions installed at the same time?
A: Yes, you can install multiple versions and switch between them using the update-alternatives tool. - Q: How do I set a default Java version?
A: Use sudo update-alternatives --config java to select the default Java version. - Q: Does apt install the latest Java version?
A: The version available via apt depends on Ubuntu 18.04’s repositories. For the latest versions, you might need to add external repositories or download from Oracle.


