How to Change Hostname on Ubuntu 18.04
The first thing we need to do is - to get the current hostname.
To display the current hostname - simply enter the following command:
hostnamectl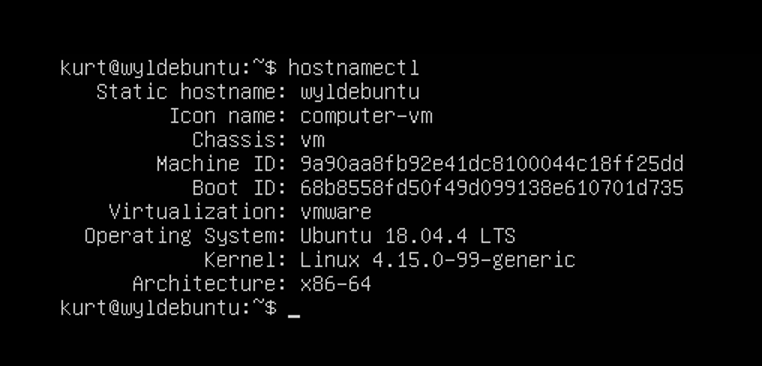
As you can see in the image above, the current hostname of this server is - wyldebuntu.

The following steps, described below, show how to change the hostname in Ubuntu 18.04
Change the hostname using command hostnamectl.
For example, to change the system static hostname to serverspace, you would use the following command:
sudo hostnamectl set-hostname serverspace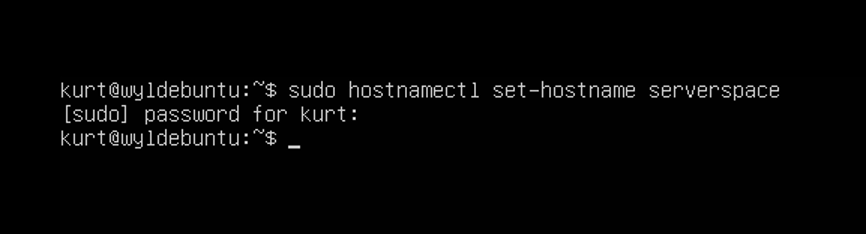
The hostnamectl command does not produce output. On success, 0 is returned, otherwise - a non-zero failure code.
Edit the /etc/hosts file.
Open the /etc/hosts file with preferred text editor and change the old hostname to the new one:
sudo nano /etc/hosts127.0.0.1 serverspace:
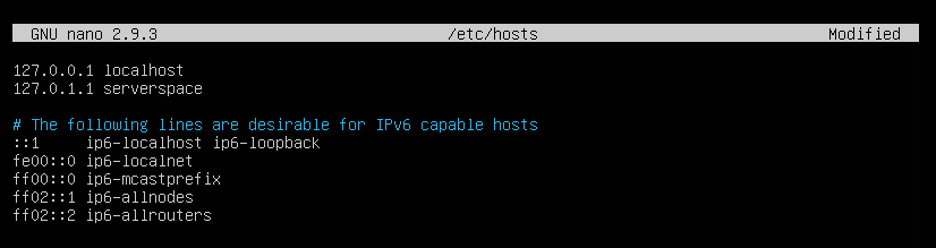
Press ctrl+O and then Enter to save modified file and next press ctrl+X to exit from nano.
Edit the cloud.cfg file.
If the cloud-init package is installed you also need to edit the cloud.cfg file. This package is usually installed by default in the images provided by the cloud providers such as AWS and it is used to handle the initialization of the cloud instances.
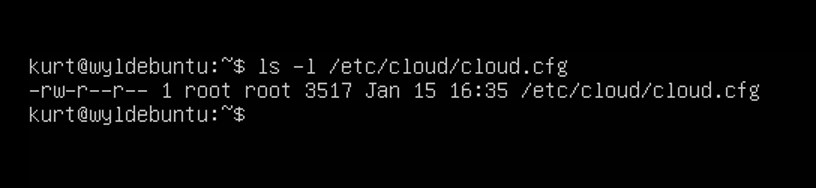
To check if the package is installed simply run the following command:
ls -l /etc/cloud/cloud.cfg
If you see the following output it means that the package is not installed and no further action is required.
ls: cannot access '/etc/cloud/cloud.cfg': No such file or directory.
If the package is installed the output will look like the following:
-rw-r--r-- 1 root root 3169 May 21 17:35 /etc/cloud/cloud.cfg
In this case you’ll need to open the /etc/cloud/cloud.cfg file:
sudo nano /etc/cloud/cloud.cfgSearch for preserve_hostname and change the value from false to true.
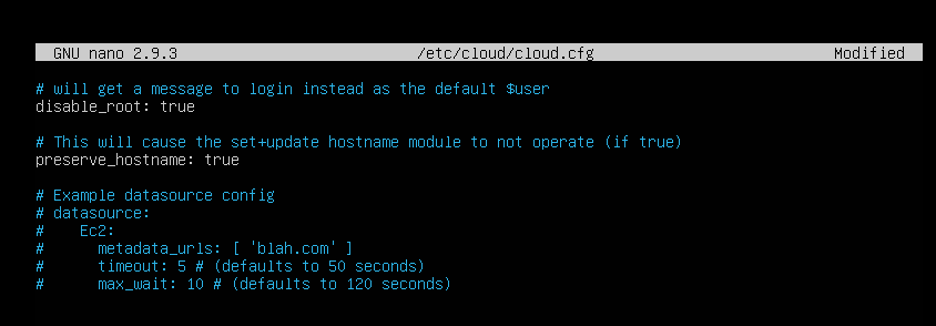
Press ctrl+O and then Enter to save modified file and next press ctrl+X to exit from nano.
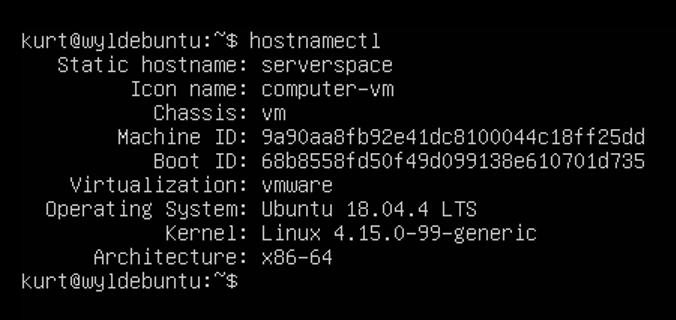
Verify the change
To verify that the hostname was successfully changed, once again use the hostnamectl command:
hostnamectl