How to Configure a Server Firewall via Control Panel (No Extra Cost)
Easily Configure Your Virtual Server Firewall Right from the Control Panel
What is this?
You can use a firewall to manage server access and network data packets directly from a control panel. This option is included in server cost and not billed separately.
Currently, the limit is 50 rules; if you need more, please submit a request to technical support.
Network architecture
In order to avoid firewall rule conflicts and configure a firewall correctly, you need to understand the sequence of existing firewall operation. First, you can configure a firewall for a private network. Second, you can configure a firewall for a server via a control panel. And third, you can configure an internal firewall via iptables in Linux or use Windows built-in firewall.
Incoming packets first reach a network-level firewall (if exists). If packets have passed it, a server-level firewall comes into play, and finally an internal software mechanism is used. For outgoing packets, the reverse sequence applies.
Avoid using a server-level firewall and internal software firewall simultaneously:
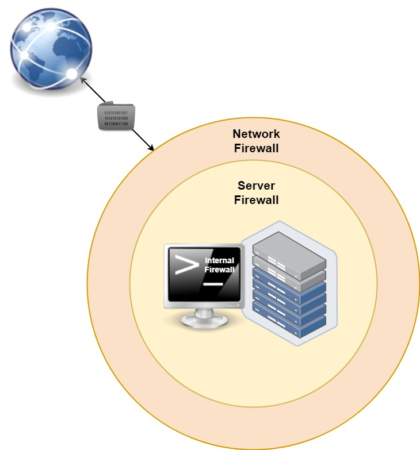
Rule creation
To configure a firewall in any VPS, go to Firewall section in the server settings.
Important notice:
- Rule order is essential: the less sequential number of a rule, the higher its priority. You may reorder rules by dragging and dropping them in a list.
- By default, all incoming and outgoing data packets are allowed.
To create a rule, click Add:
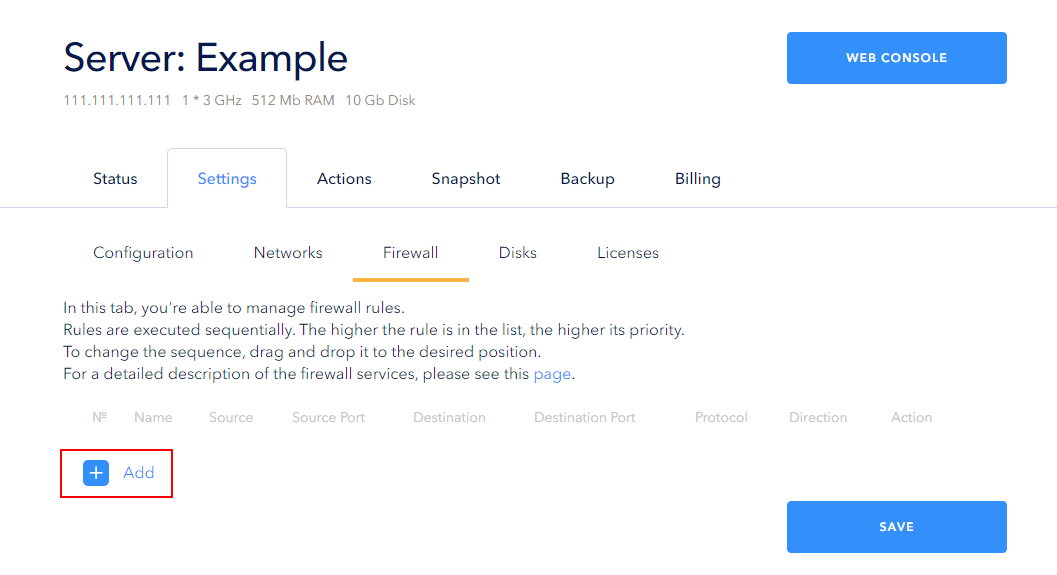
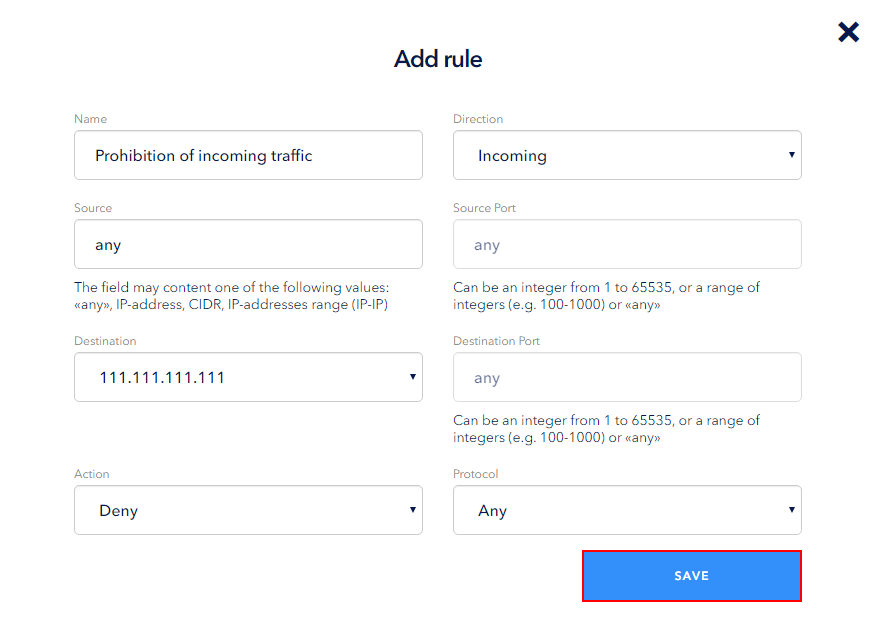
Add Rule window will open. Fill in the following fields:
- Name: a meaningful (mnemonic) name (max. 50 characters) usually describing the rule purpose;
- Direction: direction of packets governed by the rule; can be either Incoming or Outgoing. Incoming means that the rule is applied to incoming data packets, and Outgoing means that it is applied to outgoing data packets;
- Source/Destination: depending on the direction, contains either server IP address or one of the following values: IP address, CIDR, IP address range, or any;
- SourcePort/DestinationPort: when TCP, UDP, or TCP and UDP is selected, you may specify a port, port range, or Any;
- Action: action to be performed; it can be either Allow or Deny. Allow permits data packet transmission, while Deny prohibits it;
- Protocol: protocol type (ANY, TCP, UDP, TCP and UDP, and ICMP).
To create a rule, click Save.
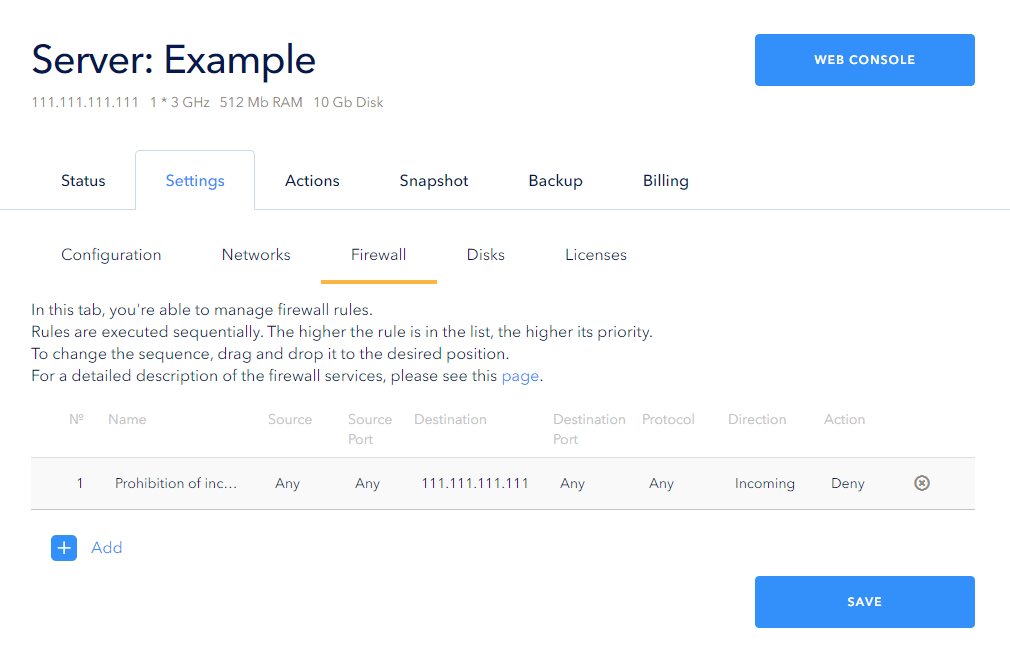
In our example, the rule blocks all packets coming to a server:
To apply the rule, click Save. You can create several rules and save them all at once:
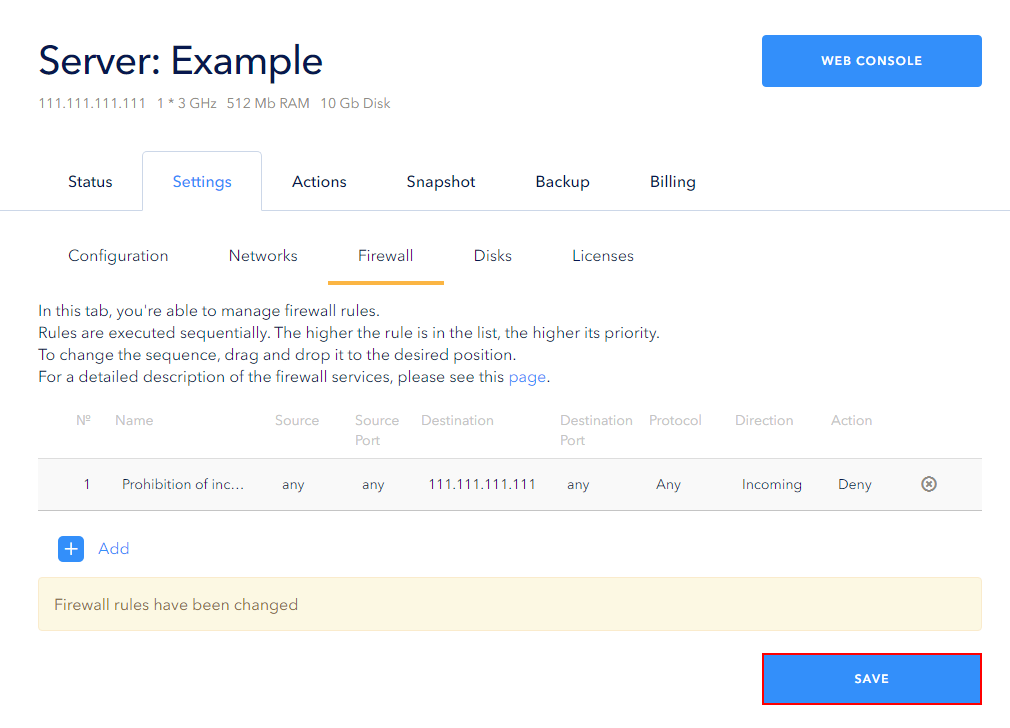
Then, a page will look as follows:
Rule priority
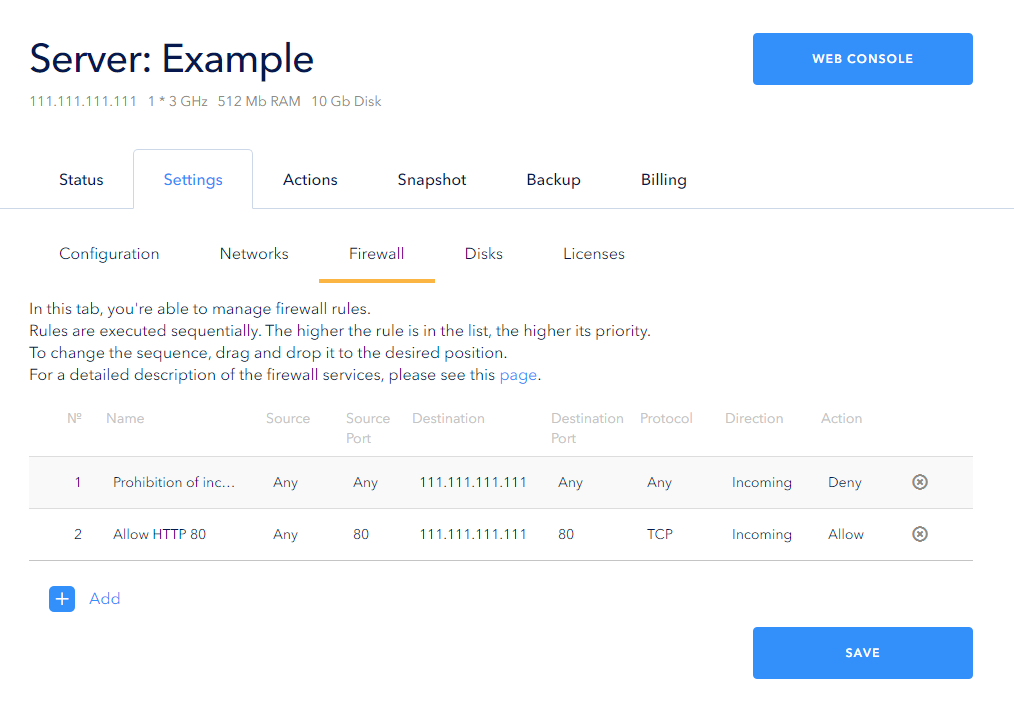
The less sequential number of a rule, the higher its priority. For example, after you have created a rule to deny all incoming traffic, create a rule to allow incoming TCP packets on port 80. After you save configuration changes, this port will remain inaccessible since the denying rule has higher priority than the allowing one:
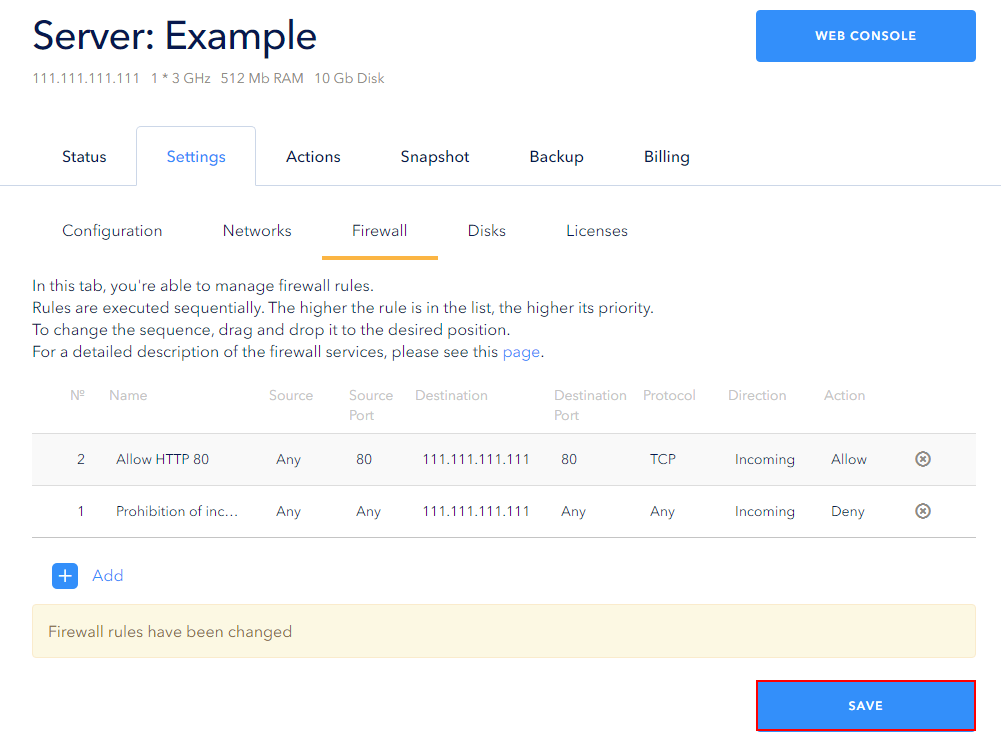
To change rule priority, drag the allowing rule to the first place and save changes:
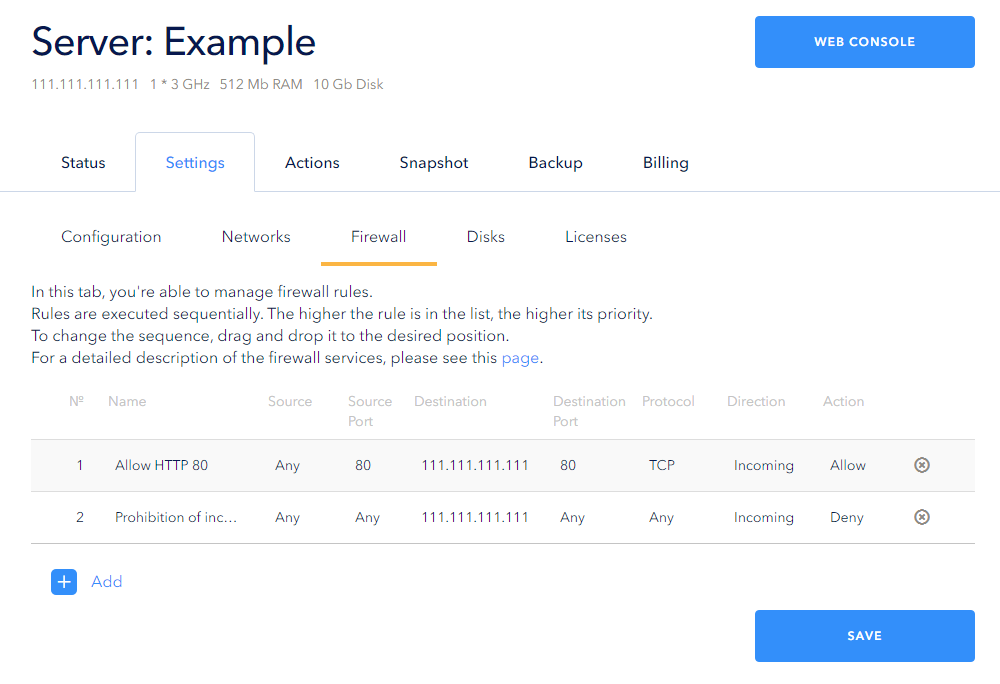
After saving, rule sequential numbers will change, as well as their priorities:
 700
300
 700
300
 700
300


