Corporate networks have long gone beyond the usual boundaries of wired office building connections and almost every organisation has a different level of distributed infrastructure. Remote employees, workplaces not tied to a single point all these groups are united by the ability to use laptops, netbooks, own workstations, which gives rise to a number of new problems. When users are not under a "unified umbrella" a new range of threats emerge for which a solution must be found. Unauthorised access, theft or loss of data can cause a lot of damage to the information system and the company as a whole.
Let's imagine that an IS or information network engineer has lost his laptop at the airport for unknown reasons. The most primary means that will help not only to protect access to information in the corporate network, but also on the laptop locally is disc encryption.
What is BitLocker?
BitLocker is a technology for converting information with a cryptographic algorithm based on symmetric AES. It is available for server and professional versions of the Windows family of operating systems. It is used both for encrypting data on discs and removable devices, for this purpose there is BitLocker To Go technology, which is similar in use. Within corporate networks with a domain or using AD technology. For server operating systems it is necessary to add a component, which we will consider below.
How does BitLocker work?
The main problem of any symmetric encryption algorithm is the transmission and storage of the secret key. The developers of the technology have tried to develop several mechanisms of user authentication. Let's start from easy and relatively safe ways, it is a passphrase or an ordinary flash drive. From the password, the key is generated by a known algorithm, if it is compromised, then accordingly the key too.
In order to come up with a complex password, take as a basis two words, preferably not in English. For example, thick and scream, it will be the body of the password of 12 symbols, add numbers, capital letters, special symbols, so that it looks like the following way kolly_krik:, of course, this sequence, it is desirable to write in Latin. And instead of a low underscore write the abbreviation of the service where you authenticate. For example, for a YouTube account, this will look like the open version of koLlyYTkRIK: and closed njkCnsQYTrHBR:, however, no one forbids you to use a password manager. For which a master key is also usually required.
A flash drive, the secure analogue of a cryptographic token, also needs basic security. If using a smart card or the same token, we know that the information on them is encrypted and limits the user's attempts to enter the pin code to decrypt, the flash drive does not do this. And we can emulate the work of a crypto token, using popular software tools, separately encrypting the flash drive with the key, specifying a limit on the number of input attempts.
A secure way to store the key is to use the built-in TPM in the motherboard, which provides secure storage of keys or crypto-token. The essence of which is isolation from the IS, the device interacts with the server or PC only when verifying the key and two-factor authentication.
Activating and configuring BitLocker
To do this, let's create a cloud server on Serverspace. Let's go to the left menu tab to servers, having previously selected the cloud platform and click on the Create Server button.
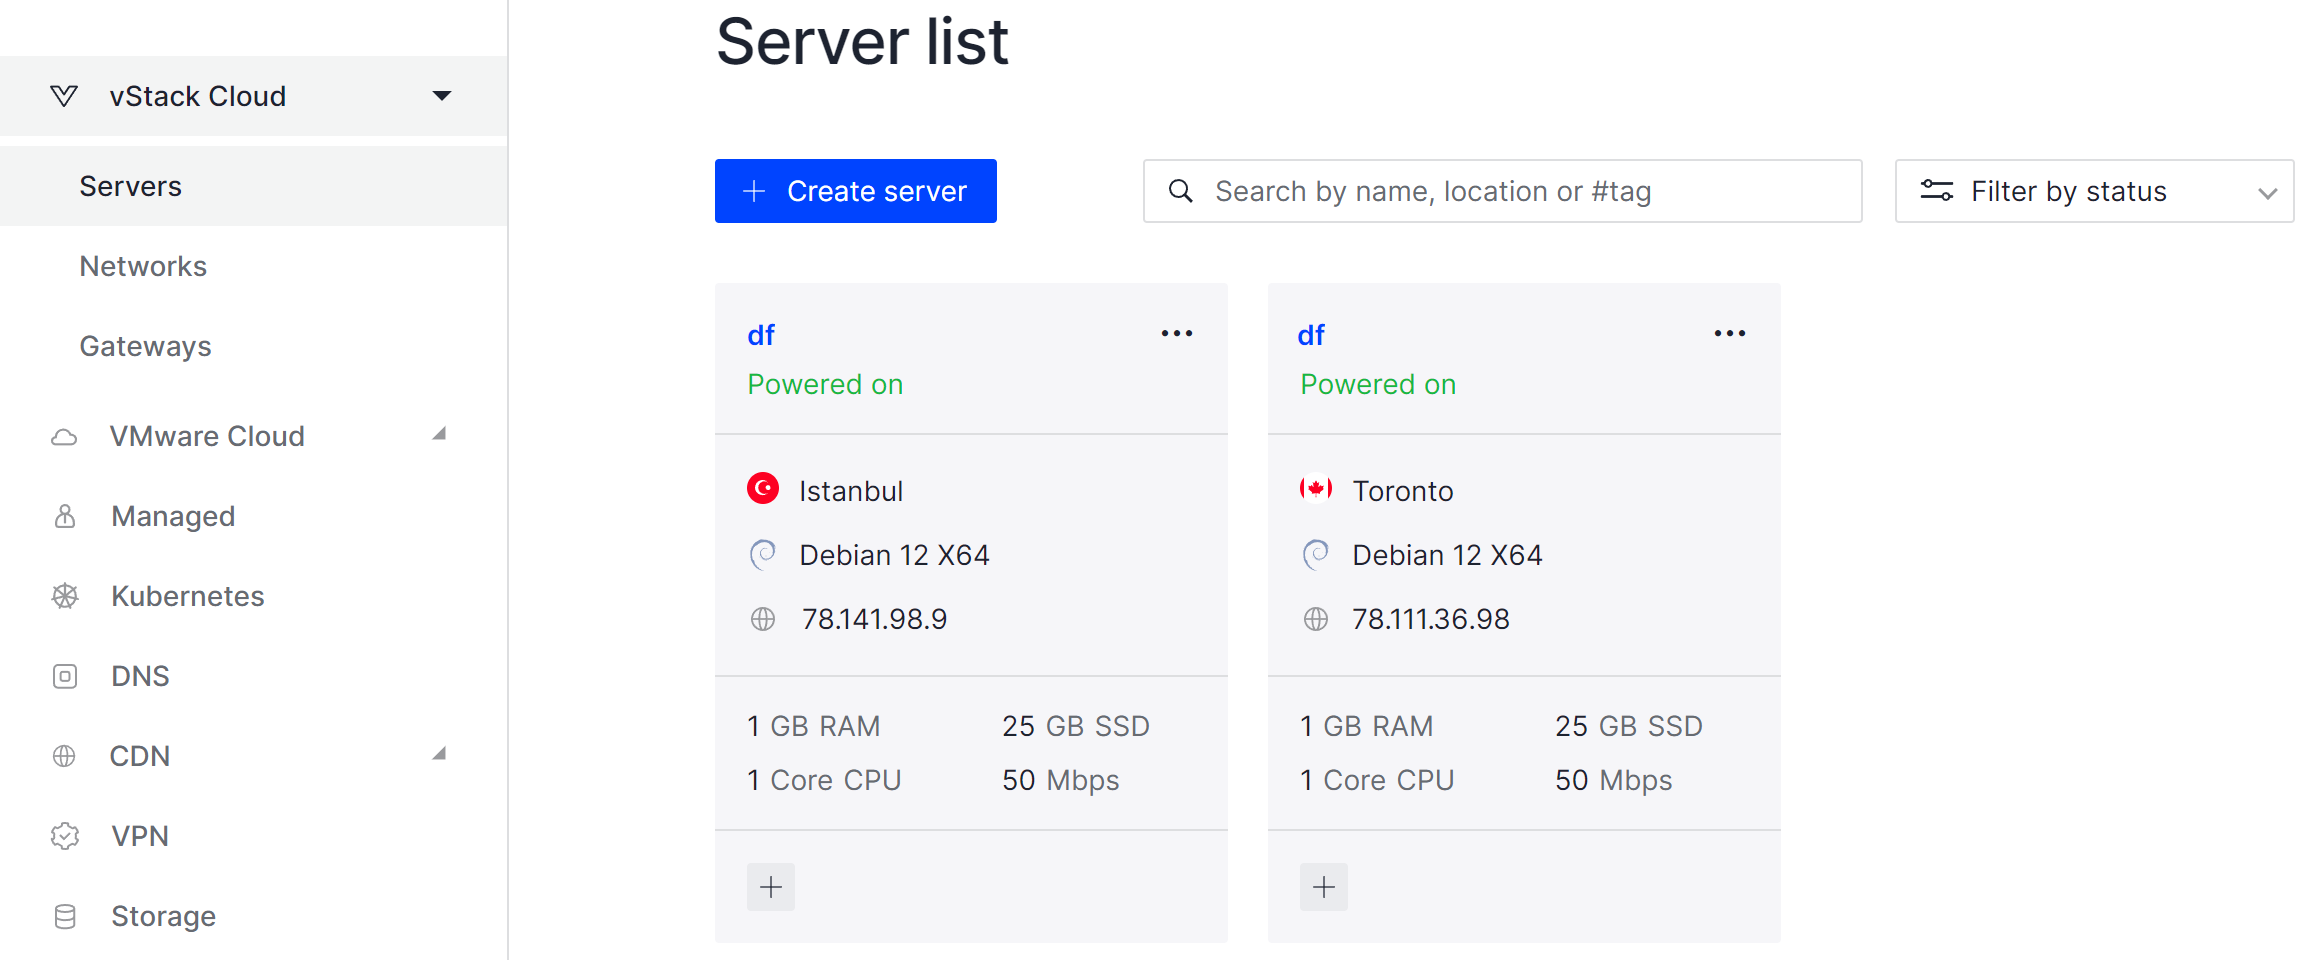
Choose the OS version, select the server location, specify the data centre and click the Order Button. After that the machine will be deployed, literally, in a few minutes. Let's go to the configured machine and enter Server Manager:

On the top right, find Manage and go to Add Roles and Features, then a window will open where you need to find BitLocker Drive Encryption in the Features tab and add the feature, after which the server will restart:

Open Explorer with Win + E and select the required drive for encryption and turn on BitLocker via the Turn on Bitlocker item:
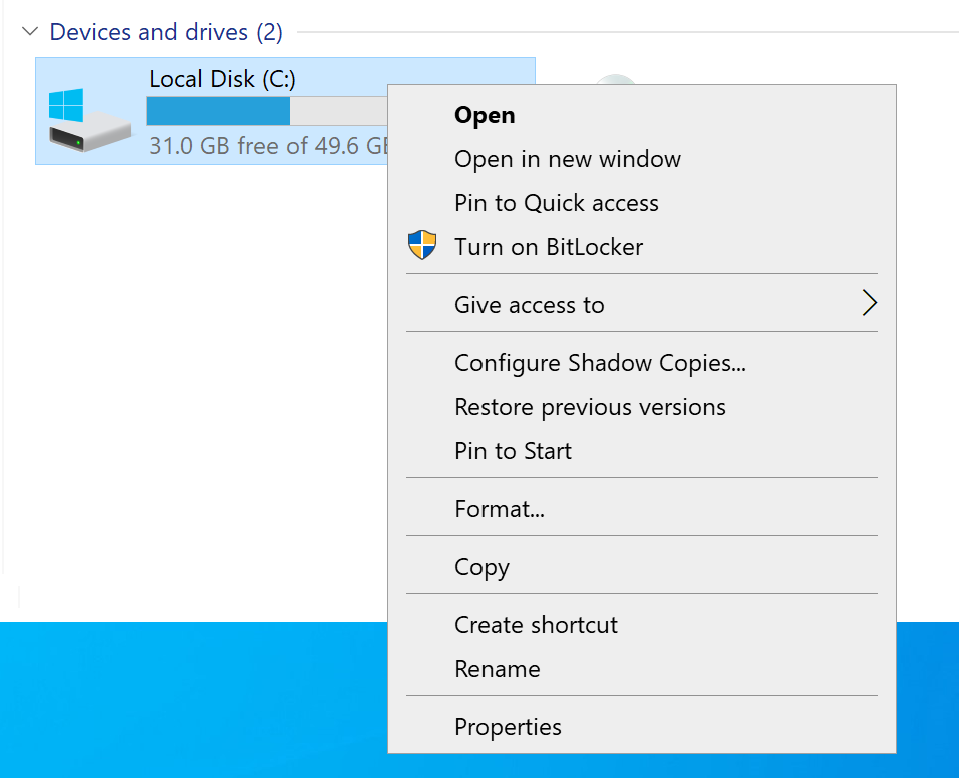
If your machine does not have a TMP chip for secure key storage, you will see a similar error message where you will be prompted to enable the option to work without a TMP, if you have one, then skip this item:

To do this, let's go to Group Policies and configure this feature:

Let's open the policy by right-clicking and go to Group Policy Configuration -> Computer Configuration - Administrative Templates - Windows Components - Bitlocker - Operating System Drives:
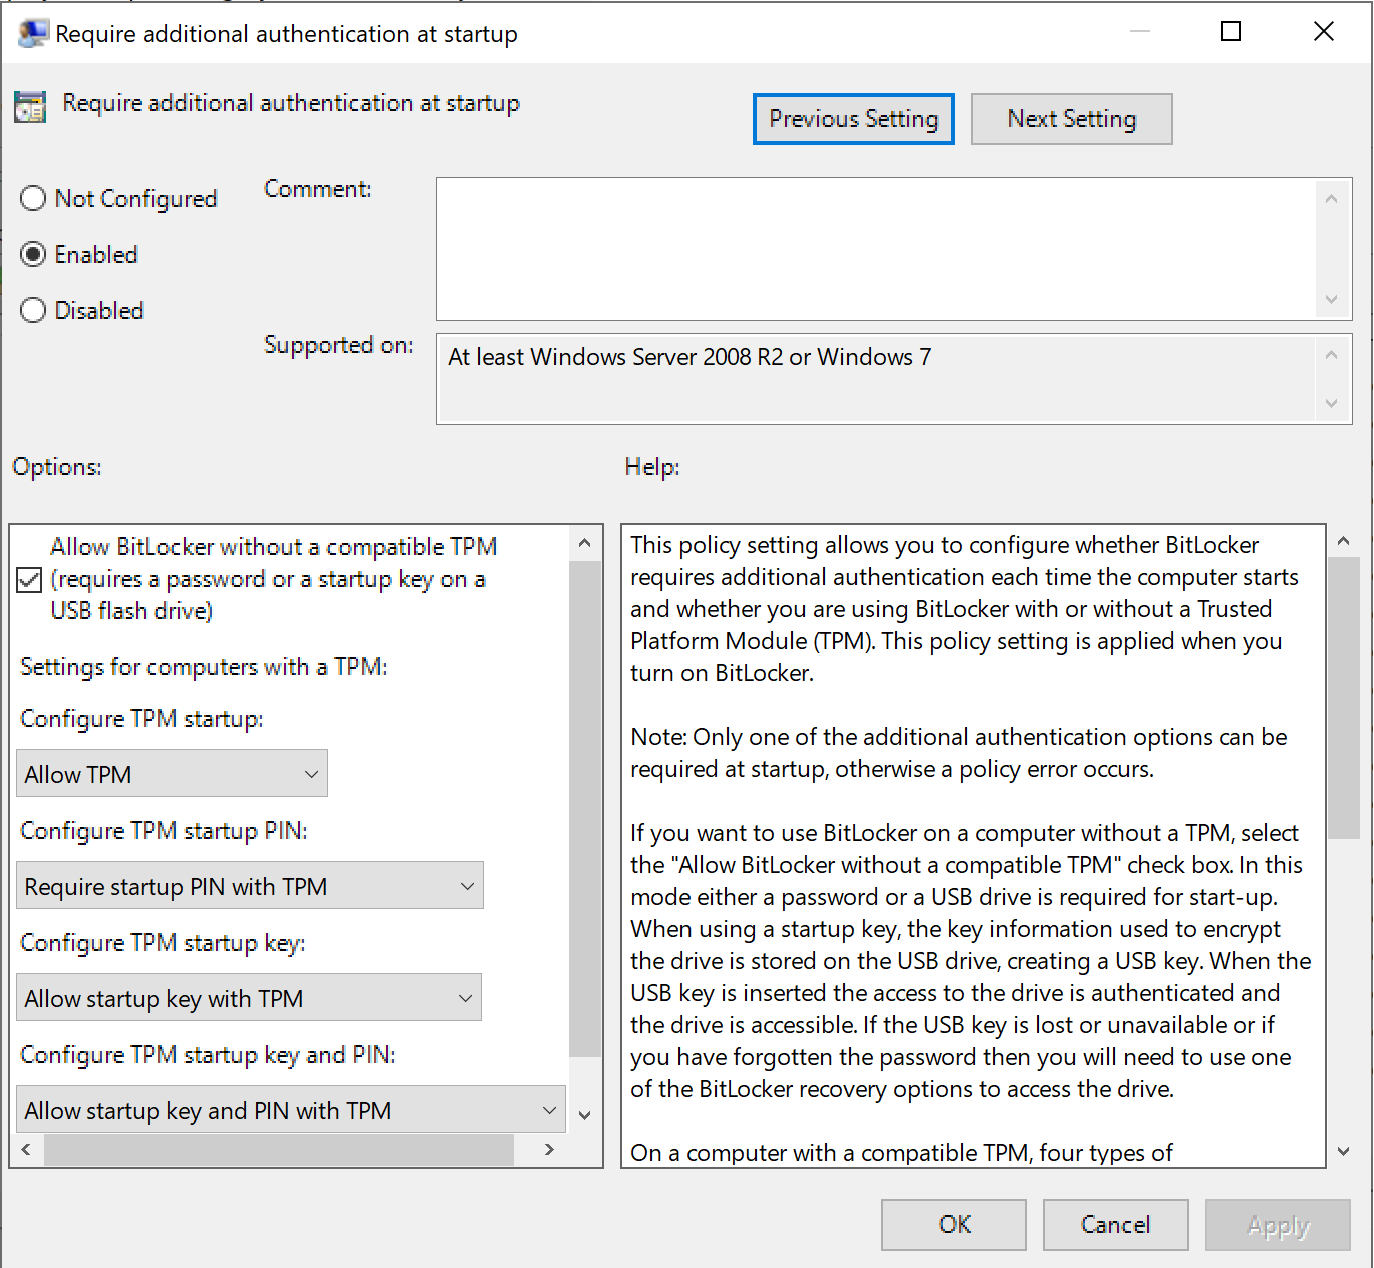
Check that all the settings in the policy match and click OK to apply the settings. Afterwards, go back to Explorer with the Win + E key combination and enable encryption for the disc:
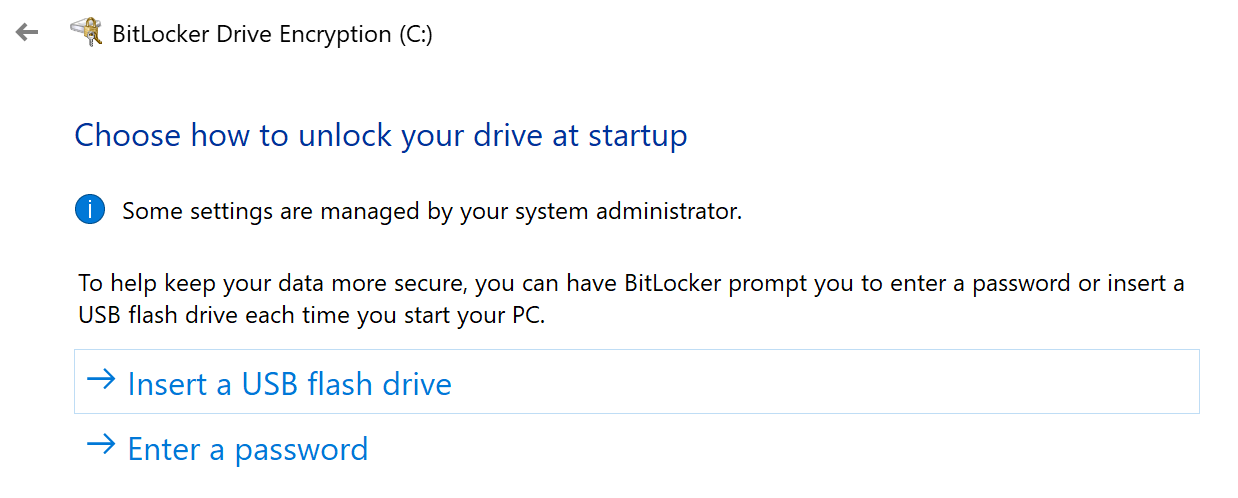
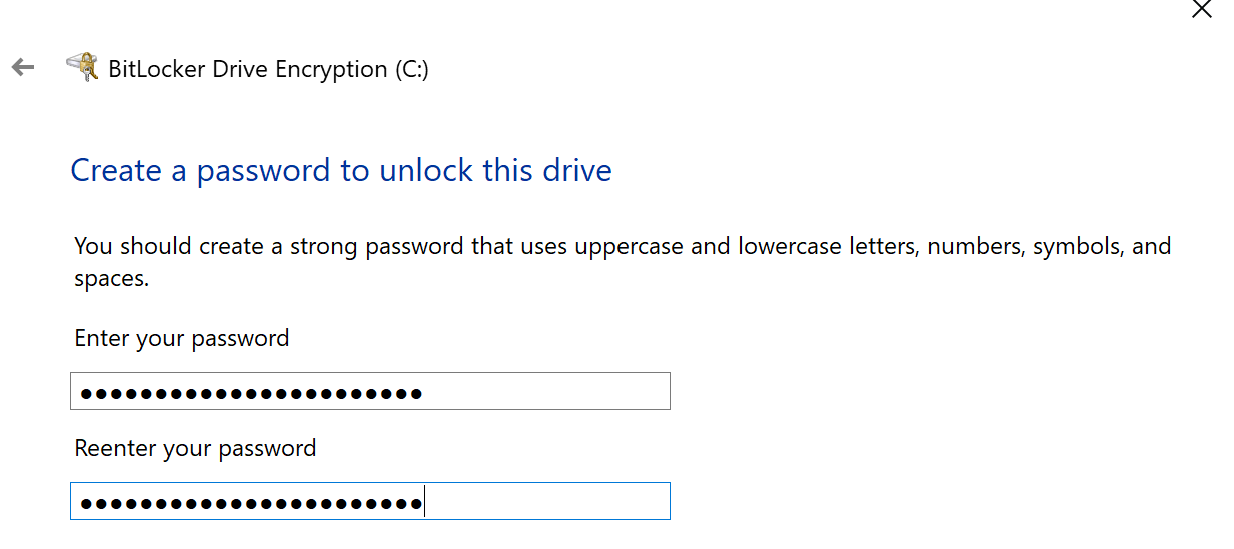
We use a passphrase composed according to the method described above:
BitLocker will offer to save the recovery keys, this function cannot be disabled. There are options to save to a file, to a flash drive or to print:

Once a disc is encrypted, its performance can be reduced by about 10%, but increases the privacy of the stored data. BitLocker can be managed through the panel, which can be found through the standard search:

Thus, BitLocker is an important tool for ensuring data security in modern corporate networks, where information protection becomes a priority.


