
Tags are a powerful and flexible feature in Zabbix that allows you to efficiently organize, categorize, and manage your monitored entities—such as hosts, templates, triggers, and events. By assigning tags as labels to these entities, you gain granular control over how they are displayed, filtered, and acted upon within the Zabbix monitoring interface.
Tags make it easier to segment your infrastructure by function, location, environment (e.g., production, staging, test), or any custom classification relevant to your organization. They become especially valuable in large-scale environments, where hundreds or thousands of hosts and triggers are monitored, helping administrators quickly locate, analyze, and respond to events tied to specific groups or conditions.
In addition, Zabbix tags play a key role in configuring event correlation, custom alerting, and automated actions. For example, you can create actions that are triggered only when events with specific tag combinations occur, reducing noise and improving the relevance of your alerts.

Tags
Tags can be added to:
- Templates
- Hosts
- Items
- Triggers
- Services
- Template items and hosts
To use tags in Zabbix:
1. Define the tag properties
Before you can use tags, you need to define the properties that will be associated with them. For example, you might define a tag property called "environment" that can have values such as "production" or "test."
2. Assign tags to entities
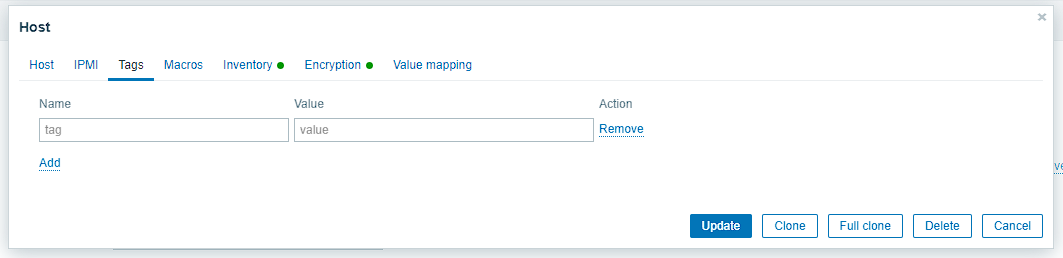
Once you've defined the tag properties, you can assign tags to your monitored entities. For example, you might assign the "environment" tag to a host and set its value to "production". You can assign tags to entities under Configuration > Hosts(or other entity types such as templates or triggers) > tags.
3. Filter and group entities by tags
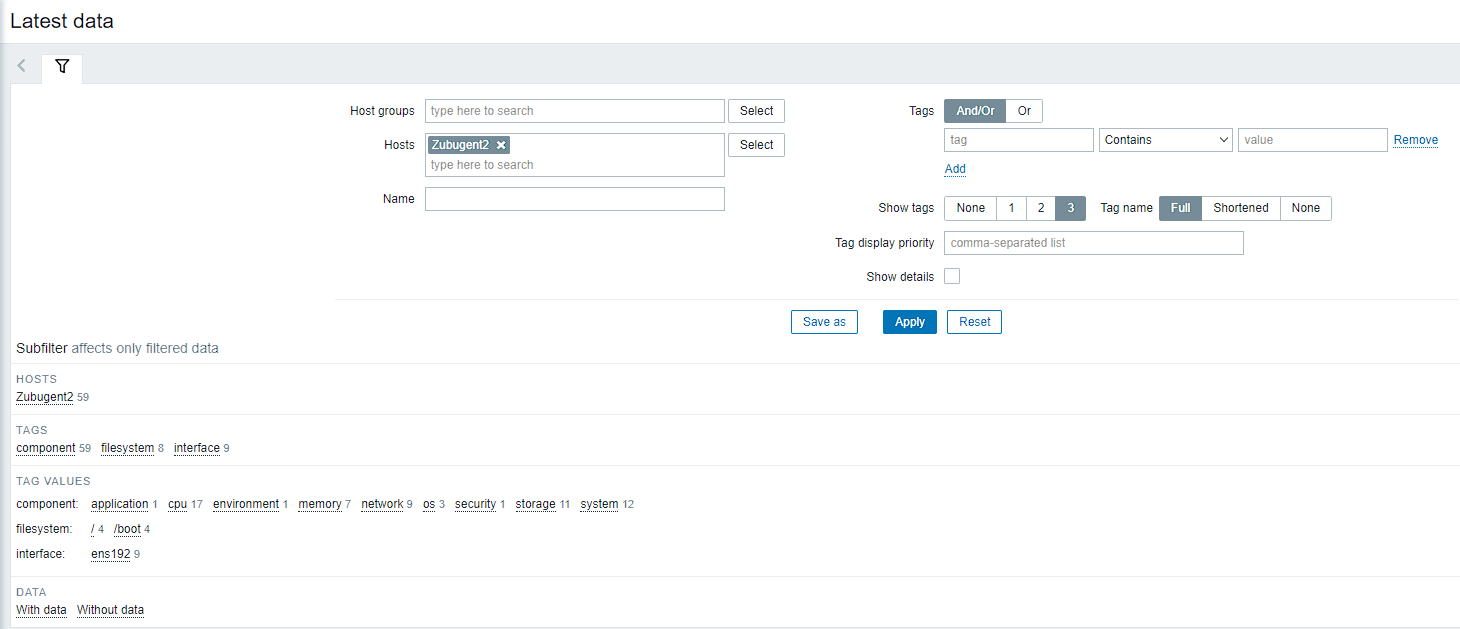
With tags assigned to your monitored entities, you can now filter and group them in the Zabbix monitoring dashboard. For example, you might filter hosts by the "environment" tag and only show those that have a value of "production". You can also group entities by tags and create custom views of your monitored infrastructure.
Macros
In addition to defining and assigning tags to monitored entities, you can also use macros to assign dynamic values to tags based on entity properties or other factors. Macros are variables that are replaced with their actual values when they are used in tags or other Zabbix configurations.
Here are some examples of macros for tags in Zabbix:
- {HOST.NAME}: This macro is replaced with the name of the host being monitored. You can use this macro to create tags that are specific to individual hosts, such as "environment: production-{HOST.NAME}".
- {TRIGGER.NAME}: This macro is replaced with the name of the trigger that caused an event or action. You can use this macro to create tags that indicate the cause of an event, such as "cause: high-CPU-{TRIGGER.NAME}".
- {ITEM.VALUE}: This macro is replaced with the value of an item being monitored. You can use this macro to create tags that indicate the state of an item, such as "state: up-{ITEM.VALUE}".
To use macros in tags, simply include the macro in the tag definition, enclosed in curly braces ({}). Zabbix will replace the macro with its actual value when the tag is displayed or used in other configurations.
Using macros in tags can make your monitoring configurations more flexible and dynamic. By assigning tags with macros based on entity properties or other factors, you can quickly identify and respond to events or issues in your monitored infrastructure.
Conclusion
We explored how to add tags to your Zabbix elements—an essential tool for structuring and organizing your monitoring environment. Tags enhance visibility, simplify filtering, and enable more efficient management of large-scale infrastructures.


