Configuring the Remote Desktop Gateway on Windows
We will explain in detail how to configure the Remote Desktop Gateway (RDG) service on a domain on platforms running Windows Server.
What is RDG
Microsoft offers to use remote access to desktops using the RDP protocol (Remote Desktop Protocol). To create a secure connection, the RDG (Remote Desktop Gateway) service is used. Its feature is that it uses an HTTPS connection. This creates a reliable communication channel that guarantees the user the proper level of protection. Accordingly, there is no need to use third-party services to create a VPN tunnel.
Using the functions of restricting access to network resources, administrators create connections depending on the user's role in the company. RDG allows connecting not only to one subnet but also to others that are located behind a NAT or firewall. The gateway has a simple and convenient interface with flexible settings. A novice administrator can easily figure out the settings and create the necessary connection templates depending on the internal hierarchy of the company.
Role configuration
Launch the "Server Manager", go to the "Add Role" tab on the right side:
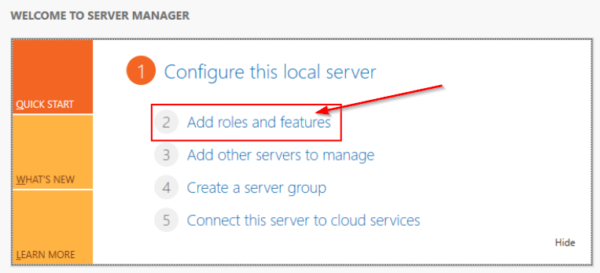
For example, use the first item:

Next, the utility will ask you to specify the server for which the role is being issued. Select from the list, click "Next". In the next step, a list of available server roles will appear. For example, we put “Remote Desktop Service”:
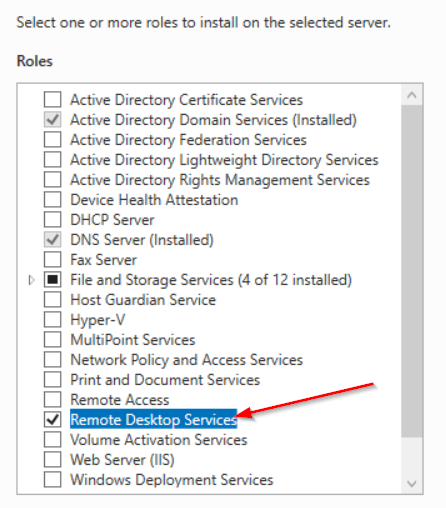
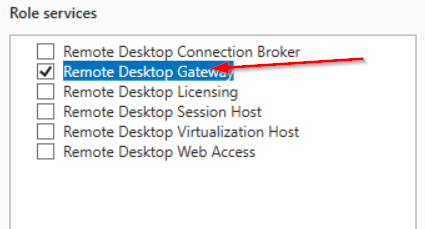
After clicking the “Next” button, information about the selected role will be displayed on the screen. We agree and move on to the next step. Now an added feature has appeared in the Role Server section. We go into it and note the options that are necessary for the administrator. For example, activate RDG:
The setup wizard checks the selected role and compatibility with the server OS. If you need to install additional components, the workspace automatically opens with the marked components. For RDG to work, web administration services with a full set of software tools must be installed in the operating system:
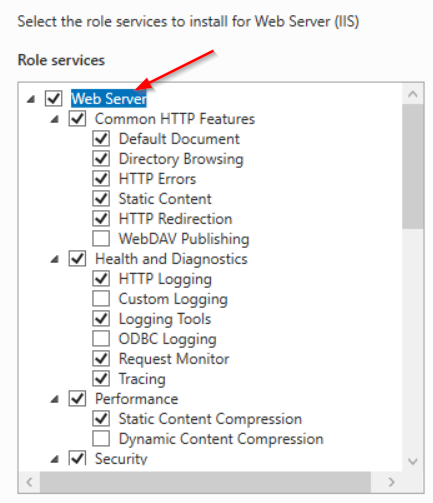
We recommend that you leave the selected services by default. Click "Next", confirm the installation.
Access to resources
After installing the selected role, go to the main window of the Server Manager. Select the “Tools” section and proceed to the RDG setup. A new popup window will open (RD Gateway Manager). In it, go to the tab with the server name, then select "Policies" and configure authorized connections. Press the “Wizard” button to open the setup wizard:

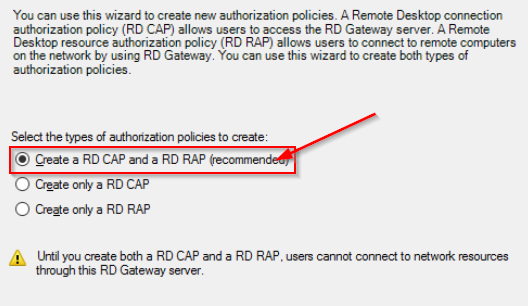
The installer will offer a choice of 3 points. Leave the first option active:
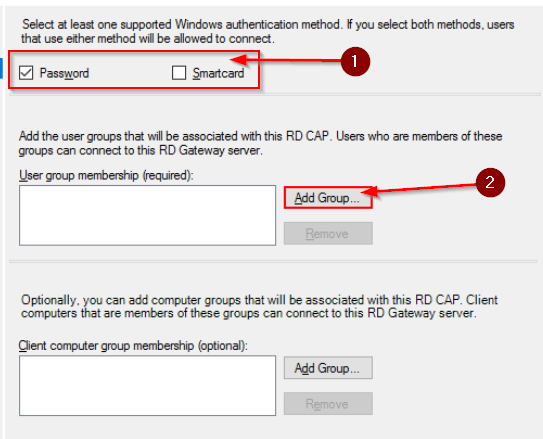
Set a name for the new template, click “Next”. The next step is to select an authentication method and a list of users who will gain access to the policy. Authorization is allowed with a password or a smart card, or both. Leave only a password. Next, click the "Add Group" button and add data to the field:
Next, we differentiate access to network resources to which users will connect through the Remote Desktop Gateway:
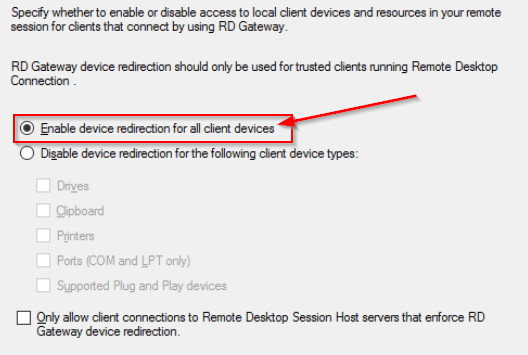
Let us leave the first point as an example. Click "Next." Now you need to set the timeout values for network resources. We put it down depending on the requirements. A window with a customized template will appear on the screen. If the information is correct, go to the next step.
The setup wizard will ask you to specify an authorization policy for network resources. First, we come up with a configuration name. Then we add the user groups that will connect:
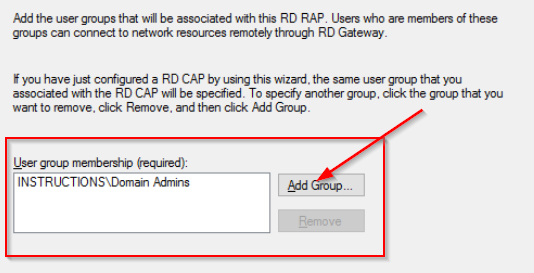
Now select the resource group:
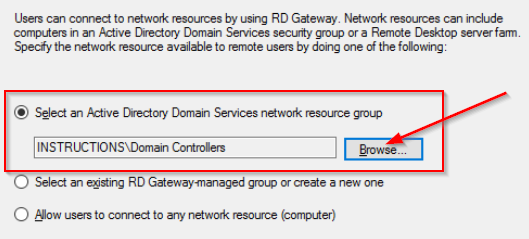
The setup wizard will ask you to specify the port number for the connection. If there are no special requirements, we leave by default - 3389. After clicking “Next”, information about the created authorization policy will appear on the screen. If everything is correct, we complete the configuration.
Installing the SSL certificate
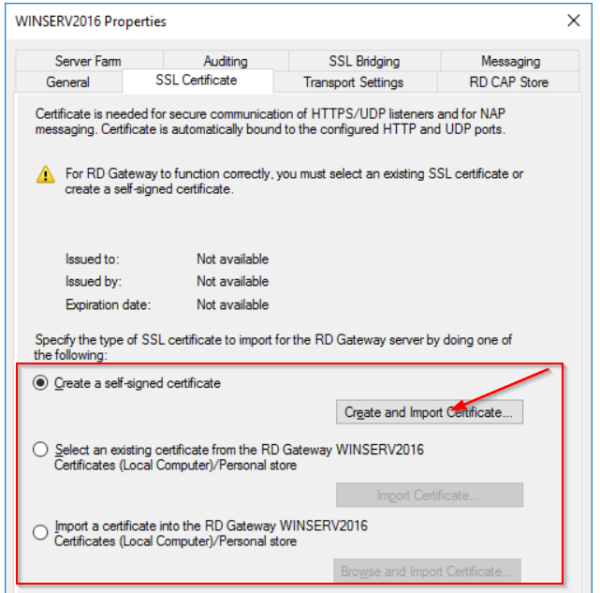
For RDG access to be active, you must also create a certificate. In the RDG Manager working window, go to the "Server Name" section. Using the context menu, open the item “View or change certificate properties”. In the window that opens, switch to the SSL tab. There are 3 options for creating. Select the item marked in red in the screenshot:
Now we write the name of the certificate and the path along which it will be stored:
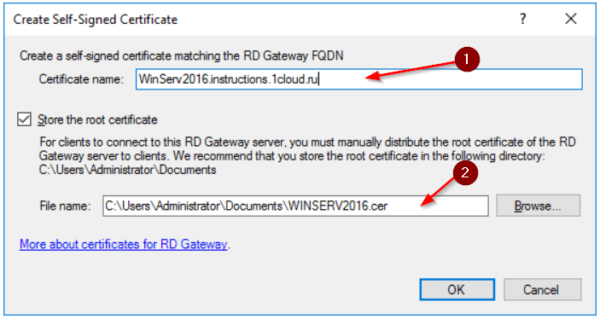
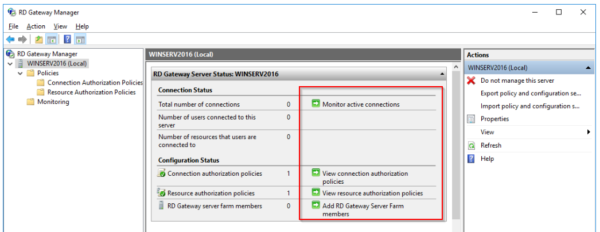
Click “OK” to generate. As a result, manager workspace is as follows:
For increased security, it is recommended that you change the default port for connecting via Remote Desktop Protocol. Open the "Actions" section in the RDG Manager, the "Properties" item. Go to the tab "Transportation properties". In the field marked in red, change the value:
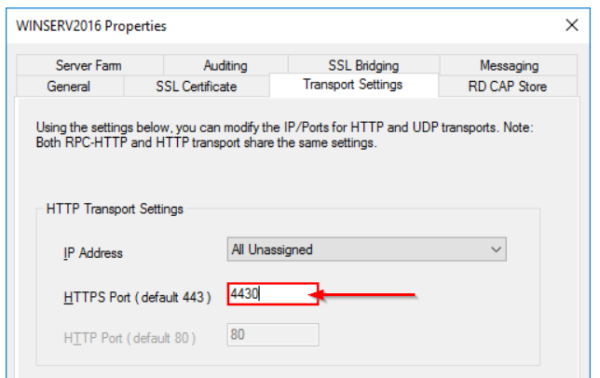
We confirm the changes, close the window.
How to connect
Now you need to configure the connection through RDP. Press the key combination Win + R, enter the command mstsc.exe. In the window that opens, click "Options":
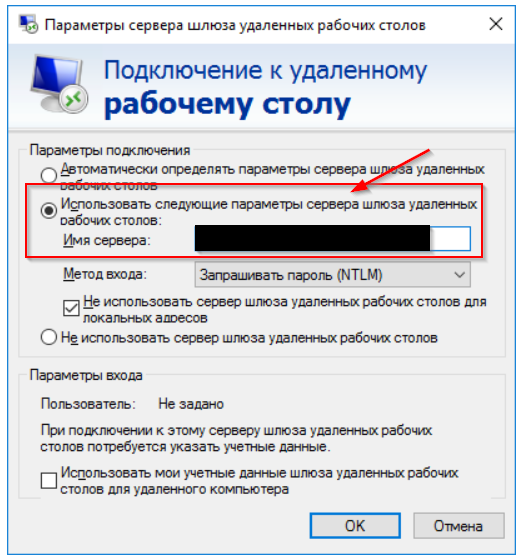
In the field marked in red, we write the server address, and through the colon at the end, mark the port number. Click "OK".
Now go to the "General" tab. Enter the domain name and user name:
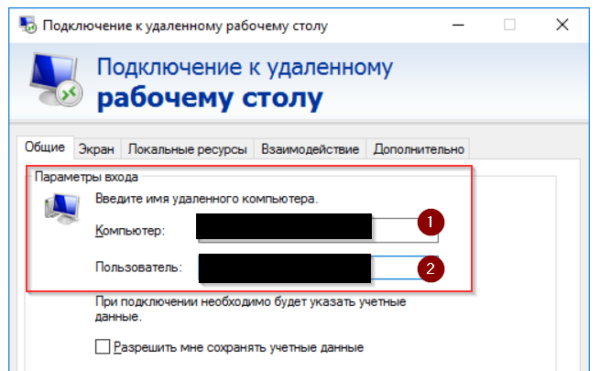
The setup wizard will ask you to enter a password for the account name. Enter it. Configuration completed.
 700
300
 700
300
 700
300


