How to Backup Ubuntu Server 20.04 with Bacula — Step-by-Step Backup Configuration Guide
Bacula is a powerful and versatile backup solution designed for scalability and reliability in both small and large environments. It supports network-based backups, enabling you to securely back up data across multiple machines. Bacula also offers advanced features such as data integrity verification, encryption to protect sensitive information, and flexible scheduling options.
In this comprehensive tutorial, we will guide you step-by-step through configuring file backup on a local Ubuntu Server 20.04, helping you ensure your important data is safely stored and easily recoverable when needed.
First, let's take a look at the Bacula components:
- Bacula Director manages backup and restore tasks and coordinates file verification;
- Bacula Console allows you to manage the Director component, run jobs, view statistics, and so on;
- Bacula File works in every system that needs backup, interacts with the Director and sends files on its request;
- Bacula Storage manages the physical storages and writes the backups to them;
- Bacula Catalog is a service database for organizing backup, recovery, and file verification. Thanks to the catalog, the utility has retrospective information about all files and storage devices.
Step 1 – Installing Bacula and database
Bacula uses the Postfix server to send email notifications when a task is completed. You need to install and configure it if you want to receive emails. The setup process is described here: How to install and configure Postfix as a send-only SMTP server
Let’s install Bacula
apt install baculaEnter the Postfix configuration data when prompted, or select "no connection" if you don't need emails.
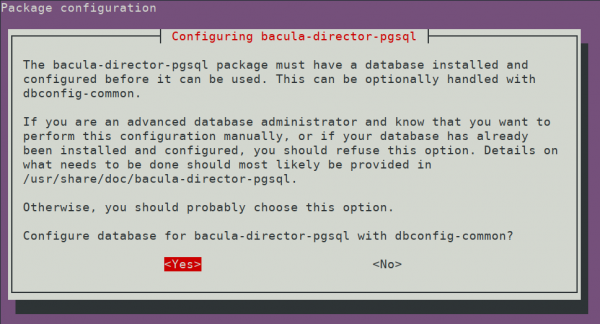
In the next step, select "Yes “to configure the PostgreSQL database server and” localhost" for its hostname. You can leave the password field empty.

Step 2 – Configuring Bacula
First, set up a backup storage device. Create a folder for recording backups and make bacula its owner.
mkdir /opt/backup

chown bacula:bacula /opt/backup
Add the following configuration to the file /etc/bacula/bacula-sd.conf:
Device {

Name = LocalSD

Media Type = File

Archive Device = /opt/backup

LabelMedia = yes; # lets Bacula label unlabeled media

Random Access = Yes;

AutomaticMount = yes; # when device opened, read it

RemovableMedia = no;

AlwaysOpen = no;

Maximum Concurrent Jobs = 5

}
To apply the changes, restart the service.
sudo systemctl restart bacula-sd.serviceNow you need to add storage information to /etc/bacula/bacula-dir.conf. Note that the password must match the password string in bacula-sd.conf
Storage {

Name = LocalSD # Must be equal to the "Name" parameter of the "Storage" section in the /etc/bacula/bacula-sd.conf file

Address = 127.0.0.1

Password = "Password"

Device = LocalSD

Media Type = File

}
Also, add information about the new FileSet that specifies the directories to back up.
FileSet {

Name = "LocalFS"

Include {

Options {

signature = MD5

}

File = /home

}

}
In this example, the /home folder is selected for backup. You can also add other goals in the same way. Keep in mind that the folder where backups located should not be backed up.
Also, add a Schedule:
Schedule {

Name = "LocalDaily"

Run = Full daily at 03:00

}
The last one is the Job configuration:
Job {

Name = "LocalBackup"

JobDefs = "DefaultJob"

Enabled = yes

Level = Full

FileSet = "LocalFS"

Schedule = "LocalDaily"

Storage = LocalSD

Write Bootstrap = "/var/lib/bacula/LocalhostBackup.bsr"

}
Save the file and close it, restart the service.
systemctl restart bacula-dirBacula will now run a full backup of the specified folders daily at 03:00. If you want to do this immediately, log in to the bconsole, type “run” select "LocalBackup", and confirm it. To check the job status, enter "status" and select "1".
 700
300
 700
300
 700
300


