Manual management of servers and databases is a source of errors, inconsistencies, and wasted time. Terraform allows you to describe infrastructure as code, ensuring repeatability, version control, and automation. This guide will help you set up a virtual server with PostgreSQL using Terraform, creating a reliable and reproducible environment for your applications.

What is Terraform: Your Universal Builder
Terraform is not just a tool; it’s a language for interacting with the cloud. Using declarative code (HCL), you describe the desired state of your infrastructure:
"I need 3 Ubuntu 22.04 servers, 4 vCPUs, 8GB RAM, with PostgreSQL 15, replication, and daily backups."
How it works:
- Write code describing resources (servers, networks, databases).
- Terraform creates an execution plan.
- After confirmation, it builds the infrastructure.
- Stores the current state in a file.
- For changes, calculates the delta and applies it.
Terraform: Occam’s Razor for Infrastructure
Advantages:
- Unified Language for Any Cloud (AWS, GCP, Azure, Yandex Cloud, etc.).
- Idempotency:
- Repeated applications don’t break a working system.
- Dependency Graph:
- Automatically determines resource creation order.
- Module Ecosystem:
- Pre-built solutions for common tasks.
- Change Preview:
- View consequences before applying changes.
Disadvantages:
- Learning Curve:
- Requires understanding of Infrastructure as Code (IaC) principles.
- Leaky Abstractions:
- Sometimes manual intervention is needed.
- State Management:
- Painful if state file is lost or conflicts arise.
- Limited Logic:
- Complex conditions require workarounds.
Hard Truth: According to HashiCorp, adopting Terraform results in:
- 60% reduction in deployment time.
- 90% fewer configuration errors.
- 40% lower infrastructure costs.
Step-by-Step Setup: PostgreSQL Server in Serverspace
Step 0: Preparation
Install Terraform.
Configure access to Serverspace VPS.
Create a project directory:
mkdir sc-postgres && cd sc-postgres
touch {main.tf,variables.tf,outputs.tf}
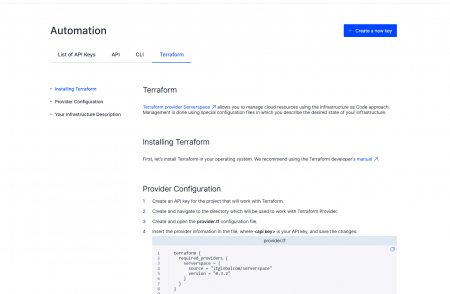
Step 1 - Provider Configuration (`main.tf`)
terraform {
required_providers {
serverspace = {
source = "serverspace-vps/serverspace"
version = "0.95.0"
}
}
}
provider "serverspace" {
token = var.sc_token
cloud_id = var.sc_cloud_id
folder_id = var.sc_folder_id
zone = "ru-central1-a"
}
Step 2 - Secrets and Variables (`variables.tf`)
variable "sc_token" {
description = "Serverspace OAuth token"
type = string
sensitive = true
}
variable "sc_cloud_id" {
description = "Serverspace Cloud ID"
type = string
}
variable "sc_folder_id" {
description = "Serverspace Folder ID"
type = string
}
variable "db_password" {
description = "PostgreSQL admin password"
type = string
sensitive = true
}
Important! Create a `.tfvars` file for values (do not commit to Git!):
# secret.auto.tfvars
sc_token = "your_oauth_token"
sc_cloud_id = "b1gvmr57rvq9"
sc_folder_id = "b1g8fp3ku62a"
db_password = "StRoNg!PaSsWoRd#123"
Step 3 - Network and Security (`main.tf`)
resource "serverspace_vpc_network" "db_network" {
name = "postgres-network"
}
resource "serverspace_vpc_subnet" "db_subnet" {
name = "postgres-subnet"
network_id = serverspace_vpc_network.db_network.id
v4_cidr_blocks = ["192.168.10.0/24"]
zone = "ru-central1-a"
}
resource "serverspace_vpc_security_group" "db_sg" {
name = "postgres-security-group"
network_id = serverspace_vpc_network.db_network.id
ingress {
description = "PostgreSQL"
port = 5432
protocol = "TCP"
v4_cidr_blocks = ["0.0.0.0/0"] # Restrict in production!
}
ingress {
description = "SSH"
port = 22
protocol = "TCP"
v4_cidr_blocks = ["192.168.0.0/16"] # Limit to internal network
}
egress {
description = "Outgoing traffic"
protocol = "ANY"
v4_cidr_blocks = ["0.0.0.0/0"]
}
}
Step 4 - Virtual Machine with PostgreSQL (`main.tf`)
resource "serverspace_compute_instance" "db_server" {
name = "postgres-master"
platform_id = "standard-v3"
zone = "ru-central1-a"
resources {
cores = 4
memory = 8
}
boot_disk {
initialize_params {
image_id = "fd82sqrj4uk9" # Ubuntu 22.04
size = 20
}
}
network_interface {
subnet_id = serverspace_vpc_subnet.db_subnet.id
nat = true
security_group_ids = [serverspace_vpc_security_group.db_sg.id]
}
metadata = {
ssh-keys = "ubuntu:${file("~/.ssh/id_rsa.pub")}"
}
provisioner "remote-exec" {
inline = [
"sudo apt update",
"sudo apt install -y postgresql-15",
"sudo systemctl enable postgresql"
]
connection {
type = "ssh"
user = "ubuntu"
private_key = file("~/.ssh/id_rsa")
host = self.network_interface[0].nat_ip_address
}
}
}
Step 5 - Managed Database (Alternative to VM)
resource "serverspace_mdb_postgresql_cluster" "prod_db" {
name = "production-db"
environment = "PRESTABLE"
network_id = serverspace_vpc_network.db_network.id
config {
version = 15
resources {
resource_preset_id = "s2.micro" # 2 vCPU, 8GB RAM
disk_size = 100
disk_type_id = "network-ssd"
}
}
host {
zone = "ru-central1-a"
subnet_id = serverspace_vpc_subnet.db_subnet.id
}
user {
name = "admin"
password = var.db_password
permission {
database_name = "prod_db"
}
}
database {
name = "prod_db"
owner = "admin"
}
}
Step 6 - Launch and Verify
1. Initialize:
terraform init # Download provider2. Plan:
terraform plan # Preview changes3. Apply:
terraform apply # Enter "yes" after reviewing plan4. Output connection details (`outputs.tf`):
output "vm_public_ip" {
value = serverspace_compute_instance.db_server.network_interface[0].nat_ip_address
}
output "db_connection" {
value = "postgres://admin:${var.db_password}@${serverspace_mdb_postgresql_cluster.prod_db.host[0].fqdn}:6432/prod_db"
sensitive = true
}
Alternatively, to avoid manual effort, you can use Terraform automation services at this link.
Real-Life Scenarios: How Terraform Saves the Day
Scenario 1 - Data Center Disaster
terraform destroy -target=serverspace_compute_instance.db_server
terraform apply # Server recreated in 4 minutes
Scenario 2 - Scaling Under Load
Update in code:
resources {
cores = 8 # Was 4
memory = 16 # Was 8
}
Apply: `terraform apply` — server is recreated with new parameters.
Scenario 3 - Testing Updates
terraform workspace new staging # Clone infrastructure
terraform apply -var="db_password=Test@123" # Test environment
# After validation, apply config to prod
Terraform doesn’t just automate routine tasks. It transforms infrastructure management:
- Version Control:
- Infrastructure in Git = change history.
- Reliability:
- Idempotency = predictability.
- Security:
- Code > manual tweaks.
- Cost Savings:
- Destroy unused resources with one command.


