This guide shows how to install and configure the Icinga 2 network infrastructure monitoring tool in Debian 9.

What is Icinga 2?
Icinga is an open source monitoring application that you can use to monitor critical services and systems on your virtual server. Icinga 2 can monitor hosts on the network or check external network protocols, such as the status of the HTTP server, mail server, file-sharing services and others.
Icinga 2 can be configured to monitor the status of internal systems, to check the load, memory, free disk space or other internal host parameters. Icinga can also be configured to send notifications and alerts via email or SMS to system administrators specified in contacts.
Initial requirements
Many of the commands in this guide require superuser privileges. If a bash: sudo: command is not found when using the sudo command, you need to activate the superuser mode, set the sudo command, and add your user to the sudo group:
su -

apt-get install sudo -y

usermod -aG sudo yourusername
The LAMP stack must be installed on the virtual server.
Update local repositories and packages:
sudo apt-get update && sudo apt-get upgradeUsing OPCache to increase download speed
To increase the loading speed of your application using the OPCache plugin available in PHP 7, add the following OPCache parameters to the end of the PHP configuration file:
vi /etc/php/7.0/apache2/php.iniInsert the following lines:
opcache.enable=1

opcache.enable_cli=1

opcache.interned_strings_buffer=8

opcache.max_accelerated_files=10000

opcache.memory_consumption=128

opcache.save_comments=1

opcache.revalidate_freq=1
Restart Apache for the changes to take effect:
systemctl restart apache2Database settings
Install the DBMS required by the Racing 2 web application for monitoring, and the Icinga Web 2 interface for storing users, contacts, and other collected data. Run the following command to install the MariaDB database and PHP module required to access the MySQL database in Debian 9:
apt install php7.0-mysql mariadb-server mariadb-clientLog in to the MySQL console and protect the MariaDB superuser account:
mysql -h localhostuse mysql;update user set plugin='' where user='root';flush privileges;exitNext, run the MySQL security script:
sudo mysql_secure_installationLog into the database console and create the database for Icinga 2:
mysql -pCreate a user with a strong password to manage the Icinga 2 application database by entering the commands below. In this example, replace icingadb, icinga-user, and strongpassword with your database name and credentials:
create database icingadb;

grant all privileges on icingadb.* to 'icinga_user'@'localhost' identified by 'strongpassword';

flush privileges;
Create a second MySQL database used by Icinga 2 Web to store users and groups. As in the previous step, replace the database name and credentials. You can use the same MySQL user account to manage both databases simultaneously (icinga_user'@'localhost):
create database icinga_users;

grant all privileges on icinga_users.* to 'icinga_user'@'localhost' identified by 'strongpassword';

exit
Installing Icinga 2
Install Icinga 2 and the Icinga 2 MySQL module to access the MariaDB database:
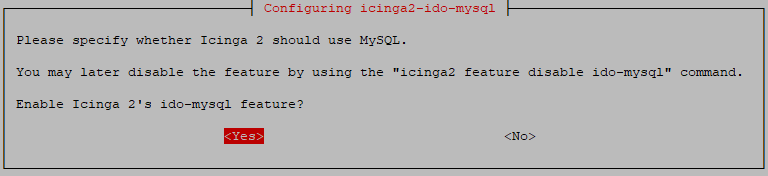
apt install icinga2 icinga2-ido-mysqlDuring installation, the question arises of using the MySQL module. Choose Yes on the command line:
After installing Icinga 2, start the Icinga 2 service and check the status of the daemon:
systemctl start icinga2.servicesystemctl status icinga2.serviceInstalling the Icinga 2 Web Interface
To control Icinga 2 through the web interface, install the Icinga 2 web interface and command line interface (CLI) packages:
apt install icingaweb2 icingacliRestart the Icinga 2 daemon and check its status:
systemctl restart icinga2.servicesystemctl status icinga2.serviceAn Icinga 2 database is required to install the MySQL schema:
mysql -u root icingadb -p < /usr/share/icinga2-ido-mysql/schema/mysql.sqlOpen the Icinga 2 MySQL IDO configuration file:
vi /etc/icinga2/features-enabled/ido-mysql.confAdd the Icinga 2 database credentials as shown in the example below. Use the credentials of the first database you created in the previous step in creating the database:
library "db_ido_mysql"

object IdoMysqlConnection "ido-mysql" {

user = "icinga_user",

password = "strongpassword",

host = "localhost",

database = "icingadb"

}
Save the file and restart the Icinga 2 daemon:
systemctl restart icinga2.serviceCreate the Icinga Web 2 log directory and add the appropriate file system permissions to grant group write permissions:
mkdir -p /var/log/icingaweb2/chgrp -R icingaweb2 /var/log/icingaweb2/chmod -R 775 /var/log/icingaweb2/Configure Icinga 2 through the web interface
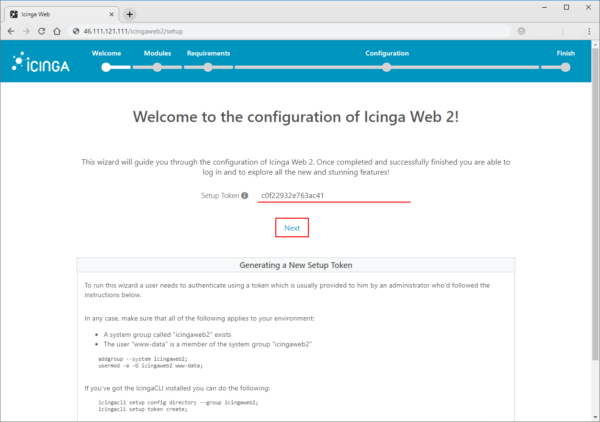
Generate the installation token. Store it in an easily accessible place. You will need to use it to access Icinga 2 setup:
icingacli setup token createThe output of this command should be something like this:
The newly generated setup token is: c0f22932e763ac41Note: To show the generated token, if you forgot it, you can use the command:
icingacli setup token showOpen the HTTP port to connect to the web interface:
iptables -A INPUT -p tcp --dport 80 -j ACCEPTOpen your browser and go to http://exampleIP/icingaweb2/setup. Replace example IP with the IP address of your virtual server. At the first stage of installation, add the token created earlier:
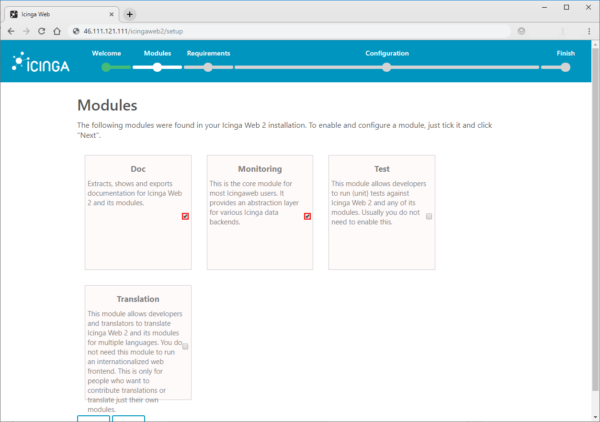
On the next screen, check the Doc and Monitoring modules and click Next to continue:
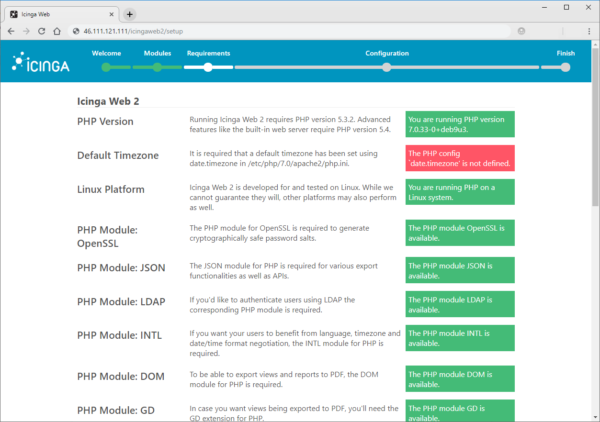
Icinga 2 will check your system requirements and PHP modules to ensure that all requirements are met before continuing with the installation and configuration process. If some modules are missing, they must be re-installed.
Scroll down to the bottom of the page and click Next to continue:
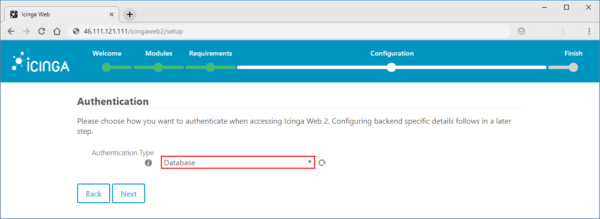
For the authentication type, select database:
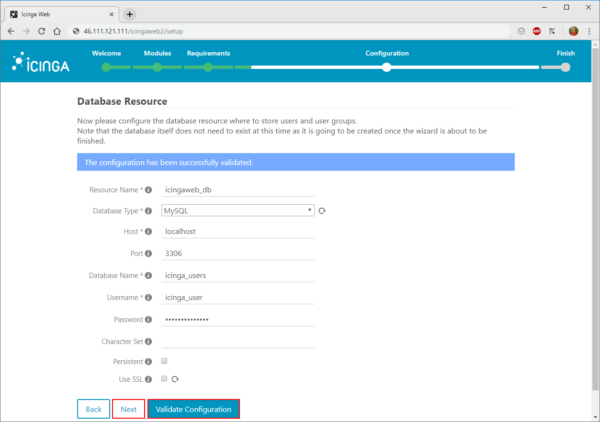
Use the information from the second database you created earlier to add the credentials needed to access the Icinga 2 database to store users and groups.
Use icingaweb_db as the name for this resource.
Host and Port parameters must be localhost and 3306, respectively. Do not enable persistent and SSL options. Click the Validate configuration button to confirm the database. After successfully checking the database, click Next to go to the next step in the Icinga 2 configuration process:
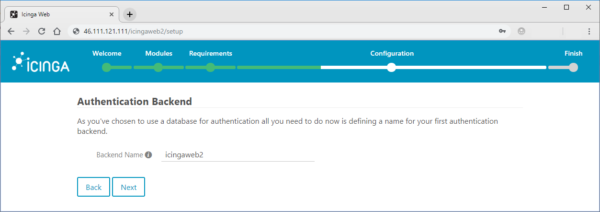
Define a name for the authentication database and click Next:
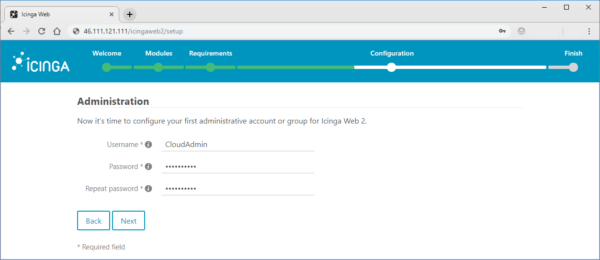
Add a username with a strong password to log in to Icinga 2 web interface and click Next:
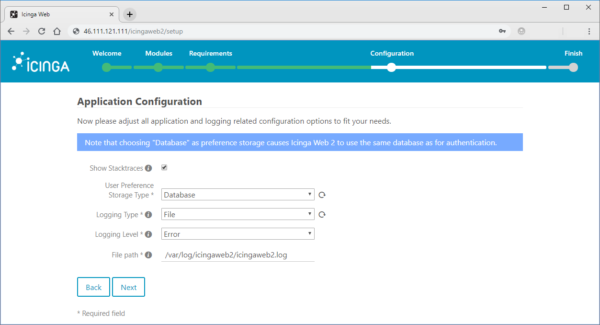
Next, configure the application and configure error logging using the following parameters:
- Check Show Stacktraces;
- Storage Type = Database;
- Logging Type = File;
- Logging Level = Error;
- File path = /var/log/icingaweb2/icingaweb2.log
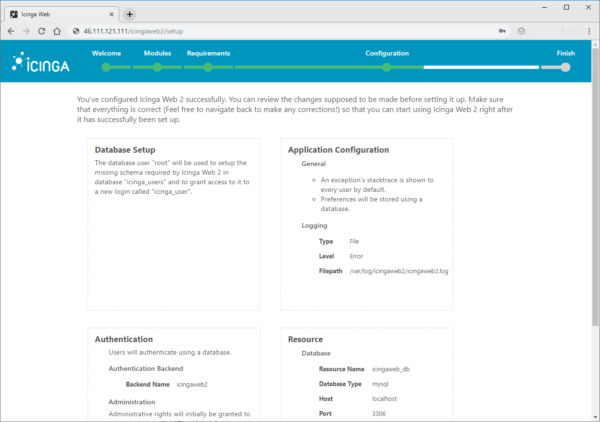
View the information report and, if there are no errors, click Next to continue:
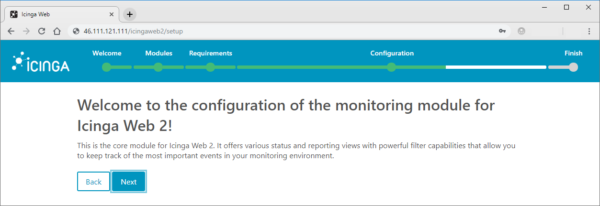
In the next window, click Next to continue:
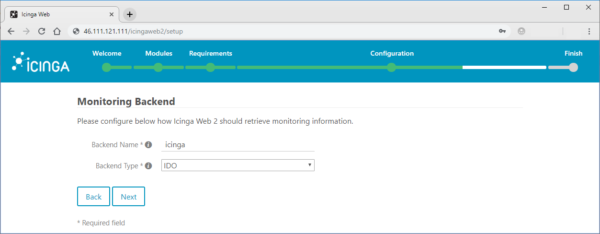
Add a name for Icinga 2 Backend, select IDO as Backend Type and click Next:
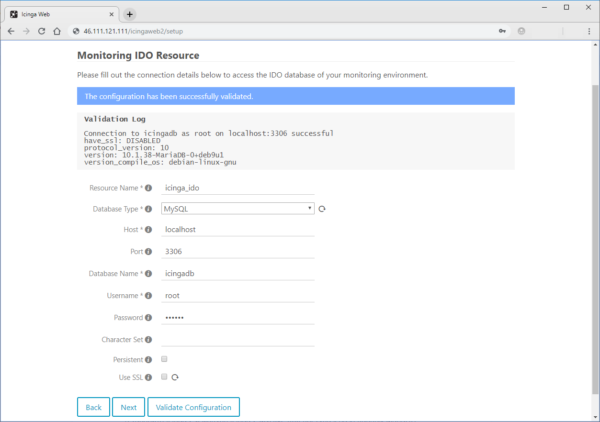
Add database credentials to configure the IDO resource environment. After adding, click the Validate Configuration button to check the Icinga monitoring IDO resource.
After the message Successfully validated appears, click Next:
Configure the transport module using the following parameters:
Transport Name = icinga2

Transport Type = Local Command File

Command File = /var/run/icinga2/cmd/icinga2.cmd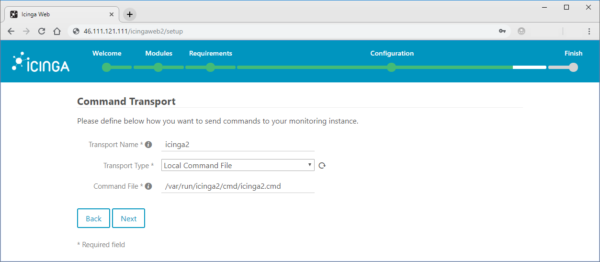
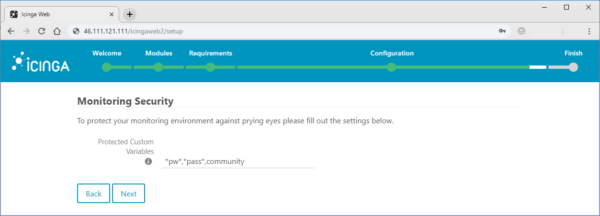
Set the monitoring security environment variables (you can leave the default values):
The next screen shows a detailed report of the current configuration. Check the configuration and click Finish to complete the installation process:
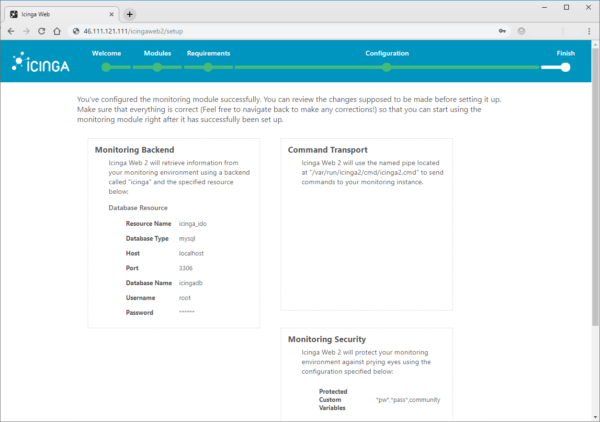
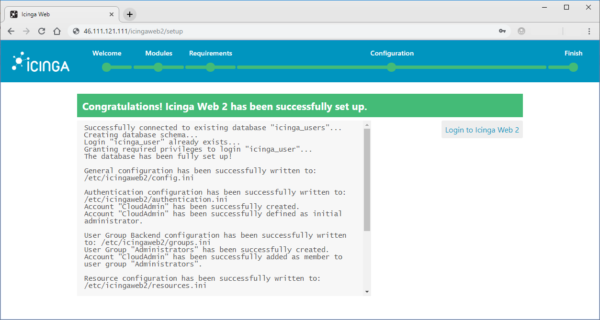
After the installation and configuration process is completed, a message appears stating that Icinga Web 2 has been successfully configured:
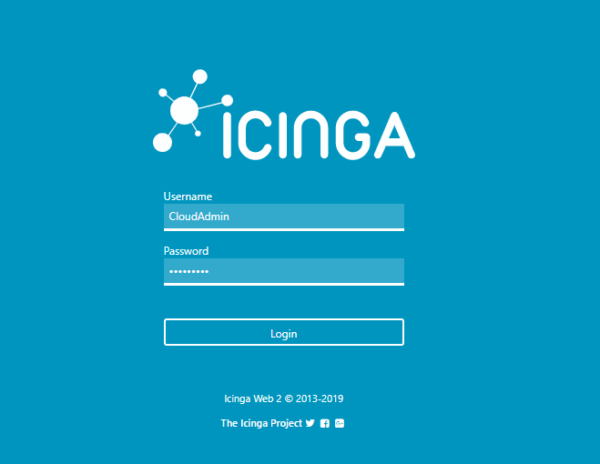
Log in to the Icinga 2 panel at http://exampleIP/icingaweb2/authentication/login:
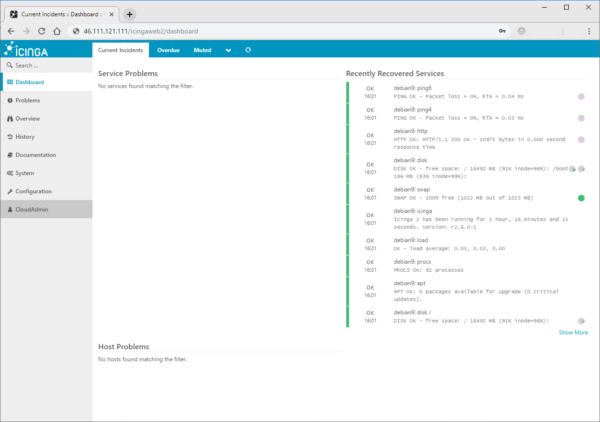
You will be redirected to the Icinga Web 2 control panel, where you will see the services and resources of the virtual server that are currently monitored by Icinga 2:
You have successfully installed and configured the Icinga 2 monitoring application and the Icinga Web 2 interface in Debian 9.


