
WordPress is one of the most widely used content management systems (CMS) worldwide. It powers millions of websites thanks to its ease of use, even for users with little or no experience in web development. In this tutorial, we’ll walk you through the process of setting up and configuring a clean Ubuntu server to deploy a fully functional WordPress site.
If you want to save time, Serverspace offers preconfigured virtual machines with WordPress already installed — perfect for a quick launch.

Creating the Server
The fastest way to get a server is to deploy a so-called VPS. This is a virtual server based on VMWare or in our case vStack — a unique development of ServerSpace corporation, which allows you to create a server in 40 seconds.
So, let's go to the serverspace website https://serverspace.io/ and register there. Authenticate to your account and navigate: vStack cloud -> Servers -> Create Server. Next, choose the operating system, in our case it will be Ubuntu 20.04 x64. Then choose the location of the server, if you plan to develop the site for customers from the Europe, choose the Amsterdam data center.

Then choose the server config. For our test site we will use a virtual server with 2 CPUs, 4 GB of RAM, 60 GB hard drive and 50Mb/s internet connection speed. This configuration will be enough for about 50,000 users per day, which is almost an unattainable dream for a newly deployed website in the first few months. If the number of users increases, you can easily add resources to your server. For this feature, VPS is very good at the initial stage.
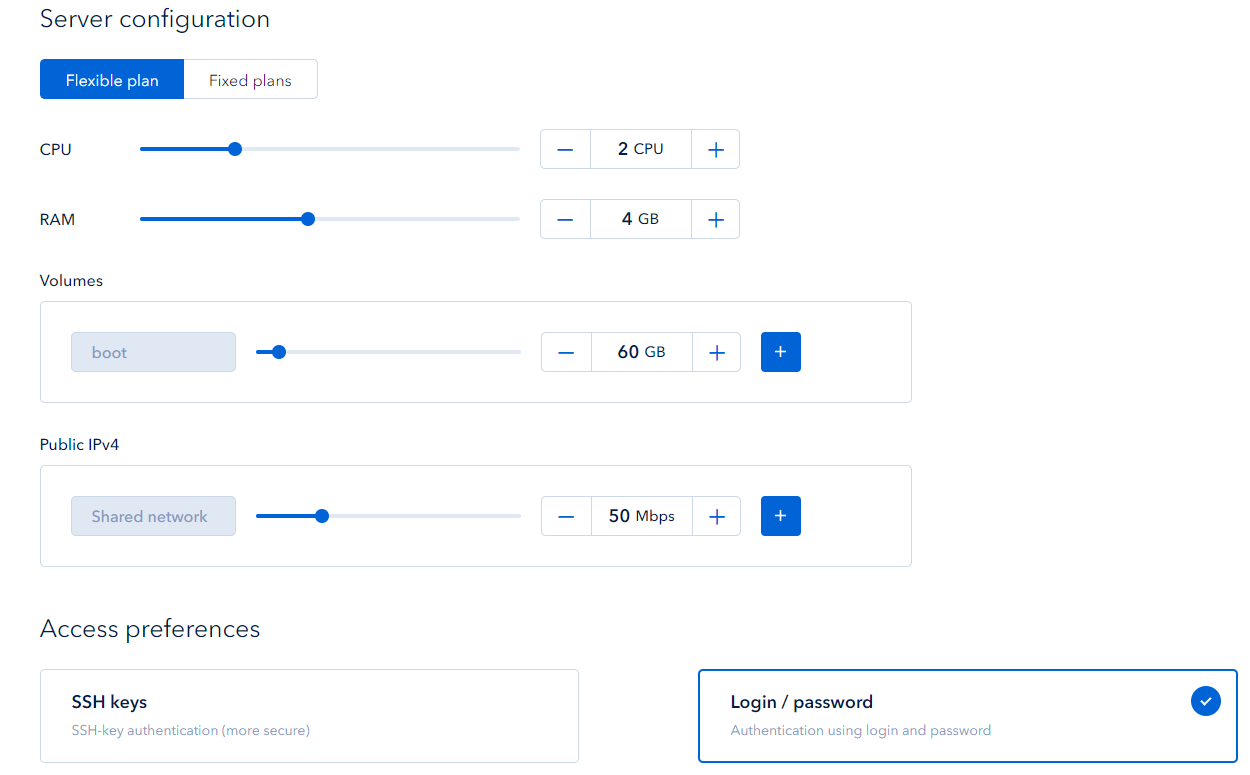
We choose the “login and password” authentication and log in to our server by using putty.
Setting up the Ubuntu Server
Before installing WordPress, we need to install a package of server software — the Apache web server and the MySQL database, as well as the PHP language. But before that, we need to update our OS:
sudo apt-get update && sudo apt-get upgrade -yInstalling Apache Web Server
In order to install the latest version of the Apache webserver, enter the following commands:
sudo apt install apache2 apache2-utilsThen add Apache to the autorun and start the service:
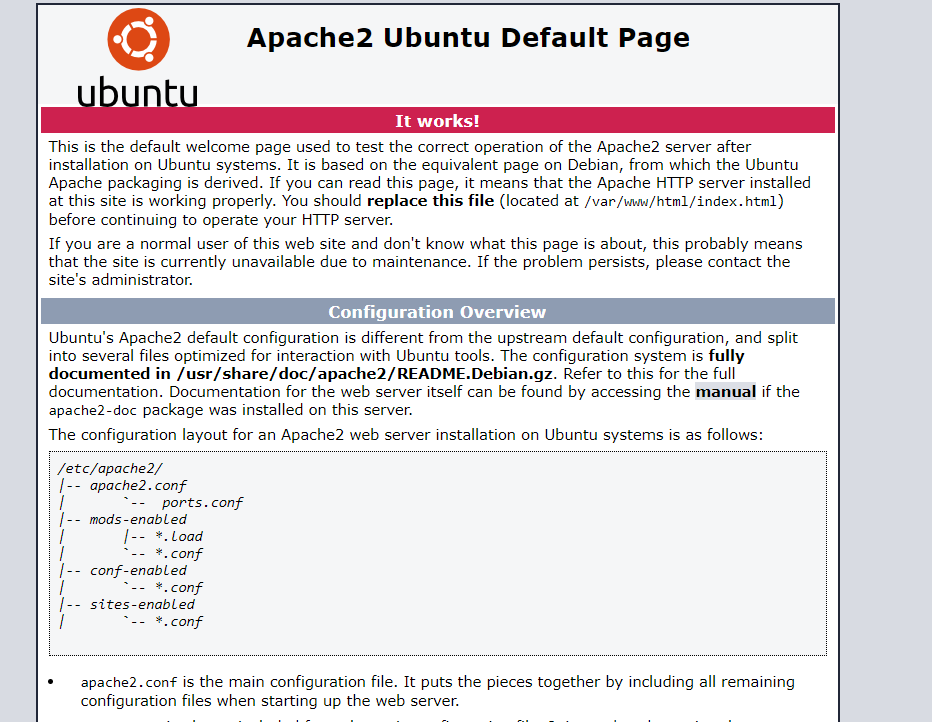
sudo systemctl enable apache2sudo systemctl start apache2To check if Apache is available online, let's type in the IP address of your server in your browser. If you are installing a webserver on a local machine, use the address http://127.0.0.1 or http://localhost
By default, all HTML documents are located in the /var/www/html directory. We also require the Apache "mod_rewrite" module for WordPress to work correctly. To enable it, run the following command:
sudo a2enmod rewriteThen restart the webserver:
sudo systemctl restart apache2Installing the MySQL Database
To install the mysql db, run the command:
sudo apt install mysql-client mysql-serverTo complete the setup, run the command:
sudo mysql_secure_installationThe system will prompt you to install a password verification plugin, which will prohibit the use of weak passwords:
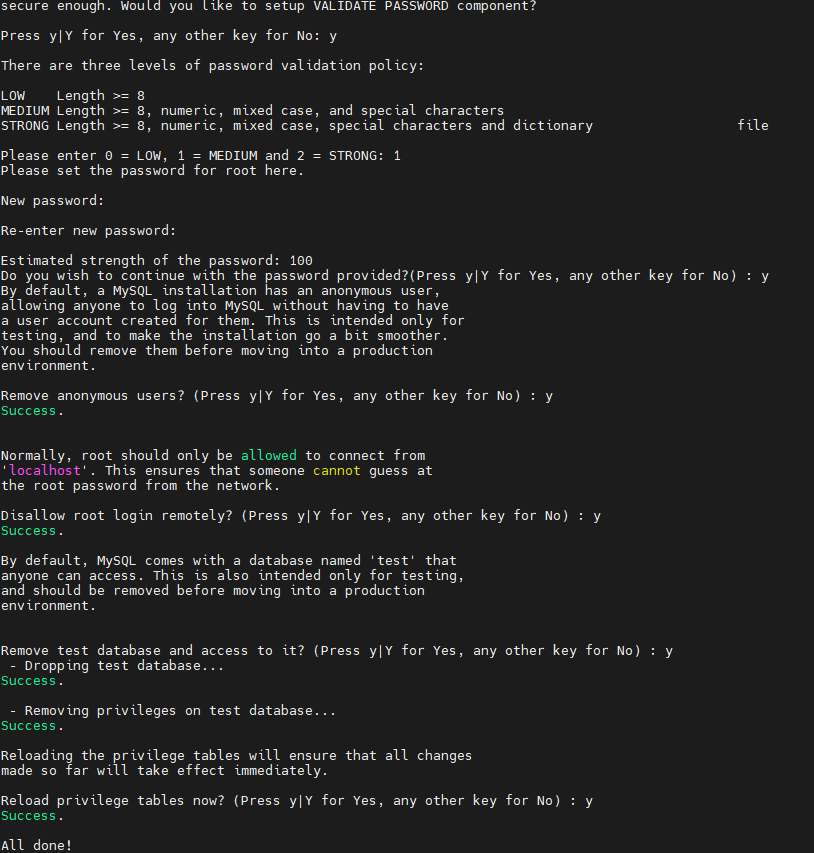
Then you will need to change the password and disable access to the superuser account from the network and also disable guest access. So we answer y for all.
Installing PHP
And finally, before you install WordPress on Ubuntu 20.04 — you require installing PHP and a few modules to work with the web server and MySQL database. To do this, run the command:
sudo apt install php7.4 php7.4-mysql libapache2-mod-php7.4 php7.4-cli php7.4-cgi php7.4-gdTo test how PHP works, create a file named test.php in /var/www/html/:
sudo nano /var/www/html/test.phpFile text:
<?php

phpinfo();

?>
Save it and then open http://ip-address/test.php in a web browser. If everything is set up correctly, you will see a page with information about the PHP version. Naturally, as a matter of security, it should be removed after a successful test.
Installing WordPress on the Ubuntu Server
So finally download the latest version of CMS WordPress from the official website:
wget -c http://wordpress.org/latest.tar.gzExtract the contents of the archive to your current folder:
tar -xzvf latest.tar.gzCopy the WordPress files from your current folder to /var/www/html/:
sudo rsync -av wordpress/* /var/www/html/In order for the web server to work properly with these files, you need to set the correct permissions for them, namely the user and group www-data:
sudo chown -R www-data:www-data /var/www/html/sudo chmod -R 755 /var/www/html/And now the installation of WordPress on Ubuntu 20.04 is complete, but there is still left to configure the database connection. To have WordPress open by default, let's delete the index.html file:
sudo rm /var/www/html/index.htmlCreating a Database for the New Website
To create a database, first log in to the mysql management interface, to do so, execute:
sudo mysql -u root -pEnter the password that you entered during installation, then separately execute the following commands to create the database, user and set the correct privileges for them:
mysql> CREATE DATABASE wp_db;mysql> CREATE USER 'wpusr'@'localhost' IDENTIFIED BY 'password';mysql> GRANT ALL PRIVILEGES ON wp_db.* TO 'wpusr'@'localhost';mysql> FLUSH PRIVILEGES;mysql> EXIT;Replace wp_db with the desired database name, wpusr with the username, and password with the desired password. The modifier localhost means that you can connect to the database only from local machine.
Configuring WordPress on the Ubuntu Server
Everything is ready to configure WordPress. Type in the ip address of your server where you installed WordPress, or localhost if the paltform was installed on a local computer. In the first window, the program will ask you to choose a language. Then click "Next" and enter the database name, username, and password that you used during db creation.
Finally, all that's left is to choose a website name, an admin login, and come up with a complex password.
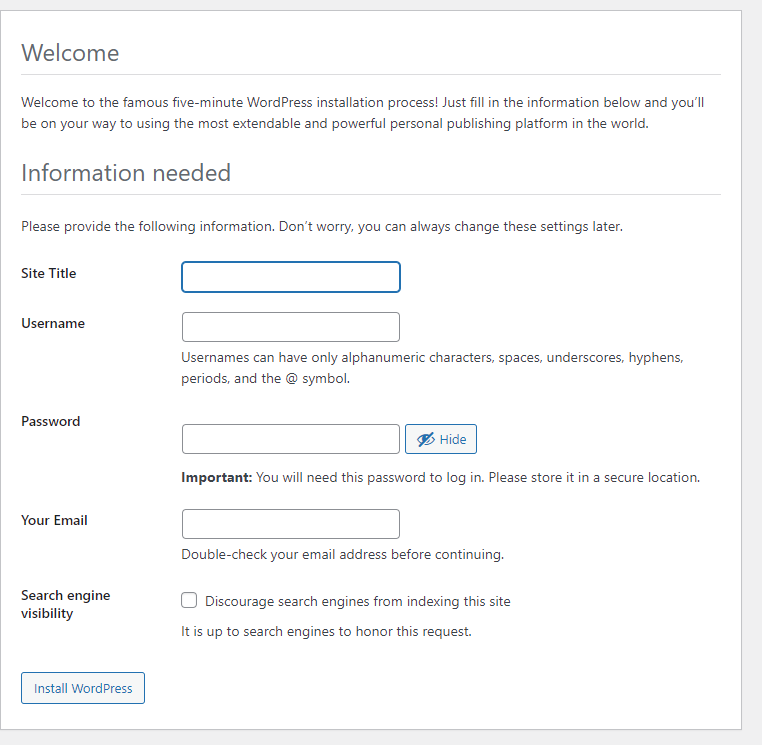
At the end, all that's left is to log in, and you can use the WordPress content management system you've just set up.

Congratulations, now you can easily create your own website using a bunch of templates, plugins and a graphical interface. This is where the fun part begins.
Conclusion
Deploying a WordPress website on an Ubuntu server is a straightforward process, even for beginners. With just a few commands, you can configure a full web environment, install WordPress, and start building your website. This approach offers flexibility, scalability, and control that preconfigured hosting plans may lack. And if you’re looking for an even faster setup, Serverspace provides ready-to-go WordPress VPS templates to save you time and effort.
FAQ
- 1. Do I need a domain name to install WordPress on Ubuntu?
No, a domain is not required for installation. You can use your server's IP address. However, for a production website, using a domain is recommended for better accessibility and branding. - 2. Is it safe to leave test.php on the server?
No, you should delete test.php after confirming that PHP is working. Leaving it may expose sensitive server information to attackers. - 3. Can I host multiple WordPress websites on the same server?
Yes. You’ll need to configure virtual hosts in Apache and set up separate directories and databases for each site. - 4. What should I do if I forget my WordPress admin password?
You can reset it via the MySQL command line or by using the "Forgot password" link on the login page if email is configured. - 5. How do I secure my WordPress installation?
Start by keeping WordPress, themes, and plugins updated. Use strong passwords, limit login attempts, and consider installing a security plugin like Wordfence.


